1.小程序的第三方框架
- 腾讯 wepy 类似于vue
- 美团 mpvue 类似于vue
- 京东 tao 类似于react
- 滴滴 chameleon
- uni-app 类似于vue
- 原生框架MINA
2. 帮助文件
接口文档地址:https://www.showdoc.com.cn/128719739414963/2513235043485226
阿里巴巴字体iconfont:https://www.iconfont.cn/
即本项目的后台已经写好了,直接调用接口即可
3.项目的搭建
3.1新建小程序项目
填入自己的openID
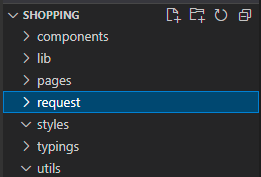
3.2搭建目录结构
| ?录名 | 作? |
|---|---|
| styles | 存放公共样式 |
| components | 存放组件 |
| lib | 存放第三?库 |
| utils | ??的帮助库 |
| request | ??的接?帮助库 |
3.3. 搭建项目的页面
| ??名称 | 名称 |
|---|---|
| ?? | index |
| 分类?? | category |
| 商品列表?? | goods_list |
| 商品详情?? | goods_detail |
| 购物??? | cart |
| 收藏?? | collect |
| 订单?? | order |
| 搜索?? | search |
| 个?中??? | user |
| 意?反馈?? | feedback |
| 登录?? | login |
| 授权?? | auth |
| 结算?? | pay |
3.4. 引?字体图标
1. 打开阿?巴巴字体图标 ?站
https://www.iconfont.cn/
2. 选择的图标
选择自己想要的图标添加入库
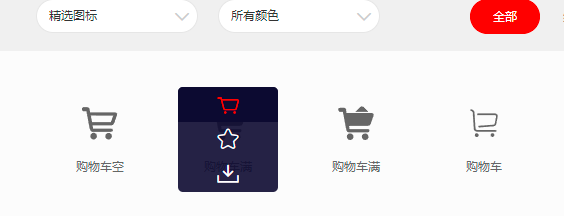
3. 添加?项?
选择购物车图标
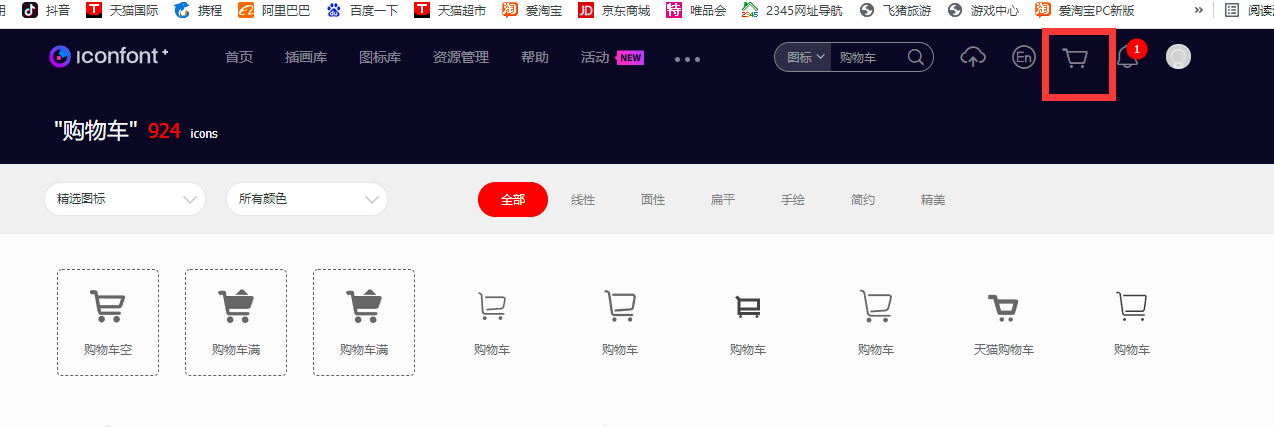
点击添加至项目(我选择了三个购物车的图标)
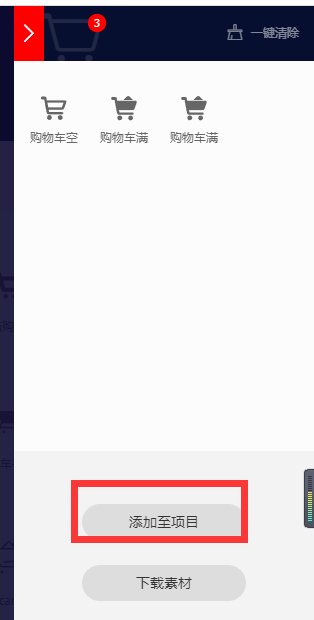
可以将其添加到一个已有的项目或者新建一个项目
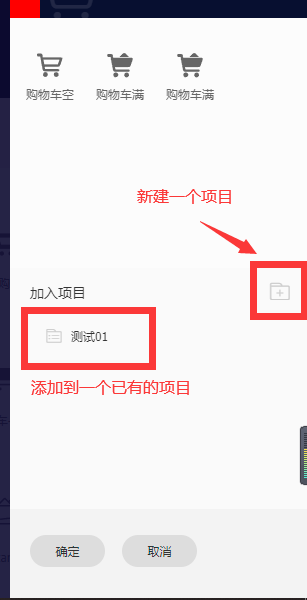
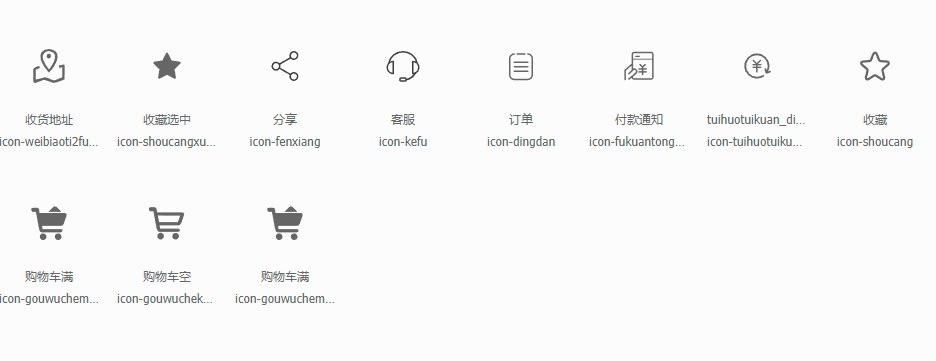
本次项目所需要的图标
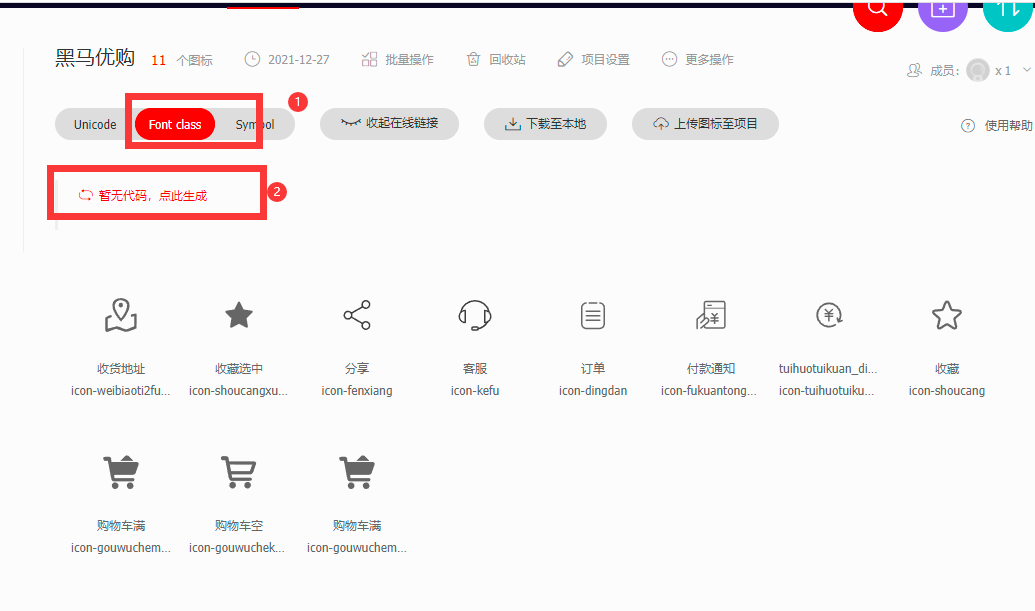
点击Font class生成代码
会生成一个class地址
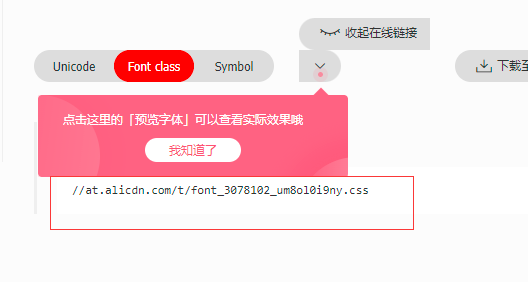
4. 点击链接,复制样式,将其放入styles目录下的iconfont.wxss中
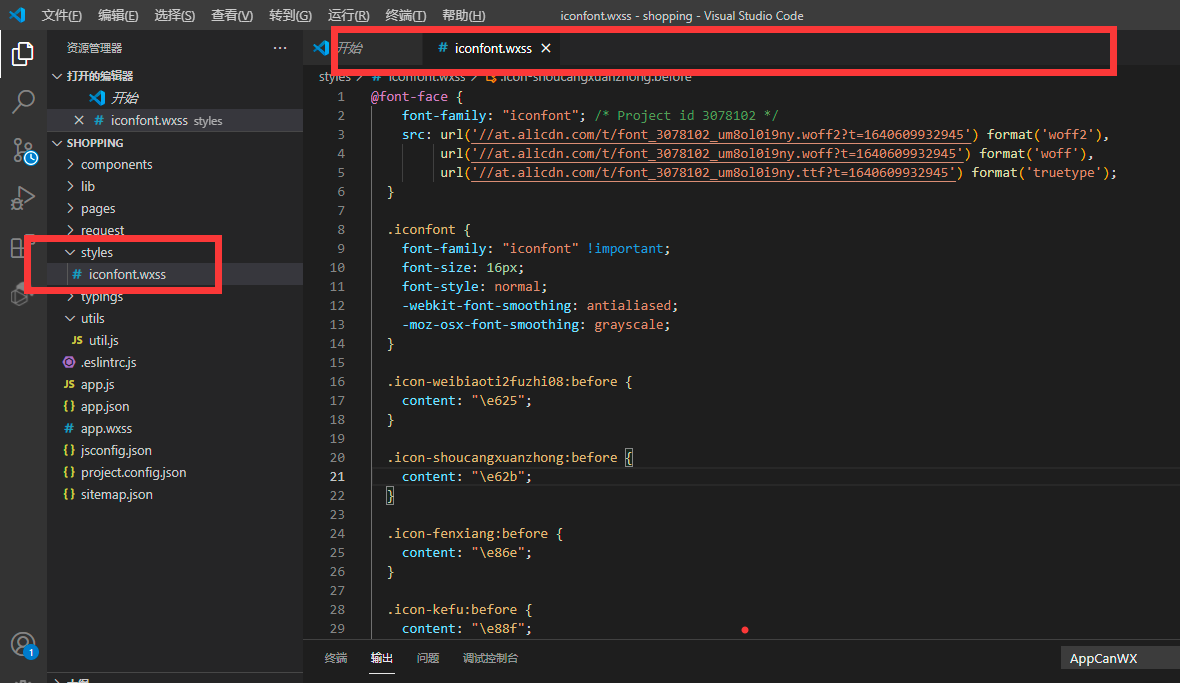
@font-face {
    font-family: "iconfont"; /* Project id 3078102 */
    src: url('//at.alicdn.com/t/font_3078102_um8ol0i9ny.woff2?t=1640609932945') format('woff2'),
         url('//at.alicdn.com/t/font_3078102_um8ol0i9ny.woff?t=1640609932945') format('woff'),
         url('//at.alicdn.com/t/font_3078102_um8ol0i9ny.ttf?t=1640609932945') format('truetype');
  }

  .iconfont {
    font-family: "iconfont" !important;
    font-size: 16px;
    font-style: normal;
    -webkit-font-smoothing: antialiased;
    -moz-osx-font-smoothing: grayscale;
  }

  .icon-weibiaoti2fuzhi08:before {
    content: "\e625";
  }

  .icon-shoucangxuanzhong:before {
    content: "\e62b";
  }

  .icon-fenxiang:before {
    content: "\e86e";
  }

  .icon-kefu:before {
    content: "\e88f";
  }

  .icon-dingdan:before {
    content: "\e645";
  }

  .icon-fukuantongzhi:before {
    content: "\e60c";
  }

  .icon-tuihuotuikuan_dianpu:before {
    content: "\e773";
  }

  .icon-shoucang:before {
    content: "\e8b9";
  }

  .icon-gouwucheman:before {
    content: "\e600";
  }

  .icon-gouwuchekong:before {
    content: "\e601";
  }

  .icon-gouwucheman1:before {
    content: "\e602";
  }
5. 在app.wxss中导入要使用的样式
@import "./styles/iconfont.wxss"
3.5 创建tabbar页面
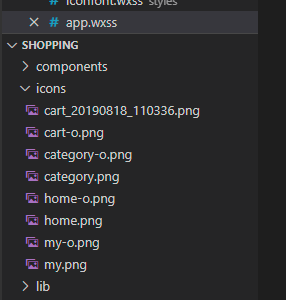
1. 在项目中创建icon文件夹,并将素材中的相关图标拷贝进入
2. 常见tabbar相关页面和样式
app.json中
{
  "pages":[
    "pages/index/index",
    "pages/category/index",
    "pages/goods_list/index",
    "pages/goods_detail/index",
    "pages/cart/index",
    "pages/collect/index",
    "pages/order/index",
    "pages/search/index",
    "pages/user/index",
    "pages/feedback/index",
    "pages/login/index",
    "pages/auth/index",
    "pages/pay/index"
  ],
  "tabBar": {
    "color": "#999",
    "selectedColor": "#ff2d4a",
    "backgroundColor": "#fafafa",
    "position": "bottom",
    "borderStyle": "black",
    "list": [
      {
        "pagePath": "pages/index/index",
        "text": "首页",
        "iconPath": "icons/home.png",
        "selectedIconPath": "icons/home-o.png"
      },
      {
        "pagePath": "pages/category/index",
        "text": "分类",
        "iconPath": "icons/category.png",
        "selectedIconPath": "icons/category-o.png"
      },
      {
        "pagePath": "pages/cart/index",
        "text": "购物车",
        "iconPath": "icons/cart.png",
        "selectedIconPath": "icons/cart-o.png"
      },
      {
        "pagePath": "pages/user/index",
        "text": "我的",
        "iconPath": "icons/my.png",
        "selectedIconPath": "icons/my-o.png"
      }
    ]
  },


  "window":{
    "backgroundTextStyle":"light",
    "navigationBarBackgroundColor": "#eb4450",
    "navigationBarTitleText": "黑马优购",
    "navigationBarTextStyle":"white"
  },
  "style": "v2",
  "sitemapLocation": "sitemap.json"
}
2.初始化页面
在app.wxss中
@import "./styles/iconfont.wxss";

/**在微信小程序中 不支持通配符* **/
page,view,text,swiper-item,image,navigator{
    padding: 0;
    margin: 0;
    box-sizing: border-box;
}
/**
 主题颜色 通过变量来实现
 less中存在变量这个知识点
 原生的css和wxss也支持变量
**/
page{
    /**定义主题颜色**/
    --themeColor:#eb4450;
    /**
    统一字体大小
    1px = 2rpx
    **/
    font-size: 20rpx;
}
4. ??
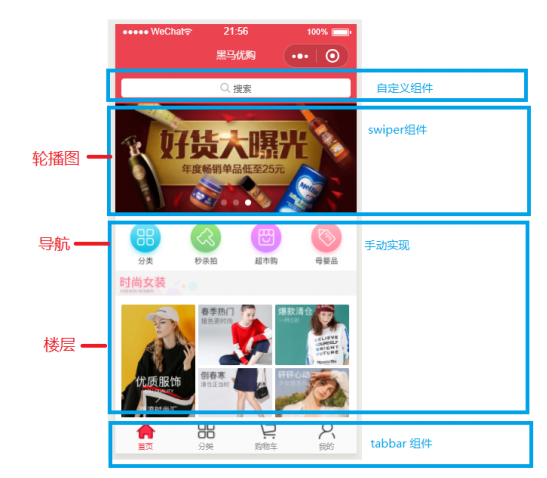
4.1. 效果
4.2 使??定义组件的?式实现头部搜索框
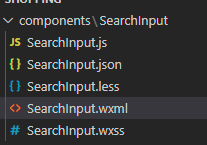
1. 在components下面创建一个SearchInput组件,实现搜索的功能
2. 在SearchInput.wxml创建搜索导航
<view class="search_input">
    <navigator url="/pages/search/index" open-type="navigate">
        搜索
    </navigator>
</view>
3. SearchInput.wxss中的样式
/* components/SearchInput/SearchInput.wxss */
.search_input {
  height: 90rpx;
  padding: 10rpx;
  background-color: var(--themeColor);
}
.search_input navigator {
  height: 100%;
  display: flex;
  justify-content: center;
  align-items: center;
  background-color: white;
  border-radius: 15rpx;
  color: #666;
}
4.引入所使用的组件
在pages/index/index.json中引入所使用的组件

{
  "usingComponents": {
    "SearchInput":"../../components/SearchInput/SearchInput"
  },
  "navigationBarTitleText": "优购首页"
}
5.使用组件
在pages/index/index.wxml
<view class="pyg_index">
    <!--搜索框开始-->
    <SearchInput></SearchInput>
    <!--搜索框结束-->
</view>
4.3 首页轮播图
1. 网络请求获取轮播图的数据
在pages/index/index.js下
Page({

  /**
   * 页面的初始数据
   */
  data: {
    //轮播图数组
    swipperList:[]
  },

  /**
   * 生命周期函数--监听页面加载
   */
  onLoad: function (options) {
    //异步请求获取轮播图的数据
    wx.request({
      url: 'https://api-hmugo-web.itheima.net/api/public/v1/home/swiperdata',
      success:(result)=>{
        this.setData({
          swipperList:result.data.message
          })
      }

    });

  }
  })
接口调用结果显示
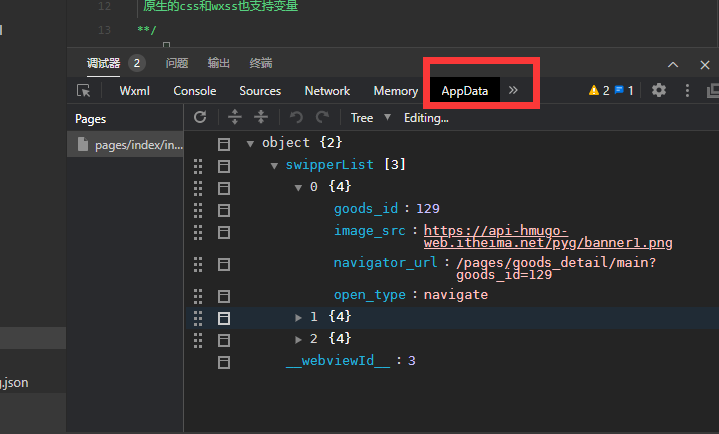
没有结果显示解决办法
- 没有添加appid,点击详情按钮,选择不校验合法域名
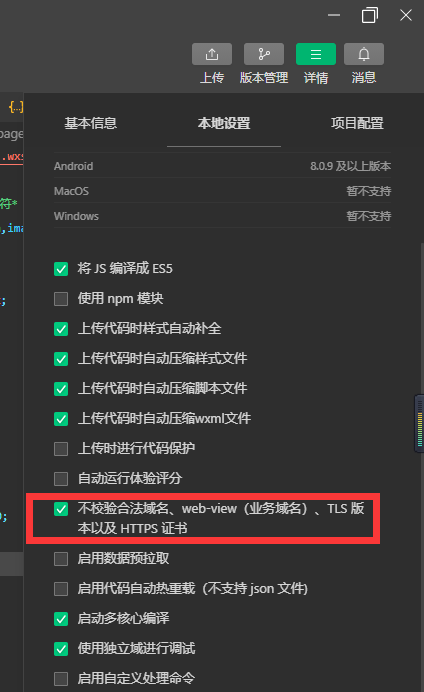
- 为了后面的开发管理和部署上线,选择开发管理中的服务设置,设置服务器的域名

2. 轮播图动态渲染
在pages/index/index/wxml中
    <!--轮播图开始-->
    <view class="index_swiper">
        <!--
            1.swiper标签存在默认高度和宽度
            100%*150px
            2.image标签也存在默认宽度和高度
            320px*240px
            3.设计轮播图
                     先看原图的高度 750*340
                    让图片高度自适应 宽度等于100%
                    让swiper的高度和图片高度一样即可
            4.图片标签
              mode属性渲染模式
                widthfix 让标签的宽高和标签内容的宽高发生等比例的变化
        -->
        <swiper autoplay indicator-dots circular>
            <swiper-item wx:for="{{swipperList}}" wx:key="goods_id">
                <navigator>
                <image mode="widthfix" src="{{item.image_src}}"></image>
                </navigator>

            </swiper-item>
        </swiper>
    </view>

    <!--轮播图结束-->
相应的wxss
.index_swiper swiper {
  width: 750rpx;
  height: 340rpx;
}
.index_swiper swiper image {
  width: 100%;
}
3. 将原生的请求改为promise方式
- 在request的目录下创建index.js
export const request=(params)=>{

    return new Promise((resolve,reject)=>{
        wx.request({
            ...params,
            success:(result)=>{
                resolve(result);
            },
            fail: (err)=>{
                reject(err)
            }
        });
    } )
}
- 在pages/index/index.js中加入request.js的路径
import {request} from "../../request/index.js"
- 请求路径的改写
  onLoad: function (options) {
    //异步请求获取轮播图的数据
    // wx.request({
    //   url: 'https://api-hmugo-web.itheima.net/api/public/v1/home/swiperdata',
    //   success:(result)=>{
    //     this.setData({
    //       swipperList:result.data.message
    //       })
    //   }

    // });
    request({url:'https://api-hmugo-web.itheima.net/api/public/v1/home/swiperdata'})
    .then(result=>{
      this.setData({
        swipperList:result.data.message
      })
    })

  },
4.4 首页分类导航模块
1. 请求接口数据
在pages/index/index.js中获取导航数据
  //获取导航数据
  getCatesList(){
    request({url:'https://api-hmugo-web.itheima.net/api/public/v1/home/catitems'})
    .then(result=>{
      this.setData({
        catesList:result.data.message
      })
    })
  }
2. 页面进行导航数据的显示
在pages/index/indedx.wxml中进行导航数据的显示
    <!--导航开始-->
    <view class="index_cate">
        <navigator
        wx:for="{{catesList}}"
        wx:key="name"
        >
        <image  mode="widthFix" src="{{item.image_src}}">

        </image>
        </navigator>
    </view>

    <!--导航结束-->
3. css样式
.index_cate {
  display: flex;
  padding: 20rpx;
}
.index_cate navigator {
  flex: 1;
}
.index_cate navigator image {
  width: 100%;
}
4.5 首页楼层模块
1. 获取接口数据
pages/index/index.js
  //获取楼层的接口数据
  getFloorList(){
    request({url:'https://api-hmugo-web.itheima.net/api/public/v1/home/floordata'})
    .then(result=>{
      this.setData({
        floorList:result.data.message
      })
    })
  }
2. 内容显示
pages/index/index.wxml
  <!--楼层开始-->
    <view class="index_floor">
    <view >
        <view wx:for="{{floorList}}"
        wx:for-item="item1"
        wx:for-index="index1"
        wx:key="floor_title"
        class="floor_group"
        >
        <!--标题-->
        <view class="floor_title" >
            <image src="{{item1.floor_title.image_src}}" mode="widthFix" ></image>
        </view>
        <!--内容-->
        <view class="floor_list">
        <navigator
        wx:for="{{item1.product_list}}"
        wx:for-item="item2"
        wx:for-index="index2"
        wx:key="name">
            <image src="{{item2.image_src}}" mode="{{index2===0?'widthFix':'scaleToFill'}}"/>

        </navigator>

        </view>
        </view>
    </view>
    </view>

    <!--楼层结束-->
3. 导入样式
pages/index/index.wxss
.index_floor .floor_group .floor_title {
  padding: 10rpx 0;
}
.index_floor .floor_group .floor_title image {
  width: 100%;
}
.index_floor .floor_group .floor_list {
  overflow: hidden;
}
.index_floor .floor_group .floor_list navigator {
  float: left;
  width: 33.3%;
  /*后面四个的超链接*/
  /*2.3超链接*/
}
.index_floor .floor_group .floor_list navigator:nth-last-child(-n+4) {
  /**
                原图 232*386
                232/286 = 33.3vw/height
                **/
  height: 27.72711207vw;
  border-left: 10rpx solid #fff;
}
.index_floor .floor_group .floor_list navigator:nth-child(2),
.index_floor .floor_group .floor_list navigator:nth-child(3) {
  border-bottom: 10rpx solid #fff;
}
.index_floor .floor_group .floor_list navigator image {
  width: 100%;
  height: 100%;
}
首页效果
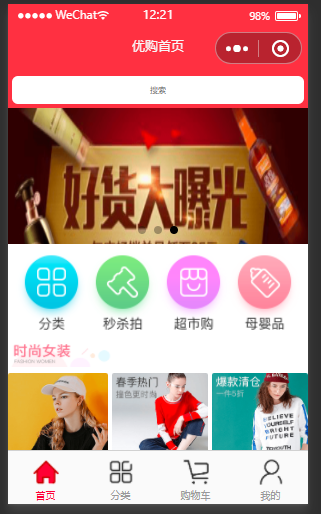
5. 分类页面
5.1 请求相关的数据
在pages/category/index.js
// pages/category/index.js
import {request} from "../../request/index.js";
Page({

  /**
   * 页面的初始数据
   */
  data: {
      //左侧的菜单数据
      leftMenuList:[],
      //右侧的商品数据
      rightContent:[],
      //被点击的左侧菜单
      currentIndex:0
  },
      //接口的返回数据
      Cates:[],
  onLoad:function(options){
      this.getCates()
  },
  //获取分类菜单
  getCates(){
    request({
      url:"https://api-hmugo-web.itheima.net/api/public/v1/categories"
    })
    .then(result=>{
      this.Cates=result.data.message
      //构造左侧的大菜单数据
      let leftMenuList=this.Cates.map(v=>v.cat_name)
      //构造右侧的商品数据
      let rightContent=this.Cates[0].children;
      this.setData({
        leftMenuList,
        rightContent
      })
    })
  },
  //左侧菜单的点击事件
  handleItemTap(e)
  {
    /**
     * 1.获取别点击的索引
     * 2.getdata中currentIndex赋值
     * 3.根据不同的索引渲染右侧的菜单
     */
   const {index}=e.currentTarget.dataset;
   let rightContent=this.Cates[index].children;
   this.setData({
    currentIndex:index,
    rightContent
   })
  }
})
5.2 页面的编写
在pages/category/index.wxml
<view class="cates">
    <SearchInput></SearchInput>
    <view class="cates_container">
        <!--左侧菜单-->
        <scroll-view class="left_menu" scroll-y>
          <view class="menu_item {{index===currentIndex?'active':''}}"
          wx:for="{{leftMenuList}}"
          wx:key="this"
          bindtap="handleItemTap"
          data-index="{{index}}"
          >
              {{item}}
          </view>

        </scroll-view>
        <!--右侧商品内容-->
        <scroll-view class="right_content" scroll-y>
            <view class="goods_group"
            wx:for="{{rightContent}}"
            wx:for-index="index1"
            wx:for-item="item1"
            >
             <view class="goods_title">
                 <text class="delimiter"></text>
                 <text class="title">{{item1.cat_name}}</text>
                 <text class="delimiter"></text>
             </view>
             <view class="goods_list">
                 <navigator
                 wx:for="{{item1.children}}"
                 wx:for-index="index2"
                 wx:for-item="item2"
                 wx:key="cat_id"
                 >
                  <image src="{{item2.cat_icon}}" mode="widthFix"></image>
                  <view class="goods_name">{{item2.cat_name}}</view>
                 </navigator>
             </view>
            </view>
        </scroll-view>
    </view>

</view>
5.3 相关的样式
在pages/category/index.wxss
page {
  height: 100%;
}
.cates {
  height: 100%;
}
.cates .cates_container {
  display: flex;
  height: cac(100vh - 90rpx);
}
.cates .cates_container .left_menu {
  flex: 2;
}
.cates .cates_container .left_menu .menu_item {
  height: 80rpx;
  display: flex;
  justify-content: center;
  align-items: center;
  font-size: 30rpx;
}
.cates .cates_container .left_menu .active {
  color: var(--themeColor);
  border-left: 5rpx solid currentColor;
}
.cates .cates_container .right_content {
  flex: 5;
}
.cates .cates_container .right_content .goods_group .goods_title {
  height: 80rpx;
  display: flex;
  justify-content: center;
  align-items: center;
}
.cates .cates_container .right_content .goods_group .goods_title .delimiter {
  color: #ccc;
  padding: 0 10rpx;
}
.cates .cates_container .right_content .goods_group .goods_list {
  display: flex;
  flex-wrap: wrap;
}
.cates .cates_container .right_content .goods_group .goods_list navigator {
  width: 33.33%;
  text-align: center;
}
.cates .cates_container .right_content .goods_group .goods_list navigator image {
  width: 50%;
}
5.3 添加缓存
先判断本地是否有没有过期的旧数据,如果有就使用旧数据,没有就重新从接口中获取
在pages/category/index.js中修改的部分代码
onLoad:function(options){
    /**
     * 1. 先判断本地存储中有没有旧数据
     * {tine:Date.now,data[...]}
     * 2. 没有旧数据直接发送新请求
     * 有旧数据同时旧数据也没有过期 就是要本地存储中的旧数据即可
     */
    //1.获取本地存储中的数据(小程序中也是本地存储)
    const Cates=wx.getStorage("cates");
    this.getCates()
    //2.判断
    if(!Cates)
    {
      //不存在 发送请求获取数据
      this.getCates();
    }
    else
    {

      // //有旧的数据 定义过期时间
        if(Date.now()-Cates.time>1000*10)
        {
          //重新发送数据
          this.getCates()
        }
        else{
          //可以使用旧数据
          this.Cates=Cates.data;
            //构造左侧的大菜单数据
      let leftMenuList=this.Cates.map(v=>v.cat_name)
      //构造右侧的商品数据
      let rightContent=this.Cates[0].children;
      this.setData({
        leftMenuList,
        rightContent
      })
        }
    }
  },
  //获取分类菜单
  getCates(){
    request({
      url:"https://api-hmugo-web.itheima.net/api/public/v1/categories"
    })
    .then(result=>{
      this.Cates=result.data.message

      //把接口中的数据存入本地存储中
    wx.setStorageSync("cates", {time:Date.now(),data:this.Cates});

      //构造左侧的大菜单数据
      let leftMenuList=this.Cates.map(v=>v.cat_name)
      //构造右侧的商品数据
      let rightContent=this.Cates[0].children;
      this.setData({
        leftMenuList,
        rightContent
      })
    })
  },
5.4 点击菜单左侧列表置顶
在scrocll-view中有设置滚动条的位置
在页面中添加属性scroll-top并绑定值
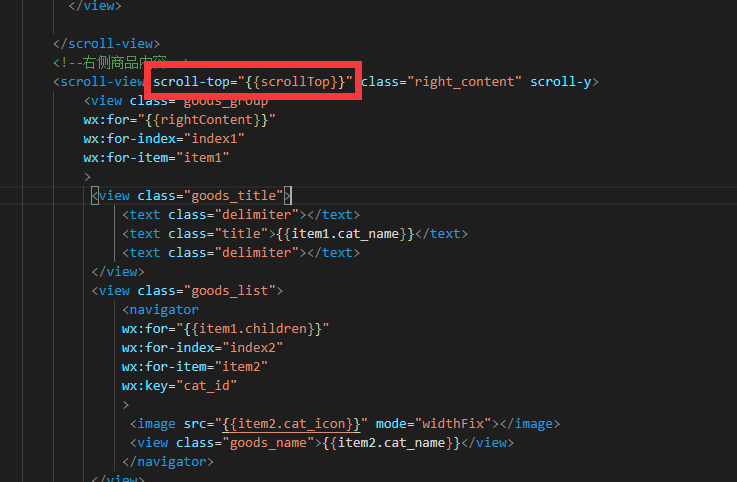
在data中添加scrollTop
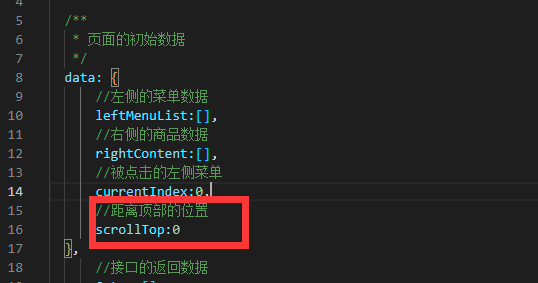
修改点击事件,点击一次距离顶部的距离为0
  //左侧菜单的点击事件
  handleItemTap(e)
  {
    /**
     * 1.获取别点击的索引
     * 2.getdata中currentIndex赋值
     * 3.根据不同的索引渲染右侧的菜单
     */
   const {index}=e.currentTarget.dataset;
   let rightContent=this.Cates[index].children;
   this.setData({
    currentIndex:index,
    //距离顶部的位置
    scrollTop:0,
    rightContent
   })
  }
5.5 提取公共接口路径
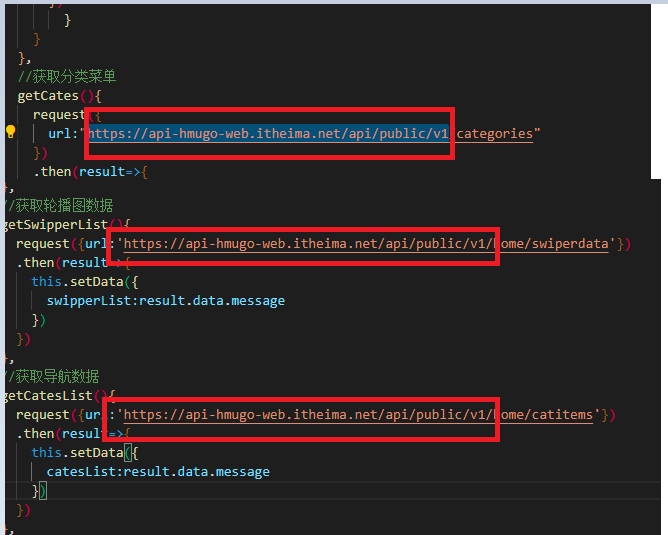
发现这些接口有一些共同的路径,我们将其提取处理
在request/index.js下提取公共路径
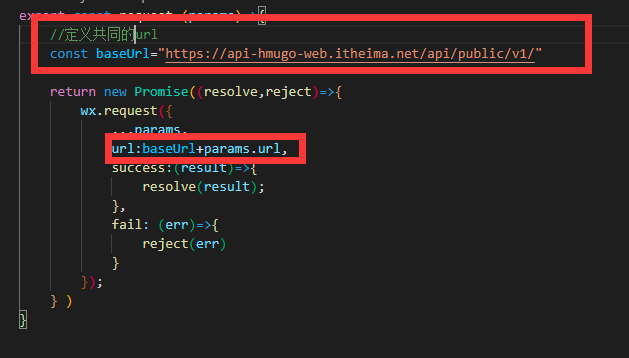
然后在其他的请求接口中删除https://api-hmugo-web.itheima.net/api/public/v1/即可
6.商品列表
6.1 定义tab组件
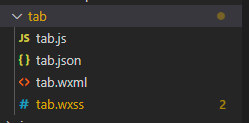
1. tab/tab.wxml
<view class="tab">
    <view class="tab_title">
        <view class="title_item {{item.isActive?'active':''}}"
        wx:for="{{tab}}"
        wx:key="id"
        bindtap="handleItemTap"
        data-index="{{index}}"
        >
            {{item.value}}
        </view>
    </view>
    <view class="tab_content">
        <slot></slot>
    </view>
</view>
2. tab/tab.wxss
.tab{}
.tab_title{
    display: flex;
}
.title_item{
    display: flex;
    justify-content: center;
    align-items: center;
    flex: 1;
    padding: 15rpx 0;
}
.active{
    color: var(--themeColor);
    border-bottom: 5rpx solid currentColor;
}
.tab_content{}
3. tab/tab.js
// components/tab/tab.js
Component({
  /**
   * 组件的属性列表
   */
  properties: {
      tab:{
        type:Array,
        value:[]
      }
  },

  /**
   * 组件的初始数据
   */
  data: {

  },

  /**
   * 组件的方法列表
   */
  methods: {
    handleItemTap(e)
    {
      //获取点击的索引
      const {index}=e.currentTarget.dataset;
     //触发父组件中的事件  自定义
     this.triggerEvent("tabItemChange",{index})
    }
  }
})
6.2 商品列表中使用组件
1. pages/gods_list/index.wxml
    <!--搜索框开始-->
    <SearchInput></SearchInput>
    <!--搜索框结束-->
    <tab tab="{{tab}}" bindtabItemChange="handleTabItemChange">
        <block wx:if="{{tab[0].isActive}}">1</block>
        <block wx:elif="{{tab[1].isActive}}">2</block>
        <block wx:elif="{{tab[2].isActive}}">3</block>
    </tab>
2. pages/gods_list/index.json
{
  "usingComponents": {
    "SearchInput":"../../components/SearchInput/SearchInput",
    "tab":"../../components/tab/tab"
  },
  "navigationBarTitleText": "商品列表"
}
3. pages/gods_list/index.js
// pages/goods_list/index.js
Page({

  /**
   * 页面的初始数据
   */
  data: {
    tab:[
      {
        id:0,
        value:'综合',
        isActive:true
      },
      {
        id:1,
        value:'销量',
        isActive:false
      },
      {
        id:0,
        value:'价格',
        isActive:false
      }
    ]

  },

  /**
   * 生命周期函数--监听页面加载
   */
  onLoad: function (options) {
    console.log(options)

  },
  //标题的点击事件 从子组件中传递过来的
  handleTabItemChange(e)
  {
    //获取被点击标题发索引
    const {index}=e.detail
    //修改原数组
    let {tab}=this.data
    tab.forEach((v,i)=>i===index?v.isActive=true:v.isActive=false);
    //赋值到data中
    this.setData({
      tab
    })
  }
})
6.3 商品列表的实现
需求分析
-
用户上滑页面 滚动条触底 开始加载下一页数据
- 找到滚动条触底事件
- 判断还有没有下一页数据
- 获取总页数 总页数=math.ceil(总条数/页容量)
- 获取当前页的页码
- 判断当前;页面是否大于总页数
- 假如没有下一页数据会弹出一个提示
- 假如有下一页数据,加载下一页数据
当前的页码++
重新发送请求
数据请求回来 要对data中的数据进行拼接而不是全部替换
-
下拉刷新页面
- 触发下拉刷新事件 需要在页面的Json文件中开始一个配置项
- 重置数据 数组
- 重置页码 设置为1
- 重新发送请求
- 数据请求回来了 需要手动关闭 等待效果
1. pages/goods_list/index.js
import {request} from "../../request/index.js";
Page({

  /**
   * 页面的初始数据
   */
  data: {
    tab:[
      {
        id:0,
        value:'综合',
        isActive:true
      },
      {
        id:1,
        value:'销量',
        isActive:false
      },
      {
        id:0,
        value:'价格',
        isActive:false
      }
    ],
    goodsList:[]

  },
  //接口要的数据
  QueryParams:{
    qurty:"",
    cid:"",
    pagenum:1,
    pagesize:10
  },
  //总页数
  totalPages:1,
  /**
   * 生命周期函数--监听页面加载
   */
  onLoad: function (options) {
   this.QueryParams.cid=options.cid;
   this.getGoodsList();

  },
  //获取商品数据
  getGoodsList(){
    request({url:"goods/search",data:this.QueryParams})
    .then(result=>{
      //获取总条数
      const total=  result.data.message.total
      //计算总页数
      this.totalPages=Math.ceil(total/this.QueryParams.pagesize)
      console.log(this.totalPages)
      this.setData({
        goodsList:[...this.data.goodsList,...result.data.message.goods]
        })
    })
    //关闭下拉刷新的窗口 如果没有
    wx.stopPullDownRefresh()
  },
  //标题的点击事件 从子组件中传递过来的
  handleTabItemChange(e)
  {
    //获取被点击标题发索引
    const {index}=e.detail
    //修改原数组
    let {tab}=this.data
    tab.forEach((v,i)=>i===index?v.isActive=true:v.isActive=false);
    //赋值到data中
    this.setData({
      tab
    })
  },
  //页面上滑 滑动条触底事件
  onReachBottom(){
    if(this.QueryParams.pagenum>=this.totalPages)
    {
     wx.showToast({title: '没有下一页数据了' })
    }
    else{
     //还有下一页数据
     this.QueryParams.pagenum++;
     this.getGoodsList()
    }
  },
  //页面上滑刷新
  onPullDownRefresh()
  {
    //1.重置数组
    this.setData({
      goodsList:[]
    })
    //重置页码
    this.QueryParams.pagenum=1;
    //发送请求
    this.getGoodsList();
  }

})
2. pages/goods_list/index.wxss
.first_tab .goods_item {
  display: flex;
  border-bottom: 1rpx solid #ccc;
}
.first_tab .goods_item .goods_img_wrap {
  flex: 2;
  display: flex;
  justify-content: center;
  align-items: center;
}
.first_tab .goods_item .goods_img_wrap image {
  width: 70%;
}
.first_tab .goods_item .goods_info_wrap {
  flex: 3;
  display: flex;
  flex-direction: column;
  justify-content: space-around;
}
.first_tab .goods_item .goods_info_wrap .goods_name {
  display: -webkit-box;
  overflow: hidden;
  -webkit-box-orient: vertical;
  -webkit-line-clamp: 2;
}
.first_tab .goods_item .goods_info_wrap .goods_price {
  color: var(--themeColor);
  font-size: 32rpx;
}
3. pages/goods_list/index.js
// pages/goods_list/index.js
import {request} from "../../request/index.js";
Page({

  /**
   * 页面的初始数据
   */
  data: {
    tab:[
      {
        id:0,
        value:'综合',
        isActive:true
      },
      {
        id:1,
        value:'销量',
        isActive:false
      },
      {
        id:0,
        value:'价格',
        isActive:false
      }
    ],
    goodsList:[]

  },
  //接口要的数据
  QueryParams:{
    qurty:"",
    cid:"",
    pagenum:1,
    pagesize:10
  },
  //总页数
  totalPages:1,
  /**
   * 生命周期函数--监听页面加载
   */
  onLoad: function (options) {
   this.QueryParams.cid=options.cid;
   this.getGoodsList();

  },
  //获取商品数据
  getGoodsList(){
    request({url:"goods/search",data:this.QueryParams})
    .then(result=>{
      //获取总条数
      const total=  result.data.message.total
      //计算总页数
      this.totalPages=Math.ceil(total/this.QueryParams.pagesize)
      console.log(this.totalPages)
      this.setData({
        goodsList:[...this.data.goodsList,...result.data.message.goods]
        })
    })
    //关闭下拉刷新的窗口 如果没有
    wx.stopPullDownRefresh()
  },
  //标题的点击事件 从子组件中传递过来的
  handleTabItemChange(e)
  {
    //获取被点击标题发索引
    const {index}=e.detail
    //修改原数组
    let {tab}=this.data
    tab.forEach((v,i)=>i===index?v.isActive=true:v.isActive=false);
    //赋值到data中
    this.setData({
      tab
    })
  },
  //页面上滑 滑动条触底事件
  onReachBottom(){
    if(this.QueryParams.pagenum>=this.totalPages)
    {
     wx.showToast({title: '没有下一页数据了' })
    }
    else{
     //还有下一页数据
     this.QueryParams.pagenum++;
     this.getGoodsList()
    }
  },
  //页面上滑刷新
  onPullDownRefresh()
  {
    //1.重置数组
    this.setData({
      goodsList:[]
    })
    //重置页码
    this.QueryParams.pagenum=1;
    //发送请求
    this.getGoodsList();
  }

})
7. 商品详情页面
需求分析
-
点击轮播图预览大图
1. 给轮播图绑定点击事件
2. 调用小程序的api priviewUmage -
点击加入购物车
- 绑定点击事件
- 获取缓存中的购物车数据 数组格式
- 先判断当前的商品是否存在购物车中
- 已经存在 修改购物车中的商品数量 购物车中的商品数量++ 重新把购物车中的数组填充回缓存中
- 不存在于购物车的数组中,直接给购物车数组添加一个新元素 新元素带上购买属性num 重新把购物车数组填充回缓存中
1.pages/goods_detail/index.wxml
<view class="detail_swiper">
    <swiper
    autoplay
    circular
    indicator-dots
    >
        <swiper-item
        wx:for="{{goodsObj.pics}}"
        wx:key="pics_id"
        bindtap="bindlePrevewImage"
        data-url="{{item.pics_mid}}"
        >
         <image mode="widthFix" src="{{item.pics_mid}}"></image>
        </swiper-item>

    </swiper>

    <view class="goods_price">¥{{goodsObj.goods_price}}</view>
    <view class="goods_name_row">
        <view class="goods_name">{{goodsObj.goods_name}}</view>
        <view class="goods_collect" bindtap="handleCollect">
            <text class="iconfont {{isCollect?'icon-shoucangxuanzhong':'icon-shoucang'}} "></text>
            <view class="collect_text">收藏</view>
        </view>
    </view>
</view>

<view class="goods_info">
    <view class="goods_info_title">图文详情</view>
    <view class="goods_info_content">
        <!--富文本-->
        <rich-text nodes="{{goodsObj.goods_introduce}}">

        </rich-text>
    </view>
</view>

<view class="btm_tool">
    <view class="tool_item">
        <view class="iconfont icon-kefu"></view>
        <view>客服</view>
        <button open-type="contact"></button>
    </view>
    <view class="tool_item">
        <view class="iconfont icon-fenxiang"></view>
        <view>分享</view>
        <button open-type="share"></button>
    </view>
    <navigator open-type="switchTab" url="/pages/cart/index" class="tool_item">
        <view class="iconfont icon-gouwucheman"></view>
        <view>购物车</view>
    </navigator>
    <view class="tool_item btn_cart" bindtap="handleCartAdd">
        <view>加入购物车</view>
    </view>
    <view class="tool_item btn_buy">

        <view>立即购买</view>
    </view>
</view>
2. pages/goods_detail/index.wxss
page {
  padding-bottom: 90rpx;
}
.detail_swiper swiper {
  height: 65vw;
  text-align: center;
}
.detail_swiper swiper image {
  width: 60%;
}
.goods_price {
  padding: 15rpx;
  font-size: 32rpx;
  font-weight: 600;
  color: var(--themeColor);
}
.goods_name_row {
  display: flex;
}
.goods_name_row .goods_name {
  border-top: 5rpx solid #dedede;
  border-bottom: 5rpx solid #dedede;
  padding: 10rpx 0;
  flex: 5;
  color: #000;
  font-size: 30rpx;
  padding: 0 10rpx;
  display: -webkit-box;
  overflow: hidden;
  -webkit-box-orient: vertical;
  -webkit-line-clamp: 2;
}
.goods_name_row .goods_collect {
  flex: 1;
  display: flex;
  flex-direction: column;
  justify-content: center;
  align-items: center;
  border-left: 1rpx solid #000;
}
.goods_name_row .goods_collect .icon-shoucangxuanzhong {
  color: orangered;
}
.goods_info .goods_info_title {
  font-size: 32rpx;
  color: var(--themeColor);
  font-weight: 600;
  padding: 20rpx;
}
.btm_tool {
  border-top: 1rpc solid #000;
  position: fixed;
  left: 0;
  bottom: 0;
  width: 100%;
  height: 90rpx;
  background-color: #fff;
  display: flex;
}
.btm_tool .tool_item {
  flex: 1;
  display: flex;
  flex-direction: column;
  align-items: center;
  justify-content: center;
  font-size: 24rpx;
  position: relative;
}
.btm_tool .tool_item button {
  position: absolute;
  top: 0;
  left: 0;
  width: 100%;
  height: 100%;
  opacity: 0;
}
.btm_tool .btn_cart {
  flex: 2;
  display: flex;
  flex-direction: column;
  justify-content: center;
  align-items: center;
  background-color: #ffa500;
  color: #fff;
  font-size: 30rpx;
  font-weight: 600;
}
.btm_tool .btn_buy {
  flex: 2;
  display: flex;
  flex-direction: column;
  justify-content: center;
  align-items: center;
  background-color: #eb4450;
  color: #fff;
  font-size: 30rpx;
  font-weight: 600;
}
- pages/goods_detail/index.js
// pages/goods_detail/index.js
import {request} from "../../request/index.js";
/**
 * 点击轮播图预览大图
 *  1.给轮播图绑定点击事件
 *  2.调用小程序的api priviewUmage
 *
 * 点击加入购物车
 *  1.绑定点击事件
 *  2.获取缓存中的购物车数据  数组格式
 *  3.先判断当前的商品是否存在购物车中
 *  4.已经存在 修改购物车中的商品数量  购物车中的商品数量++ 重新把购物车中的数组填充回缓存中
 *  5.不存在于购物车的数组中,直接给购物车数组添加一个新元素 新元素带上购买属性num 重新把购物车数组填充回缓存中
 *
 *
 * 3. 商品收藏
 *  1. 页面onshow的时候 加载缓存中的商品收藏数据
 *  2. 判断该商品是不是被收藏
 *    是 改变页面的图标
 * 3. 点击商品收藏按钮
 *    1. 判断该商品是否存在商品缓存数组中
 *    2. 已存在 把该商品删除
 *    3. 不存在 把商品添加到收藏数组中
*/

Page({

  /**
   * 页面的初始数据
   */
  data: {
    goodsObj:{},
    //商品是否别收藏过
    isCollect:false

  },
  //商品对象
  GoodsInfo:{},

  /**
   * 生命周期函数--监听页面加载
   */
  onShow: function () {
    let pages= getCurrentPages();
    let currentPage=pages[pages.length-1];
    let options=currentPage.options;
    const {goods_id}=options
    this.getGoodsDetail(goods_id)

  },
  //获取商品详情数据
  getGoodsDetail(goods_id)
  {
    request({url:'goods/detail',data:{goods_id}})
    .then(result=>{
      const goodsObj=result.data.message;
      this.GoodsInfo=goodsObj
      //获取缓存中的商品收藏数组
      let collect=wx.getStorageSync("collect")||[];
      //判断当前商品是否别收藏
      let isCollect = collect.some(v=>v.goods_id===this.GoodsInfo.goods_id)
      this.setData({
        goodsObj:{
          goods_name:goodsObj.goods_name,
          goods_price:goodsObj.goods_price,
          //iphone部分手机不识别webp图片格式 可以在后端进行修改 临是可以自己该 确保后台存在,1.webp=>1,jpg
          goods_introduce:goodsObj.goods_introduce.replace(/\.webp/g,'.jpg'),
          pics:goodsObj.pics
        },
        isCollect
      })
    })
  },
  bindlePrevewImage(e){
      //构造预览图片的数组
      const urls=this.GoodsInfo.pics.map(v=>v.pics_mid);
      //接收传递过来的url
      const current=e.currentTarget.dataset.url;
      wx.previewImage({
        current,
        urls
      })
  },
  handleCartAdd()
  {
      //1.获取缓存中的购物车数据
      let cart=wx.getStorageSync("cart")||[];
      //2.判断商品是否存在与购物车中
      let index=cart.findIndex(v=>v.goods_id===this.GoodsInfo.goods_id);
      if(index===-1)
      {
       //3.不存在第一次添加
       this.GoodsInfo.num=1;
       this.GoodsInfo.checked=true
       cart.push(this.GoodsInfo);
      }
      else
      {
        //4.已经存在购物车中 执行num++
        cart[index].num++
      }
      //5.把购物车重新添加到缓存中
      wx.setStorageSync('cart', cart)
      wx.showToast({
        title:"加入成功",
        icon:'success',
        //true 防止用户手抖疯狂点击
        mask: true
      })

  },
  //点击商品收藏图标
  handleCollect(){
    let isCollect=false
    //1. 获取缓存中商品收藏数组
    let collect=wx.getStorageSync("collect")||[]
    //判断该商品是否被收藏过
    let index=collect.findIndex(v=>v.goods_id===this.GoodsInfo.goods_id)
    //3 当index=1-表示已经收藏过
    if(index!==-1)
    {
        //已经收藏过 应该从收藏册数组中删除
        collect.splice(index,1)
        isCollect=false;
        wx.showToast({
          title:"取消成功",
          icon:"success",
          mask:true
        });
    }
    else{
      //没有收藏过
      collect.push(this.GoodsInfo)
      isCollect=true
      wx.showToast({
        title:"收藏成功",
        icon:"success",
        mask:true
      });
    }
    wx.setStorageSync("collect",collect)
    this.setData({
      isCollect
    })
  }
})
8. 商品收藏页面
1. 在 pages/collect/index.json中引入组件
{
  "usingComponents": {
    "tab":"../../components/tab/tab"
  },
  "navigationBarTitleText":"商品收藏"
}
** 2.pages/collect/index.wxml**
<tab tab="{{tabs}}" bindtabItemChange="handleTabItemChange">
    <view class="collect_main">
        <view class="collect_title">
            <text class="collect_tips active">全部</text>
            <text class="collect_tips">正在热卖</text>
            <text class="collect_tips">即将上线</text>
        </view>
        <view class="collect_content">
            <navigator class="goods_item"
                wx:for="{{collect}}"
                wx:key="goods_id"
                url="/pages/goods_detail/index?goods_id={{item.goods_id}}"
                >
                        <!--左侧图片容器-->
                        <view class="goods_img_wrap">
                            <image mode="widthFix" src="{{item.goods_small_logo?item.goods_small_logo:'http://image5.suning.cn/uimg/b2c/newcatentries/0000000000-000000000160455569_1_400x400.jpg'}}">
                            </image>
                        </view>
                        <!--右侧商品容器-->
                        <view class="goods_info_wrap" >
                            <view class="goods_name">{{item.goods_name}}</view>
                            <view class="goods_price">¥{{item.goods_price}}</view>
                        </view>
                </navigator>
        </view>
    </view>
 </tab>
3. pages/collect/index.js
// pages/collect/index.js
Page({

  /**
   * 页面的初始数据
   */
  data: {
    collect:[],
    tabs:[
      {
        id:0,
        value:"商品收藏",
        isActive:true
      },
      {
        id:1,
        value:"品牌收藏",
        isActive:false
      },
      {
        id:2,
        value:"店铺收藏",
        isActive:false
      },
      {
        id:3,
        value:"浏览足迹",
        isActive:false
      }
    ]

  },
  onShow(){
    const collect=wx.getStorageSync("collect")||[]
    this.setData({
      collect
    })
  },
  handleTabItemChange(e)
  {
    console.log(e)
    //获取被点击标题发索引
    const {index}=e.detail
    //修改原数组
    let {tabs}=this.data
      for(let i=0;i<4;i++)
      {
        if(i===index)
        {
          tabs[i].isActive=true
        }
        else
        {
          tabs[i].isActive=false
        }
      }
    //赋值到data中
    this.setData({
      tabs
    })
  }
})
4. pages/collect/index.wxss
.collect_main {
  background-color: #f3f4f6;
}
.collect_main .collect_title {
  padding: 40rpx 0;
}
.collect_main .collect_title .collect_tips {
  padding: 15rpx;
  border: 1rpx solid #ccc;
  margin-left: 25rpx;
  background-color: #fff;
}
.collect_main .collect_title .active {
  color: var(--themeColor);
  border-color: currentColor;
}
.collect_main .collect_content .goods_item {
  display: flex;
  background-color: #fff;
  border-bottom: 1rpx solid #ccc;
}
.collect_main .collect_content .goods_item .goods_img_wrap {
  flex: 2;
  display: flex;
  justify-content: center;
  align-items: center;
}
.collect_main .collect_content .goods_item .goods_img_wrap image {
  width: 70%;
}
.collect_main .collect_content .goods_item .goods_info_wrap {
  flex: 3;
  display: flex;
  flex-direction: column;
  justify-content: space-around;
}
.collect_main .collect_content .goods_item .goods_info_wrap .goods_name {
  display: -webkit-box;
  overflow: hidden;
  -webkit-box-orient: vertical;
  -webkit-line-clamp: 2;
}
.collect_main .collect_content .goods_item .goods_info_wrap .goods_price {
  color: var(--themeColor);
  font-size: 32rpx;
}
9.购物车页面
需求分析
-
获取用户的收获地址
- 绑定点击事件
- 调用小程序内置api 获取用户是收货地址 wx.choseAddress
-
获取用户对小程序所授予获取地址的权限状态 scope
- 假设用户点击获取收货地址的提示框选择确定 authSetting scope,当 scope值为true 可以直接调用收货地址api
- 假设用户点击获取收货地址的提示框选择取消 scope值为true 诱导用户自己打开授权设置页面 当用户重新给收货地址授权的时候 获取收货地址
- 假设用户没有调用过获取收货地址的api scopewei undefined 可以之际调用收货地址的api
- 把收货地址放入本地缓冲中
- 页面加载完毕
- 获取本地存储中的地址数据
- 把数据设置给data中的一个变量
-
onshow
1. 获取缓存中的购物车数组
2. 把购物车中的数据填充到data中 -
全选的实现
1. onshow获取缓存中的购物车数据
2. 根据购物车中的商品数据 所有的商品都被选中 checked=true 全选就被选中 -
总价格 总数量
- 需要商品被选中,我们才拿他来计算
- 获取购物车数组
- 遍历
- 判断商品是否选中
- 总价格+=商品单价*商品数量
- 总数量+=商品数量
- 把计算后的单价和数量 设置回data即可
-
商品属性
- 绑定change事件
- 获取被修改的商品对象
- 商品对象的选择状态取反
- 重新将数据填充回data中和缓存中
- 重新计算全选 总价格 总数量
-
全选和反选
- 全选 复选框都绑定事件change
- 获取data中的全选变量 allchecked
- 直接取反 allchecked
- 遍历购物车数组和allchecked 重新设置回data 把购物车重新设置回缓存中
-
商品数量的编辑
- “+”,"-"按钮 绑定同一个点击事件 区分的关键 自定义属性: “+” +1, “-” -1
- 传递被点击商品的id goods_id
- 获取data中的购物车数组 来获取需要被修改的商品的对象
- 直接修改商品对象的数据 num
当购物车的数量为=1 同时点击的为"-"
弹框(showMNodel)提示用户是否删除
1 确定直接删除
2 取消 什么也不做
5.把cart数组 重新设置回缓存中和data中
-
点击结算
- 判断有没有收货地址信息
- 判断用户有没有选购商品
- 经过以上认证跳转到支付页面
1. pages/cart/index.wxml
<view class="revice_address_row">
    <!--当收货地址不存在时按钮显示 空对象的Boolean类型也为true-->
    <view class="address_btn" wx:if="{{!address.userName}}">
        <button bindtap="handleChoseAddress" type="primary" plain>收货地址</button>
    </view>
    <!--收货地址存在就显示-->
    <view wx:else class="user_info_row">
       <view class="user_info">
           <view>
            {{address.userName}}
           </view>
            <view>
                {{address.provinceName+address.cityName+address.countyName+address.detailInfo}}
            </view>
            <view class="user_phone">
                {{address.telNumber}}
            </view>
       </view>
    </view>
</view>
<!--购物车内容-->
<view class="cart_content">
    <view class="cart_title">购物车</view>
    <view class="cart_main">
        <!--当购物车不为空-->
       <block wx:if="{{cart.length!==0}}">
        <view class="cart_item"
        wx:for="{{cart}}"
        wx:key="goods_id"
        >
            <!--复选框-->
            <view class="cart_chk_wrap">
                <checkbox-group bindchange="handeItemChange" data-id="{{item.goods_id}}">
                    <checkbox checked="{{item.checked}}"></checkbox>
                </checkbox-group>
            </view>
            <!--商品图片-->
            <navigator class="cart_img_wrap">
                <image mode="widthFix" src="{{item.goods_small_logo}}"></image>
            </navigator>
            <!--商品信息-->
            <view class="cart_info_wrap">
                <view class="goods_name">{{item.goods_name}}</view>
                <view class="goods_price_wrap">
                    <view class="goods_price">¥{{item.goods_price}}</view>
                    <view class="cart_num_tool">
                        <view bindtap="handleItemNumEdit" data-operation="{{-1}}" data-id="{{item.goods_id}}" class="num_edit" >-</view>
                        <view class="goods_num">{{item.num}}</view>
                        <view bindtap="handleItemNumEdit" data-operation="{{1}}" data-id="{{item.goods_id}}" class="num_edit">+</view>
                    </view>
                </view>
            </view>
        </view>
       </block>
       <block wx:else="{{cart.length!==0}}">
           <image mode="widthFix" src="https://gimg2.baidu.com/image_search/src=http%3A%2F%2Fhbimg.b0.upaiyun.com%2Fa4064bdab5f6c800ed664014f3eb7d13a4dd25b3138d0-hYHe07_fw658&refer=http%3A%2F%2Fhbimg.b0.upaiyun.com&app=2002&size=f9999,10000&q=a80&n=0&g=0n&fmt=jpeg?sec=1644844807&t=a98780f2ab7a2ee2653d589ef43e9f93"></image>
       </block>
    </view>
</view>
<!--底部工具栏-->
<view class="footer_tool">
    <!--全选-->
    <view class="all_chk_wrap">
        <checkbox-group bindchange="handleItemAllCheck">
            <checkbox  checked="{{allChecked}}">全选</checkbox>
        </checkbox-group>
    </view>
    <!--总价格-->
    <view class="total_price_wrap">
        <view class="total_price">
            总计<text class="total_price_text">¥{{totalPrice}}</text>
        </view>
        <view>
            包含运费
        </view>
    </view>
    <view class="order_pay_wrap" bindtap="handlePay">
        结算{{totalNum}}
    </view>
</view>
2. pages/cart/index.wxss
page {
  padding-bottom: 90rpx;
}
.revice_address_row .address_btn {
  padding: 20rpx;
}
.revice_address_row .address_btn button {
  width: 60%;
}
.revice_address_row .user_info_row {
  display: flex;
  padding: 20rpx;
}
.revice_address_row .user_info_row .user_info {
  flex: 5;
}
.revice_address_row .user_info_row .user_phone {
  flex: 3;
  text-align: right;
}
.cart_content .cart_title {
  padding: 20rpx;
  font-size: 36rpx;
  color: var(--themeColor);
  border-top: 1rpx solid currentColor;
  border-bottom: 1rpx solid currentColor;
}
.cart_content .cart_main .cart_item {
  display: flex;
  padding: 10rpx;
  border-bottom: 1rpx solid #000;
}
.cart_content .cart_main .cart_item .cart_chk_wrap {
  flex: 1;
  display: flex;
  justify-content: center;
  align-items: center;
}
.cart_content .cart_main .cart_item .cart_img_wrap {
  flex: 2;
  display: flex;
  align-items: center;
  justify-content: center;
}
.cart_content .cart_main .cart_item .cart_img_wrap image {
  width: 80%;
}
.cart_content .cart_main .cart_item .cart_info_wrap {
  flex: 4;
  display: flex;
  flex-direction: column;
  justify-content: space-around;
}
.cart_content .cart_main .cart_item .cart_info_wrap .goods_name {
  display: -webkit-box;
  overflow: hidden;
  -webkit-box-orient: vertical;
  -webkit-line-clamp: 2;
  color: #666;
}
.cart_content .cart_main .cart_item .cart_info_wrap .goods_price_wrap {
  display: flex;
  justify-content: space-between;
}
.cart_content .cart_main .cart_item .cart_info_wrap .goods_price_wrap .goods_price {
  color: var(--themeColor);
  font-size: 34rpx;
}
.cart_content .cart_main .cart_item .cart_info_wrap .goods_price_wrap .cart_num_tool {
  display: flex;
}
.cart_content .cart_main .cart_item .cart_info_wrap .goods_price_wrap .cart_num_tool .num_edit {
  width: 55rpx;
  height: 55rpx;
  display: flex;
  justify-content: center;
  justify-items: center;
  border: 1rpx solid #ccc;
}
.cart_content .cart_main .cart_item .cart_info_wrap .goods_price_wrap .cart_num_tool .goods_num {
  width: 55rpx;
  height: 55rpx;
  display: flex;
  justify-content: center;
  justify-items: center;
}
.footer_tool {
  position: fixed;
  bottom: 0;
  left: 0;
  width: 100%;
  height: 90rpx;
  background-color: #fff;
  display: flex;
  border-top: 1rpx solid #ccc;
}
.footer_tool .all_chk_wrap {
  flex: 2;
  display: flex;
  justify-content: center;
  align-items: center;
}
.footer_tool .total_price_wrap {
  flex: 5;
  padding-right: 15rpx;
  text-align: right;
}
.footer_tool .total_price_wrap .total_price text.total_price_text {
  color: var(--themeColor);
  font-size: 34rpx;
  font-weight: 600;
}
.footer_tool .order_pay_wrap {
  flex: 3;
  background-color: var(--themeColor);
  color: #fff;
  font-size: 32rpx;
  font-weight: 600;
  display: flex;
  justify-content: center;
  align-items: center;
}
异步编程中的Promise
在使用微信小程序的过程中,我发现由于异步流程延迟的原因,导致不能及时的获取真实的数据,我们可以使用promise()异步请求来解决这个问题
在utils下面创建一个名为asyncWx.js文件,后面问我们可以进行异步待遇
/**
 *promise形式的 getSetting
 */
export const getSetting =()=>{
    return new Promise((resolve,reject)=>{
        wx.getSetting({
            success: function(result) {
                resolve(result)
            },
            fail:(err)=>{
                reject(err)
            }
        });
    })
}

/**
 *promise形式的 chooseAddress
 */
 export const chooseAddress =()=>{
    return new Promise((resolve,reject)=>{
        wx.chooseAddress({
            success: function(result) {
                resolve(result)
            },
            fail:(err)=>{
                reject(err)
            }
        });
    })
}

/**
 *promise形式的 openSetting
 */
 export const openSetting =()=>{
    return new Promise((resolve,reject)=>{
        wx.openSetting({
            success: function(result) {
                resolve(result)
            },
            fail:(err)=>{
                reject(err)
            }
        });
    })
}

export const showToast =({title})=>{
    return new Promise((resolve,reject)=>{
        wx.showToast({
            title: title,
            icon: 'success',
            success:(res)=>{
                resolve(res)
            },
            fail:(err)=>{
                reject(err)
            }
          })
    })
}
3.pages/cart/index.js
调用相关的异步函数
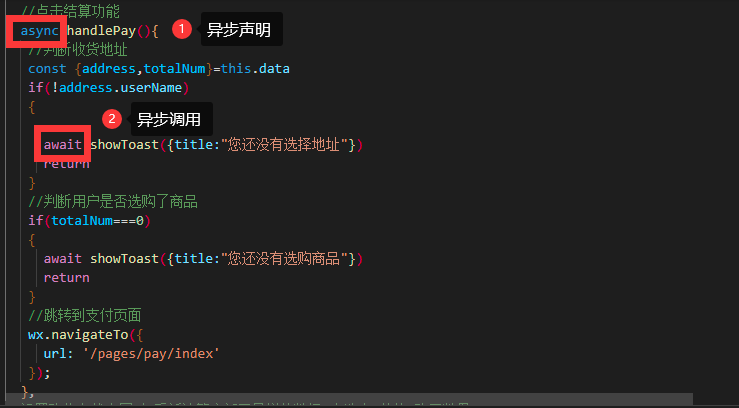
// pages/cart/index.js
//调用promise
import{getSetting,chooseAddress,openSetting,showToast} from "../../utils/asyncWx.js"
// import regeneratorRuntime from "../../lib/runtime/runtime"
Page({

  /**
   * 页面的初始数据
   */
  data: {
      address:{},
      cart:[],
      allChecked:false,
      totalPrice:0,
      totalNum:0
  },
  onShow(){
  // 获取缓冲中的收货地址信息
  const address=wx.getStorageSync("address")
  //获取缓存中的购物车数据
  const cart=wx.getStorageSync("cart")||[]
  // 计算全选中
  // every 数组方法 遍历会接收一个回调函数  如果每一个回调函数都返回true every方法的返回值就为true 只有有一个返回false every方法不在执行 防护false
    //空数组返回值为true
  // const allChecked=cart.length?cart.every(v=>v.checked):false
        this.setCart(cart)
        this.setData({
          address
        })
  },
  //点击获取收货地址
  async handleChoseAddress()
  {

  //1.获取权限状态
  const res1=await getSetting();
  const scopeAddress=res1.authSetting['scope.address']
  //2 。判断权限状态
    if(scopeAddress===false)
    {
      await openSetting()
    }
    //调用获取收货地址的api
    const address=await chooseAddress();
    console.log(address)
    //放入缓存中
    wx.setStorageSync('address', address)
  },
  //商品选中
  handeItemChange(e)
  {
      //获取选中商品的id
      const goods_id=e.currentTarget.dataset.id
      //获取购物车数组
      let {cart}=this.data;
      //找到被修改商品的对象
      let index = cart.findIndex(v=>v.goods_id===goods_id)
      //修改商品的选中事件
      cart[index].checked=!cart[index].checked
      this.setCart(cart)
  },
  //商品全选和反选
  handleItemAllCheck(e)
  {
      //获取data中的数据和选中状态
      let {cart,allChecked}=this.data
      //选中状态取反
      allChecked=!allChecked
      //循环修改cart中商品的选中状态
      cart.forEach(v=>v.checked=allChecked)
      //把修改后的值填充回data或者缓存中
      this.setCart(cart)

  },
  //商品数量的编辑
  handleItemNumEdit(e)
  {
    //获取传递过来的参数
    const {operation,id}=e.currentTarget.dataset
    //获取购物车数组
    let {cart}=this.data;
    //找到需要获取商品的索引
    const index=cart.findIndex(v=>v.goods_id===id)
    if(cart[index].num===1&&operation===-1)
    {
      //弹框提示
      wx.showModal({
        title: '提示',
        content: '你是否删除',
        success: (res)=> {
          if (res.confirm) {
            cart.splice(index, 1);
            this.setCart(cart)
          } else if (res.cancel) {
            console.log('用户点击取消')
          }
        }
      })
    }
    //进行修改数量
    else
    {
    cart[index].num+=operation
    this.setCart(cart)
    }
  },
  //点击结算功能
  async handlePay(){
   //判断收货地址
   const {address,totalNum}=this.data
   if(!address.userName)
   {

     await showToast({title:"您还没有选择地址"})
     return
   }
   //判断用户是否选购了商品
   if(totalNum===0)
   {
     await showToast({title:"您还没有选购商品"})
     return
   }
   //跳转到支付页面
   wx.navigateTo({
     url: '/pages/pay/index'
   });
  },
//设置购物车状态同时 重新计算底部工具栏的数据 全选中 价格 购买数量
  setCart(cart){
    let allChecked=true
      //总价格 总数量
      let totalPrice=0
      let totalNum=0
      cart.forEach(v=>{
        if(v.checked)
        {
          totalPrice+=v.num*v.goods_price
          totalNum+=v.num
        }
        else{
            allChecked=false
        }
      })
      if(cart.length==0)
      {
        allChecked=false
      }
      //将数据设置回data和缓存中
      this.setData({
        cart,
        totalNum,
        totalPrice,
        allChecked
      })
      wx.setStorageSync("cart",cart)
  }
})
10.搜索中心
10.1 需求分析
-
输入绑定 值改变事件 input事件
- 获取输入框的值
- 判断合法性
- 校验通过 把输入框的值发送到后台
- 返回数据打印的页面上
-
防抖 (防止抖动) 定时器 节流
- 防抖一般用于防止重复输入 重复请求 节流一般用于页面上拉和下拉,可以定义全局变量定时器id来实现
10.2 具体实现
1. pages/search/index.wxml
<view class="search_row">
    <input placeholder="请输入您要搜索的商品" value="{{inputValue}}" bindinput="handleInpput"></input>
    <button hidden="{{!isFouces}}" bindtap="handleCancle">取消</button>
</view>
<view class="search_content">
        <navigator url="/pages/goods_detail/index?goods_id={{item.goods_id}}" class="search_item" wx:for="{{goods}}" wx:key="{{goods_id}}">
                {{item.goods_name}}
        </navigator>
</view>
2. pages/search/index.js
import {request} from "../../request/index.js"
Page({

  /**
   * 页面的初始数据
   */
  data: {
    goods:[],
    //取消按钮是显示
    isFouces:false,
    //输入框的值
    inputValue:''
  },
  Timeid:-1,
  handleInpput(e)
  {
     //获取输入框的值
     const {value}=e.detail
     //监测合法值
     if(!value.trim())
     {
       this.setData({
         goods:[],
         isFouces:false
       })
       //值不合法
       return ;
     }
     this.setData({
       isFouces:true
     })
     //发送获取数据
     clearTimeout(this.Timeid)
     this.Timeid=setTimeout(()=>{
       this.qsearch(value)
     },1000)
     this.qsearch(value)

  },
  //发送请求获取搜索数据
  async qsearch(query)
  {
    console.log(query)
    const res=await request({url:"goods/search",data:{query}});
    this.setData({
      goods:res.data.message.goods
    })
  },
  //点击取消按钮
  handleCancle()
  {
      this.setData({
        inputValue:'',
        isFouces:false,
        goods:[]
      })
  }
})
3. pages/search/index.wxss
page {
  background-color: #dedede;
  padding: 20rpx;
}
.search_row {
  height: 60rpx;
  display: flex;
}
.search_row input {
  background-color: #fff;
  flex: 4;
  height: 100%;
  padding-left: 30rpx;
}
.search_row button {
  flex: 1;
  height: 100%;
  font-size: 26rpx;
  padding: 0;
  margin: 0 10rpx;
  display: flex;
  justify-content: center;
  align-items: center;
}
.search_content {
  margin-top: 30rpx;
}
.search_content .search_item {
  background-color: #fff;
  font-size: 26rpx;
  padding: 15rpx 10rpx;
  border-bottom: 1rpx solid #ccc;
  overflow: hidden;
  white-space: nowrap;
  text-overflow: ellipsis;
}
11.个人中心
11.1 用户登录授权
1. page/login/index.wxml
<!--pages/login/index.wxml-->
<button plain type="primary" open-type="getUserInfo" bindgetuserinfo="handleGetUserInfo">登录 </button>
2. pages/login/index.js
// pages/login/index.js
Page({
  handleGetUserInfo(e)
  {
    const {userInfo} = e.detail;
    wx.setStorageSync('userInfo', userInfo)
    wx.navigateBack({
      delta: 1
    })
  }
})
3. pages/login/index.wxss
/* pages/login/index.wxss */
button{
    margin-top: 40rpx;
    width: 70%;
}
11.2 商品收藏
1. 在pages/collect/index.json中引入组件
{
  "usingComponents": {
    "tab":"../../components/tab/tab"
  },
  "navigationBarTitleText":"商品收藏"
}
2. pages/collect/index.wxss
<tab tab="{{tabs}}" bindtabItemChange="handleTabItemChange">
    <view class="collect_main">
        <view class="collect_title">
            <text class="collect_tips active">全部</text>
            <text class="collect_tips">正在热卖</text>
            <text class="collect_tips">即将上线</text>
        </view>
        <view class="collect_content">
            <navigator class="goods_item"
                wx:for="{{collect}}"
                wx:key="goods_id"
                url="/pages/goods_detail/index?goods_id={{item.goods_id}}"
                >
                        <!--左侧图片容器-->
                        <view class="goods_img_wrap">
                            <image mode="widthFix" src="{{item.goods_small_logo?item.goods_small_logo:'http://image5.suning.cn/uimg/b2c/newcatentries/0000000000-000000000160455569_1_400x400.jpg'}}">
                            </image>
                        </view>
                        <!--右侧商品容器-->
                        <view class="goods_info_wrap" >
                            <view class="goods_name">{{item.goods_name}}</view>
                            <view class="goods_price">¥{{item.goods_price}}</view>
                        </view>
                </navigator>
        </view>
    </view>
 </tab>
3. pages/ccollect/index.wxss
.collect_main {
  background-color: #f3f4f6;
}
.collect_main .collect_title {
  padding: 40rpx 0;
}
.collect_main .collect_title .collect_tips {
  padding: 15rpx;
  border: 1rpx solid #ccc;
  margin-left: 25rpx;
  background-color: #fff;
}
.collect_main .collect_title .active {
  color: var(--themeColor);
  border-color: currentColor;
}
.collect_main .collect_content .goods_item {
  display: flex;
  background-color: #fff;
  border-bottom: 1rpx solid #ccc;
}
.collect_main .collect_content .goods_item .goods_img_wrap {
  flex: 2;
  display: flex;
  justify-content: center;
  align-items: center;
}
.collect_main .collect_content .goods_item .goods_img_wrap image {
  width: 70%;
}
.collect_main .collect_content .goods_item .goods_info_wrap {
  flex: 3;
  display: flex;
  flex-direction: column;
  justify-content: space-around;
}
.collect_main .collect_content .goods_item .goods_info_wrap .goods_name {
  display: -webkit-box;
  overflow: hidden;
  -webkit-box-orient: vertical;
  -webkit-line-clamp: 2;
}
.collect_main .collect_content .goods_item .goods_info_wrap .goods_price {
  color: var(--themeColor);
  font-size: 32rpx;
}
4. pages/collect/index.js
// pages/collect/index.js
Page({

  /**
   * 页面的初始数据
   */
  data: {
    collect:[],
    tabs:[
      {
        id:0,
        value:"商品收藏",
        isActive:true
      },
      {
        id:1,
        value:"品牌收藏",
        isActive:false
      },
      {
        id:2,
        value:"店铺收藏",
        isActive:false
      },
      {
        id:3,
        value:"浏览足迹",
        isActive:false
      }
    ]

  },
  onShow(){
    const collect=wx.getStorageSync("collect")||[]
    this.setData({
      collect
    })
  },
  handleTabItemChange(e)
  {
    console.log(e)
    //获取被点击标题发索引
    const {index}=e.detail
    //修改原数组
    let {tabs}=this.data
      for(let i=0;i<4;i++)
      {
        if(i===index)
        {
          tabs[i].isActive=true
        }
        else
        {
          tabs[i].isActive=false
        }
      }
    //赋值到data中
    this.setData({
      tabs
    })
  }
})
11.3 意见反馈
11.3.1 需求分析
-
点击+号 触发tap点击事件
- 调用小程序内置的选择图片的api
- 获取到图片的路径 数组
- 把图片路径存到data的变量中
- 页面可以根据 图片数组 进行循环显示自定义组件
-
点击自定义图片 组件
- 获取被点击元素的索引
- 获取data中的图片数组
- 根据索引=数组中删除对应的元素
- 把数组重新设置到data中
-
点击提交
- 获取文本域的内容
- data中定义变量表示输入框的内容
- 文本域绑定输入事件 事件触发的时候 把输入框的值存入到变量中
- 对这些内容合法性验证
- 验证通过用户选择图片 上传到我们专门的图片服务器 返回图片的外网链接
- 遍历图片数组
- 挨个上传
- 维护一个图数组 存放;图片上传后的外网路径
- 文本域和外网的图片链接一起提交到服务器 前端模拟
- 清空当前页面
- 返回上一页
- 获取文本域的内容
11.3.2 具体实现
由于需要使用图片上传的组件,先引入图片上传的组件
11.3.2.1 引入图片上传的组件
- 在components下面创建一个名为Upimg的文件夹,用于文件上传组件
- 在components/Upimg下面的Upimg文件下声明组件
{
  "component": true,
  "usingComponents": {}
}
- components/Upimg/Upimg.wxml
<view class="up_img_wrap">
    <image src="{{src}}"></image>
    <icon class="" type="clear" size="23" color="red">

    </icon>

</view>
- components/Upimg/Upimg.wxss
.up_img_wrap{
    width: 90rpx;
    height: 90rpx;
    position: relative;
}
.up_img_wrap image{
    width: 100%;
    height: 100%;
    border-radius: 15rpx;
}
.up_img_wrap icon{
    position: absolute;
    top: -22rpx;
    right: -22rpx;
}
- components/Upimg/Uping.js
// components/Upimg/Upimg.js
Component({
  /**
   * 组件的属性列表
   */
  properties: {
    src: {
      type:String,
      value:""
    }

  },

  /**
   * 组件的初始数据
   */
  data: {

  },

  /**
   * 组件的方法列表
   */
  methods: {

  }
})
11.3.2.2 页面编写
1. 在pages/feedback/index.json中声明组件
{
  "usingComponents": {
    "SearchInput":"../../components/SearchInput/SearchInput",
    "tab":"../../components/tab/tab",
    "UpImg":"../../components/Upimg/Upimg"
  },
  "navigationBarTitleText":"意见反馈",
  "enablePullDownRefresh":true,
  "backgroundTextStyle":"dark"
}
2. pages/feedback/index.wxml
<tab tab="{{tab}}" bindtabItemChange="handleTabItemChange">
<view class="fb_main">
    <view class="fb_title">问题的种类</view>
    <view class="fb_tips">
        <text>功能建议</text>
        <text>购买遇到的问题</text>
        <text>性能问题</text>
        <text>其他</text>
    </view>
    <view class="fb_content">
        <textarea value="{{textVal}}" bindinput="handleTextInput" placeholder="请输入您要描述的问题"></textarea>
        <view class="fb_tool">
          <button bindtap="handleChoseImg">+</button>
         <view class="up_img_item"
         wx:for="{{chooseImgs}}"
         wx:key="this"
         bindtap="handleRemoveImage"
         data-index="{{index}}"
         >
              <UpImg src="{{item}}"></UpImg>
        </view>

        </view>
    </view>
    <view class="form_btn_wrap">
        <button bindtap="handleFormSubmit" type="warn">
            <icon class="" type="success_no_circle" size="23" color="white">
            </icon>
            提交
        </button>
    </view>
</view>
</tab>
3. pages/feedback/index.wxss
page {
  background-color: #eeeeee;
}
.fb_main {
  padding: 20rpx;
}
.fb_main .fb_tips {
  display: flex;
  flex-wrap: wrap;
}
.fb_main .fb_tips text {
  width: 30%;
  padding: 10rpx;
  text-align: center;
  background-color: #fff;
  margin: 20rpx 10rpx;
}
.fb_main .fb_content {
  background-color: #fff;
  margin-top: 20rpx;
}
.fb_main .fb_content textarea {
  padding: 10rpx;
}
.fb_main .fb_content .fb_tool {
  display: flex;
  flex-wrap: nowrap;
  padding-bottom: 30rpx;
}
.fb_main .fb_content .fb_tool button {
  margin: 0;
  width: 90rpx;
  height: 90rpx;
  font-size: 60rpx;
  padding: 0;
  display: flex;
  justify-content: center;
  align-items: center;
  margin-left: 20rpx;
  color: #ccc;
  margin-top: 20rpx;
}
.fb_main .fb_content .fb_tool .up_img_item {
  margin-top: 20rpx;
  margin-left: 20rpx;
}
.fb_main .form_btn_wrap {
  margin-top: 20rpx;
  display: flex;
  justify-content: flex-end;
}
.fb_main .form_btn_wrap button {
  background-color: red;
  color: white;
  margin: 0;
  padding: 0;
  width: 30%;
}
4. pages/feedback/index.js
Page({

  /**
   * 页面的初始数据
   */
  data: {
    tab:[
      {
        id:0,
        value:'体验问题',
        isActive:true
      },
      {
        id:1,
        value:'商品商家投诉',
        isActive:false
      }
    ],
    //被选中图片的路径 数组
    chooseImgs:[],
  //     //外网的图片路径数组
  // UploadImgs:[],
    //文本域内容
    textVal:''
  },

    //标题的点击事件 从子组件中传递过来的
    handleTabItemChange(e)
    {
      //获取被点击标题发索引
      const {index}=e.detail
      //修改原数组
      let {tab}=this.data
      tab.forEach((v,i)=>i===index?v.isActive=true:v.isActive=false);
      //赋值到data中
      this.setData({
        tab
      })
    },
    //点击+号自定义选择图片
    handleChoseImg(e)
    {
      //调用小程序中内置的选择图片api
      wx.chooseImage({
          //同时选中图片的数量
          count:9,
          //图片的格式 原图 压缩
          sizeType:['original','compressed'],
          //图片的来源 相册 照相机
          sourceType:['album','camera'],
          success:(result)=>{
            console.log(result)
            this.setData({
              //图片数组进行拼接
              chooseImgs:[...this.data.chooseImgs,...result.tempFilePaths]
            })
          }
      });
    },
    //点击自定义的图片进行删除
    handleRemoveImage(e)
    {
      //获取被点击的组件的索引
      const {index}=e.currentTarget.dataset
      //获取data中的图片数组
      let {chooseImgs}=this.data
      //删除元素
      chooseImgs.splice(index,1)
      this.setData({
        chooseImgs
      })
    },
    //文本域的输入事件
    handleTextInput(e)
    {
      this.setData({
        textVal:e.detail.value
      })
    },
    //提交按钮的点击事件
    handleFormSubmit()
    {
      //获取文本域的内容
      const {textVal,chooseImgs}=this.data
      //合法性验证
      if(!textVal.trim())
      {
        //不合法
        wx.showToast({
          title:'输入不合法',
          icon:'none',
          mask: true
        });
        return
      }
      //准备上传文件,到专门的服务器
      //上传文件的api不支持多个文件同时上传
      //显示正在等待的图片
      wx.showLoading({
        title:"正在上传",
        mask:true
      })
      if(chooseImgs.length!=0)
      {
      chooseImgs.forEach((v,i)=>{
      wx.uploadFile({
        //图片要上传到哪里
        // url: 'https://images.ac.cn/Home/Index/UploadAction/',
        url:'https://img.coolcr.cn/api/upload',
        //要上传文件的路径
        filePath:v,
        //上传文件的名称 后台获取某个文件 file
        // name:'file',
        name:"image",
        // header: {}, // 设置请求的 header
         // HTTP 请求中其他额外的 form data
        formData: {},
        success: function(res){
          let url=JSON.parse(res.data).data.url
          // this.UploadImgs.push(url)
        }
      })

        //所有图片都上传完毕才会触发
        if(i===chooseImgs.length-1){
          wx.hideLoading()
          console.log('把文本中的内容和外网的图片数组提交到后台中')
          //提交都成功了
          //重置页面
          this.setData({
            textVal:'',
            chooseImgs:[]
          })
          //返回到上一个页面
          wx.navigateBack({
            delta: 1

          })
        }
    })
  }
  else
  {
    console.log("只是提交了文本")
    wx.hideLoading()
     //返回到上一个页面
     wx.navigateBack({
      delta: 1
    })

  }
    }
})
11.4 个人中心
1. pages/user/index.wxml
<view class="user_info_wrap">
    <view wx:if="{{userInfo.avatarUrl}}" class="user_img_wrap">
        <image class="user_bg" src="{{userInfo.avatarUrl}}"></image>
        <view class="user_info">
            <image class="user_icon" src="{{userInfo.avatarUrl}}"></image>
            <view class="user_name">{{userInfo.nickName}}</view>
        </view>
    </view>
    <view wx:else class="user_btn">
        <navigator url="/pages/login/index">登录</navigator>
    </view>
</view>

<view class="user_content">
    <view class="user_main">
      <!--历史足迹-->
      <view class="history_wrap">
          <navigator>
              <view class="his_num">8</view>
              <view class="his_name">收藏的店铺</view>
          </navigator>
          <navigator url="/pages/collect/index">
            <view class="his_num">{{collectNums}}</view>
            <view class="his_name">收藏的商品</view>
        </navigator>
        <navigator>
            <view class="his_num">8</view>
            <view class="his_name">关注的商品</view>
        </navigator>
        <navigator>
            <view class="his_num">8</view>
            <view class="his_name">我的足迹</view>
        </navigator>
      </view>

      <!--我的订单-->
      <view class="orders_wrap">
          <view class="order_title">我的订单</view>
          <view class="order_content">
              <navigator url="/pages/order/index?type=1">
               <view class="iconfont icon-dingdan"></view>
               <view class="order_name">全部订单</view>
              </navigator>
              <navigator url="/pages/order/index?type=2">
                <view class="iconfont icon-fukuantongzhi"></view>
                <view class="order_name">待付款</view>
               </navigator>
               <navigator url="/pages/order/index?type=3">
                <view class="iconfont icon-weibiaoti2fuzhi08"></view>
                <view class="order_name">待收货</view>
               </navigator>
               <navigator>
                <view class="iconfont icon-tuihuotuikuan_dianpu"></view>
                <view class="order_name">退货/退款</view>
               </navigator>
          </view>
      </view>
      <!--收货地址管理-->
      <view class="address_wrap">
          收货地址管理
      </view>
      <view class="app_info_wrap">
          <view class="app_info_item app_info_contact">
              <text>联系客服</text>
              <text>400-618-4000</text>
          </view>
          <navigator class="app_info_item" url="/pages/feedback/index">意见反馈</navigator>
          <view class="app_info_item">关于我们</view>
      </view>
      <!--推荐-->
      <view class="recommend_wrap">
          把应用推荐给其他人
      </view>
    </view>
</view>
2. pages/user/index.wxss
page {
  background-color: #edece8;
}
.user_info_wrap {
  height: 45vh;
  overflow: hidden;
  background-color: var(--themeColor);
  position: relative;
}
.user_info_wrap .user_img_wrap {
  position: relative;
}
.user_info_wrap .user_img_wrap .user_bg {
  height: 50vh;
  filter: blur(10rpx);
}
.user_info_wrap .user_img_wrap .user_info {
  position: absolute;
  left: 50%;
  top: 20%;
  transform: translateX(-50%);
  text-align: center;
}
.user_info_wrap .user_img_wrap .user_icon {
  width: 150rpx;
  height: 150rpx;
  border-radius: 50%;
}
.user_info_wrap .user_img_wrap .user_name {
  color: #fff;
  margin-top: 40rpx;
}
.user_info_wrap .user_btn {
  position: absolute;
  left: 50%;
  transform: translateX(-50%);
  top: 40%;
  border: 1rpx solid greenyellow;
  color: greenyellow;
  font-size: 38rpx;
  padding: 30rpx;
  border-radius: 10rpx;
}
.user_content {
  position: relative;
}
.user_content .user_main {
  padding-bottom: 100rpx;
  color: #666;
  position: absolute;
  width: 90%;
  left: 50%;
  transform: translateX(-50%);
  top: -40rpx;
}
.user_content .user_main .history_wrap {
  background-color: #fff;
  display: flex;
}
.user_content .user_main .history_wrap navigator {
  flex: 1;
  padding: 10rpx 0;
  text-align: center;
}
.user_content .user_main .history_wrap navigator .his_num {
  color: var(--themeColor);
}
.user_content .user_main .orders_wrap {
  background-color: #fff;
  margin-top: 30rpx;
}
.user_content .user_main .orders_wrap .order_title {
  padding: 20rpx;
  border-bottom: 1rpx solid #ccc;
}
.user_content .user_main .orders_wrap .order_content {
  display: flex;
}
.user_content .user_main .orders_wrap .order_content navigator {
  padding: 15rpx 0;
  flex: 1;
  text-align: center;
}
.user_content .user_main .orders_wrap .order_content navigator .iconfont {
  color: var(--themeColor);
  font-size: 40rpx;
}
.user_content .user_main .address_wrap {
  margin-top: 30rpx;
  background-color: #fff;
  padding: 20rpx;
}
.user_content .user_main .app_info_wrap {
  margin-top: 30rpx;
  background-color: #fff;
}
.user_content .user_main .app_info_wrap .app_info_item {
  padding: 20rpx;
  border-bottom: 1rpx solid #ccc;
}
.user_content .user_main .app_info_wrap .app_info_contact {
  display: flex;
  justify-content: space-between;
}
.user_content .user_main .recommend_wrap {
  margin-top: 30rpx;
  background-color: #fff;
  padding: 20rpx;
}
3. pages/user/index.js
// pages/user/index.js
Page({

  /**
   * 页面的初始数据
   */
  data: {
    userInfo:{},
    //收藏商品的数量
    collectNums:0


  },
  onShow(){
    const userInfo=wx.getStorageSync('userInfo')
    const collect=wx.getStorageSync("collect")||[]
    this.setData({
      userInfo,
      collectNums:collect.length
    })
  }
})
说明:由于是个人用户,小程序的订单功能未实现,但小程序中的大部分功能已经实现