- 可以把博客主题的相关资源放到了又拍云上,很大程度上减轻了服务器的流量压力来提升打开速度。
- 使用nginx自动解压缩来提升网站打开速度
Vue项目在开发环境中编写完毕,编译看看启动速度。
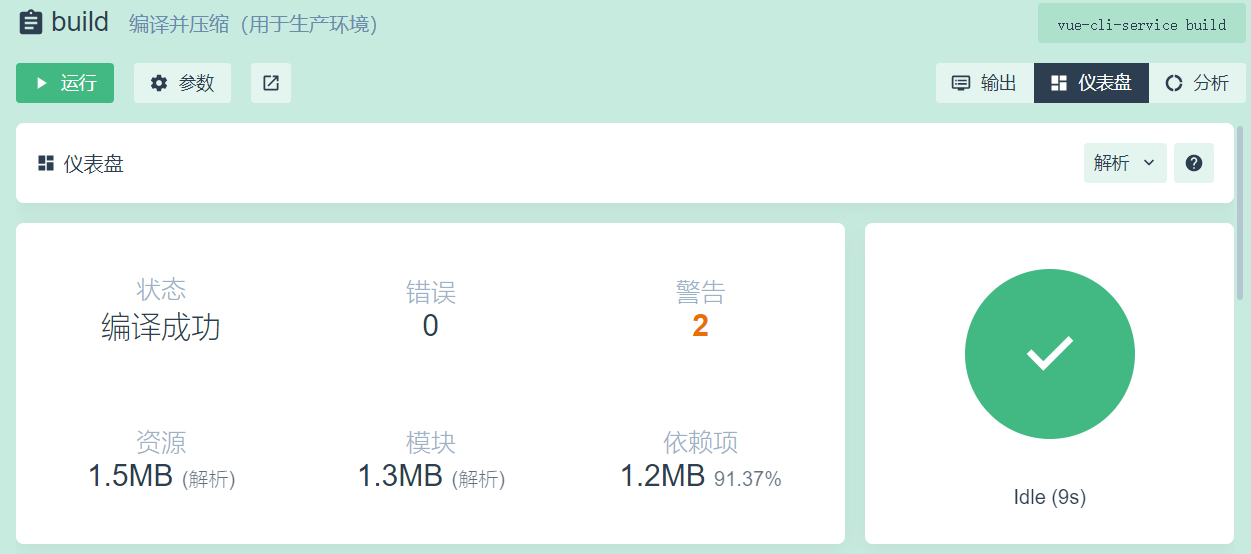
使用cmd输入vue ui打开ui界面,编译如图。

发现需要9s,非常需要对其优化,记录一下优化过程,以后可以及时查阅。
1、productionSourceMap:false
修改vue.config.js中的配置
module.exports = {
  outputDir: `${srcFile}`, // 在npm run build时 生成文件的目录 type:string, default:'dist'
  productionSourceMap: false, // 是否在构建生产包时生成 sourceMap 文件,false将提高构建速度
}
如果不加false,则在打包的过程中会出现map文件,该文件的主要主要作用是让我们打包后的文件像未加密的代码一样,可以准确的输出相关的错误信息。默认情况下productionSourceMap为true,在此情况下,项目打包过后,代码都是经过压缩加密的,如果运行时报错,输出的错误信息无法准确得知代码具体哪里出错。
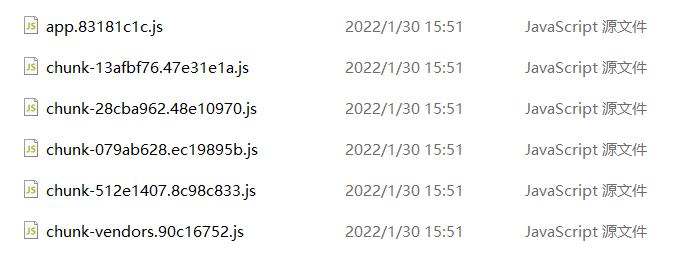
| productionSourceMap: true(默认) | productionSourceMap: false |
|---|---|
 |  |
结果:

2、路由懒加载
把组件按组分块
有时候我们想把某个路由下的所有组件都打包在同个异步块 (chunk) 中。只需要使用 命名 chunk (opens new window),一个特殊的注释语法来提供 chunk name (需要 Webpack > 2.4)。
const Foo = () => import(/* webpackChunkName: "group-foo" */ './Foo.vue')
const Bar = () => import(/* webpackChunkName: "group-foo" */ './Bar.vue')
const Baz = () => import(/* webpackChunkName: "group-foo" */ './Baz.vue')
Webpack 会将任何一个异步模块与相同的块名称组合到相同的异步块中。
3、关闭Prefetch
因为vuecli 3默认开启prefetch(预先加载模块),提前获取用户未来可能会访问的内容
在首屏会把这十几个路由文件,都一口气下载了。
**注意:**prefetch其实并不会影响首页的加载速度,只是优化子页面
使用场景:当对流量有限制时可以使用,比如移动端,只用查看首页或者其它并不是全部页面的时候,使用perfetch可能会导致流量的不必要损耗。
所以我们要关闭这个功能,在vue.config.js中设置
// vue.config.js
module.exports = {
  chainWebpack: config => {
    // 移除 prefetch 插件
    config.plugins.delete('prefetch')

    // 或者
    // 修改它的选项:
    config.plugin('prefetch').tap(options => {
      options[0].fileBlacklist = options[0].fileBlacklist || []
      options[0].fileBlacklist.push(/myasyncRoute(.)+?\.js$/)
      return options
    })
  }
}
4、element-ui组件按需加载
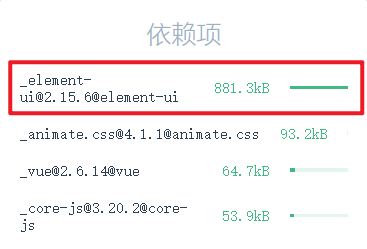
打包过程中可以看到element-ui占用了881.3kB,所以需要对其进行按需引入。

具体参考
易错点:项目是基于vue-cli 3.x的版本,并没有官网的.babelrc文件,只有babel.config.js文件,而且项目不需要引入完整的element-ui,只需要引入部分,按官网的步骤安装babel-plugin-component后在babel.config.js写入内容,报错
解决方法:
.babelrc文件和babel.config.js文件都是配置文件,可以视为相同,之后需要使用npm安装
npm i @babel/preset-env -D
而且,也不再使用es2015,改成@babel/preset-env,两者是相同的,其作用都是编译es6语法,因此在babel.config.js中写成
module.exports = {
  presets: [
    '@vue/cli-plugin-babel/preset',
    ["@babel/preset-env", { "modules": false }]
  ],
  "plugins": [
    [
      "component",
      {
        "libraryName": "element-ui",
        "styleLibraryName": "theme-chalk"
      }
    ]
  ]
}
结果:

5、使用CDN外部加载资源 vue, vuex, vue-router,axios
对于vue, vuex, vue-router,axios等我们可以利用wenpack的externals参数来配置,这里我们设定只需要在生产环境中才需要使用:
// vue.config.js中的核心代码
const isProduction = process.env.NODE_ENV === 'production';
const cdn = {
    css: [],
    js: [
        'https://cdn.bootcss.com/vue/2.5.17/vue.runtime.min.js',
        'https://cdn.bootcss.com/vue-router/3.0.1/vue-router.min.js',
        'https://cdn.bootcss.com/vuex/3.0.1/vuex.min.js',
        'https://cdn.bootcss.com/axios/0.18.0/axios.min.js',
    ]
}
module.exports = {
    chainWebpack: config => {
        // 生产环境配置
        if (isProduction) {
            // 生产环境注入cdn
            config.plugin('html')
                .tap(args => {
                    args[0].cdn = cdn;
                    return args;
                });
        }
    },
    configureWebpack: config => {
        if (isProduction) {
            // 用cdn方式引入
            config.externals = {
                'vue': 'Vue',
                'vuex': 'Vuex',
                'vue-router': 'VueRouter',
                'axios': 'axios'
            }
        }
    },
}
index.html里的相关核心代码
<!-- 使用CDN的CSS文件 -->
  <% for (var i in htmlWebpackPlugin.options.cdn && htmlWebpackPlugin.options.cdn.css) { %>
    <link href="<%= htmlWebpackPlugin.options.cdn.css[i] %>" rel="preload" as="style">
    <link href="<%= htmlWebpackPlugin.options.cdn.css[i] %>" rel="stylesheet">
  <% } %>
  <!-- 使用CDN的JS文件 -->
  <% for (var i in htmlWebpackPlugin.options.cdn && htmlWebpackPlugin.options.cdn.js) { %>
    <link href="<%= htmlWebpackPlugin.options.cdn.js[i] %>" rel="preload" as="script">
  <% } %>
7.gzip
拆完包之后,我们再用gzip做一下压缩
安装compression-webpack-plugin
cnmp i compression-webpack-plugin -D
// 在vue.congig.js中引入并修改webpack配置
const CompressionPlugin = require('compression-webpack-plugin')

configureWebpack: (config) => {
        if (process.env.NODE_ENV === 'production') {
            // 为生产环境修改配置...
            config.mode = 'production'
            return {
                plugins: [new CompressionPlugin({
                    test: /\.js$|\.html$|\.css/, //匹配文件名
                    threshold: 10240, //对超过10k的数据进行压缩
                    deleteOriginalAssets: false //是否删除原文件
                })]
            }
        }
在服务器我们也要做相应的配置
如果发送请求的浏览器支持gzip,就发送给它gzip格式的文件
nginx中
    # 开启gzip
    gzip on;

    # 启用gzip压缩的最小文件,小于设置值的文件将不会压缩
    gzip_min_length 1k;

    # gzip 压缩级别,1-9,数字越大压缩的越好,也越占用CPU时间,后面会有详细说明
    gzip_comp_level 5;

    # 进行压缩的文件类型。javascript有多种形式,后面的图片压缩不需要的可以自行删除
    gzip_types application/atom+xml application/geo+json application/javascript application/x-javascript application/json application/ld+json application/manifest+json application/rdf+xml application/rss+xml application/xhtml+xml application/xml font/eot font/otf font/ttf image/svg+xml text/css text/javascript text/plain text/xml;

    # 是否在http header中添加Vary: Accept-Encoding,建议开启
    gzip_vary on;

    # Nginx作为反向代理的时候启用
	gzip_proxied any;

	# 将接收压缩文件的浏览器中排除Internet Explorer 6,因为IE6根本不支持gzip
	gzip_disable "msie6";

	# 设置系统获取几个单位的缓存用于存储gzip的压缩结果数据流。例如 4 4k 代表以4k为单位,按照原始数据大小以4k为单位的4倍申请内存,4 8k 代表以8k为单位,按照原始数据大小以8k为单位的4倍申请内存。如果没有设置,默认值是申请跟原始数据相同大小的内存空间去存储gzip压缩结果。
	gzip_buffers 16 8k;

	# 识别http的协议版本。由于早期的一些浏览器或者http客户端,可能不支持gzip自解压,用户就会看到乱码,所以做一些判断还是有必要的。
	gzip_http_version 1.1;

    # 设置压缩所需要的缓冲区大小
    gzip_buffers 4 16k;
# 重启nginx
systemctl restart nginx
检测方法:
- 使用站长工具进行检测
- 打开 NetWork 查看Response Headers 中是否包含
content-encoding: gzip,那么就是开启了 gzip。
**报错信息:**使用VUE webpack进行打包时出现了ERROR TypeError:Cannot read property ‘tapPromise‘ of undefined问题,检查后发现是compression-webpack-plugin版本问题,通过降低版本可以临时解决此类问题
compression-webpack-plugin 目前最新版是 7.1.2
解决方法:
-
先执行卸载命令
npm uninstall compression-webpack-plugin -
执行安装命令
npm i compression-webpack-plugin@5.0.1
8.图片压缩
安装 npm install image-webpack-loader --save-dev
// 在chainWebpack中新增以下代码
config.plugins.delete('prefetch')
config.module.rule('images')
    .test(/\.(png|jpe?g|gif|svg)(\?.*)?$/)
    .use('image-webpack-loader')
    .loader('image-webpack-loader')
    .options({ bypassOnDebug: true })
9.代码压缩
安装插件 npm i -D uglifyjs-webpack-plugin
// 代码压缩
//在configureWebpack中加入
const UglifyJsPlugin = require('uglifyjs-webpack-plugin')
// 核心代码
new UglifyJsPlugin({
    uglifyOptions: {
        //生产环境自动删除console
        compress: {
            drop_debugger: true,
            drop_console: true,
            pure_funcs: ['console.log']
        }
    },
    sourceMap: false,
    parallel: true
})
10.整个vue.config.js代码参考
const CompressionPlugin = require('compression-webpack-plugin')
const isProduction = process.env.NODE_ENV === 'production'
const cdn = {
    css: [],
    js: [
        'https://cdn.staticfile.org/vue/2.6.11/vue.js',
        'https://cdn.staticfile.org/vue-router/3.0.1/vue-router.min.js',
        'https://cdn.staticfile.org/vuex/3.0.1/vuex.min.js',
        'https://cdn.staticfile.org/axios/0.19.0-beta.1/axios.min.js',
    ],
}

// 代码压缩
const UglifyJsPlugin = require('uglifyjs-webpack-plugin')

module.exports = {
    publicPath: '/',
    outputDir: 'dist',
    productionSourceMap: false,
    chainWebpack: (config) => {
        config.plugins.delete('prefetch')

        config.plugin('html').tap((args) => {
            args[0].title = '欢迎来到我的个人网站'
            return args
        })
        // 生产环境配置
        if (isProduction) {
            // 生产环境注入cdn
            config.plugin('html').tap((args) => {
                args[0].cdn = cdn
                return args
            })
        }
    },
    configureWebpack: (config) => {
        if (isProduction) {
            // 用cdn方式引入
            config.externals = {
                vue: 'Vue',
                vuex: 'Vuex',
                'vue-router': 'VueRouter',
                axios: 'axios',
            }
            config.mode = 'production'
            config['performance'] = {
                //打包文件大小配置
                maxEntrypointSize: 10000000,
                maxAssetSize: 30000000,
            }
            // 为生产环境修改配置...
            return {
                plugins: [
                    new CompressionPlugin({
                        test: /\.js$|\.html$|\.css/, //匹配文件名
                        threshold: 10240, //对超过10k的数据进行压缩
                        deleteOriginalAssets: false, //是否删除原文件
                    }),
                    new UglifyJsPlugin({
                        uglifyOptions: {
                            //生产环境自动删除console
                            compress: {
                                drop_debugger: true,
                                drop_console: true,
                                pure_funcs: ['console.log']
                            }
                        },
                        sourceMap: false,
                        parallel: true
                    })
                ],
            }
        }
    },
    devServer: {
        proxy: {
            '/api': {
                target: '线上接口地址',
                ws: true,
                changeOrigin: true,
                pathRewrite: {
                    '^/api': '/', // 根据之前vuejs的配置,用来拿掉URL上的(/api),但是暂时没有什么效果
                },
            },
        },
    },
    css: {
        // css预设器配置项
        loaderOptions: {
            less: {
                // 若 less-loader 版本小于 6.0,请移除 lessOptions 这一级,直接配置选项。
                modifyVars: {
                    // 初始化可直接覆盖变量
                    'primary-color': '#1890FF',
                    'text-color': '#111',
                    'border-color': '#eee',
                    'nice-blue': '#f0f',
                },
                javascriptEnabled: true,
            },
        },
    },
}
打包出来的文件怎么跑起来
首先全局安装:
npm install -g serve
其次,在项目所在dist文件里执行以下命令:
serve -s
打包结果

出现警告是因为当前资源(asset)和入口起点超过指定文件限制
对vue.config.js文件进行配置:
configureWebpack: (config) => {
        if (process.env.NODE_ENV === 'production') {
            config.mode = 'production'
            config['performance'] = {
                //打包文件大小配置
                maxEntrypointSize: 10000000,
                maxAssetSize: 30000000,
            }
        }
    }
好文mark:「通过gzip和nginx来提高网站打开速度」。