主要介绍组件的自定义事件的概念,使用等。
何为组件自定义事件:
- 组件自定义事件是一种组件间的通信方式,方向是 子组件====>父组件。
- 使用场景:A是子组件,B是父组件,如果要把B的数据传给A,可以使用props配置项,如果要把A的数据转给B,就要用到组件自定义事件或者使用props加回调函数也可实现。
先使用props加回调函数实现子组件传递数据给父组件。

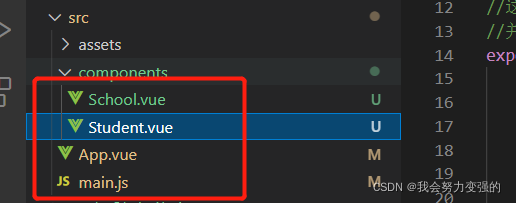
main.js:
//引入vue依赖
import Vue from 'vue'
//引入组件App
import App from './App.vue'

// 关闭生产提示
Vue.config.productionTip = false

//创建一个vue实例
new Vue({
  //这个目前还没学过,先知道他的作用是将app放入容器中。
  render: h => h(App),

  //配置该vue实例管理id为app的容器
}).$mount('#app')
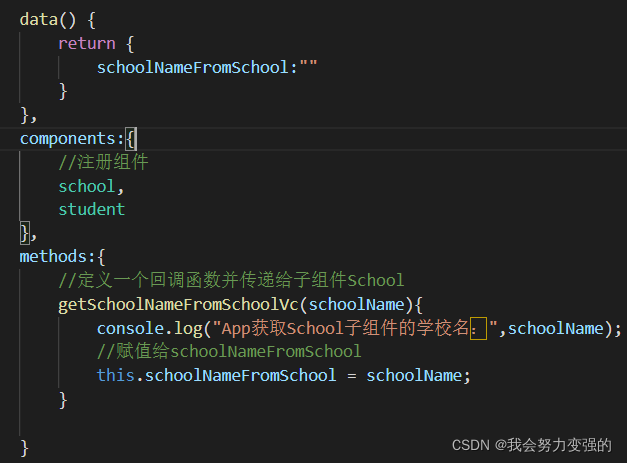
App.vue:
<template>
    <!-- 编写结构 -->
    <div>
        <!-- 传递回调函数给子组件School -->
        <school :getSchoolNameFromSchoolVc="getSchoolNameFromSchoolVc"></school>
    <hr>
    <student></student>

    <div>App获取School子组件的学校名:{{schoolNameFromSchool}}</div>
    </div>
</template>

<script>
// 原本的引入
// import school from "./School.vue"
// import student from "./Student.vue"

//修改后的
//引入school组件和student组件,涉及es模块化的语法
import school from "./components/School.vue"
import student from "./components/Student.vue"

export default {

    data() {
        return {
            schoolNameFromSchool:""
        }
    },
    components:{
        //注册组件
        school,
        student
    },
    methods:{
        //定义一个回调函数并传递给子组件School
        getSchoolNameFromSchoolVc(schoolName){
            console.log("App获取School子组件的学校名:",schoolName);
            //赋值给schoolNameFromSchool
            this.schoolNameFromSchool = schoolName;
        }

    }
}
</script>

<style>

</style>
schoo.vue:
<template>
    <!-- 编写组件结构代码,也就是html代码 -->
    <!-- 需要一个div括住,也就是只能有一个根元素,一般使用div -->
    <div class="orange">
        <div>学校:{{schoolName}}</div>
        <div>地址:{{schoolAddress}}</div>
        <!-- //定义一个按钮,点击传递学校名称给App组件。 -->
        <button @click="sendSchoolNameToApp">传递学校名给App组件</button>
    </div>
</template>

<script>
//交互代码编写的地方,需要暴露出去给其他地方引入
//这个需要有一点es6模块化的知识,这里一般使用默认暴露,因为这是单文件组件,只需要暴露一个组件对象,
//并且引入默认暴露的组件引入语法比较简单。
export default {
    data() {
        return {
        schoolName:"尚硅谷",
        schoolAddress:"北京"
        }
    },
    //接收回调函数
    props:["getSchoolNameFromSchoolVc"],
    methods:{
       sendSchoolNameToApp(){
           //调用回调函数,并把学校名传递进去
           this.getSchoolNameFromSchoolVc(this.schoolName)
       }
    }
}
</script>

<style scoped>
    /* 编写样式的地方 */
    .orange{
        background-color: orange;
    }
</style>
student.vue:
<template>
    <!-- 编写组件结构代码,也就是html代码 -->
    <!-- 需要一个div括住,也就是只能有一个根元素,一般使用div -->
    <div class="orange">
        <div>学生姓名:{{studentName}}</div>
        <div>年龄:{{studentAge}}</div>
    </div>
</template>

<script>
//交互代码编写的地方,需要暴露出去给其他地方引入
//这个需要有一点es6模块化的知识,这里一般使用默认暴露,因为这是单文件组件,只需要暴露一个组件对象,
//并且引入默认暴露的组件引入语法比较简单。
export default {
    data() {
        return {
        studentName:"张三",
        studentAge:18
        }
    },
}
</script>

<style>
    /* 编写样式的地方 */
    .orange{
        background-color: gray;
    }
</style>
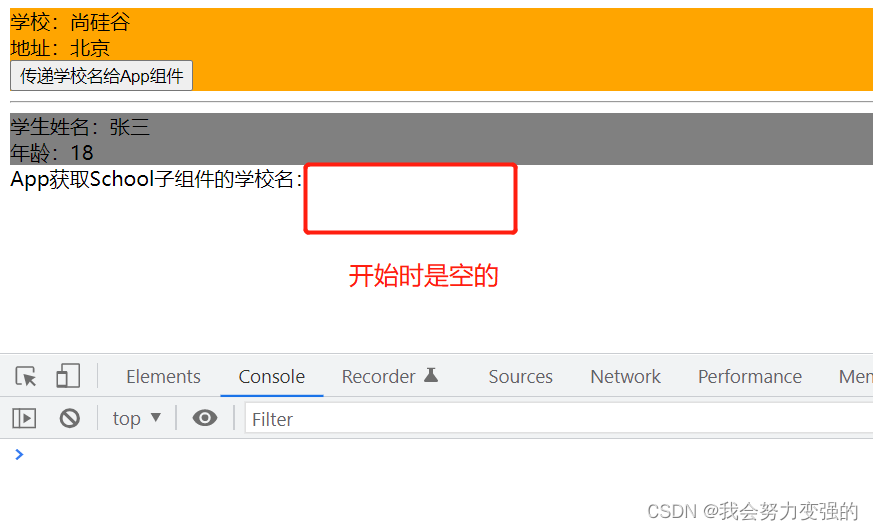
这种方式的流程:
-
在父组件(App)中定义一个回调方法并传递给子组件(School)。


该回调方法是把School组件传递过来的学校名渲染在App组件对应的区域。 -
子组件使用props配置项接收回调函数,并且编写一个按钮,点击就调用该回调函数把数据传递到App组件中。


效果:


第二种方式是使用组件自定义事件实现:
使用组件自定义事件实现把子组件Student的学生名传递到App组件,并进行渲染。
分一下步骤:
3. 在父组件App中,设置自定义事件,并配置一个事件回调


4. 在子组件中,触发自定义事件,把值传过去。


效果:


除了在组件标签中绑定自定义事件,也可以配合ref属性在生命周期回调函数$mounted中进行绑定。


执行效果一样的。
自定义事件照样可以使用事件修饰符once。


使用props或者组件自定义事件进行子组件像父组件传递数据的方式是比较像的。
props的方式是直接把回调函数传递给子组件调用。
而组件自定义事件是把回调函数通过事件的方式暴露出去,然后子组件通过触发事件,达到调用回调函数的效果。
解绑组件自定义事件:

或者组件被销毁时,这些自定义事件会被销毁。