运行环境
-
编写web.xml
<?xml version="1.0" encoding="UTF-8"?> <web-app xmlns="http://xmlns.jcp.org/xml/ns/javaee" xmlns:xsi="http://www.w3.org/2001/XMLSchema-instance" xsi:schemaLocation="http://xmlns.jcp.org/xml/ns/javaee http://xmlns.jcp.org/xml/ns/javaee/web-app_4_0.xsd" version="4.0"> <servlet> <servlet-name>springmvc</servlet-name> <servlet-class>org.springframework.web.servlet.DispatcherServlet</servlet-class> <init-param> <param-name>contextConfigLocation</param-name> <param-value>classpath:applicationContext.xml</param-value> </init-param> <load-on-startup>1</load-on-startup> </servlet> <servlet-mapping> <servlet-name>springmvc</servlet-name> <url-pattern>/</url-pattern> </servlet-mapping> <filter> <filter-name>encoding</filter-name> <filter-class>org.springframework.web.filter.CharacterEncodingFilter</filter-class> <init-param> <param-name>encoding</param-name> <param-value>utf-8</param-value> </init-param> </filter> <filter-mapping> <filter-name>encoding</filter-name> <url-pattern>/*</url-pattern> </filter-mapping> </web-app> -
编写applicationContext.xml
<?xml version="1.0" encoding="UTF-8"?>
<beans xmlns="http://www.springframework.org/schema/beans"
       xmlns:xsi="http://www.w3.org/2001/XMLSchema-instance"
       xmlns:context="http://www.springframework.org/schema/context"
       xmlns:mvc="http://www.springframework.org/schema/mvc"
       xsi:schemaLocation="http://www.springframework.org/schema/beans http://www.springframework.org/schema/beans/spring-beans.xsd http://www.springframework.org/schema/context https://www.springframework.org/schema/context/spring-context.xsd http://www.springframework.org/schema/mvc https://www.springframework.org/schema/mvc/spring-mvc.xsd">
    <!--    自动扫描包,让指定包下的注解生效,由IOC容器统一管理-->
    <context:component-scan base-package="com.lzj.controller"/>
    <!--    让SpringMVC不处理静态资源-->
    <mvc:default-servlet-handler/>
    <!--    自动完成BeanNameUrlHandlerMapping和SimpleControllerHandlerAdapter实例的注入-->
    <mvc:annotation-driven/>

    <!--解决json 乱码配置-->
    <mvc:annotation-driven>
        <mvc:message-converters register-defaults="true">
            <bean class="org.springframework.http.converter.StringHttpMessageConverter">
                <constructor-arg value="UTF-8"/>
            </bean>
            <bean class="org.springframework.http.converter.json.MappingJackson2HttpMessageConverter">
                <property name="objectMapper">
                    <bean class="org.springframework.http.converter.json.Jackson2ObjectMapperFactoryBean">
                        <property name="failOnEmptyBeans" value="false"/>
                    </bean>
                </property>
            </bean>
        </mvc:message-converters>
    </mvc:annotation-driven>

    <!--    视图解析器-->
    <bean id="internalResourceViewResolver" class="org.springframework.web.servlet.view.InternalResourceViewResolver">
        <!--        前缀-->
        <property name="prefix" value="/WEB-INF/jsp/"/>
        <!--        后缀-->
        <property name="suffix" value=".jsp"/>
    </bean>
</beans>
使用Ajax异步加载数据
-
导入jquery
注意这里的script不能写成自闭和
<script src="${pageContext.request.contextPath}/statics/js/jquery-3.6.0.js"></script> -
编写实体类User
@Data @AllArgsConstructor @NoArgsConstructor public class User { private String name; private int age; private String sex; } -
编写控制器AjaxController
@RestController public class AjaxController { @RequestMapping("/a2") public List<User> a2(){ List<User> userList = new ArrayList<User>(); userList.add(new User("lzj",1,"男")); userList.add(new User("wxl",20,"女")); userList.add(new User("hh",18,"男")); return userList; } } -
编写jsp文件
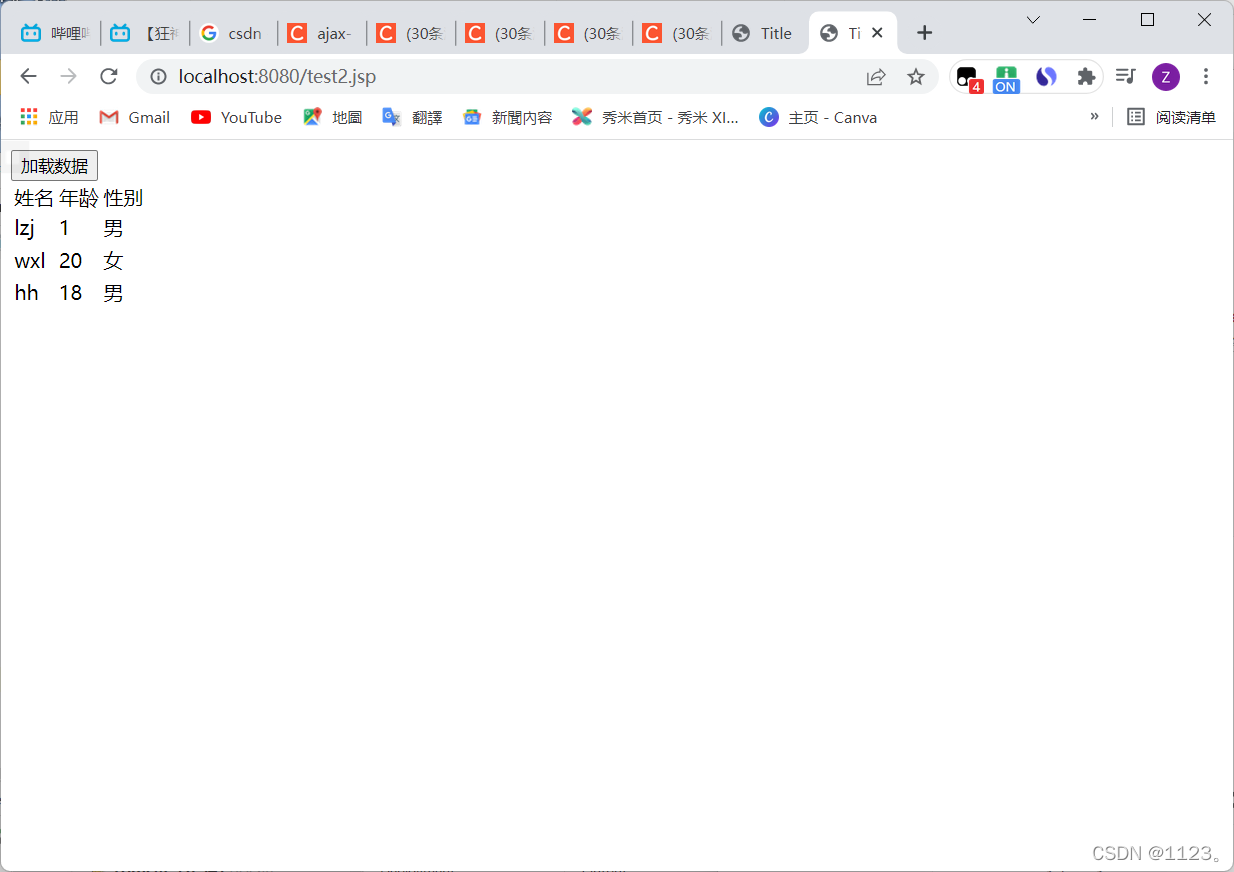
点击获取数据,数据即显示出来
<%-- Created by IntelliJ IDEA. User: 86158 Date: 2022/2/24 Time: 19:38 To change this template use File | Settings | File Templates. --%> <%@ page contentType="text/html;charset=UTF-8" language="java" %> <html> <head> <title>Title</title> <script src="${pageContext.request.contextPath}/statics/js/jquery-3.6.0.js"></script> <script> $(function (){ $("#btn").click(function (){ $.post({ url:"${pageContext.request.contextPath}/a2", success:function (data){ // console.log(data); var html=""; for (let i=0;i<data.length;i++){ html+="<tr>"+ "<td>"+data[i].name+"</td>"+ "<td>"+data[i].age+"</td>"+ "<td>"+data[i].sex+"</td>"+ "<tr>" } $("#content").html(html) } }) }) }) </script> </head> <body> <input type="button" value="加载数据" id="btn"> <table> <tr> <td>姓名</td> <td>年龄</td> <td>性别</td> </tr> <tbody id="content"> <%--数据:后台--%> </tbody> </table> </body> </html> -
实现效果

使用Ajax实现用户验证
-
导入jquery
注意这里的script不能写成自闭和
<script src="${pageContext.request.contextPath}/statics/js/jquery-3.6.0.js"></script> -
编写实体类User
@Data @AllArgsConstructor @NoArgsConstructor public class User { private String name; private int age; private String sex; } -
编写控制器AjaxController
@RestController public class AjaxController { @RequestMapping("/a3") public String a3(String name,String pwd){ String msg=""; if(name!=null){ if("admin".equals(name)){ msg="ok"; }else{ msg="用户名有误"; } } if(pwd!=null){ if("123456".equals(pwd)){ msg="ok"; }else{ msg="用户名有误"; } } return msg; } } -
编写jsp文件
<%-- Created by IntelliJ IDEA. User: 86158 Date: 2022/2/24 Time: 19:56 To change this template use File | Settings | File Templates. --%> <%@ page contentType="text/html;charset=UTF-8" language="java" %> <html> <head> <title>Title</title> <script src="${pageContext.request.contextPath}/statics/js/jquery-3.6.0.js"></script> <script type="text/javascript"> function a1(){ $.post({ url:"${pageContext.request.contextPath}/a3", data:{"name":$("#name").val()}, success:function (data){ // console.log(data) if(data.toString()=="ok"){ $("#userInfo").css("color","green"); }else{ $("#userInfo").css("color","red"); } $("#userInfo").html(data); } }) } function a2(){ $.post({ url:"${pageContext.request.contextPath}/a3", data:{"pwd":$("#pwd").val()}, success:function (data){ // console.log(data) if(data.toString()=="ok"){ $("#pwdInfo").css("color","green"); }else{ $("#pwdInfo").css("color","red"); } $("#pwdInfo").html(data); } }) } </script> </head> <body> <p> 用户名:<input type="text" id="name" οnblur="a1()"> <span id="userInfo"></span> </p> <p> 密码:<input type="text" id="pwd" οnblur="a2()"> <span id="pwdInfo"></span> </p> </body> </html> -
实现效果

注意事项
- 导入jquery时不能自闭和
- 在jsp文件中id选择器(#)和name选择器(.)