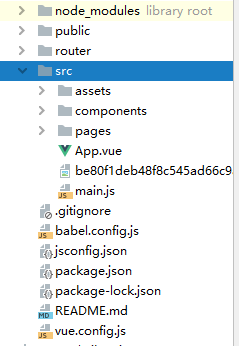
如果你和我一样从来没做过前端开发,只能看懂一点点html和css,且几乎完全不懂vue.js 这篇文章可以给你补充一点最基本的概念,还有一点最基础的写法。
写前端代码出不来效果真是非常折磨人的事情
这里用一个简单的用vant做的界面为例

0.准备部分
0.1 vant 安装
传送门
要注意 如果用vue-cli 还需要在 babel.config.js 添加东西
0.2 怎么使用vue项目?
不需要额外做一个html文件。直接npm run serve即可
1.如何开始?

假定已经建立了项目 此时你npm run serve可以得到vue的helloword
我们需要把组件在App.vue里展现。
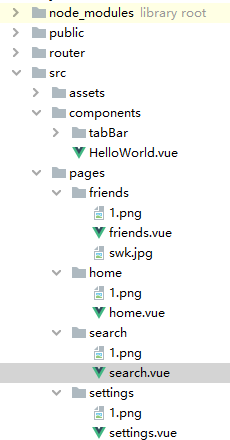
在component里建立tabBar组件

首先在vant文档里找个底部导航栏
传送门
首先在main.js里注册
import { createApp } from 'vue';
import { Tabbar, TabbarItem } from 'vant';

const app = createApp();
app.use(Tabbar);
app.use(TabbarItem);
app.mount('#app');
把后面的代码复制到tabBar.vue里
(template对应上半部分 script对应下半部分)
<template>
<van-tabbar v-model="active">
  <van-tabbar-item icon="home-o">标签</van-tabbar-item>
  <van-tabbar-item icon="search">标签</van-tabbar-item>
  <van-tabbar-item icon="friends-o">标签</van-tabbar-item>
  <van-tabbar-item icon="setting-o">标签</van-tabbar-item>
</van-tabbar>
</template>
<script>
import { ref } from 'vue';

export default {

  setup() {
    const active = ref(0);
    return { active };
  },
};

</script>

<style scoped>

</style>
这样就能得到最基础的底部导航栏了

然而导航栏还需要有导航的功能 这里还需要vue-router
首先要给激活之前标签的route功能

然后根据导航去的位置 在pages里再做若干个页面

vue页面的写法可以类似这样:
<template>
  <img src="@/pages/friends/1.png" width="290" height="235" alt="a"/>
  <tab-bar></tab-bar>
</template>

<script>
import TabBar from "@/components/tabBar/tabBar";
export default {
  name: "f-riends",
  components: {TabBar}
}
</script>

<style scoped>

</style>
然后在main.js布置路由
import friends from "@/pages/friends/friends";
import Home from "@/pages/home/home";
import search from "@/pages/search/search";
import settings from "@/pages/settings/settings";
const router = createRouter({
    history: createWebHistory(),
    routes:[
        {
            path:'/friends',
            name:'f-riends',
            component: friends
        },
        {
            path:'/home',
            name:'h-ome',
            component: Home
        },
        {
            path:'/search',
            name:'s-earch',
            component: search
        },
        {
            path:'/settings',
            name:'s-ettings',
            component: settings
        }

    ]
})
app.use(router);
至此 就大概好用了
用的素材是4个从网上找到的swk的响子脸


