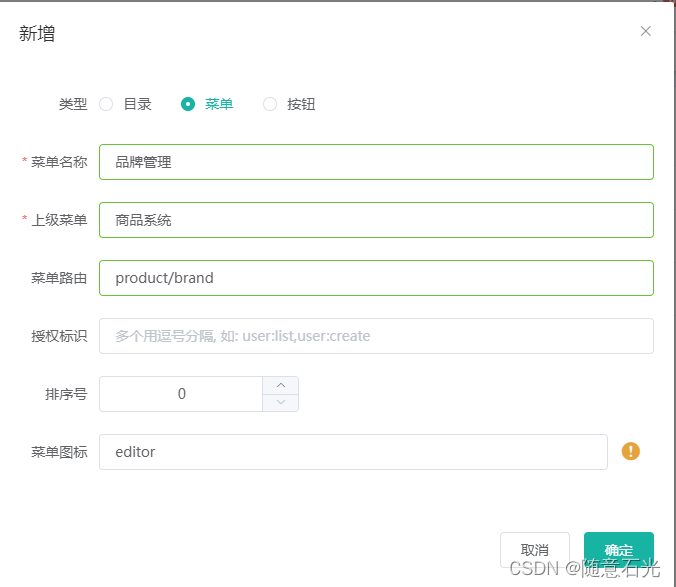
一:逆向生成前后台代码
1.创建品牌管理菜单

2.前台代码功能实现
1)在之前生成的product代码中复制brand.vue和brand-add-or-update.vue

2)复制到src\views\modules\product里面

3)重启项目

4)在index.js注释掉权限,让其返回true
/**
 * 是否有权限
 * @param {*} key
 */
export function isAuth (key) {
  /* return JSON.parse(sessionStorage.getItem('permissions') || '[]').indexOf(key) !== -1 || false */
  return true;
}
二:效果优化与快速显示
1)优化页面,删除多余提示
       <el-table-column
        prop="showStatus"
        header-align="center"
        align="center"
        label="显示状态">
      </el-table-column>
2)关闭语法校验,在build的webpack.base.conf.js中注释相关代码
const createLintingRule = () => ({
/*   test: /\.(js|vue)$/,
  loader: 'eslint-loader',
  enforce: 'pre',
  include: [resolve('src'), resolve('test')],
  options: {
    formatter: require('eslint-friendly-formatter'),
    emitWarning: !config.dev.showEslintErrorsInOverlay
  } */
})
3)在el-table-column中修改显示状态自定义显示
<template slot-scope="scope">
   <el-switch v-model="scope.row.showStatus" active-color="#13ce66"
   inactive-color="#ff4949"></el-switch>
</template>
4)在dialog中修改显示状态为开关样式
<el-form-item label="显示状态" prop="showStatus">
      <el-switch
            v-model="dataForm.showStatus"
            active-color="#13ce66"
            inactive-color="#ff4949"
          >
          </el-switch>
    </el-form-item>

5)调整dialog文字
设定el-form的label-width=“120px”
<el-form :model="dataForm" :rules="dataRule" ref="dataForm" @keyup.enter.native="dataFormSubmit()"
      label-width="120px"></el-form>

6)监听显示状态,决定商品是否显示
- 添加@change="updateBrandStatus(scope.row)"事件
     <el-table-column prop="showStatus" header-align="center" align="center" label="显示状态">
        <template slot-scope="scope">
          <el-switch
            v-model="scope.row.showStatus"
            active-color="#13ce66"
            inactive-color="#ff4949"
            @change="updateBrandStatus(scope.row)">
          </el-switch>
        </template>
      </el-table-column>
- 在methos中实现该方法
   /**
     * 监听显示状态
     */
    updateBrandStatus(data){
      //发送请求修改状态
      let brandId = data.brandId;
      let showStatus = data.showStatus;
      this.$http({
          url: this.$http.adornUrl("/product/brand/update"),
          method: "post",
          data: this.$http.adornData({brandId,showStatus}, false)
        }).then(({ data }) => {
            this.$message({
              message: "显示状态更新成功",
              type: "success",
            });
        });
    },
7)为显示状态激活和未激活的时候都赋值,未激活-0,激活-1
<el-table-column prop="showStatus" header-align="center" align="center" label="显示状态">
        <template slot-scope="scope">
          <el-switch
            v-model="scope.row.showStatus"
            active-color="#13ce66"
            inactive-color="#ff4949"
            :active-value="1"
            :inactive-value="0"
            @change="updateBrandStatus(scope.row)">
          </el-switch>
        </template>
      </el-table-column>
- :active-value=“1”,激活时数据库保存为1
- :inactive-value=“0”,未激活时数据库保存为0