上一章成功搭建了工程
这一章主要看一下初始工程以及讲怎么安装路由
我们先把一开始的工程研究一下,该删的删掉。
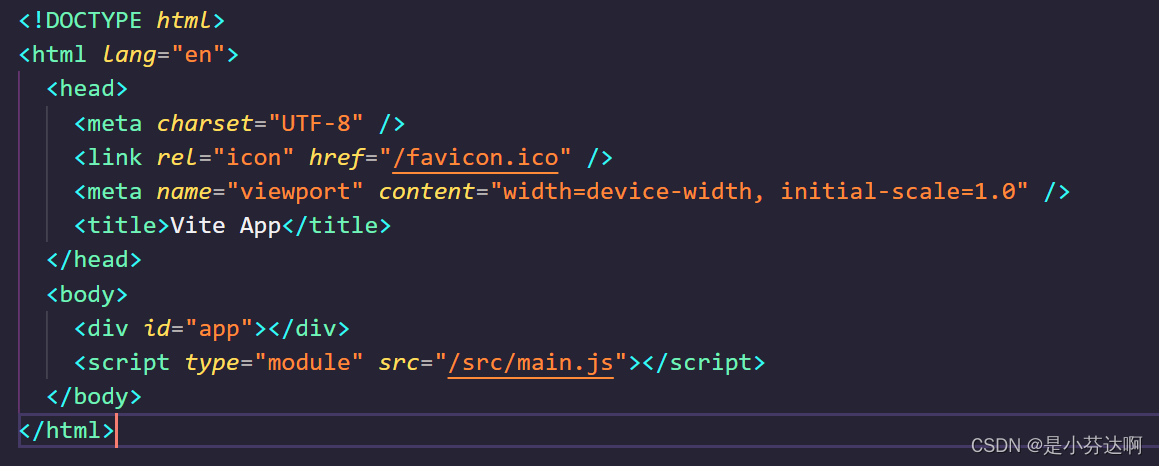
1,我们肯定首先看index.html,上一章我们说index现在放在根目录而不是public中了。写过html的应该比较能理解,我的感受就是比vue2的index.html更清晰。头部的话title我们就是网页的标题,引入了网页的图标;然后html部分看到一个id是app的容器我们进行挂载,js部分我们引入了main.js。和一般的html写法都一样。

2,然后我们肯定看main.js,这边的写法就本质和vue2不同,写过vue2的都知道我们是引入(import Vue from ‘vue’)然后new Vue其实是一个对象,这里vue3更像是创建一个App组件然后挂载在我们index里面app的容器上的。这里我们稍微改动一下,用一个变量赋值一下更清晰,下面会用到。
import { createApp } from 'vue'
import App from './App.vue'

createApp(App).mount('#app')
import { createApp } from 'vue'
import App from './App.vue'

const app=createApp(App)

app.mount('#app')
3,然后我们肯定是看App.vue,这里还是分三个部分,js,html和css,很明显我们script 用了setup语法糖。这里就不具体讲这个setup了,可以去B站了解一下。这边我们看到引入了子组件然后一个传值msg的逻辑,我们看一下HelloWorld.vue,我们看到用defineProps去接受这个msg,然后页面还是双花括号的写法;下面是一些a链接,还有一个按钮,点击+1,引入了ref,这里提一下vue3基本数据类型可以用ref,对象用reative,因为是Number类型所以用ref,可以看到setup语法糖也不需要return这个count 。
这里HelloWorld.vue下面用不到就直接删了,主要看一下传值。
<script setup>
// This starter template is using Vue 3 <script setup> SFCs
// Check out https://vuejs.org/api/sfc-script-setup.html#script-setup
import HelloWorld from './components/HelloWorld.vue'
</script>

<template>
  <img alt="Vue logo" src="./assets/logo.png" />
  <HelloWorld msg="Hello Vue 3 + Vite" />
</template>

<style>
#app {
  font-family: Avenir, Helvetica, Arial, sans-serif;
  -webkit-font-smoothing: antialiased;
  -moz-osx-font-smoothing: grayscale;
  text-align: center;
  color: #2c3e50;
  margin-top: 60px;
}
</style>
<script setup>
import { ref } from 'vue'

defineProps({
  msg: String
})

const count = ref(0)
</script>

<template>
  <h1>{{ msg }}</h1>

  <p>
    Recommended IDE setup:
    <a href="https://code.visualstudio.com/" target="_blank">VS Code</a>
    +
    <a href="https://github.com/johnsoncodehk/volar" target="_blank">Volar</a>
  </p>

  <p>
    <a href="https://vitejs.dev/guide/features.html" target="_blank">
      Vite Documentation
    </a>
    |
    <a href="https://v3.vuejs.org/" target="_blank">Vue 3 Documentation</a>
  </p>

  <button type="button" @click="count++">count is: {{ count }}</button>
  <p>
    Edit
    <code>components/HelloWorld.vue</code> to test hot module replacement.
  </p>
</template>

<style scoped>
a {
  color: #42b983;
}
</style>
4,我们先安装路由,npm install vue-router@4(这是支持vue3的)
然后在 src文件下创建一个 router/index.js 文件,在src上创建view放我们的页面。先创建两个页面来测试一下路由有没有成功,然后在main.js去引入路由。
//router/index.js
import { createRouter, createWebHistory } from "vue-router"
const routes = [
    {
        path: '/home',
        name: 'home',
        component: () => import('../view/about.vue')
    },
    {
        path: '/about',
        name: 'about',
        component: () => import('../view/about.vue')
    }
]
const router = createRouter({
    history: createWebHistory(),
    routes
})

export default router
//main.js
import { createApp } from 'vue'
import App from './App.vue'
import router from "./router"

const app=createApp(App)
app.use(router)

app.mount('#app')
//App.vue
<script setup></script>

<template>
  <h1>vue3+vite</h1>
  <router-link to="/home">home</router-link><br />
  <router-link to="/about">about</router-link><br />
  <router-view></router-view>
</template>

<style></style>
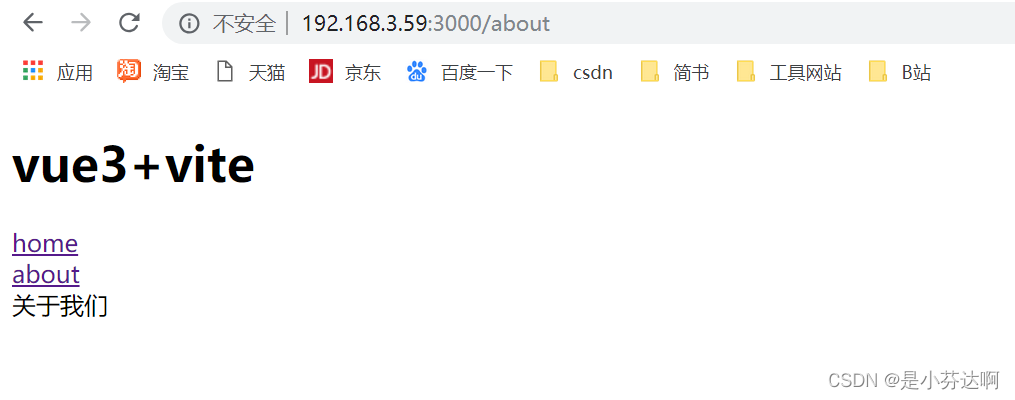
效果如图,成功了

5,上面有没有觉得路径引入很不舒服,我们在vue2的时侯引入组件都是用别名引入,这里我们也可以用别名
//vite.config.js
import { defineConfig } from 'vite'
import vue from '@vitejs/plugin-vue'
const path = require('path')

// https://vitejs.dev/config/
export default defineConfig({
  plugins: [vue()],
  resolve: {
    alias: {
      '@': path.resolve(__dirname, 'src')//配置别名
    }
  },
  server: {
    host: '0.0.0.0'    //可以通过ip+host访问
  }
})
写的不好,欢迎留言
