vuex插件
vuex插件

使用条件

实现多组件共享数据的方法
方法一:全局事件中线(乱)
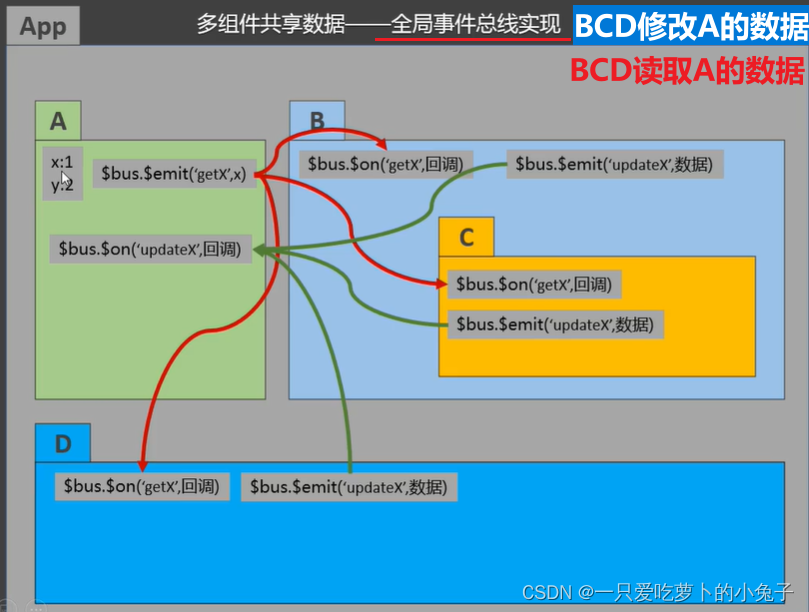
方法二:vuex实现多数组共享数据√
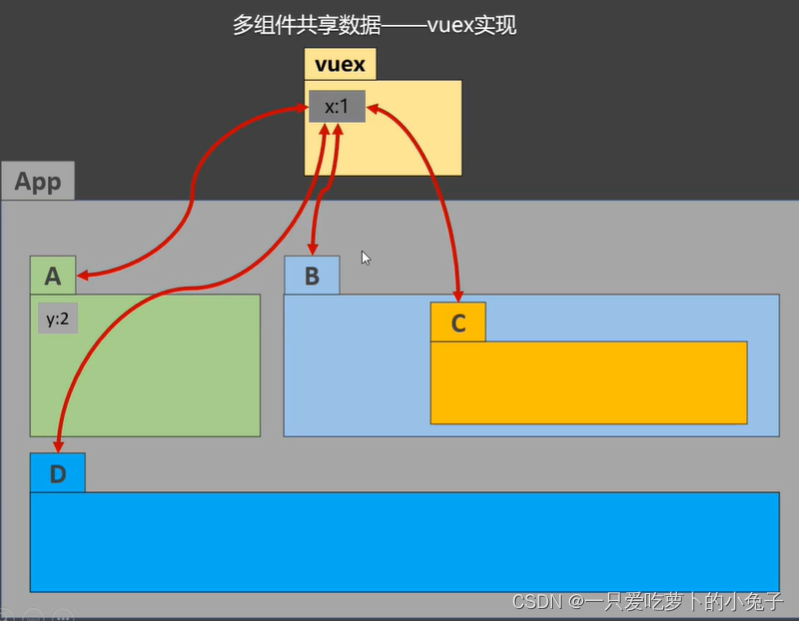
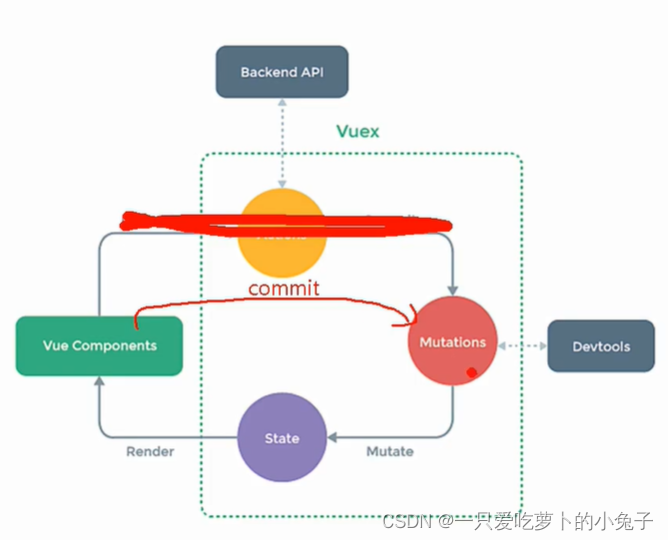
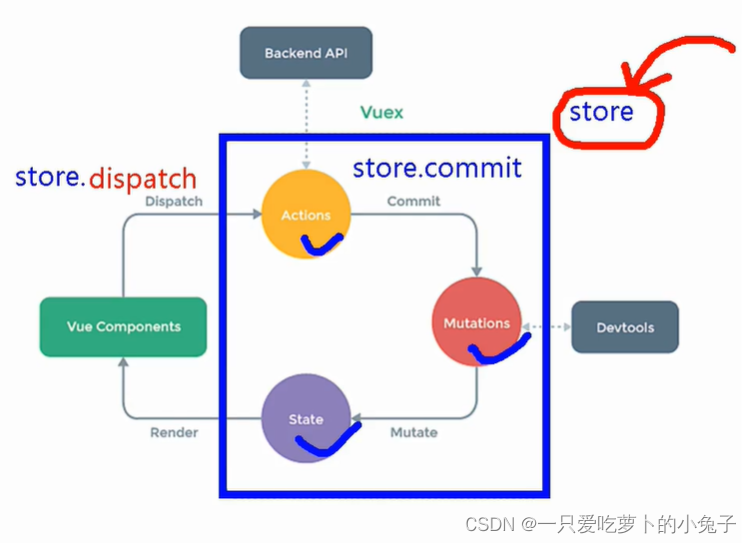
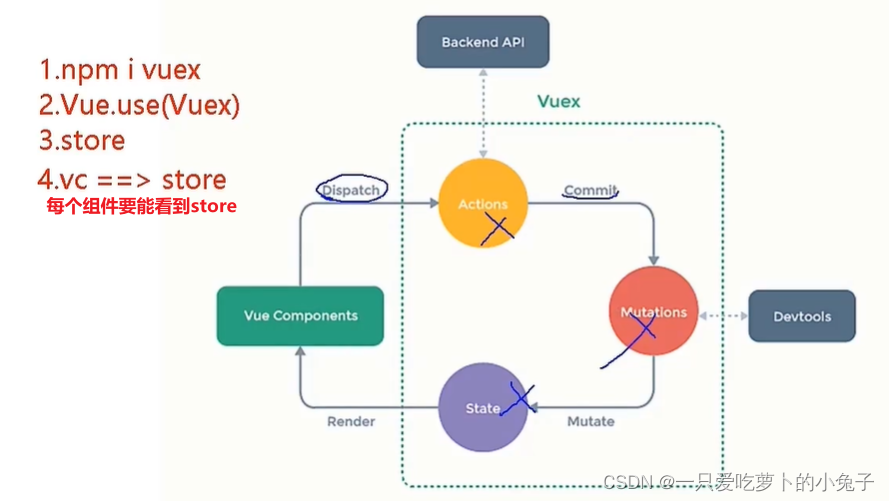
vuex工作原理
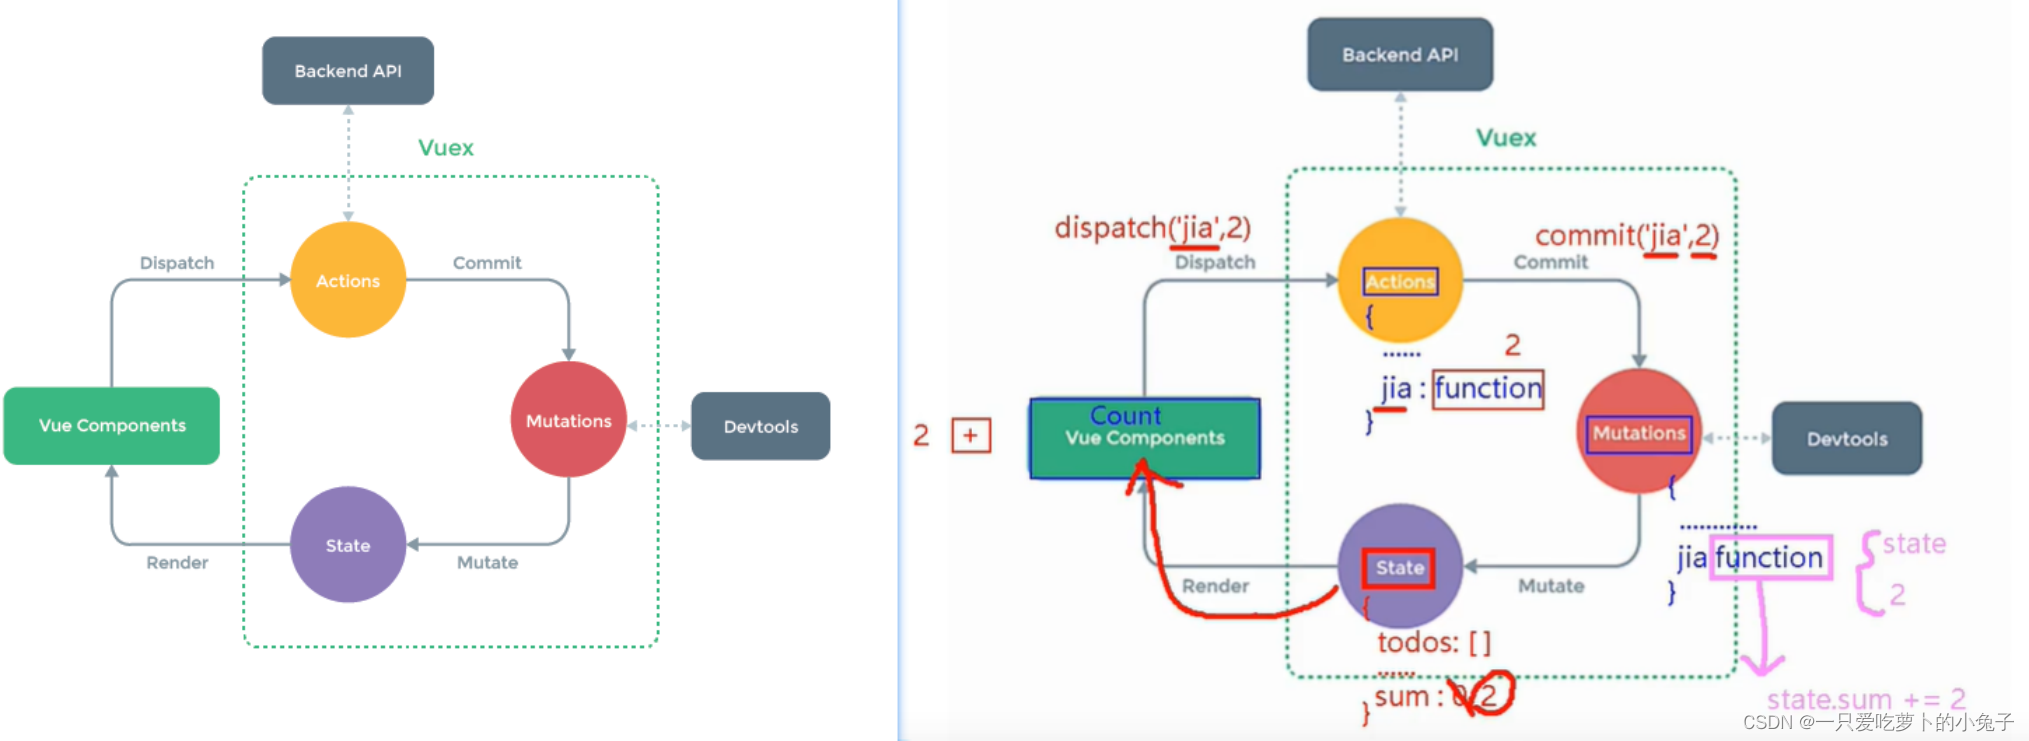
如下图, 如果知道自己要做什么, 也知道数据可以跳过上方API
如下图,dispatch、commit方法都是store的。
vue2中使用vuex小结:
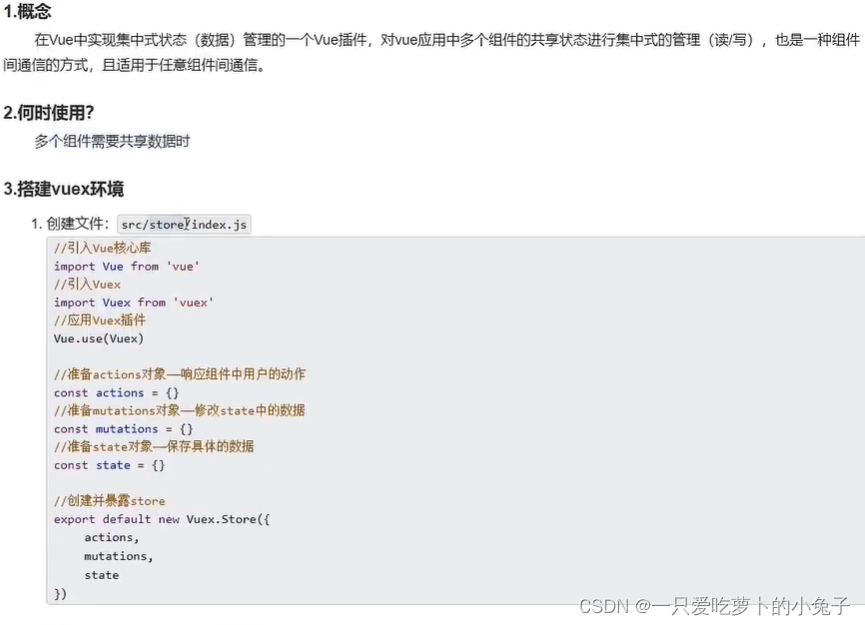

基本使用
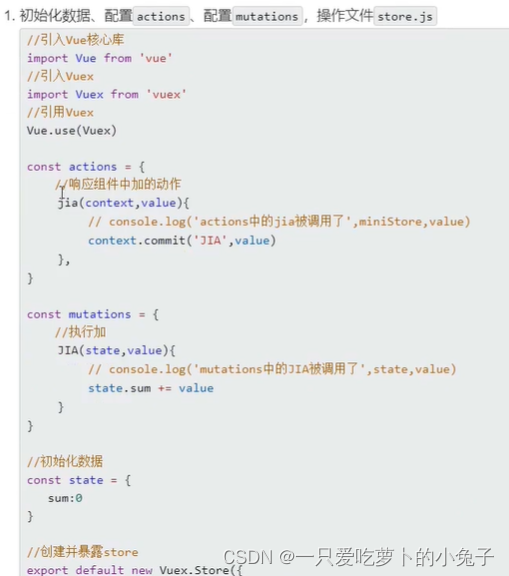

vue3搭建vuex环境
步骤总览
简单vuex实例

state用于存储数据
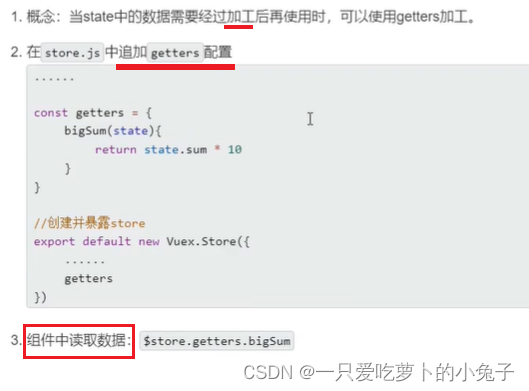
getters 加工数据
1.命令行安装vuex

npm i vuex@版本
–save放入依赖
npm i vuex@4 --save
2.在main.js中引入并使用vuex创建一个store实例
/**
 * 本文件是整个项目的入口文件
 */
import { createApp } from 'vue'
import App from './App.vue'

// 1.引入vuex
import { createStore } from "vuex";

// 2.创建一个新的store
const store = createStore({
  state(){
    return{
      sum:0
    }
  },actions:{

  }
  ,mutations:{

  }
})

const app=createApp(App)
// 3.将store实例作为插件安装
app.use(store)

app.mount('#app')
3.在模板中使用
<template>
  <div>
    <h1>当前求和为:{{ $store.state.sum }}</h1>
  </div>
</template>
4.发送到actions进行处理
  methods: {
    increment() {
      this.$store.dispatch("increment", this.selectNum);
    },
  }
4.在actions阶段, 用context参数调用commit进入mutations阶段,注意第一参数全部大写.
  actions:{
    increment(context,value){
      context.commit('INCREMENT', value)
    }
  },
如果跳过actions阶段,
用commit直接进入mutations阶段
commit的第一个参数要全大写
  methods: {
    increment() {
      this.$store.commit("INCREMENT", this.selectNum);
    },
  },
5.在mutations内编写对应函数
const store = createStore({
  state(){
    return{
      sum:0,
    }
  },actions:{
	// 本次简单实例不用actions, 直接进行commit
  },mutations:{
    INCREMENT(state,value){
      state.sum+=value;
    },
  }
})
getters的使用
vuex实例中的getters用来对state内的数据进行加工使用
可以类比data和computed
1.在main.js中的vuex实例(即store)配置
const store = createStore({
  state(){
    return{
      sum:0,
    }
  },
  actions:{},
  mutations:{},
  getters:{
    bigSum(state){
      return state.sum*10;
    }
  }
})
2.在模板中使用{{ $store.getters.bigSum }}
<template>
  <div>
    <h1>当前求和为:{{ $store.state.sum }}</h1>
    <h2>当前求和扩大十倍后为:{{ $store.getters.bigSum }}</h2>
  </div>
</template>
小结:
