Luckysheet的使用和如何保存文件到后端
文章介绍
- 因为官方的cdn依赖没法用,需要自己buide
- 前端我用的是vue element admin,基于vue cli搭建的。
- 后端用的C# .net core web api搭建。
资料链接
Luckysheet的使用
依赖的生成与导入
- 下载
https://github.com/mengshukeji/Luckysheet.git
- 用vscode打开新建终端

- 输入以下命令
npm install
npm install gulp -g
npm run dev
npm run build
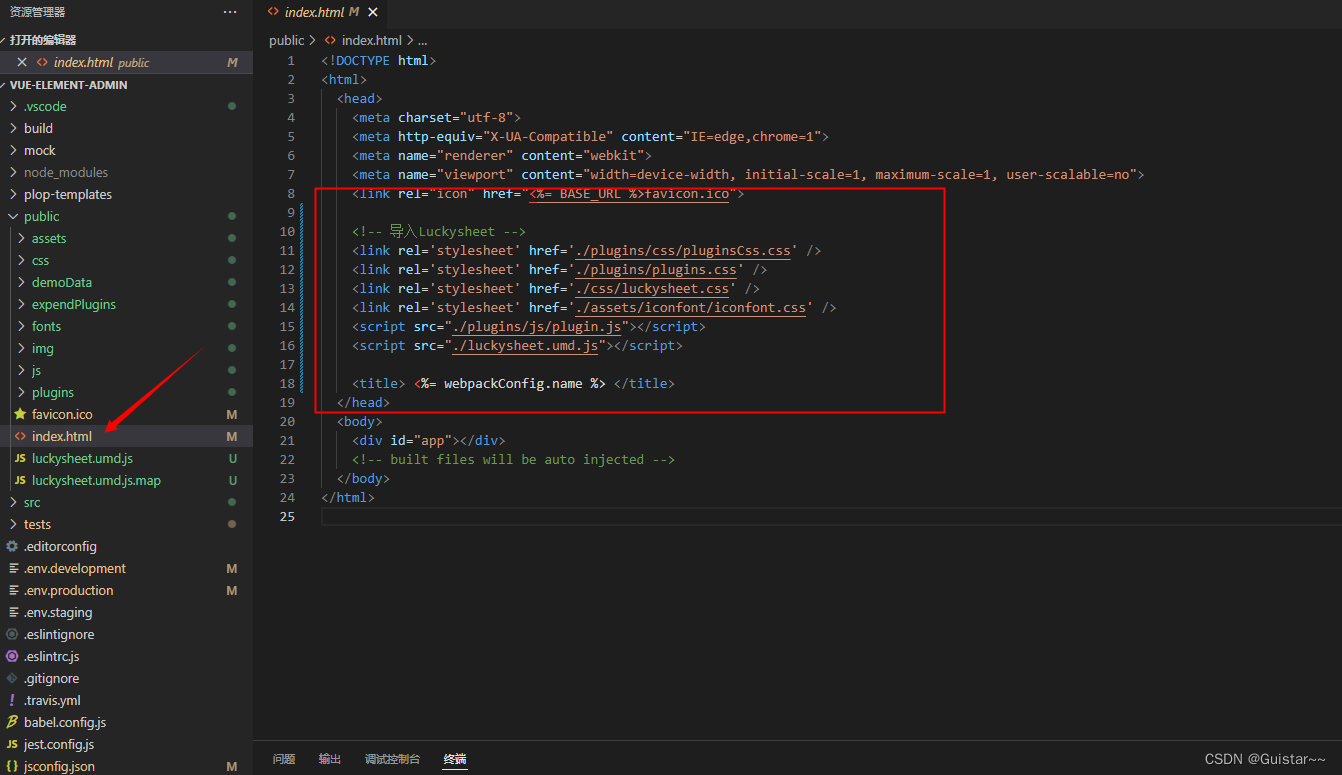
- 将生成的dist文件夹下的除了index所有文件复制到项目目录pubulic下面

- 再自己vue项目,pubulic/Index文件添加luckysheet依赖
<!-- 导入Luckysheet -->
<link rel='stylesheet' href='./plugins/css/pluginsCss.css' />
<link rel='stylesheet' href='./plugins/plugins.css' />
<link rel='stylesheet' href='./css/luckysheet.css' />
<link rel='stylesheet' href='./assets/iconfont/iconfont.css' />
<script src="./plugins/js/plugin.js"></script>
<script src="./luckysheet.umd.js"></script>
使用luckysheet
- 新建一个页面,因为我用的是vue element admin的框架,如果你们用的其他vue,新建一个新的vue页面就行。
<template>
<div id="luckysheet" style="margin:0px;padding:0px;position:absolute;width:100%;height:100%;left: 0px;top: 20px;" />
</template>
<script>
export default {
data() {
return {
}
},
mounted() {
// In some cases, you need to use $nextTick
// this.$nextTick(() => {
// eslint-disable-next-line no-undef
$(function() {
window.luckysheet.create({
container: 'luckysheet', // 设定DOM容器的id
title: '测试Excel', // 表 头名
lang: 'zh', // 中文
showinfobar: false, // 是否显示顶部信息栏
showsheetbar: true, // 是否显示底部sheet按
// loadUrl: 'http://localhost:5086/api/sheet/sheet/66'
data: [
{
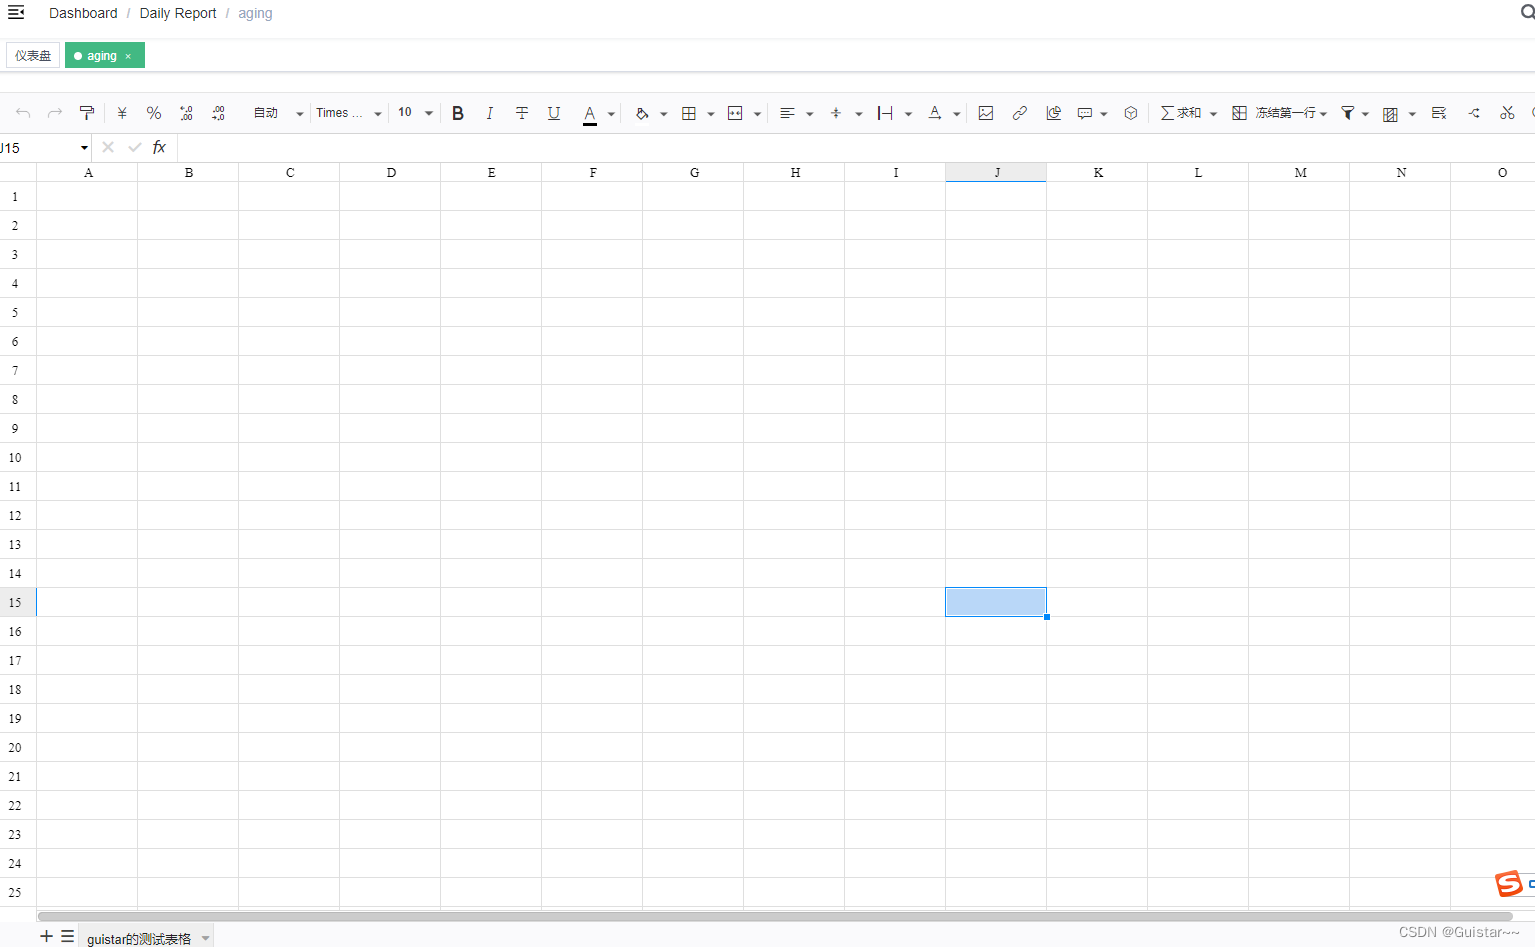
name: 'guistar的测试表格', // 工作表名称
color: '#eee333', // 工作表(工作表名称底部边框线)颜色
index: 0, // 工作表索引(新增一个工作表时该值是一个随机字符串)
status: 1, // 激活状态
order: 0, // 工作表的下标
hide: 0, // 是否隐藏
row: 30, // 行数
column: 17, // 列数
defaultRowHeight: 28, // 自定义行高,单位px
defaultColWidth: 100, // 自定义列宽,单位px
celldata: [], // 初始化使用的单元格数据,r代表行,c代表列,v代表该单元格的值,最后展示的是value1,value2
config: {
merge: {}, // 合并单元格
rowlen: {}, // 表格行高
columnlen: {}, // 表格列宽
rowhidden: {}, // 隐藏行
colhidden: {}, // 隐藏列
borderInfo: {}, // 边框
authority: {} // 工作表保护
},
scrollLeft: 0, // 左右滚动条位置
scrollTop: 0, // 上下滚动条位置
luckysheet_select_save: [], // 选中的区域
calcChain: [], // 公式链
isPivotTable: false, // 是否数据透视表
pivotTable: {}, // 数据透视表设置
filter_select: {}, // 筛选范围
filter: null, // 筛选配置
luckysheet_alternateformat_save: [], // 交替颜色
luckysheet_alternateformat_save_modelCustom: [], // 自定义交替颜色
luckysheet_conditionformat_save: {}, // 条件格式
frozen: {}, // 冻结行列配置
chart: [], // 图表配置
zoomRatio: 1, // 缩放比例
image: [], // 图片
showGridLines: 1, // 是否显示网格线
dataVerification: {} // 数据验证配置
}
]
})
})
},
methods: {
}
}
</script>
<style lang="scss" scoped>
</style>
运行:http://localhost:8080/
如何保存到后端,及如何从后端去拿
原理:
- 保存数据:将表格数据options.data,转化成字符串保存到服务器
- 拉取数据:将服务器的字符拿下来,导入到表格
保存到后端
- 新建一个保存按钮
<Button type="info" @click="upExcel">上传</Button>
async upExcel() {
  // eslint-disable-next-line no-undef
  var objsheet = luckysheet.getAllSheets() // 得到表的数据
  options = objsheet // 将表的数据保存本地
  this.postsheet()
}
async postsheet() {
  var strsheet = await JSON.stringify(options)// 对象转化为字符串
  // var str = escape(strsheet)// 加密字符串
  const sheetinfo = { id: 1, filename: strsheet }// 拼接成对象
  await updata(sheetinfo)// 传递对象后台
},
import { updata, getdata } from '@/api/sheet'
// http://localhost:5086/api/sheet/updata/11111111111
export function updata(sheetstr) {
  return request({
    url: '/sheet/updata',
    method: 'post',
    data: sheetstr
  })
}

// http://localhost:5086/api/sheet/sheet/1
export function getdata(sheetid) {
  return request({
    url: '/sheet/sheet/' + sheetid,
    method: 'get'
  })
}
- C#后端
用Filename来存上传到字符串
public IActionResult info([FromBody] Sheet Sheet1)
{
    Sheet sheet = new Sheet();
    sheet.Filename = Sheet1.Filename;
    EacContext.Sheet.AddRange(sheet);
    EacContext.SaveChanges();
    return Ok(new { msg = "上传成功" });
}
public class Sheet
{
    public int Id { get; set; }

    public string Filename { get; set; } = null!;
}