前言

看到掘金上有这样一种效果,感觉很好看,就是那种毛玻璃效果,于是想试试写一个登录页面并且实现遮罩,但是写成了开始游戏,可是光一个开始游戏也没意思,干脆写一个小游戏吧,直接试试贪吃蛇。
如何实现
    <div class="main">
        <!-- 毛玻璃遮罩盒子 -->
        <div id=beginBox>
            <div class="btn" id="begin">开始游戏</div>
        </div>
        <!-- 蛇 -->
        <div class="map" id="map"></div>
    </div>
这是我HTML中body部分的代码,main是主体,也就是游戏场地。
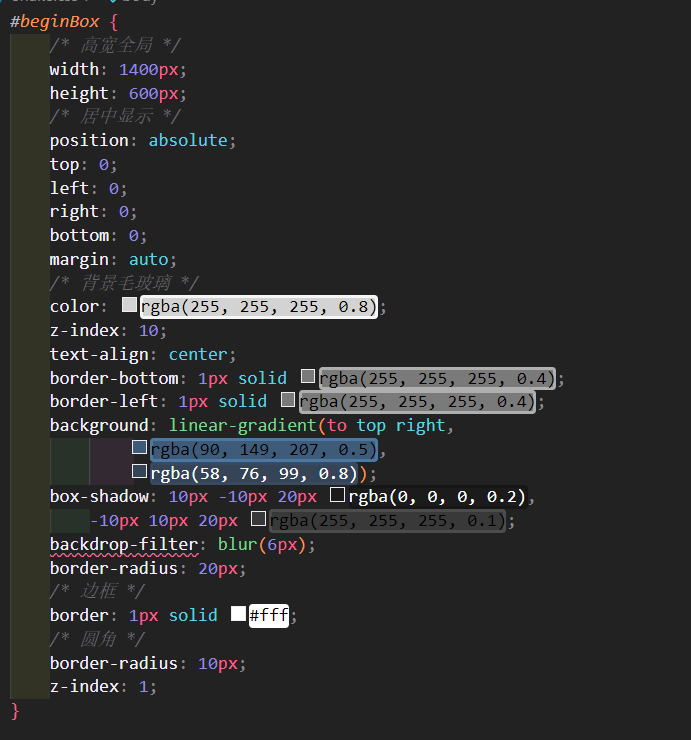
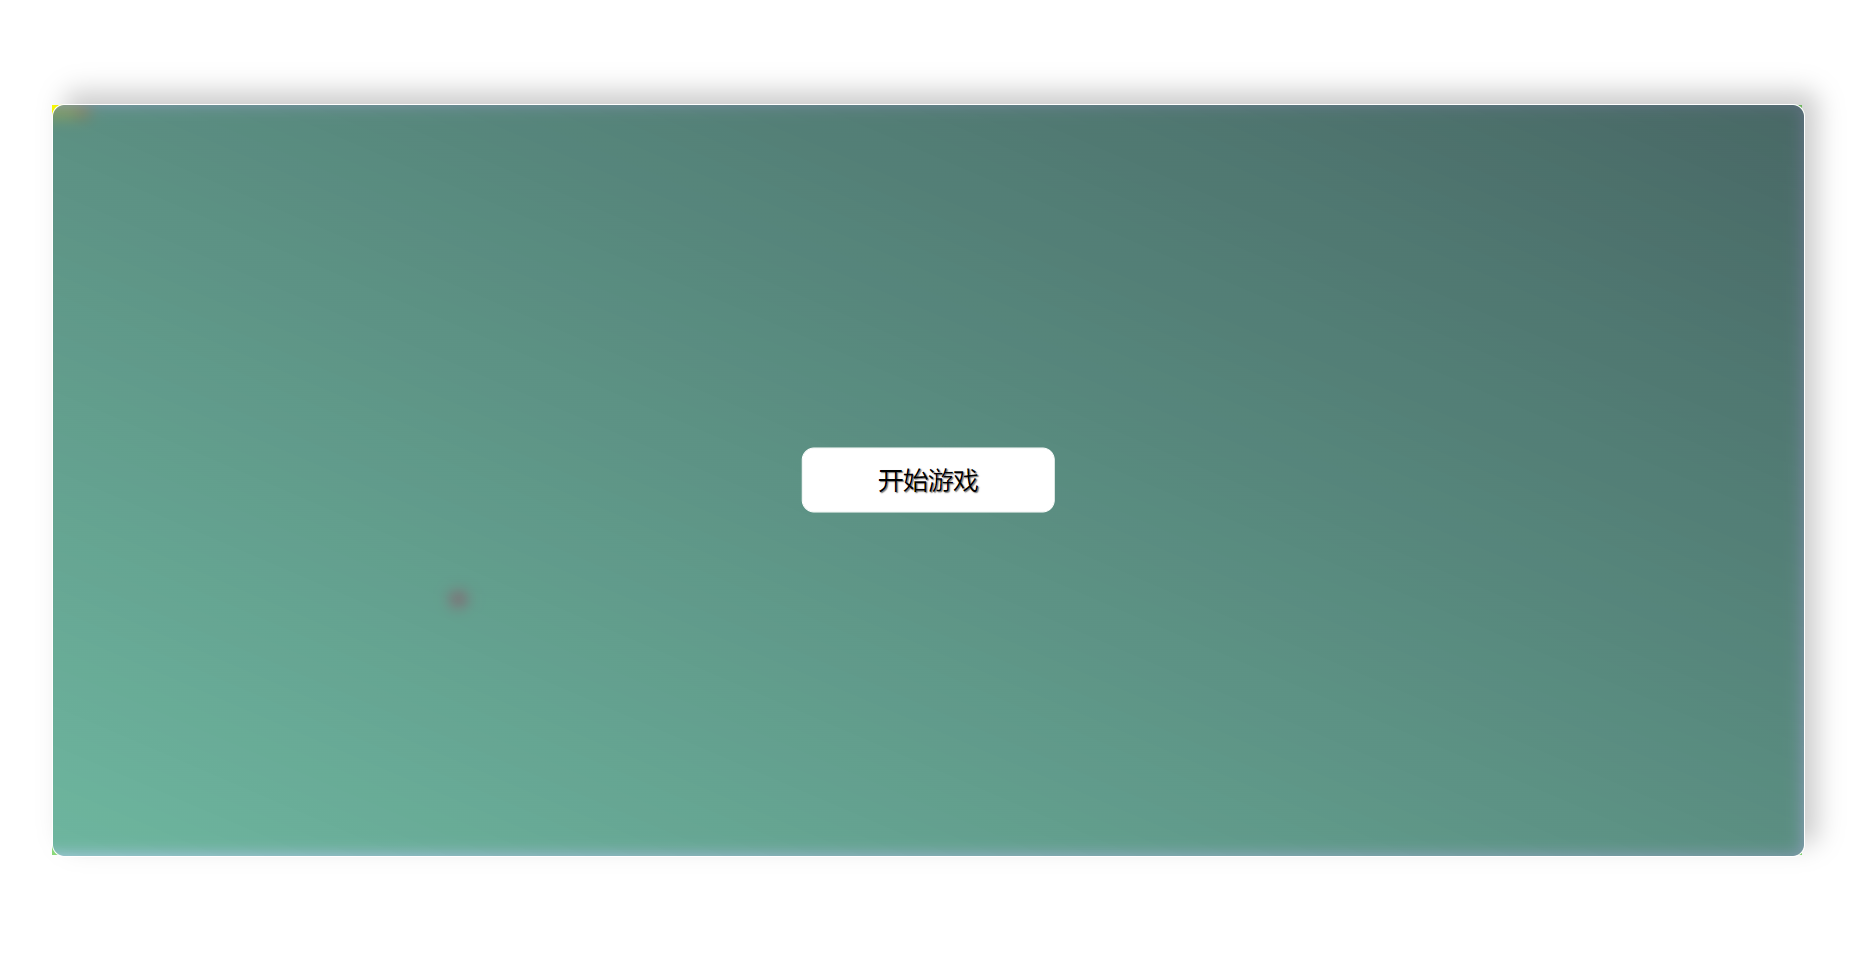
beginBox是开始游戏的界面,我再这个盒子里面实现了毛玻璃遮罩,还不错。
然后下面那个盒子就是蛇了。
如果你也想试试毛玻璃遮罩效果,可以看看我的css。

直接看js代码吧。
首先,我们先定义好全局变量,做好准备。
// 蛇的速度,即计时器的间隔时间
var SnakeTime = 200;
// 蛇的身体
var map = document.getElementById('map');
速度是计时器控制的。
接下来,我们创建一个方法,Snake(),这是蛇整个的构造方法。
我再这个方法里面写了蛇的一些东西。
我的蛇初始是3个10*10的正方形拼成的。
// 设置蛇的宽、高、默认走的方向
    this.width = 10;
    this.height = 10;
    this.direction = 'right';
所以方法里面,我首先确定了宽高,以及使用direction属性确定方向。
然后,我们这个蛇的三个点,需要按照规律排好,我这里使用了一个数组。
this.body = [
    { x: 2, y: 0 },   // 蛇头,第一个点
    { x: 1, y: 0 },   // 蛇脖子,第二个点
    { x: 0, y: 0 }    // 蛇尾,第三个点
];
这还只是蛇的初始化状态哈!蛇还没创建。
然后我们来创建蛇。
定义一个方法。这个方法在snake方法里面。
// 显示蛇
    this.display = function () {
        // 创建蛇
        for (var i = 0; i < this.body.length; i++) {
            if (this.body[i].x != null) {
                // 当吃到食物时,x==null,不能新建,不然会在0,0处新建一个
                var s = document.createElement('div');
                // 将节点保存到状态中,以便于后面删除
                this.body[i].flag = s;
                // 设置宽高
                s.style.width = this.width + 'px';
                s.style.height = this.height + 'px';
                //设置颜色
                s.style.backgroundColor = 'yellow';
                // 设置位置
                s.style.position = 'absolute';
                s.style.left = this.body[i].x * this.width + 'px';
                s.style.top = this.body[i].y * this.height + 'px';
                // 添加进去
                map.appendChild(s);
            }
        }
        //设置蛇头的颜色
        this.body[0].flag.style.backgroundColor = 'orange';
    };
在这个方法里面,s就是一个div,而body数组的长度是3,我们循环3此,依次追加,就拼成了,头、身、尾。
但是,此时蛇,是出来了,但是不能动啊....
所以在定义一个方法,也是在snake方法里面。
this.run = function () {
        // 后一个元素到前一个元素的位置
        for (var i = this.body.length - 1; i > 0; i--) {
            this.body[i].x = this.body[i - 1].x;
            this.body[i].y = this.body[i - 1].y;
        }

        // 根据方向处理蛇头
        switch (this.direction) {
            case "left":
                this.body[0].x -= 1;
                break;
            case "right":
                this.body[0].x += 1;
                break;
            case "up":
                this.body[0].y -= 1;
                break;
            case "down":
                this.body[0].y += 1;
                break;
        }

        // 判断是否出界,根据蛇头判断
        if (this.body[0].x < 0 || this.body[0].x > 150 || this.body[0].y < 0 || this.body[0].y > 60) {
            clearInterval(timer);
            // 清除定时器
            alert("出界啦,游戏结束!");
            document.getElementById('beginBox').style.display = 'block';
            // 删除旧的
            for (var i = 0; i < this.body.length; i++) {
                if (this.body[i].flag != null) {
                    // 如果刚吃完就死掉,会加一个值为null的
                    map.removeChild(this.body[i].flag);
                }
            }
            this.body = [   // 回到初始状态,
                { x: 2, y: 0 },
                { x: 1, y: 0 },
                { x: 0, y: 0 }
            ];
            this.direction = 'right';
            this.display();   // 显示初始状态
            return false;   // 结束
        }

        // 判断蛇头吃到食物,xy坐标重合,
        if (this.body[0].x == food.x && this.body[0].y == food.y) {
            // 蛇加一节,因为根据最后节点定,下面display时,会自动赋值的
            this.body.push({ x: null, y: null, flag: null });
            // 获取蛇的长度
            var len = this.body.length;
            // 根据蛇的长度,设置定时器频率SnakeTime
            SnakeTime = SnakeTime - (len - 3) * 5;
            // SnakeTime最低不能小于40
            if (SnakeTime < 40) {
                SnakeTime = 40;
            }
            refresh();
            // 清除食物,重新生成食物
            map.removeChild(food.flag);
            food.display();
        }

        // 吃到自己死亡,从第五个开始与头判断,因为前四个永远撞不到
        for (var i = 4; i < this.body.length; i++) {
            if (this.body[0].x == this.body[i].x && this.body[0].y == this.body[i].y) {
                clearInterval(timer);   // 清除定时器,
                alert("你咬到了自己,游戏结束!");
                // 显示id为beginBox的毛玻璃遮罩盒子
                document.getElementById('beginBox').style.display = 'block';
                // 删除旧的
                for (var i = 0; i < this.body.length; i++) {
                    if (this.body[i].flag != null) {
                        // 如果刚吃完就死掉,会加一个值为null的
                        map.removeChild(this.body[i].flag);
                    }
                }
                this.body = [   // 回到初始状态,
                    { x: 2, y: 0 },
                    { x: 1, y: 0 },
                    { x: 0, y: 0 }
                ];
                this.direction = 'right';
                this.display();   // 显示初始状态
                return false;   // 结束
            }
        }

        // 先删掉初始的蛇,在显示新蛇
        for (var i = 0; i < this.body.length; i++) {
            if (this.body[i].flag != null) {
                // 当吃到食物时,flag是等于null,且不能删除
                map.removeChild(this.body[i].flag);
            }
        }
        // 重新显示蛇
        this.display();
    }
}
这段代码有点多哈。我们拆开看。
// 后一个元素到前一个元素的位置
for (var i = this.body.length - 1; i > 0; i--) {
      this.body[i].x = this.body[i - 1].x;
      this.body[i].y = this.body[i - 1].y;
}
首先,蛇是一节节动的,所以我们使用循环,让他后一个替代前一个的位置。
然后,根据direction属性来判断方向。
	// 根据方向处理蛇头
        switch (this.direction) {
            case "left":
                this.body[0].x -= 1;
                break;
            case "right":
                this.body[0].x += 1;
                break;
            case "up":
                this.body[0].y -= 1;
                break;
            case "down":
                this.body[0].y += 1;
                break;
        }
然后,我们就要定义出界后游戏结束了,这个就不多说了。
// 判断是否出界,根据蛇头判断
        if (this.body[0].x < 0 || this.body[0].x > 150 || this.body[0].y < 0 || this.body[0].y > 60) {
            clearInterval(timer);
            // 清除定时器
            alert("出界啦,游戏结束!");
            document.getElementById('beginBox').style.display = 'block';
            // 删除旧的
            for (var i = 0; i < this.body.length; i++) {
                if (this.body[i].flag != null) {
                    // 如果刚吃完就死掉,会加一个值为null的
                    map.removeChild(this.body[i].flag);
                }
            }
            this.body = [   // 回到初始状态,
                { x: 2, y: 0 },
                { x: 1, y: 0 },
                { x: 0, y: 0 }
            ];
            this.direction = 'right';
            this.display();   // 显示初始状态
            return false;   // 结束
        }
这里的x和y都是整体的px/蛇的盒子高宽,也就是除10,1 = 10px。
然后,就是吃食物了。
当蛇头与食物相遇,我们就认为它吃了食物,于是我们通过位置来判断吃东西。
        // 判断蛇头吃到食物,xy坐标重合,
        if (this.body[0].x == food.x && this.body[0].y == food.y) {
            // 蛇加一节,因为根据最后节点定,下面display时,会自动赋值的
            this.body.push({ x: null, y: null, flag: null });
            // 获取蛇的长度
            var len = this.body.length;
            // 根据蛇的长度,设置定时器频率SnakeTime
            SnakeTime = SnakeTime - (len - 3) * 5;
            // SnakeTime最低不能小于40
            if (SnakeTime < 40) {
                SnakeTime = 40;
            }
            refresh();
            // 清除食物,重新生成食物
            map.removeChild(food.flag);
            food.display();
        }
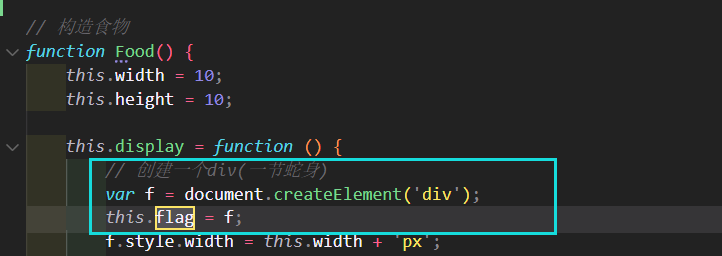
说明一下:这个
flag是当时创建食物时留下的一个对象。
创建食物方法我写在了后面,一步步看吧。
而下面这部分代码:
			// 获取蛇的长度
            var len = this.body.length;
            // 根据蛇的长度,设置定时器频率SnakeTime
            SnakeTime = SnakeTime - (len - 3) * 5;
            // SnakeTime最低不能小于40
            if (SnakeTime < 40) {
                SnakeTime = 40;
            }
是为了可以动态的实现蛇吃到食物后,速度加快。
这里,我有一个
refresh();这个后面再看。
然后就是咬到自己,游戏结束,这个不多说。
现在就到了构造食物了。
// 构造食物
function Food() {
    this.width = 10;
    this.height = 10;

    this.display = function () {
        // 创建一个div(一节蛇身)
        var f = document.createElement('div');
        this.flag = f;
        f.style.width = this.width + 'px';
        f.style.height = this.height + 'px';
        f.style.background = 'red';
        f.style.position = 'absolute';
        this.x = Math.floor(Math.random() * 80);
        this.y = Math.floor(Math.random() * 40);
        f.style.left = this.x * this.width + 'px';
        f.style.top = this.y * this.height + 'px';
        map.appendChild(f);
    }
}
实际上,这个“食物”就是创建了蛇的一节身体。
后面也可以看见,有一个追加到蛇身。
map.appendChild(f);
看到这,你可能还疑惑,不应该啊,这也无法分辨出明确的蛇和食物啊,也就是说,很抽象啊。
因为我最后面,还有一个创建对象过程。
var snake = new Snake();
var food = new Food();
// 初始化显示
snake.display();
food.display();
将方法作为了一个对象。
而我们为了控制蛇的方向,我们需要使用键盘事件来改变蛇的属性。
// 给body加按键事件,上下左右
document.body.onkeydown = function (e) {
    // 有事件对象就用事件对象,没有就自己创建一个,兼容低版本浏览器
    var ev = e || window.event;

    switch (ev.keyCode) {
        case 38:
            if (snake.direction != 'down') {   // 不允许返回,向上的时候不能向下
                snake.direction = "up";
            }
            break;
        case 40:
            if (snake.direction != "up") {
                snake.direction = "down";
            }
            break;
        case 37:
            if (snake.direction != "right") {
                snake.direction = "left";
            }
            break;
        case 39:
            if (snake.direction != "left") {
                snake.direction = "right";
            }
            break;
        // 兼容WASD键
        case 87:
            if (snake.direction != "down") {
                snake.direction = "up";
            }
            break;
        case 83:
            if (snake.direction != "up") {
                snake.direction = "down";
            }
            break;
        case 65:
            if (snake.direction != "right") {
                snake.direction = "left";
            }
            break;
        case 68:
            if (snake.direction != "left") {
                snake.direction = "right";
            }
            break;
    }

};
当然,我这里做了兼容,WASD和上下左右键都通用控制。
最后就是点击开始游戏的事件了。
// 获取开始按钮
var btn = document.getElementById('begin');
// 点击开始游戏事件
btn.onclick = function () {
    // 开始按钮毛玻璃幕布
    var parent = this.parentNode;
    // 隐藏开始按钮
    parent.style.display = 'none';
    // 获取定时器时间
    let time = SnakeTime;

    timer = setInterval(function () {
        snake.run();
    }, time);
}
我们这里面是使用了setInterval来实现不断的前进走动。
    timer = setInterval(function () {
        snake.run();
    }, time);
但是啊,因为这个计时器他是不刷新的,也就是说启动时,
time = 200,然后你改变time的值。此时
time值确实变了,但是,这个setInterval它只认定第一次的设置,它不会动态改变。
那怎么办呢?首先,分析,他要什么时候做出time值的刷新,肯定是吃到食物的时候对吧。
于是,我们写一个刷新函数。
// 定义刷新定时器方法
function refresh() {
    // 停止定时器
    clearInterval(timer);
    // 刷新定时器
    timer = setInterval(function () {
        snake.run();
        console.log(SnakeTime);
    }, SnakeTime);
}
然后,你们就知道我上面说的refresh()方法是什么了吧?就是用于动态刷新setInterval的。
这样,这个贪吃蛇就写好了。
效果
开始页面

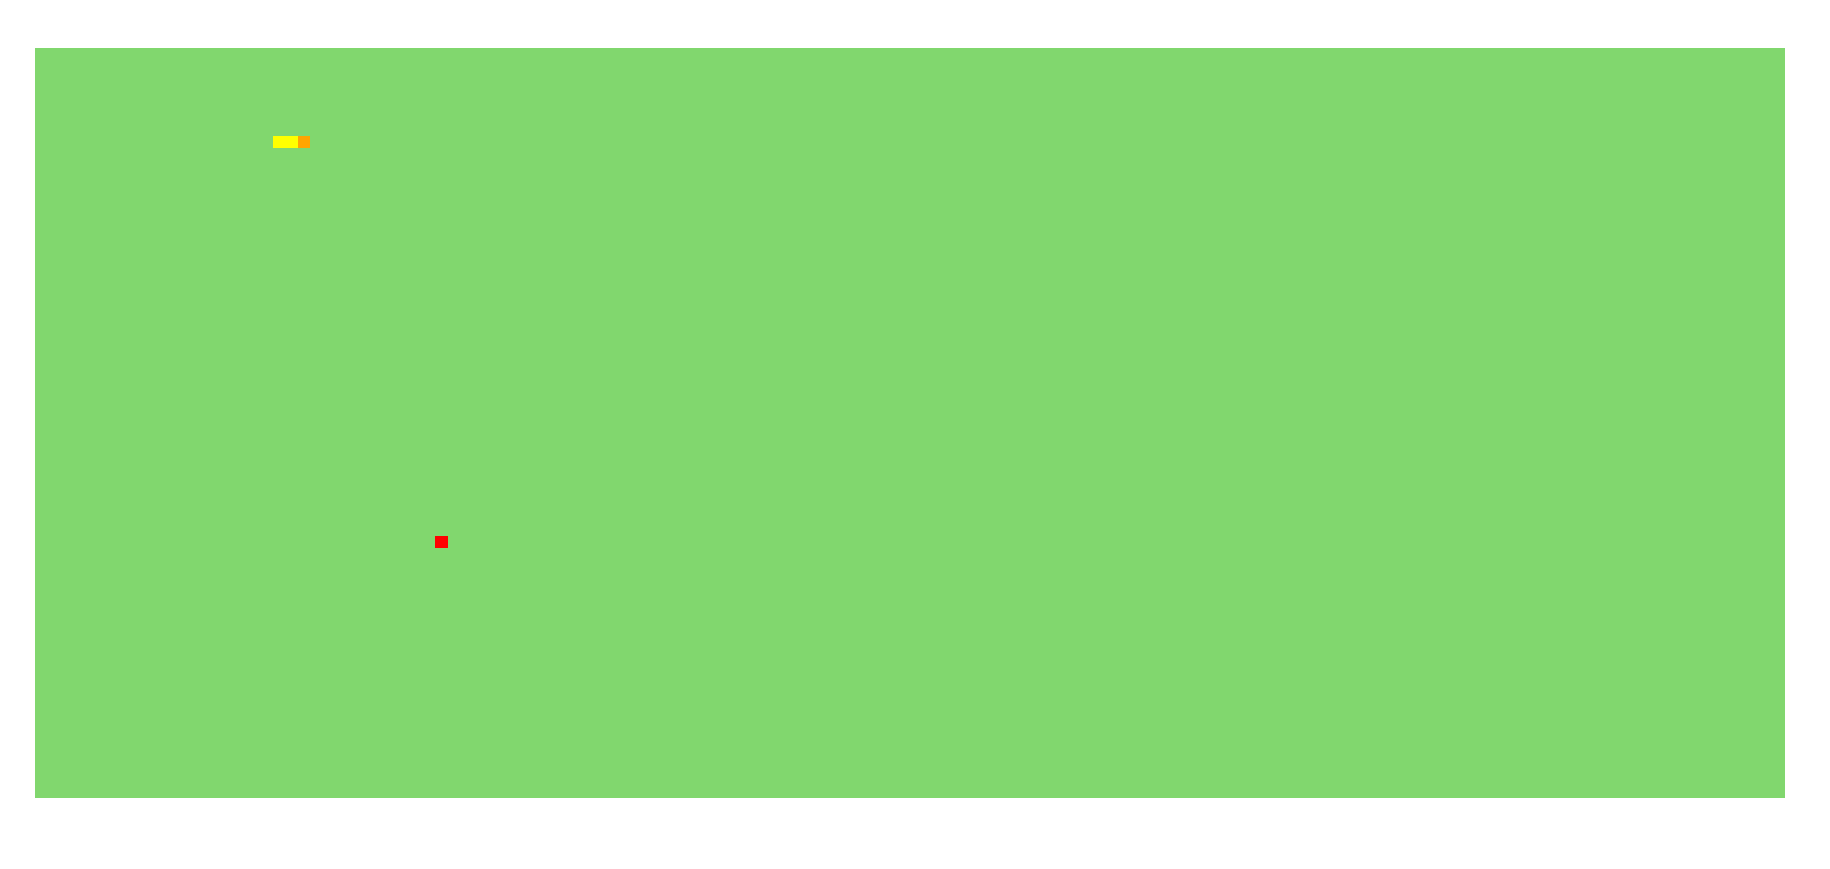
游戏界面

完整源码
Github:JanYork/Snake
Gitee:janyork/Snake