介绍
Jest是目前前端工程化下单元测试火热的技术栈,而Enzyme的支持提供了Jest测试React业务、组件的能力,下面来介绍一下React组件测试的一些实际场景。
1. 测试依赖包
	"enzyme": "^3.11.0",
    "enzyme-adapter-react-16": "^1.15.2",
    "enzyme-to-json": "^3.3.5",
    "jest": "^28.1.1",
    "jest-less-loader": "^0.1.2",
    "jsdom": "^19.0.0",			//解决mount渲染组件失败的BUG,具体见上文
    "ts-jest": "^28.0.5",
2. 测试环境搭建
由于enzyme的配置在每次需要测试组件时都需要加入,因此配置setup.js后在每次测试组件中提前引入是不错的选择。
setup.js:
import Enzyme from 'enzyme';
import Adapter from 'enzyme-adapter-react-16';
const jsdom = require('jsdom');

//解决无法mount渲染组件的问题
const { JSDOM } = jsdom;
const { window } = new JSDOM('');
const { document } = new JSDOM(``).window;

global.document = document;
global.window = window;

//初始化配置
Enzyme.configure({
  adapter: new Adapter(),
});

export default Enzyme;
jest.config.js配置:
module.exports = {
  transform: {
    '^.+\\.(ts|tsx|js|jsx)?$': 'ts-jest',
    '\\.(less|css)$': 'jest-less-loader', // 支持less
  },

  testRegex: '(/__tests__/.*|(\\.|/)(test|spec))\\.(jsx?|tsx?)$',

  moduleFileExtensions: ['ts', 'tsx', 'js', 'jsx', 'json', 'node'],
};
3. 组件基础渲染测试
在为组件添加prop传值之前,可配置一个基础的 mountTest.tsx 来对组件进行一个基础渲染挂载测试,测试通过后在进行复杂情况下的测试。
mountTest.tsx
import React from 'react';
import { mount } from 'enzyme';

// 此处Component的类型存在疑问,待完善
export default function mountTest(Component: React.ComponentType<any> | React.ComponentType) {
  describe(`mount and unmount`, () => {
    it(`component could be updated and unmounted without errors`, () => {
      const wrapper = mount(<Component />);
      expect(() => {
        wrapper.setProps({});
        wrapper.unmount();
      }).not.toThrow();
    });
  });
}
4. 组件交互相关测试
Button按钮组件测试
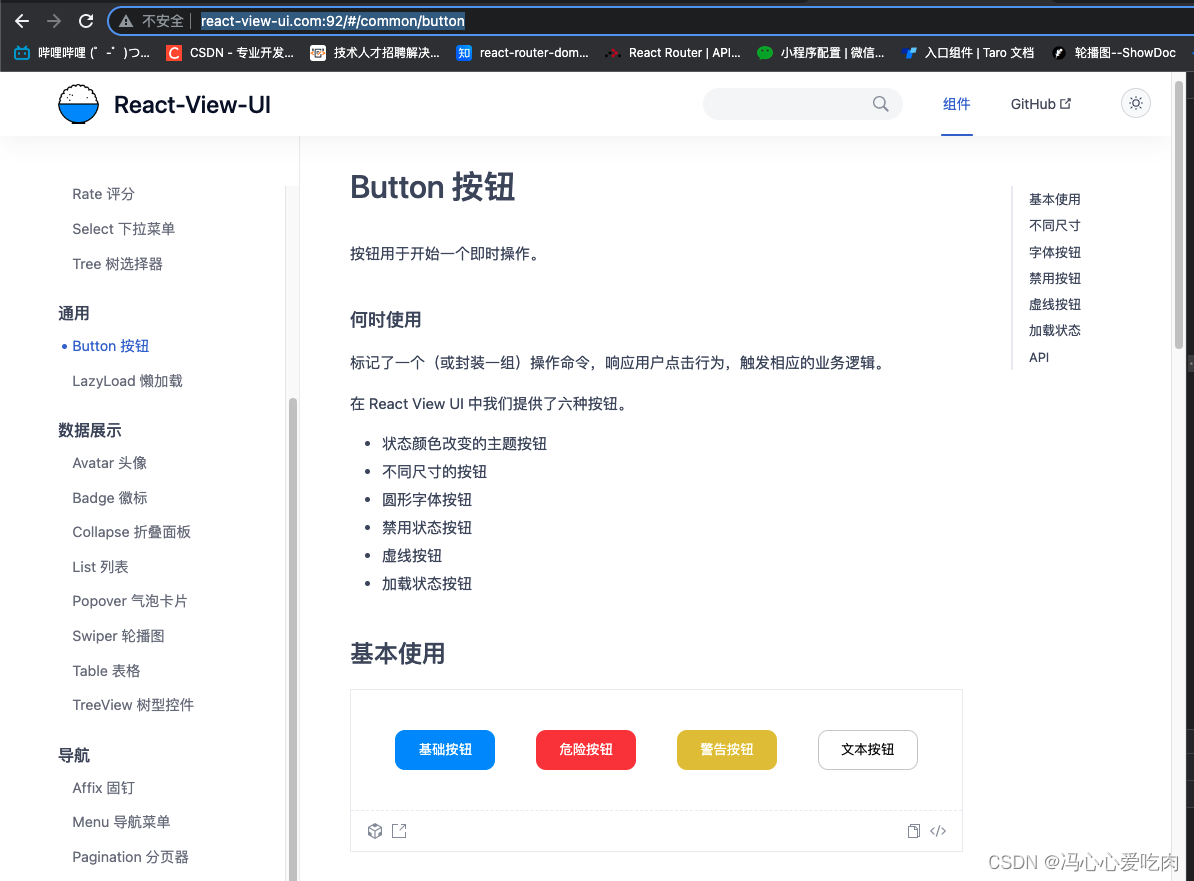
这里拿Button按钮举例,具体Button组件可在http://react-view-ui.com:92/#/common/button参考,底部描述了组件的API能力。

先看一下Button组件的整体测试文件,我一共分成了4组测试用例(不包含mountTest基础测试)。
Button.test.tsx
import React from 'react';
import Button from '../../Button/index';
import Enzyme from '../setup';
import mountTest from '../mountTest';
import { act } from 'react-dom/test-utils';

const { shallow, mount } = Enzyme;

mountTest(Button);

describe(`button`, () => {
  it('button children show correctly', () => {
    //按钮文字内容测试
    const component = shallow(<Button>testButton</Button>);
    const button = component.find('.button');
    const p = button.find('button');
    expect(p.text()).toBe('testButton');
  });
  it('click callback correctly', () => {
    //按钮点击回调测试
    const mockFn = jest.fn();
    const component = shallow(<Button handleClick={mockFn} />);
    const button = component.find('.button');
    button.simulate('click');
    const mockFnCallLength = mockFn.mock.calls.length;
    expect(mockFnCallLength).toBe(0);

    act(() => {
      //测禁用按钮
      component.setProps({
        disabled: true,
      });
    });

    button.simulate('click');
    expect(mockFn.mock.calls.length).toBe(mockFnCallLength);
  });

  it('button type set show correctly color', () => {
    //测试按钮type被赋值className
    const component = mount(<Button type="primary" />);
    expect(component.find('button').hasClass('primary')).toBe(true);
  });

  it('button loading show correctly', () => {
    //测试加载按钮显示
    const component = mount(<Button type="primary" loading />);
    expect(component.find('loading1')).not.toBeUndefined();
  });
});
从代码中可以看到,初始化配置一共有如下代码:
import React from 'react';
import Button from '../../Button/index';
import Enzyme from '../setup';
import mountTest from '../mountTest';
import { act } from 'react-dom/test-utils';

const { shallow, mount } = Enzyme;

mountTest(Button);
主要功能:引入必要的包、引入测试组件、引入组件渲染方式,这是是shallow和mount两种,并在最后优先进行了组件基础渲染测试。
第一组测试用例测试了Button按钮的文字显示正确性,是通过jest的find方法查询到Button按钮的DOM元素进行判断;之后设置了组件的disabled属性,再次进行点击测试
it('button children show correctly', () => {
    //按钮文字内容测试
    const component = shallow(<Button>testButton</Button>);
    const button = component.find('.button');
    const p = button.find('button');
    expect(p.text()).toBe('testButton');
});
第二组测试用例测试了按钮的交互,在渲染组件之后,捕捉到按钮的DOM,并自定义了mockFn函数传递给实际Button组件后进行回调测试,Button我在点击时是没有传参的,因此回调参数长度为0
it('click callback correctly', () => {
    //按钮点击回调测试
    const mockFn = jest.fn();
    const component = shallow(<Button handleClick={mockFn} />);
    const button = component.find('.button');
    button.simulate('click');
    const mockFnCallLength = mockFn.mock.calls.length;
    expect(mockFnCallLength).toBe(0);

    act(() => {
      //测禁用按钮
      component.setProps({
        disabled: true,
      });
    });

    button.simulate('click');
    expect(mockFn.mock.calls.length).toBe(mockFnCallLength);
});
第三组测试用例对Button按钮类型进行了测试,传递了type:primary,并对渲染后的组件进行判断是否有primary的类名
it('button type set show correctly color', () => {
    //测试按钮type被赋值className
    const component = mount(<Button type="primary" />);
    expect(component.find('button').hasClass('primary')).toBe(true);
});
第四组测试用例对loading Button进行了测试,同样也是检查类名的形式,与第三组测试用例类似
it('button loading show correctly', () => {
    //测试加载按钮显示
    const component = mount(<Button type="primary" loading />);
    expect(component.find('loading1')).not.toBeUndefined();
  });
这就是我对Button的测试。
Avatar头像组件测试
由于Button组件本身功能比较简单,可扩展性有限,作为第一个组件案例进行举例。
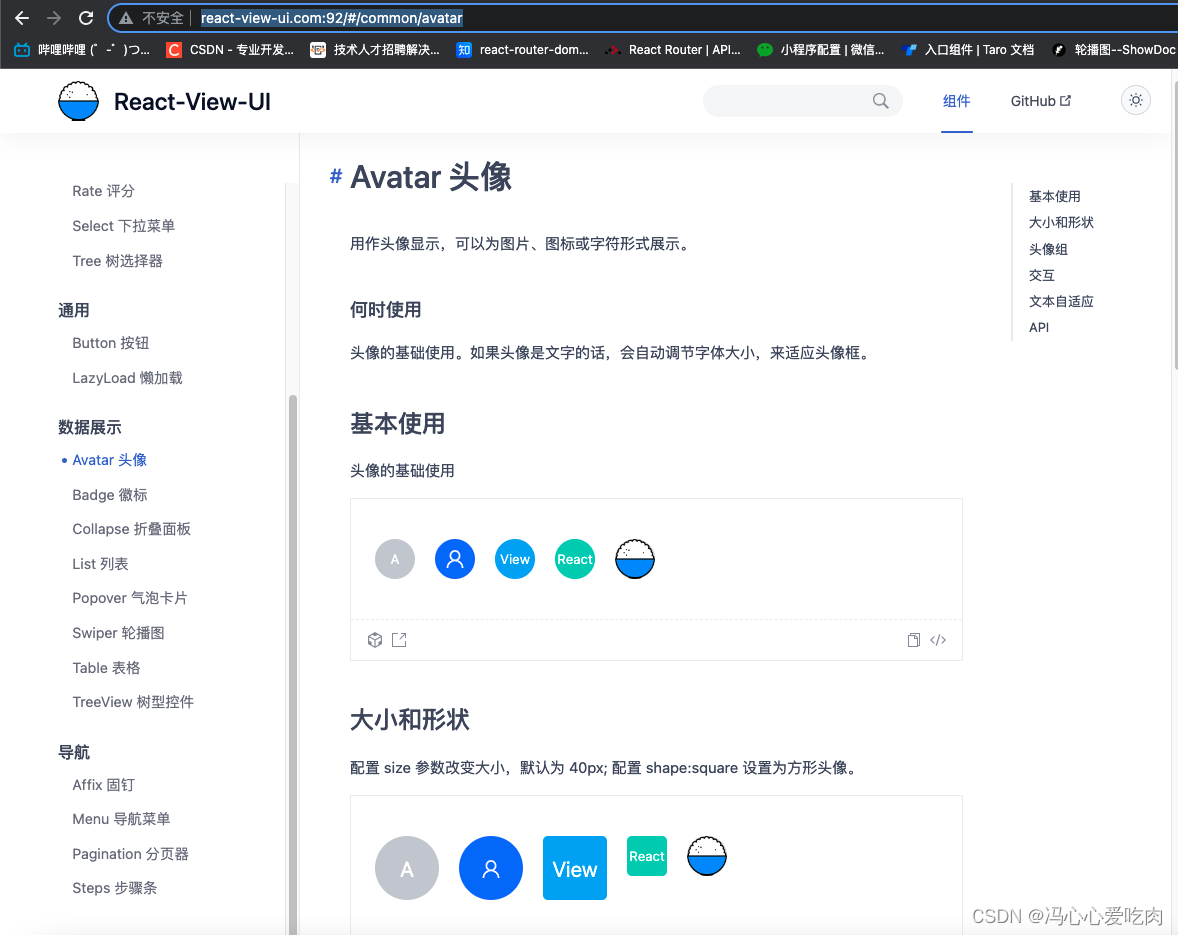
接下来对Avatar组件进行测试,Avatar组件文档可参考http://react-view-ui.com:92/#/common/avatar
组件文档如下:

还是先上测试源码。
Avatar.test.tsx:
import React, { ReactNode } from 'react';
import ReactDOM from 'react-dom';
import Avatar from '../../Avatar/index';
import AvatarGroup from '../../Avatar/group';
import { CameraOutlined } from '@ant-design/icons';
import Enzyme from '../setup';
import mountTest from '../mountTest';
import { act } from 'react-dom/test-utils';

const { mount } = Enzyme;

let container: HTMLDivElement | null;

mountTest(Avatar);

describe('Avatar', () => {
  //测试前准备容器
  beforeEach(() => {
    container = document.createElement('div');
    document.body.appendChild(container);
  });
  //测试后删除容器
  afterEach(() => {
    document.body.removeChild(container as HTMLDivElement);
    container = null;
  });

  it('test avatar children content show correctly', () => {
    //测试头像文本显示
    let contextText: string | ReactNode = 'test';
    const component = mount(<Avatar>{contextText}</Avatar>);
    expect(component.find('.text-ref').text()).toEqual('test');
    const imgSrc =
      'https://user-images.githubusercontent.com/9554297/83762004-a0761b00-a6a9-11ea-83b4-9c8ff721d4b8.png';
    act(() => {
      contextText = <img src={imgSrc}></img>;
    });
    expect(component.find('img')).toBeDefined();
  });
  it('test avatar group correctly', () => {
    //测试头像样式
    const component = (
      <AvatarGroup size={50} groupStyle={{ margin: '0 10px' }}>
        <Avatar style={{ background: 'rgb(20, 169, 248)' }} shape="square">
          View
        </Avatar>
        <Avatar style={{ background: 'rgb(51, 112, 255)' }}>React</Avatar>
        <Avatar style={{ background: 'rgb(0, 208, 184)' }}>UI</Avatar>
      </AvatarGroup>
    );

    act(() => {
      ReactDOM.render(component, container);
    });

    const avatarStyleList = [
      {
        background: 'rgb(20, 169, 248)',
        content: 'View',
      },
      {
        background: 'rgb(51, 112, 255)',
        content: 'React',
      },
      {
        background: 'rgb(0, 208, 184)',
        content: 'UI',
      },
    ];
    const groupDom = (container as HTMLDivElement).querySelector('.avatar-group') as HTMLElement;
    expect(groupDom.childElementCount).toBe(3);

    const avatars = Array.from((container as HTMLDivElement).querySelectorAll('.avatar'));
    avatars.forEach((avatar, index) => {
      //测试头像组的每个头像样式
      expect(
        avatar
          .getAttribute('style')
          ?.includes(`background: ${avatarStyleList[index].background}`) &&
          avatar.querySelector('.text-ref')?.innerHTML === avatarStyleList[index].content,
      ).toBe(true);
      if (index === 0) {
        //测试头像形状
        expect(avatar.getAttribute('style')?.includes(`border-radius: 5px`)).toBe(true);
      }
    });
  });

  it('test avatar click callback correctly', () => {
    //头像点击交互测试
    const mockFn = jest.fn();
    const component = mount(
      <Avatar
        size={54}
        triggerType="mask"
        triggerIcon={<CameraOutlined style={{ fontSize: '20px' }} />}
        triggerClick={mockFn}
      >
        <img src="https://user-images.githubusercontent.com/9554297/83762004-a0761b00-a6a9-11ea-83b4-9c8ff721d4b8.png"></img>
      </Avatar>,
    );
    act(() => {
      component.simulate('click');
    });
    let mockFnCallLength = mockFn.mock.calls.length;
    expect(mockFnCallLength).toBe(0);
    act(() => {
      component.setProps({
        triggerType: 'button',
      });
    });
    component.update();
    mockFnCallLength = mockFn.mock.calls.length;
    expect(mockFnCallLength).toBe(0);
  });
});
拆解一下组件的源码,测试最初的操作如下:
import React, { ReactNode } from 'react';
import ReactDOM from 'react-dom';
import Avatar from '../../Avatar/index';
import AvatarGroup from '../../Avatar/group';
import { CameraOutlined } from '@ant-design/icons';
import Enzyme from '../setup';
import mountTest from '../mountTest';
import { act } from 'react-dom/test-utils';

const { mount } = Enzyme;

let container: HTMLDivElement | null;

mountTest(Avatar);
和Button的测试区别点其实就在,定义了container容器,用于接下来的DOM测试。
//测试前准备容器
  beforeEach(() => {
    container = document.createElement('div');
    document.body.appendChild(container);
  });
  //测试后删除容器
  afterEach(() => {
    document.body.removeChild(container as HTMLDivElement);
    container = null;
  });
在进行测试用例之前,创建了一个空div作为React测试的容器,放置React组件,并在测试用例结束后对该容器进行清除。
接下来我们开始分析测试用例:
第一组测试用例测试了文本头像和图片头像的显示正确性,首先给组件传递了一个test文本值,对文本值进行判断。之后又给组件传递了一张图片(ReactNode),并对组件中的图片进行查询判断。
it('test avatar children content show correctly', () => {
    //测试头像文本显示
    let contextText: string | ReactNode = 'test';
    const component = mount(<Avatar>{contextText}</Avatar>);
    expect(component.find('.text-ref').text()).toEqual('test');
    const imgSrc =
      'https://user-images.githubusercontent.com/9554297/83762004-a0761b00-a6a9-11ea-83b4-9c8ff721d4b8.png';
    act(() => {
      contextText = <img src={imgSrc}></img>;
    });
    expect(component.find('img')).toBeDefined();
});
第二组测试用例较为复杂,没有通过jest的渲染方式渲染组件,而是用上了之前所讲到的container容器,并且创建了一个React虚拟DOM,渲染在测试用例环境中。这样做其实也是因为测试用例本身是需要测试不同情况下的头像样式是否生效,因此会用到这种渲染方式。
it('test avatar group correctly', () => {
    //测试头像样式
    const component = (
      <AvatarGroup size={50} groupStyle={{ margin: '0 10px' }}>
        <Avatar style={{ background: 'rgb(20, 169, 248)' }} shape="square">
          View
        </Avatar>
        <Avatar style={{ background: 'rgb(51, 112, 255)' }}>React</Avatar>
        <Avatar style={{ background: 'rgb(0, 208, 184)' }}>UI</Avatar>
      </AvatarGroup>
    );

    act(() => {
      ReactDOM.render(component, container);
    });

    const avatarStyleList = [
      {
        background: 'rgb(20, 169, 248)',
        content: 'View',
      },
      {
        background: 'rgb(51, 112, 255)',
        content: 'React',
      },
      {
        background: 'rgb(0, 208, 184)',
        content: 'UI',
      },
    ];
    const groupDom = (container as HTMLDivElement).querySelector('.avatar-group') as HTMLElement;
    expect(groupDom.childElementCount).toBe(3);

    const avatars = Array.from((container as HTMLDivElement).querySelectorAll('.avatar'));
    avatars.forEach((avatar, index) => {
      //测试头像组的每个头像样式
      expect(
        avatar
          .getAttribute('style')
          ?.includes(`background: ${avatarStyleList[index].background}`) &&
          avatar.querySelector('.text-ref')?.innerHTML === avatarStyleList[index].content,
      ).toBe(true);
      if (index === 0) {
        //测试头像形状
        expect(avatar.getAttribute('style')?.includes(`border-radius: 5px`)).toBe(true);
      }
    });
  });
通过ReactDOM.render渲染后,首先获取了所有头像的最外层容器:groupDom,并对头像组所包含的头像元素长度进行判断,我这里是传了三个头像,因此预期应该为3。
const groupDom = (container as HTMLDivElement).querySelector('.avatar-group') as HTMLElement;
expect(groupDom.childElementCount).toBe(3);
接下来获取了所有头像的DOM,并进行遍历判断,判断自定义的头像背景颜色和所传文本内容是否相同,两者都满足,则该头像的测试通过;并在我对第一个头像设置了shape: square,这代表了这是一个方形头像,因此在遍历中需要对第一个头像单独做一次测试,判断它的样式是否生效(圆角)
avatars.forEach((avatar, index) => {
      //测试头像组的每个头像样式
      expect(
        avatar
          .getAttribute('style')
          ?.includes(`background: ${avatarStyleList[index].background}`) &&
          avatar.querySelector('.text-ref')?.innerHTML === avatarStyleList[index].content,
      ).toBe(true);
      if (index === 0) {
        //测试头像形状
        expect(avatar.getAttribute('style')?.includes(`border-radius: 5px`)).toBe(true);
      }
    });
如上就是第二组测试用例,和之前测试用例不同的无非就是渲染方式和组件的样式判断,使用了原生的一些判断,最后通过jest的toBe方法进行断言。
第三组测试用例是交互测试,在对头像设置了triggerIcon、triggerType、triggerClick后可变成交互头像,具体显示可查看组件库文档-Avatar头像。这里也是先定义了一个mock函数,传递给组件作为回调函数测试,并且整体测试了mask、button两种交互头像的回调正确性
it('test avatar click callback correctly', () => {
    //头像点击交互测试
    const mockFn = jest.fn();
    const component = mount(
      <Avatar
        size={54}
        triggerType="mask"
        triggerIcon={<CameraOutlined style={{ fontSize: '20px' }} />}
        triggerClick={mockFn}
      >
        <img src="https://user-images.githubusercontent.com/9554297/83762004-a0761b00-a6a9-11ea-83b4-9c8ff721d4b8.png"></img>
      </Avatar>,
    );
    act(() => {
      component.simulate('click');
    });
    let mockFnCallLength = mockFn.mock.calls.length;
    expect(mockFnCallLength).toBe(0);
    act(() => {
      component.setProps({
        triggerType: 'button',
      });
    });
    component.update();
    mockFnCallLength = mockFn.mock.calls.length;
    expect(mockFnCallLength).toBe(0);
  });
如上就是头像组件的所有测试用例。
小结
测试React组件无非就是测试其交互性和样式渲染正确性,因此笔者在React组件测试中使用最频繁的就是文中所述的两种渲染形式
- Jest渲染(mount、render、shallow)
- ReactDOM渲染(用于测试样式、元素节点)
因此掌握了这两种渲染形式去书写测试用例,可以测试到大部分的组件业务场景,在组件上线之前mock出更多的场景来避免错误发生。
最后留一下React-View-UI组件库的线上地址吧~文档中两个组件也是组件库中的产品,比较适合挑选出来做文档。
React-View-UI组件库线上链接:http://react-view-ui.com:92/#/
github:https://github.com/fengxinhhh/React-View-UI-fs
npm:https://www.npmjs.com/package/react-view-ui
开源不易,欢迎学习和体验,喜欢请多多支持,有问题请留言。