setup 函数
因为vue3的一大特色就是composition API,区别于vue2的options API,但是composition api的使用, 需要配置一个setup 函数
setup函数,是比 beforeCreate函数的执行顺序还要早的,且之前vue2中的那些data、 methods、computed等等的模块,都可以直接写在setup中,用return出一个对象的方法实现。
也就是说,compositionAPI 是基于 逻辑功能 组织代码的, 一个功能 api 相关放到一起。
setup 函数的特点
- setup 函数是一个新的组件选项, 作为组件中 compositionAPI 的起点
- 从生命周期角度来看, setup 会在 beforeCreate 钩子函数之前执行
- setup 中不能使用 this, this 指向 undefined
- 在模版中需要使用的数据和函数,需要在
setup返回。
  <div>num: {{ num }}</div>
  <div>num1: {{ num1 }}</div>
export default {
  setup () {
    let num = 1
    let num1 = 2
    return {
      num,
      num1
    }
  }
}

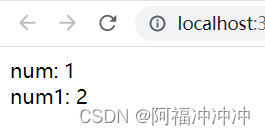
在vue组件中如代码,可以将数据渲染到页面是没问题的,但是,这个数据就不像之前写在data中那样,直接就是响应式的。此时引出reactive 函数
reactive 函数
作用
传入一个复杂数据类型,将复杂数据类型,转换成响应式数据(返回该对象的响应式代理)
  <div>{{ obj.name }}</div>
  <div>{{ obj.age }}</div>
  <button @click="obj.name = 'ls'">改值</button>
import { reactive } from 'vue'

export default {
  setup () {
    // 1. setup 需要返回值, 返回的值才能在模板中使用
    // 2. 默认的普通的值不是响应式的, 需要用 reactive 函数
    const obj = reactive({
      name: 'zs',
      age: 18
    })

    return {
      obj
    }
  }
}
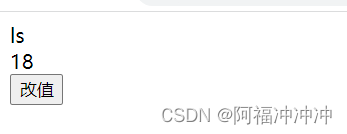
页面初始:

当我点击按钮改变值时:

此时,页面也渲染出了数据,是响应式的数据了。
特点
此处应知:vue3中,所有的函数,想要使用必须从vue中导入:
import { reactive ,computed} from 'vue'
此方法在vue3.2版本后,就没有另一个方法ref的效率高,也没有ref应用面广泛(比如简单数据类型,reactive函数就无法处理成响应式数据)。由此,引出ref函数
ref 函数
作用
- ref 函数接收一个的值, 返回一个ref 响应式对象, 有唯一的属性 value
- 在 setup 函数中, 通过 ref 对象的 value 属性, 可以访问到值
- 在模板中, ref 属性会自动解套, 不需要额外的 .value
- ref函数也支持传入复杂类型,传入复杂类型,也会做响应式处理
  <div>{{ money }}</div>
  <button @click="money++">数值++</button>
import {  ref } from 'vue'
export default {
  setup () {
  // 其本质,还是返回了一个对象,并且,此对象的value值是响应式数据,也是ref中的值。
    let money = ref(100)
    money.value++
    return {
      money
    }
  }
}
以上代码,每当点击数值++就会加一,且渲染到页面。
此时,我们打印出ref函数返回的值是什么:

可以看到,打印出的是一个对象,其中的value属性,就是传入ref函数的参数,且是响应式数据。
同理,ref函数的参数中传入一个对象,获取这个对象的属性时,依然要用.value先获取到这个对象。(在template里面,可以省略.value)
以上语法多多练习,熟悉以后发现,也还是很麻烦,有没有更简洁、更优雅的写法?有,就是vue3.2后新添加的一个语法:script setup语法
script setup语法(*)
script setup是在单文件组件 (SFC) 中使用组合式 API 的编译时语法糖。相比于普通的 script 语法更加简洁
要使用这个语法,需要将setupattribute 添加到<script>代码块上:
<script setup>
console.log('hello script setup')
</script>
顶层的绑定会自动暴露给模板,所以定义的变量,函数和import导入的内容都可以直接在模板中直接使用
<template>
  <div>
    <h3>根组件</h3>
    <div>点击次数:{{ count }}</div>
    <button @click="add">点击修改</button>
  </div>
</template>

<script setup>
import { ref } from 'vue'

const count = ref(0)
const add = () => {
  count.value++
}
</script>
与之前相比较
- 不用写一个
export default和setup函数了 - 定义的变量和方法等,也不需要return出去才能使用了
- 导入组件,不用注册,导入即用。
计算属性computed函数
computed函数调用时, 要接收一个处理函数, 处理函数中, 需要返回计算属性的值
<template>
  <div>我今年的年纪 <input type="text" v-model="age" /></div>
  <div>我明年的年龄 {{ nextAge }}</div>
  <div>我后年的年龄 <input type="text" v-model="nextAge2" /></div>
</template>

<script setup>
import { computed, ref } from 'vue'
const age = ref(10)
// 不带set的计算属性
const nextAge = computed(() => {
  return +age.value + 1
})

// 带set的计算属性
const nextAge2 = computed({
  get() {
    return +age.value + 2
  },
  set(value) {
    age.value = value - 2
  },
})
</script>
如果直接在computed的参数中,写一个函数,相当于就是写了个get函数。
除了写法不同,用法和vue2一样。
- 会有缓存
- 默认的计算属性不让改动,因为这个值是根据别的值计算得来的,如果想要改动,得用
set函数
侦听器watch函数
watch函数可以传入三个参数:
- 参数1:侦听的数据源
- 参数2:回调函数
- 参数3:额外的配置
// 监听单个ref
const money = ref(100)
watch(money, (value, oldValue) => {
  console.log(value)
})

// 监听多个ref
const money = ref(100)
const count = ref(0)
watch([money, count], (value) => {
  console.log(value)
})

// 监听ref复杂数据
const user = ref({
  name: 'zs',
  age: 18,
})
watch(
  user,
  (value) => {
    console.log('user变化了', value)
  },
  {
    // 深度监听,,,当ref的值是一个复杂数据类型,需要深度监听
    deep: true,
    // 立即执行一次
    immediate: true
  }
)

// 监听对象的某个属性的变化
const user = ref({
  name: 'zs',
  age: 18,
})
watch(
  () => user.value.name,
  (value) => {
    console.log(value)
  }
)
组件通讯——父传子
父组件和vue2一样,而子组件接收参数略有不同。
步骤:
- 父组件提供数据
- 父组件将数据传递给子组件
- 子组件通过defineProps进行接收
- 子组件渲染父组件传递的数据
父组件:
<template>
  <div>
    <h1>我是父组件</h1>
    <div>金钱:{{ money }}</div>
    <div>车辆:{{ car }}</div>
    <hr />
    <Son :money="money" :car="car"></Son>
  </div>
</template>
<script setup>
import { ref } from 'vue'
// 在setup语法中,组件导入之后就能够直接使用,不需要使用components进行局部注册
import Son from './components/Son.vue'

const money = ref(100)
const car = ref('玛莎拉蒂')
</script>
子组件:
<template>
  <div>
    <h3>我是子组件</h3>
    <div>{{ money }} --- {{ car }}</div>
  </div>
</template>
<script setup>
import { computed } from 'vue'

// defineProps: 接收父组件传递的数据
const props = defineProps({
  money: Number,
  car: String,
})

const myMoney = computed(() => {
  return props.money + 100
})
</script>
接收到的数据,在template中可以直接使用,但是在script中,得接收一下返回值
组件通讯——子传父
步骤:
- 子组件通过defineEmit获取emit对象(因为没有this)
- 子组件通过emit触发事件,并且传递数据
- 父组件提供方法
- 父组件通过自定义事件的方式给子组件注册事件
子组件:
<script setup>
defineProps({
  money: Number,
  car: String,
})

const emit = defineEmits(['changeMoney'])

const change = () => {
  emit('changeMoney', 10)
}
</script>
父组件:
<script setup>
import { ref } from 'vue'
// 在setup语法中,组件导入之后就能够直接使用,不需要使用components进行局部注册
import Son from './components/Son.vue'

const money = ref(100)
const car = ref('玛莎拉蒂')
const changeMoney = (num) => {
  money.value = money.value - num
}
</script>


<Son :money="money" :car="car" @changeMoney="changeMoney"></Son>
依赖注入 - provide 和 inject
依赖注入, 可以非常方便的实现 跨层级的 组件通信
爷组件:
<script setup>
import { provide, ref } from 'vue'
import Son from './components/Son.vue'
const money = ref(100)
const car = ref('小黄车')

const changeMoney = (m) => {
  money.value = money.value - m
}
provide('money', money)
provide('car', car)
provide('changeMoney', changeMoney)
</script>

<template>
  <h1>根组件-{{ money }} --- {{ car }}</h1>
  <hr />
  <Son></Son>
</template>
父组件:
<script setup>
import Sun from './Sun.vue'
</script>

<template>
  <h3>子组件</h3>
  <hr />
  <Sun></Sun>
</template>
孙组件:
<script setup>
import { inject } from 'vue'

const money = inject('money')
const car = inject('car')
const changeMoney = inject('changeMoney')
</script>
<template>
  <h5>Sun组件--{{ money }} --- {{ car }}</h5>
  <button @click="changeMoney(10)">修改</button>
</template>
如上代码,爷组件,可以用provide来传值,其后代组件皆可用inject来接收
想要在其后代组件中改动爷组件内的值,可以在爷组件中定义一个改动某值的函数,将函数传到后代组件中,然后,在后代组件中就可以改变爷组件内的值。