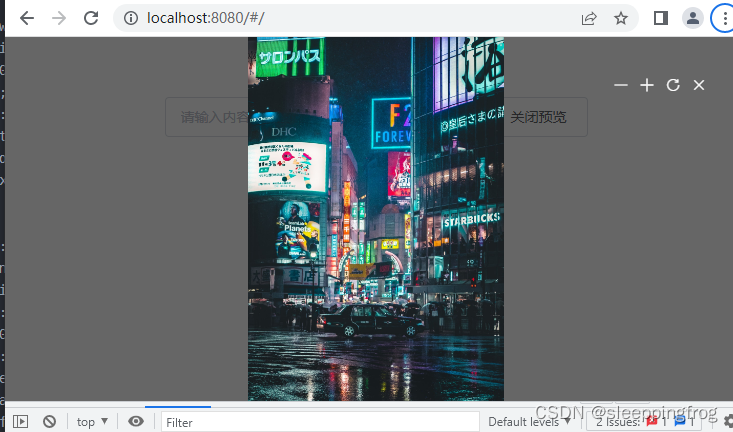
因为项目需要,之前封装了一个图片点击预览的全局组件。这次我们尝试将它封装成一个插件。通过命令式的方式来达到点击预览的效果。
在封装插件之前。我们要对vue的插件机制有个基本了解。vue的插件的核心是use方法。
其实就是在Vue类上添加一个use方法,这个方法看传入第一个参数是否是函数,如果是函数则直接执行,如果是对象,就看是否有install方法,然后执行install方法,执行的时候把Vue类传入,同时把用户传入的option也传入
Vue.use = function (plugin) {
    // 忽略已注册插件
    if (plugin.installed) {
      return
    }

    // 集合转数组,并去除第一个参数
    var args = toArray(arguments, 1);

    // 把this(即Vue)添加到数组的第一个参数中
    args.unshift(this);

    // 调用install方法
    if (typeof plugin.install === 'function') {
      plugin.install.apply(plugin, args);
    } else if (typeof plugin === 'function') {
      plugin.apply(null, args);
    }

    // 注册成功
    plugin.installed = true;
    return this;
  };
而在install方法里。vue给我们提供了几种插件注册的方式
(1) 全局minx混入? (2)全局组件注册 (3)给vue对象的原型添加该插件
也就是说。插件调用的方式我们可以选择在全局组件的方式调用,也可以选择在vue原型上调用或者在minx混入里的某个时机去调用。
说了那么多,我们开始自己的图片预览组件的开发
(1) 我们在src下新建一个plugins文件夹。新建两个文件:
prevImg.vue和index.js
<template>
    <div class="prewImg-wrap" v-show="show">
        <div class="mask"></div>
            <div class="action">
                <i class="el-icon-minus ic"></i>
                <i class=" ic el-icon-plus"></i>
                <i class=" ic el-icon-refresh-right"></i>
                <i class=" ic el-icon-close" @click="close"></i>
            </div>
            <div class="img-wrap">
                <span v-if="loading" style="color:#fff">加载中...</span>
                <img v-else ref="img" :src="url" alt="" class="pic"
                    @load="handleImgLoad"
                    @error="handleImgError">
            </div>
    </div>
</template>

<script>
    export default {
        data(){
            return {
                show: false,
                loading:false,
                url:"https://s1.chu0.com/src/img/gif/30/30e530c90d674d26aa5afb35ab7eda84.gif"
            }
        },
        mounted(){
            this.loadImg()
        },
        watch:{
           url(val) {
            this.$nextTick(_ => {
                const $img = this.$refs.img;
                if (!$img.complete) {
                this.loading = true;
                }
            });
            }
        },
        methods:{
            close(){
                this.show=false
            },
            handleImgLoad(){
                this.loading=false
            },
            handleImgError(e){
                console.log("e-rror--",e)
                this.loading=false
            }
        }

    }
</script>
<style scoped>

.prewImg-wrap{
    position:fixed;
    left:0;
    top:0;
    width: 100%;
    height: 100%;;
   overflow: hidden;
   z-index:1;
}
.action{
    width: 200px;
    padding: 20px;
    position: absolute;
    right:10px;
    top:20px;
    color:#fff;
    z-index: 30;
    display: flex;
    justify-content: flex-end;
}
.ic{
    display: inline-block;
    margin-right: 10px;
}
.mask{
    background: rgba(0,0,0,0.6);
    position: absolute;
    top:0;
    left:0;
    z-index: 10;
    width: 100%;
    height: 100%;
}
.img-wrap{
   position: absolute;
    top:0;
    left:0;
    width: 100%;
    height: 100%;
    z-index:20;
    display: flex;
    justify-content: center;
    align-items: center;
}
.pic{
    max-height: 100%;
    max-width: 100%;
}

</style>
prevImg/index.js
import PrevView from "./prewImg.vue"
export default {

    install(Vue,options){
        let PrevVueConstructor= Vue.extend(PrevView)
        let instance= new PrevVueConstructor()
        document.body.appendChild(instance.$mount().$el);

        let prevObj={
            show(opts={text:"",url:""}){
                console.log("instance:",instance)
                instance.show=true
                instance.text=opts.text||""
                instance.url=opts.url||""
            },
            hide(){
                instance.show=false
                instance=null
            }
        }
        if(!Vue.$prevObj){
            Vue.$prevObj=prevObj
        }
        Vue.prototype.$prevImg = prevObj
    }

}
这个文件使我们这个插件的核心。首先我们通过vue.extend构造一个基于vue的构造函数,它类似于vue的实例。具备vue实例的所有属性和方法,和根vue实例不同的是,通过extend构造的子类只其data只能是一个函数。我们创建Vue实例时,都会有一个el选项,来指定实例的根节点,如果不写el选项,那组件就处于未挂载状态。Vue.extend?的作用,就是基于 Vue 构造器,创建一个‘ 子类 ',再配合$mount,就可以渲染组件,并且挂载到任意指定的节点上,比如body(这是单文件组件做不到的)
在show方法中,console.log("instance:",instance)能看到它的具体结构。也正是因为它。所以我们可以直接访问到我们prewImg组件中data定义的数据。比如show,我们就可以通过操作show变量来控制open和hide方法直接让prevImg组件展示或隐藏。
最后我们把这个prevImg对象挂载到vue的原型上。
(2)main.js中引入 prevImg文件夹下的index.js
import Vue from 'vue'
import App from './App.vue'
import "./directives/composImg"
Vue.config.productionTip = false
import ElementUI from 'element-ui';
import 'element-ui/lib/theme-chalk/index.css';
import prewImg from "./plugins/prewImg"

Vue.use(ElementUI);

Vue.use(prewImg)
new Vue({
  render: h => h(App),
}).$mount('#app')
(3)具体使用
    <el-button @click="openPrev">打开预览</el-button>
    <el-button @click="closePrve">关闭预览</el-button>
<script>
export default{

   data(){
    return{
        restaurants: [],
        state1: '',
        url:"https://baj-dabanjiz-conf.oss-cn-hangzhou.aliyuncs.com/intelligent-design/image/20210730/middle/9bbeb6570f7b416b1bcbcc59a1b38635.jpg",
        url2:"https://fuss10.elemecdn.com/8/27/f01c15bb73e1ef3793e64e6b7bbccjpeg.jpeg"

    }
  },
}
    methods:{

        openPrev(){
          this.$prevImg.show({url:this.url2})
        },
        closePrve(){
            this.$prevImg.hide()
        },
    }

</script>
