前言
学习如逆水行舟,不进则退。
一、环境准备
①、安装 node
node 官网下载地址:下载 | Node.js 中文网
安装过程很简单,基本一键 next 到底就行。安装之后使用 node -v 查看当前版本。

注意:本项目使用 Vite 构建工具,需要 Node.js 版本 14.18+,16+。有些模板需要依赖更高的 Node 版本才能正常运行,当你的包管理器发出警告时,请注意升级你的 Node 版本。
将 Node.js 升级到最新的稳定版本:
# 使用 nvm 安装最新稳定版 Node.js
nvm install stable
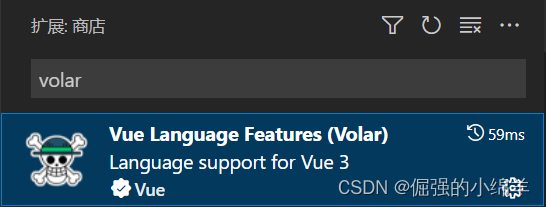
②、VSCode 安装扩展插件 Volar
注意:使用 Volar时,需禁用 Vetur
二、初始化项目
# npm
npm create vite@latest

# yarn
yarn create vite

# pnpm
pnpm create vite
然后按照终端提示操作,输入项目名称,选择模板,具体如截图所示:
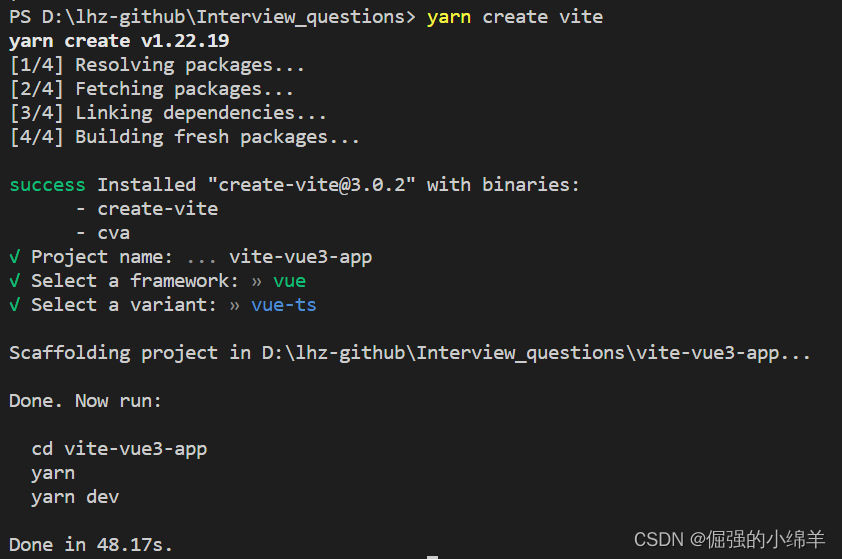
或者,你还可以通过附加的命令行选项直接指定项目名称和你想要的模板。例如,要构建一个 Vite + Vue 项目,运行:
# npm 6.x
npm create vite@latest my-vue-app --template vue-ts

# npm 7+ (需要额外的双横线)
npm create vite@latest my-vue-app -- --template vue-ts

# yarn
yarn create vite my-vue-app --template vue-ts

# pnpm
pnpm create vite my-vue-app --template vue-ts
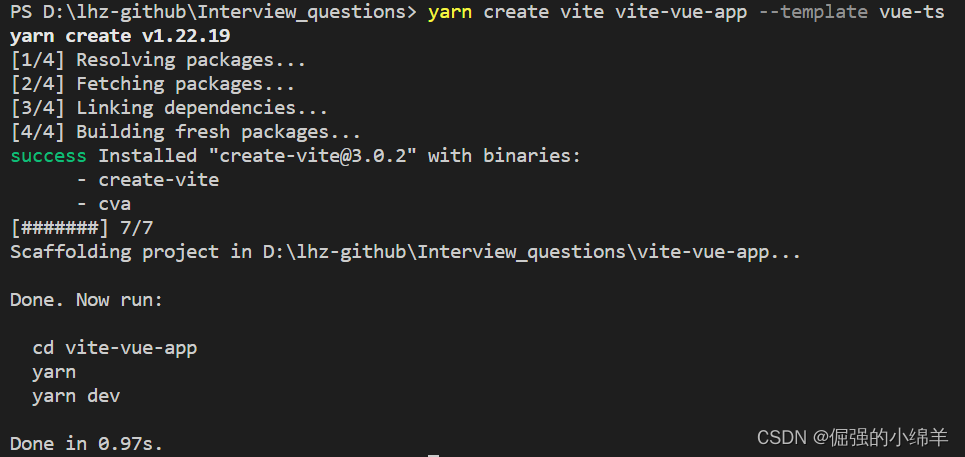
?初始化完成后,依次运行如下命令,启动项目。?
cd vite-vue-app
yarn
yarn dev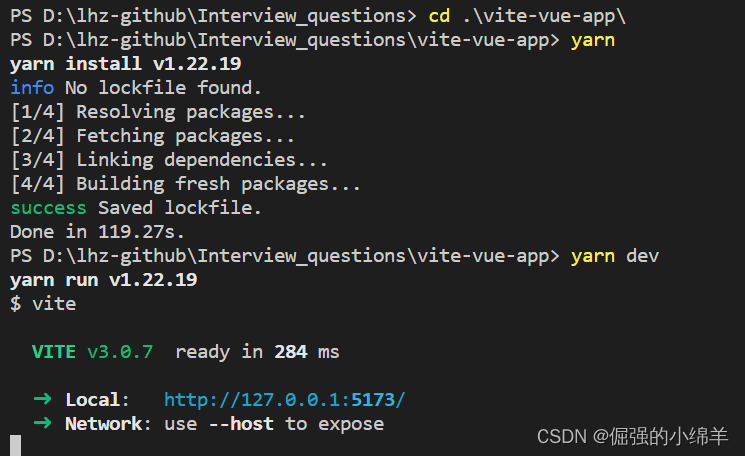
?浏览器访问?http://127.0.0.1:5173/
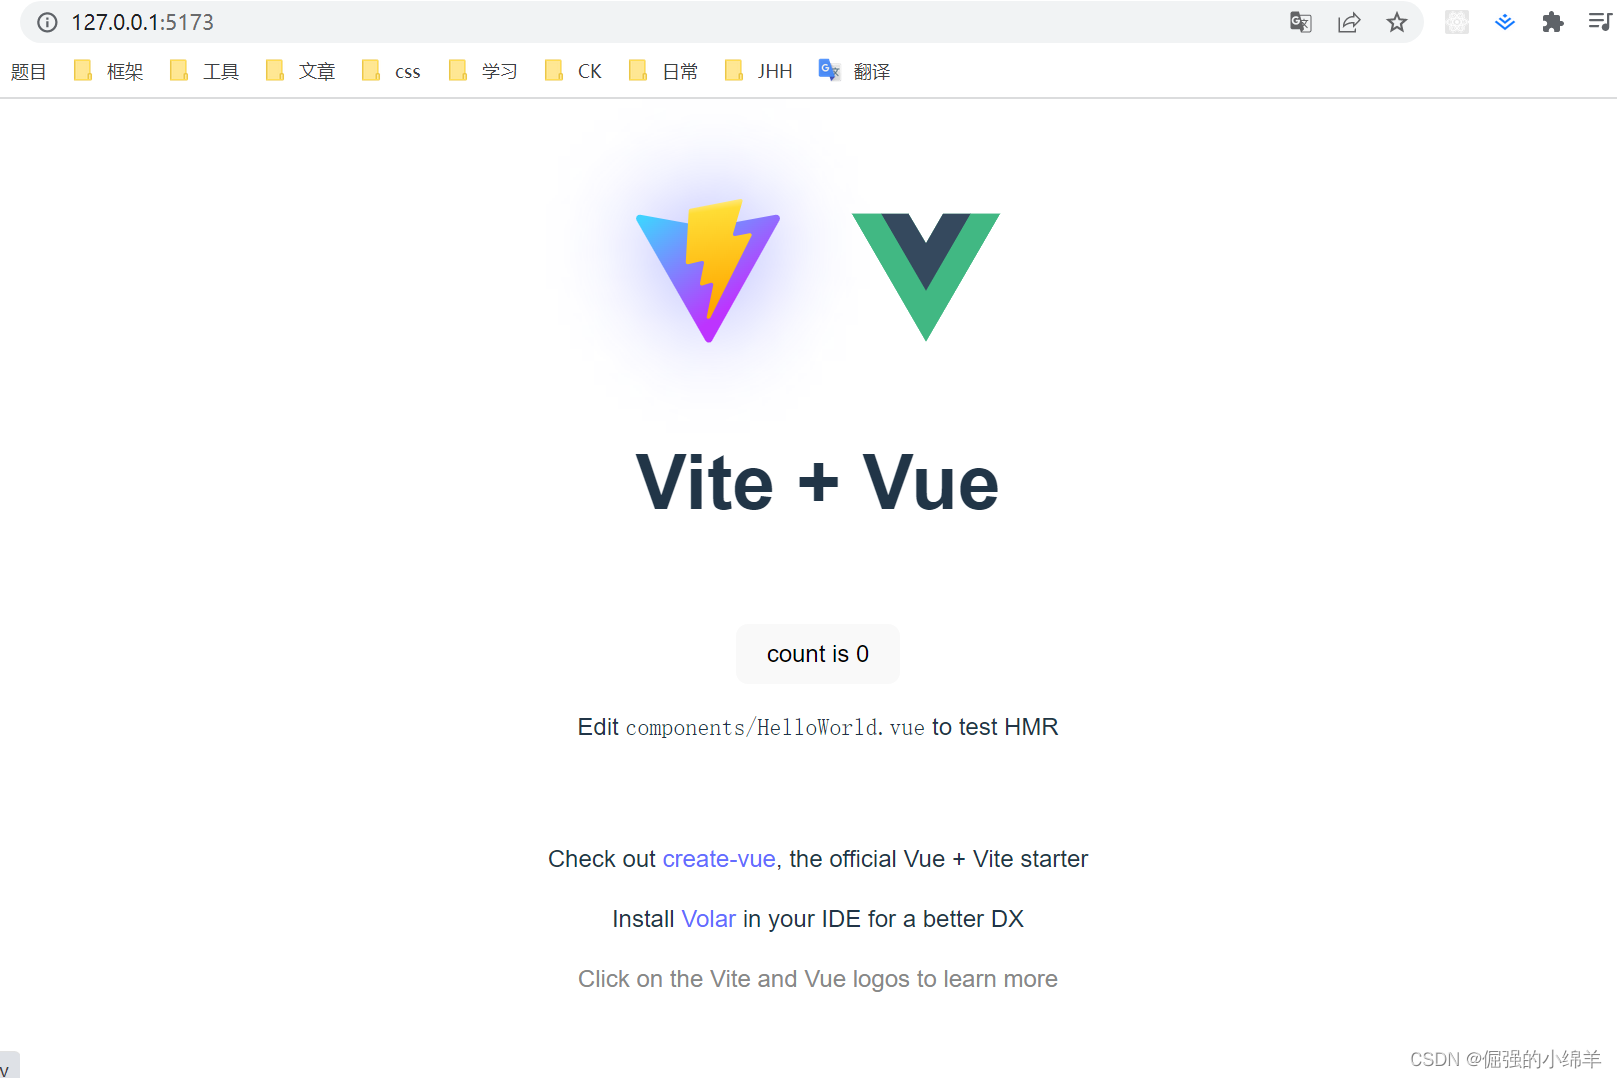
?如上图,Vite + Vue3 + TypeScript 简单的项目骨架搭建完毕。
三、修改 Vite 配置文件
①、路径别名配置,使用 @ 代替 src
a. vite 配置
关于 Vite 更多配置项及用法,请查看 Vite 官网?Configuring Vite | Vite
// vite.config.ts
import { defineConfig } from 'vite'
import vue from '@vitejs/plugin-vue'
import { resolve } from 'path'

export default defineConfig({
  plugins: [vue()],
  resolve: {
    alias: {
      '@': resolve(__dirname, 'src') // 相对路径别名配置,使用 @ 代替 src
    }
  }
})
b. 安装 @types/node
上述 vite.config.ts 文件中,编译器报错:找不到模块“path”或其相应的类型声明。

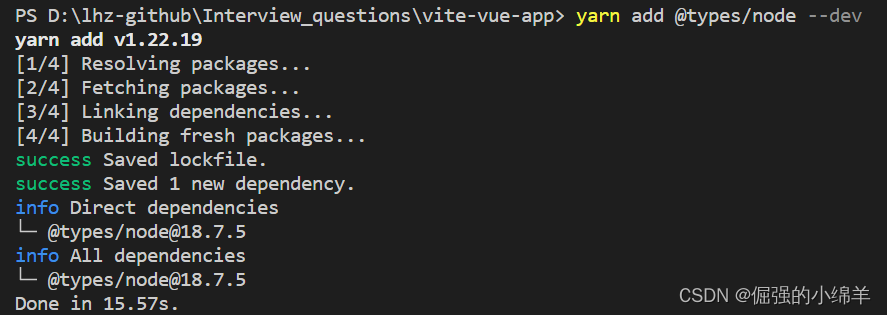
安装 Node 的TypeScript 类型描述文件即可解决报错。
# npm
npm install @types/node --save-dev

# yarn
yarn add @types/node --dev
?c.??TypeScript 编译配置
因为 TypeScript 特殊的 import 方式,需要配置允许默认导入的方式,还有路径别名的配置。
// tsconfig.json
{
  "compilerOptions": {
    "target": "ESNext",
    "useDefineForClassFields": true,
    "module": "ESNext",
    "moduleResolution": "Node",
    "strict": true,
    "jsx": "preserve",
    "sourceMap": true,
    "resolveJsonModule": true,
    "isolatedModules": true,
    "esModuleInterop": true,
    "lib": ["ESNext", "DOM"],
    "skipLibCheck": true,
    "baseUrl": "./", // 解析非相对模块的基地址,默认是当前目录
    "paths": { //路径映射,相对于baseUrl
      "@/*": ["src/*"]
    },
    "allowSyntheticDefaultImports": true // 允许默认导入
  },
  "include": ["src/**/*.ts", "src/**/*.d.ts", "src/**/*.tsx", "src/**/*.vue"],
  "references": [{ "path": "./tsconfig.node.json" }]
}
d. 别名使用
// App.vue
import HelloWorld from './components/HelloWorld.vue'

// 改为:
import HelloWorld from '@/components/HelloWorld.vue'
②、服务启动端口
// vite.config.ts
import { defineConfig } from 'vite'
import vue from '@vitejs/plugin-vue'
// 如果编辑器提示 path 模块找不到,则可以安装一下 @types/node
import { resolve } from 'path'

export default defineConfig({
  plugins: [vue()],
  resolve: {
    alias: {
      '@': resolve(__dirname, 'src') // 相对路径别名配置,使用 @ 代替 src
    }
  },
  base: './', // 设置打包路径
  server: {
    port: 8080, // 设置服务启动端口号
    open: true, // 设置服务启动时是否自动打开浏览器
    cors: true // 允许跨域
  }
})
③、环境变量
a. env 配置文件
项目根目录分别添加开发、测试和生成环境配置。
- 开发环境配置:.env.development
# 开发环境
NODE_ENV = 'development'

VITE_API_BASE_URL=''
VITE_PUBLIC_PATH='./'- ?测试环境配置:.env.test
# 测试环境
NODE_ENV = "test"

VITE_API_BASE_URL=''
VITE_PUBLIC_PATH='/'- ?生产环境配置:.env.production
# 生产环境
NODE_ENV = "production"

VITE_API_BASE_URL=''
VITE_PUBLIC_PATH='/'
?b. 环境变量智能提示
添加环境变量类型声明
// src/vite-env.d.ts
// 环境变量 TypeScript的智能提示
interface ImportMetaEnv {
  VITE_API_BASE_URL: string
  VITE_PUBLIC_PATH: string
}

interface ImportMeta {
  readonly env: ImportMetaEnv
}
然后在使用自定义环境变量时就会有智能提示,如下:

注意:在 vite.config.ts 中读取环境变量,与上面写法有些出入。
// vite.config.ts
import { ConfigEnv, loadEnv, UserConfig } from 'vite'
import vue from '@vitejs/plugin-vue'
// 如果编辑器提示 path 模块找不到,则可以安装一下 @types/node
import { resolve } from 'path'

export default ({ command, mode }: ConfigEnv): UserConfig => {
  // 获取 .env 环境配置文件
  const root = process.cwd()
  const env = loadEnv(mode, root)

  return {
    plugins: [vue()],
    resolve: {
      alias: {
        '@': resolve(__dirname, 'src'), // 相对路径别名配置,使用 @ 代替 src
      },
    },
    base: env.VITE_PUBLIC_PATH, // 设置打包路径
    server: {
      port: 8080, // 设置服务启动端口号
      open: true, // 设置服务启动时是否自动打开浏览器
      cors: true, // 允许跨域
    },
  }
}
④、浏览器跨域处理
vite 配置反向代理解决跨域。
// vite.config.ts
import { ConfigEnv, loadEnv, UserConfig } from 'vite'
import vue from '@vitejs/plugin-vue'

export default ({ command, mode }: ConfigEnv): UserConfig => {
  // 获取 .env 环境配置文件
  const root = process.cwd()
  const env = loadEnv(mode, root)

  return {
    server: {
      ...
      // 设置代理,根据我们项目实际情况配置
      proxy: {
        [env.VITE_API_BASE_URL]: {
          target: 'http://xxx.xxx.xxx.xxx:8000',
          changeOrigin: true,
          rewrite: path => path.replace(new RegExp('^' + env.VITE_API_BASE_URL), '')
        }
      }
    },
  }
}
四、集成 UI 框架 Element Plus
①、安装 Element Plus 依赖
# NPM
$ npm install element-plus --save

# Yarn
$ yarn add element-plus

# pnpm
$ pnpm install element-plus
②、完整引入
// src/main.ts
import { createApp } from 'vue'
import ElementPlus from 'element-plus'
import 'element-plus/dist/index.css'
import App from './App.vue'

const app = createApp(App)

app.use(ElementPlus)
app.mount('#app')
全局组件类型声明
// tsconfig.json
{
  "compilerOptions": {
    // ...
    "types": ["element-plus/global"]
  }
}
③、按需引入(本项目使用此方式)
自动导入要使用的组件,首先需求安装 unplugin-vue-components 和 unplugin-auto-import 这两个插件
# npm
npm install -D unplugin-vue-components unplugin-auto-import

# yarn
yarn add unplugin-vue-components unplugin-auto-import --dev
然后修改 Vite 的配置文件
// vite.config.ts
import { ConfigEnv, loadEnv, UserConfig } from 'vite'
import vue from '@vitejs/plugin-vue'

import AutoImport from 'unplugin-auto-import/vite'
import Components from 'unplugin-vue-components/vite'
import { ElementPlusResolver } from 'unplugin-vue-components/resolvers'

export default ({ command, mode }: ConfigEnv): UserConfig => {
  // ...
  return {
    plugins: [
      vue(),
      AutoImport({
        resolvers: [ElementPlusResolver()],
      }),
      Components({
        resolvers: [ElementPlusResolver()],
      }),
    ],
    ...
  }
}
配置完成后,项目中会自动新增两个文件。之后我们不需要全局注册 Element Plus 的组件,也不需要引入样式,直接可以使用,插件会自动帮我们完成相应的操作。
![]()
?④、使用
<template>
  <div>
    <el-row class="mb-4">
      <el-button>Default</el-button>
      <el-button type="primary">Primary</el-button>
      <el-button type="success">Success</el-button>
      <el-button type="info">Info</el-button>
      <el-button type="warning">Warning</el-button>
      <el-button type="danger">Danger</el-button>
    </el-row>
  </div>
</template>
components.d.ts 文件自动引入组件。?
// generated by unplugin-vue-components
// We suggest you to commit this file into source control
// Read more: https://github.com/vuejs/core/pull/3399
import '@vue/runtime-core'

export {}

declare module '@vue/runtime-core' {
  export interface GlobalComponents {
    ElButton: typeof import('element-plus/es')['ElButton']
    ElRow: typeof import('element-plus/es')['ElRow']
  }
}
页面效果如下:

五、SVG 图标
Element Plus 图标库有时满足不了实际开发需求,可以引用和使用第三方图标库,例如 iconfont,这里介绍下通过?vite-plugin-svg-icons 插件如何使用第三方图标库。
①、安装 vite-plugin-svg-icons
# yarn
yarn add vite-plugin-svg-icons -D

# npm
npm i vite-plugin-svg-icons -D

# pnpm
pnpm install vite-plugin-svg-icons -D
②、vite.config.ts 中配置插件
// vite.config.ts
import { resolve } from 'path'
import { createSvgIconsPlugin } from 'vite-plugin-svg-icons'

export default ({ command, mode }: ConfigEnv): UserConfig => {
  const root = process.cwd()

  return {
    plugins: [
      createSvgIconsPlugin({
        // 指定需要缓存的图标文件夹
        iconDirs: [resolve(root, 'src/assets/icons')],
        // 指定symbolId格式
        symbolId: 'icon-[dir]-[name]',
      })
    ],
  }
}
③、在 main.ts 中引入注册脚本
// src/main.ts
import 'virtual:svg-icons-register'
④、新建图标文件夹
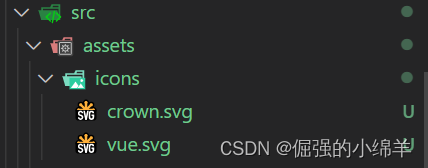
创建 src/assets/icons 文件夹,存放 svg 图标
?
⑤、TypeScript 支持
// tsconfig.json
{
  "compilerOptions": {
    "types": ["vite-plugin-svg-icons/client"]
  }
}
⑥、封装组件
<!-- src\components\SvgIcon.vue -->
<template>
  <svg aria-hidden="true" class="svg-icon">
    <use :xlink:href="symbolId" :fill="color" />
  </svg>
</template>

<script lang="ts" setup>
import { computed } from 'vue'

const props = defineProps({
  prefix: {
    type: String,
    default: 'icon',
  },
  iconClass: {
    type: String,
    required: true,
  },
  color: {
    type: String,
    default: '',
  },
})
const symbolId = computed(() => `#${props.prefix}-${props.iconClass}`)
</script>

<style lang="scss" scoped>
.svg-icon {
  width: 1em;
  height: 1em;
  vertical-align: -0.15em;
  overflow: hidden;
  fill: currentColor;
}
</style>
⑦、使用示例
<template>
  <div>
    首页
    <SvgIcon icon-class="vue"></SvgIcon>
    <SvgIcon icon-class="crown"></SvgIcon>
  </div>
</template>
效果如下图所示:?

六、集成 Vue Router
①、安装 vue-router
# npm
npm install vue-router@next

# yarn
yarn add vue-router@next
②、新建 src/router/index.ts 文件
// src/router/index.ts
import { createRouter, createWebHistory, RouteRecordRaw } from 'vue-router'

const routes: Array<RouteRecordRaw> = [
  {
    path: '/',
    name: 'home',
    component: () => import('@/views/layout/index.vue')
  }
]

const router = createRouter({
  history: createWebHistory(),
  routes
})

export default router
③、在 main.ts 文件中挂载路由配置
// src/main.ts
import { createApp } from 'vue'
import './style.css'
import App from './App.vue'
import router from '@/router/index'

const app = createApp(App)

app.use(router)
app.mount('#app')
七、集成 Pinia
Pinia 是 Vue.js 的轻量级状态管理库,Vuex 的替代方案。
①、安装 Pinia
# yarn
yarn add pinia

# npm
npm install pinia
②、在 main.ts 中挂载
// src/main.ts

// 安装后导入
import { createPinia } from 'pinia'

// 创建 pinia 实例
const pinia = createPinia()

// 挂载
app.use(pinia)
③、pinia 模块封装
// src/store/modules/user.ts
import { defineStore } from 'pinia'

const useUserStore = defineStore({
  id: 'user',
  state: () => ({
    count: 0,
  }),
  getters: {
    double: (state) => state.count * 2,
  },
  actions: {
    increment() {
      this.count++
    },
  },
})

export default useUserStore
// src/store/index.ts
import useUserStore from './modules/user'
const useStore = () => {
return {
user: useUserStore()
}
}
export default useStore④、使用示例
<script setup lang="ts">
import useStore from '@/store'

const { user } = useStore()
</script>

<template>
  <div>count: {{ user.count }}</div>
  <div>double: {{ user.double }}</div>
  <el-button @click="user.increment">add+</el-button>
</template>

<style scoped></style>
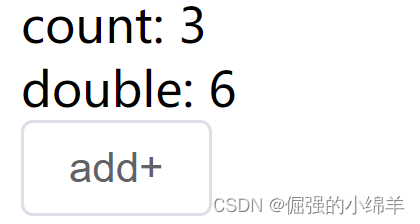
效果如下图:?
八、集成 Axios
①、安装 axios
# npm
npm install axios

# yarn
yarn add axios
②、axios 封装
在 src 目录下创建 utils 目录存储日常工具函数等,axios 作为 HTTP 工具,我们创建 http.ts 作为 axios 配置文件。
// src/utils/http.ts
import { useRouter } from 'vue-router'
import Axios, { AxiosRequestConfig, AxiosResponse, AxiosError } from 'axios'
import { ResponseData } from '@/types/ResponseData'
import { ElMessage } from 'element-plus'
const router = useRouter()

// 创建 axios 实例
const axios = Axios.create({
  // API 请求的默认前缀
  baseURL: import.meta.env.VITE_API_BASE_URL,
  // 请求超时时间
  timeout: 20000,
  headers: { 'Content-Type': 'application/json;charset=utf-8' }
})

// 前置拦截器 发起请求之前的拦截
axios.interceptors.request.use(
  async (config: AxiosRequestConfig) => {
    return config
  },
  (error) => {
    return Promise.reject(error)
  }
)

/**
 * 异常拦截处理器
 * @param {*} error
 */
const errorHandler = (error: AxiosError) => {
  // 判断是否是响应错误信息
  if (error.response) {
    if (error.response.status == 401) {
      ElMessage.error('登录已过期,请您重新登录!')
      localStorage.clear()
      router.push('/login')
    } else if (error.response.status == 405) {
      ElMessage.error('您没有此功能的操作权限!')
    }
  }
  return Promise.reject(error)
}

// 后置拦截器 获取到响应时的拦截
axios.interceptors.response.use((response: AxiosResponse<ResponseData>) => {
  return response.data
}, errorHandler)

export default axios

/**
 * GET 请求
 * @param url
 * @param config
 * @returns
 */
export const get = <T = any, R = ResponseData<T>>(
  url: string,
  config?: AxiosRequestConfig
): Promise<R> => {
  return axios.get(url, config)
}

/**
 * POST 请求
 * @param url
 * @param data
 * @param config
 * @returns
 */
export const post = <T = any, R = ResponseData<T>>(
  url: string,
  data?: any,
  config?: AxiosRequestConfig
): Promise<R> => {
  return axios.post(url, data, config)
}

/**
 * delete 删除
 * @param url
 * @param config
 * @returns
 */
export const deleteHttp = <T = any, R = ResponseData<T>>(
  url: string,
  config?: AxiosRequestConfig
): Promise<R> => {
  return axios.delete(url, config)
}

/**
 * put
 * @param url
 * @param data
 * @param config
 * @returns
 */
export const put = <T = any, R = ResponseData<T>>(
  url: string,
  data?: any,
  config?: AxiosRequestConfig
): Promise<R> => {
  return axios.put(url, data, config)
}
③、创建 ts 文件,传入泛型 T 声明返回数据类型
// src/types/ResponseData.ts
export interface ResponseData<T = any> {
  code: number
  message: string
  data: T
}
④、API 封装
新建文件?src/api/auth/login.ts,定义登录接口。
// src/api/auth/login.ts
import { post } from '@/utils/http'
import { TokenData, LoginParams } from '@/types/Auth'

// 登录服务接口
export const ServeLogin = (data: LoginParams) => {
  return post<TokenData>('/api/v1/auth/login', data)
}
新建文件?src/types/Auth.ts,定义登录接口入参类型及返回数据类型。
// src/types/Auth.ts
export interface TokenData {
  access_token: string
  expires_in: number
  type: string
}

export interface LoginParams {
  username: string
  password: string
}
⑤、API 调用
<script setup lang="ts">
import { ServeLogin } from '@/api/auth/login';

const login = async () => {
  const res = await ServeLogin({
    username: 'Jenny',
    password: '******'
  })
  console.log(res)
}

login()
</script>
九、集成 CSS 预编译器 Sass
①、安装 sass
# npm
npm install --save-dev sass

# yarn
yarn add sass -D
②、使用最新版本的 Reset CSS
新建 src/assets/styles/reset.scss?文件,将最新版本的 reset css 复制过来。
最新版本地址:The New CSS Reset | the-new-css-reset
/***
    The new CSS reset - version 1.7.3 (last updated 7.8.2022)
    GitHub page: https://github.com/elad2412/the-new-css-reset
***/

/*
    Remove all the styles of the "User-Agent-Stylesheet", except for the 'display' property
    - The "symbol *" part is to solve Firefox SVG sprite bug
 */
*:where(:not(html, iframe, canvas, img, svg, video, audio):not(svg *, symbol
      *)) {
  all: unset;
  display: revert;
}

/* Preferred box-sizing value */
*,
*::before,
*::after {
  box-sizing: border-box;
}

/* Reapply the pointer cursor for anchor tags */
a,
button {
  cursor: revert;
}

/* Remove list styles (bullets/numbers) */
ol,
ul,
menu {
  list-style: none;
}

/* For images to not be able to exceed their container */
img {
  max-width: 100%;
}

/* removes spacing between cells in tables */
table {
  border-collapse: collapse;
}

/* Safari - solving issue when using user-select:none on the <body> text input doesn't working */
input,
textarea {
  -webkit-user-select: auto;
}

/* revert the 'white-space' property for textarea elements on Safari */
textarea {
  white-space: revert;
}

/* minimum style to allow to style meter element */
meter {
  -webkit-appearance: revert;
  appearance: revert;
}

/* reset default text opacity of input placeholder */
::placeholder {
  color: unset;
}

/* fix the feature of 'hidden' attribute.
 display:revert; revert to element instead of attribute */
:where([hidden]) {
  display: none;
}

/* revert for bug in Chromium browsers
  - fix for the content editable attribute will work properly.
  - webkit-user-select: auto; added for Safari in case of using user-select:none on wrapper element*/
:where([contenteditable]:not([contenteditable='false'])) {
  -moz-user-modify: read-write;
  -webkit-user-modify: read-write;
  overflow-wrap: break-word;
  -webkit-line-break: after-white-space;
  -webkit-user-select: auto;
}

/* apply back the draggable feature - exist only in Chromium and Safari */
:where([draggable='true']) {
  -webkit-user-drag: element;
}
在 main.ts 文件中引入
import '@/assets/styles/reset.scss'③、设置 scss 全局变量
新建文件 /src/assets/styles/variables.scss
$whiteColor: #fff;
$blackColor: #000;
$redColor: red;
$borderColor: #f5f5f5;
$backgroundColor: #eff0f1;
配置 vite.config.ts 文件
// vite.config.ts
export default ({ command, mode }: ConfigEnv): UserConfig => {
  return {
    css: {
      // 使用 scss 全局变量
      preprocessorOptions: {
        scss: {
          additionalData: '@import "src/assets/styles/variables.scss";'
        }
      }
    },
    plugins: [
      ...
    ],
  }
}
使用全局变量
<template>
  <h1 class="title">首页</h1>
</template>

<style scoped lang="scss">
.title {
  color: $redColor;
}
</style>
十、代码规范
篇幅太长了,详情请看另一篇博文。。。
漫长更新中。。。
