路由跳转
后端路由:对于前端的网络请求,不同的pathname,去执行后端的不同业务
前端路由:不同的网址对应各自的页面
vue的前端路由:SPA应用要做出路由效果,就得判断当前网址,然后切换组件
vue-router就是专门做切换组件的功能,它是一个单独的技术,依赖vue,就像jQuery和dom操作一样
标签 router-link 的功能跟 a 标签的功能相同,都是可以跳转页面的,router-link 就相当于是a标签
router-view:相当于 路由网址匹配到的组件 会渲染到当前组件的这个标签上
router-link:相当于a标签,给我们提供跳转到某个路由的功能,如果没有匹配到路由就会跳转失败
我们这里的路由跳转就会用到 router-link
首先我们要下载好,然后在Vue里面引入使用
import Vue from 'vue'
import App from './App.vue'
//引入路由:主要功能就是配置路由的规则(路由模式 注册的路由地址-网址  组件原型链中绑定路由对象和路由信息)
import router from './router'

new Vue({
  //挂载路由到整个项目中:主要功能就是监听地址栏的改变 然后修改项目中的router-view组件应该加载的组件
  router,
  render: h => h(App)
}).$mount('#app')
然后在建一个js文件来注册路由
import Vue from 'vue'
//引入路由插件
import VueRouter from 'vue-router'
import Home from '../views/home/index.vue'
Vue.use(VueRouter)
const routes = [
  {
    path: '/',
    name: 'home',
    component: Home
  },
  {
    path: '/login',
    name: 'login',
    component: () => import('../views/login/index.vue')
  },
  {
    path: '/info',
    name: 'info',
    component: () => import('../views/info/index.vue')
  }
]

//配置路由规则
const router = new VueRouter({
  mode: 'history',
  routes
})
console.log(router)
export default router
最后我们就可以来写页面啦
<template>
	<div>
		<div>home</div>
		// 引入组件
		<Box1></Box1>
		//  a标签跳转链接
		<a href="/login">go login a标签做的</a> <br>
		// 路由跳转写法一
		<router-link to="/login">go info router-link做的</router-link><br>
		// 路由跳转写法二
		<router-link :to="{path:'/info'}">go info</router-link><br>
		// 路由跳转写法三
		<button @click="goinfo">js  go  info</button>
	</div>
</template>

<script>
	import Box from "./Box.vue"
	export default {
		components: {
			Box
		},
		methods: {
			goinfo() {
				this.$router.push({path:"/login"})
			}
		},
	}
</script>

<style>
</style>
login页面和info页面就自己去写一下,这里就不展示这两个页面了

query传参和动态路由传参
注册路由
import Vue from 'vue'
import VueRouter from 'vue-router'
import Home from '../views/home/index.vue'
Vue.use(VueRouter)
//注册路由
const routes = [
  {
    path: '/',
    name: 'home',
    component: Home
  },
  {
    path: '/info',
    name: 'info',
    component: () => import('../views/info/index.vue')
  },
  {
	//query传参是吧参数放在querystring字段中
	path:"/news/:id",
	name:"news",
	component:()=>import("../views/news/index.vue")
  }
]
const router = new VueRouter({
  mode: 'history',
  routes
})
console.log(router)
export default router
路由跳转
<template>
  <div>
    <h2>home</h2>
    <div v-for="el in arr" :key="el.id">
      <p>{{ el.title }}</p>
      <button @click="goinfo(el.id)">go info push</button><br />
	  <!-- 有没有?后面的没有影响,?后面的只是起一个传参的作用 -->
      <router-link to="/info?id=123456&pwd=abc123">go info to</router-link><br />
	  <router-link to="/info">go info to</router-link><br />

      <router-link :to="{ path: '/info', query: { a: 1000, b: 200 } }">go info</router-link><br />
    </div>
  </div>
</template>

<script>
export default {
  data() {
    return {
      arr: [
        { id: 1231, title: "新闻1" },
        { id: 1232, title: "新闻2" },
        { id: 1233, title: "新闻3" },
        { id: 1234, title: "新闻4" },
      ],
    };
  },
  methods: {
    goinfo(id) {
	  console.log(id, 1111111111);
	  // 模板字符串,拼接上新闻id
      this.$router.push({path:"/info",query:{id:123457,age:20,name:"karen"}})
    },
  },
};
</script>

<style>
</style>
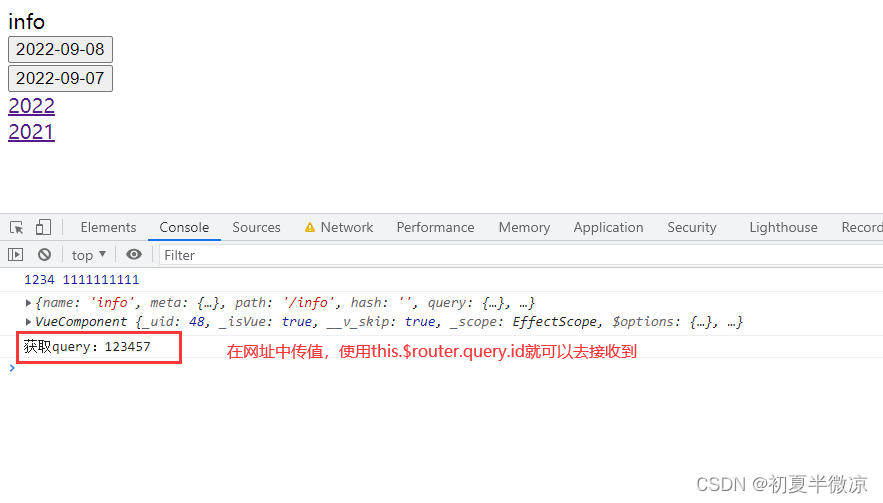
<template>
	<div>
		info <br>
		<button @click="go1(20220908)">2022-09-08</button><br>
		<button @click="go1(20220907)">2022-09-07</button><br>
		<router-link :to="{path:'/news/20220907'}">2022</router-link><br>
		<router-link to="/news/20220907?id=111&pwd=123">2021</router-link>
	</div>
</template>

<script>
	export default {
		mounted(){
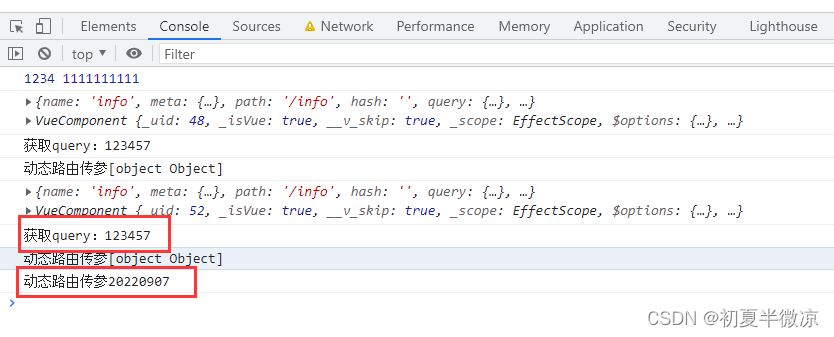
			console.log(this.$route,this)

			console.log("获取query:"+this.$route.query.id);
		},
		methods:{
			go1(arg){
				this.$router.push({name:"news",params:{id:arg}})
			}
		}
	}
</script>

<style>
</style>
子路由
import Vue from 'vue'
import VueRouter from 'vue-router'
Vue.use(VueRouter)
const routes = [{
    path: '/',
    name: 'home',
    component: () => import("../views/home/index.vue")
  },
  {
    path: '/a',
    name: 'a',
    component: () => import("../views/a/index.vue"),
    redirect: "/a/a3", //用输入的是/a路由  帮他重定向到 /a/a1
    children: [{
        path: "a1",
        name: "a1",
        component: () => import("../views/a/views/a1/index.vue"),
        children: [{
          path: "a11",
          name: "a11",
          component: () => import("../views/a/views/a1/a11/index.vue")
        }]
      },
      {
        path: "a2",
        name: "a2",
        component: () => import("../views/a/views/a2/index.vue")
      },
      {
        path: "/a/a3",
        name: "a3",
        component: () => import("../views/a/views/a3/index.vue")
      },
      {
        path: "/*",
        component: () => import("../views/a/views/a1/index.vue")
      }
    ]
  },
  {
    path: '/*',
    component: () => import("../views/err/index.vue"),
  }
]
const router = new VueRouter({
  mode: 'history',
  routes
})
console.log(router)
export default router
<template>
  <div>
    <h2>a1页面</h2>
    <button @click="fn">a3</button>
    <router-view></router-view>
    <button @click="fn1">a1子页面</button>
    <br /><br />
  </div>
</template>

<script>
export default {
  methods: {
    fn() {
      // this.$router.push("/a/a3")
      this.$router.push("a3");
    },
    fn1() {
      this.$router.push("/a/a1/a11");
    },
  },
};
</script>

<style>
</style>
<template>
	<div>
		<h1>a页面</h1>
		<router-view></router-view>
	</div>
</template>

<script>
	export default {

	}
</script>

<style>
</style>
<template>
	<div>
		<h4>a11页面</h4>
	</div>
</template>

<script>
	export default {
		methods:{

		}
	}
</script>

<style>
</style>
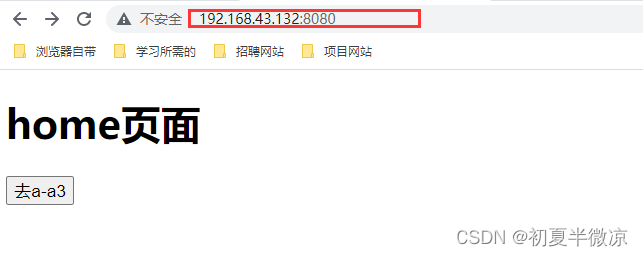
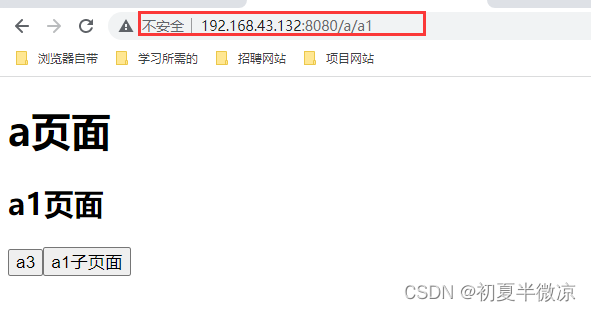
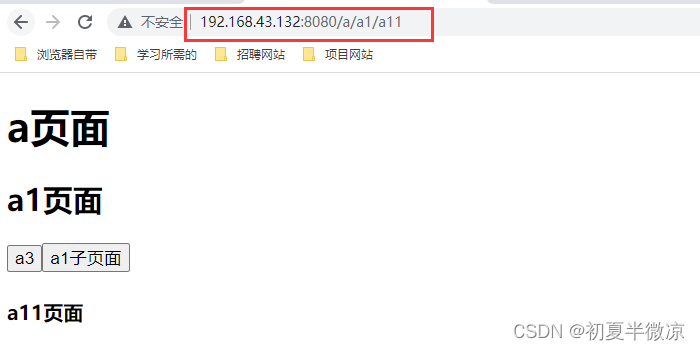
这就是子路由,一层一层的套下来,子路由里面还可以嵌套子路由
路由模式–hash&history
hash模式
在浏览器中符号“#”,#以及#后面的字符称之为hash,用window.location.hash读取
特点:hash虽然在URL中,但不被包括在HTTP请求中;用来指导浏览器动作,对服务端安全无用,hash不会重加载页面
hash 模式下,仅 hash 符号之前的内容会被包含在请求中,因此对于后端来说,即使没有做到对路由的全覆盖,也不会返回 404 错误。
history模式
history采用HTML5的新特性;且提供了两个新方法:pushState(),replaceState()可以对浏览器历史记录栈进行修改,以及popState事件的监听到状态变更
history 模式下,前端的 URL 必须和实际向后端发起请求的 URL 一致,后端如果缺少对 /items/id 的路由处理,将返回 404 错误
Vue-Router 官网上是这样说的:“不过这种模式要玩好,还需要后台配置支持……所以呢,你要在服务端增加一个覆盖所有情况的候选资源:如果 URL 匹配不到任何静态资源,则应该返回同一个 index.html 页面,这个页面就是你 app 依赖的页面
VueRouter router route三者区别区别
VueRouter是一个nodejs识别的模块包
route是路由匹配时,携带了一些信息的对象,包括path,params,hash,query等等信息
router是路由实例对象,包含了路由的跳转方法,钩子函数等等