1,当前代码是本人亲自一行行敲出来的哦
<template>
    <div style="margin-left: 28%;">
        <!-- 画布对象 -->
        <div ref="grapDiv" style="width:800px;height:400px;border: 2px dotted #ddd; border-radius: 10px;" v-show="!isCommit">
            <canvas ref="grapCvs" id="container" @mousedown.stop="mousedown" @mousemove.stop="mousemove"/>
        </div>

        <!-- 设置面板 -->
        <div ref="setControlDiv"
            style="width:280px;height:200px;background-color:#474747;border:1px solid #ddd;border-radius: 10px;margin-top: -203px;margin-left: 1px;position:absolute;"
            v-show="ifSetController">
            <div style="width:100%;height:30%;margin-top: 10px;">
                <span style="width:100%;height:30%;">
                    <label style="float:left;color:white;margin-left: 14px;margin-top: 15px;">字体大小</label>
                    <label style="float:right;color:white;margin-right: 14px;margin-top: 15px;">{{fontSize}}</label>
                </span>
                <el-div style="width:100%;height:20%;margin-top: 40px;">
                    <el-slider v-model="fontSize" style="width:89%;margin-top:20px;margin-left:17px;" :min="1" :max="10" />
                </el-div>
            </div>
            <div style="width:100%;height:45%;margin-top: 15px;padding: 7px;">
                <li @click="setImgColor" class="" v-for="(item, index) in fontColorArray" :key="index" :style="'list-style: none;width: 38px;height: 38px;float: left;background: ' + item"></li>
            </div>
        </div>
        <div ref="setDiv" v-show="!isCommit && ifSet">
            <img title="画笔设置" src="../assets/brush.png" @click="setGraph" style="margin-top:4px;float: left;margin-left: 15px;cursor: pointer;" />
        </div>

        <!-- 提交的画布对象 -->
        <div style="width:800px;height:400px;border:2px solid green; border-radius: 10px;" v-show="isCommit">
            <img :src="content">
        </div>

        <!-- 操作按钮 -->
        <div style="width:800px;padding-top: 10px;">
            <el-button @click="set()" v-show="!isCommit">画笔设置</el-button>
            <el-button @click="clear()" v-show="!isCommit">清除</el-button>
            <el-button type="primary" @click="commit()" v-show="!isCommit">提交</el-button>
            <el-button @click="goback()" v-show="isCommit">返回</el-button>
        </div>
    </div>
</template>

<style>
  /* 选中的li改变样式 */
  .activeteLi {
    box-shadow: 0 0 3px rgb(0 0 0 / 95%);
    transform: scale(1.2);
  }
</style>

<script>
import { ElMessage, ElMessageBox } from 'element-plus'
export default {
    data() {
        return {
            canvas : null,       // cvs对象
            graphics: null,      // 画笔对象
            isDrawing : false,   // 是否可以进行画
            curMouseY : null,    // 当前鼠标在屏幕中的Y轴坐标
            curMouseX: null,     // 当前鼠标在屏幕中的X轴坐标
            offsetY: null,       // cvs在屏幕中的Y轴偏移量
            xoffsetX: null,      // cvs在屏幕中的X轴偏移量
            cvsWidth: 800,       // cvs的宽度
            cvsHeight: 400,      // cvs的高度
            isCommit: false,     // 画笔是否提交
            content: null,       // 画布提交的内容
            ifGraph: false,      // 是否画过(提交的用于检验是否有签字过)
            ifSet: false,        // 是否打开设置面板
            ifSetController: false,  // 是否打开画笔设置面板
            fontSize: 1,          // 字体大小
            fontColorArray: ["#F59999", "#E86262", "#AA4446", "#6B4849",
                "#34231E", "#435772", "#2DA4A8", "#EFDCD3", "#FEAA3A",
                "#FD6041", "#CF2257", "#404040", "#92BEE2", "#2286D8"],  //画笔可选的颜色
            fontColor: "#000000"  // 画笔默认颜色
        }
    },
    methods: {
        // 颜色点击事件
        setImgColor(curIndex) {
            // 先将所有的li标签设置class为空
            let liArray = curIndex.currentTarget.parentElement.children;
            for (let child of liArray) {
                child.className = ""
            }

            // 在将当前li,添加指定的class
            curIndex.currentTarget.className = "activeteLi"
            this.fontColor = curIndex.currentTarget.style.background;
        },
        // 设置样式栏
        setGraph() {
            // 打开关闭设置面板
            this.ifSetController = this.ifSetController ? false : true
        },
        // 鼠标点击按下事件
        mousedown(e) {
            // 鼠标点击的时候设置,变量标志可以画了
            this.isDrawing = true;
            // 获取当前鼠标的位置(鼠标在屏幕中的坐标减去容器在屏幕中的偏移量即可得到鼠标当前的坐标)
            this.curMouseX = e.pageX - this.offsetX;
            this.curMouseY = e.pageY - this.offsetY;
            // 从当前鼠标的位置开始画
            this.graphics.beginPath()
            this.graphics.moveTo(this.curMouseX, this.curMouseY);

            // 鼠标离开,则关闭控制面板
            this.ifSetController = false
            this.ifSet = false
            this.$refs.grapDiv.style.cssText = "width:800px;height:400px;border: 2px dotted #ddd; border-radius: 10px;"
        },
        // 鼠标移动事件
        mousemove(e) {
            // 可以画的标志为true,代表可以进行画了
            if (this.isDrawing) {
                // 设置画笔属性
                this.graphics.strokeStyle = this.fontColor;
                this.graphics.lineWidth = this.fontSize;

                // 设置从哪里开始画
                this.curMouseX = e.pageX - this.offsetX
                this.curMouseY = e.pageY - this.offsetY
                // 获取当前鼠标的位置(鼠标在屏幕中的坐标减去容器在屏幕中的偏移量即可得到鼠标当前的坐标)
                this.graphics.lineTo(this.curMouseX, this.curMouseY)
                this.graphics.stroke()
                // 设置当前已经开始绘画了
                this.ifGraph = true
            }
        },
        // 打开设置面板
        set() {
            // 关闭设置面板
            if (this.ifSet) {
                this.ifSetController= false
                this.ifSet = false
                this.$refs.grapDiv.style.cssText = "width:800px;height:400px;border: 2px dotted #ddd; border-radius: 10px;"
            // 打开设置面板
            } else {
                this.ifSet = true
                this.$refs.grapDiv.style.cssText = "width:800px;height:400px;border: 2px dotted #ddd; border-radius: 10px 10px 0px 0px;"
                this.$refs.setDiv.style.cssText = "width:800px;height:45px;border: 2px dotted #ddd;border-top:none;border-radius:0px 0px 10px 10px;"
            }
        },
        // 清除画布
        clear() {
            this.ifGraph = false
            this.$refs.grapCvs.width = this.$refs.grapCvs.width
        },
        // 提交画布
        commit() {
            // 内容过滤
            if (!this.ifGraph) {
                ElMessage({ message: "没有可提交的内容!", type: 'error', duration:2000 })
                return
            }

            // 提交画布内容
            ElMessageBox({
                title: '操作提示',          //MessageBox 标题
                message: '确定提交?',       //MessageBox 消息正文内容
                confirmButtonText: '确定',  //确定按钮的文本内容
                cancelButtonText: '取消',   //取消按钮的文本内容
                showCancelButton: true,    //是否显示取消按钮
                closeOnClickModal: false,  //是否可通过点击遮罩关闭
                type: 'warning',           //消息类型,用于显示图标
            }).then(() => {
                this.isCommit = true
                this.ifSetController = false
                this.ifSet = false
                this.content = this.canvas.toDataURL()
                ElMessage({ message: "提交成功!", type: 'success', duration: 1000 })
            });
        },
        // 返回
        goback() {
            this.ifGraph = false
            this.$refs.grapCvs.width = this.$refs.grapCvs.width
            this.isCommit = false
        }
    },
    mounted() {
        // 获取cvs的容器
        var canvas = document.getElementById("container");
        canvas.width = this.cvsWidth;            // 设置cvs的宽度
        canvas.height = this.cvsHeight;          // 设置cvs的高度
        this.offsetY = canvas.offsetTop;         // 设置容器在屏幕中的顶部偏移量
        this.offsetX = canvas.offsetLeft;        // 设置容器在屏幕中的左边偏移量
        this.graphics = canvas.getContext("2d"); // 获取2d类型的画布对象
        this.canvas = canvas;                    // cvs对像

        // 鼠标松开后,就不允许在画
        document.addEventListener('mouseup', e => {
            this.isDrawing = false;
            this.graphics.closePath()
        })
    }
};
</script>
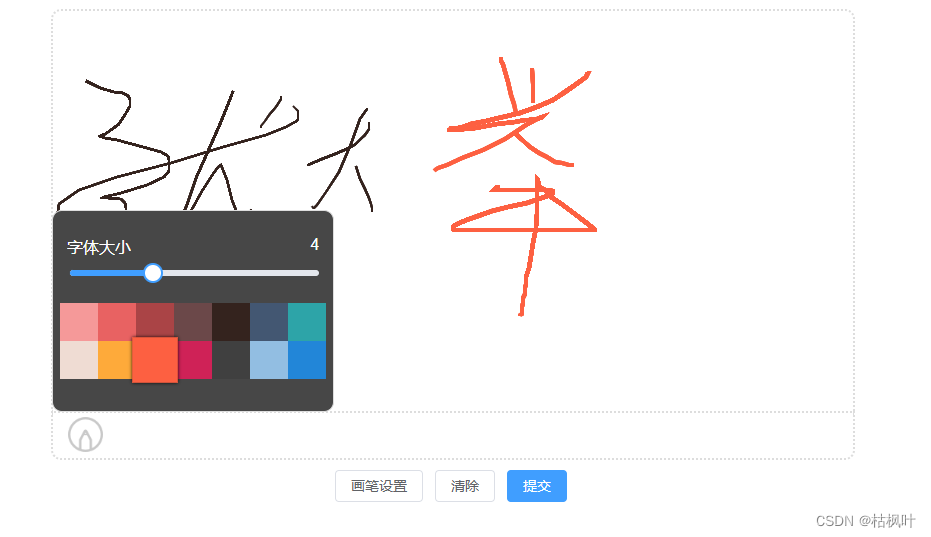
2,效果

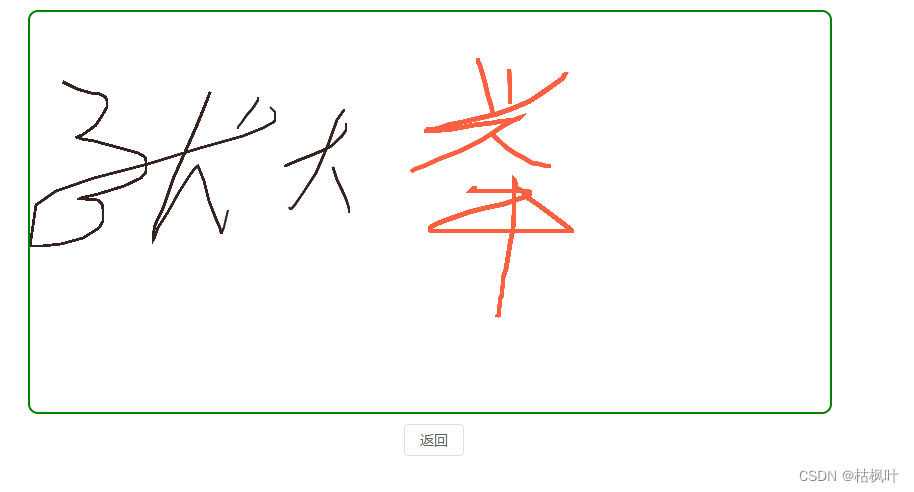
3,提交后为base64编码

上面是本人写的一款,只适合PC,
最后,本人发现一个比较好用插件,可以直接引用,下来记录下使用方式
功能描述:
1,兼容 PC 和 Mobile;
2,画布自适应屏幕大小变化(窗口缩放、屏幕旋转时画布无需重置,自动校正坐标偏移);
3,自定义画布尺寸(导出图尺寸),画笔粗细、颜色,画布背景色;
4,支持裁剪 (针对需求:有的签字需要裁剪掉四周空白)。
5,导出图片格式为 base64 ;
第一步:安装: npm install vue-esign --save
第二步:使用: 在main.js 中 引入插件
import vueEsign from ‘vue-esign’
Vue.use(vueEsign)
第三步:页面使用说明:
必须设置 ref ,用来调用组件的两个内置方法 reset() 和 generate() 无需给组件设置 style 的宽高,如果画布的 width 属性值没超出父元素的样式宽度,则该组件的样式宽度就是画布宽度,超出的话,组件样式宽度则是父元素的100%; 所以只需设置好父元素的宽度即可;
<vue-esign ref="esign" :width="800" :height="300" :isCrop="isCrop" :lineWidth="lineWidth" :lineColor="lineColor" :bgColor.sync="bgColor" />
<button @click="handleReset">清空画板</button>
<button @click="handleGenerate">生成图片</button>
export default {
	data () {
		 return {
			 lineWidth: 6,
			 lineColor: '#000000',
			 bgColor: '',
			 resultImg: '',
			 isCrop: false
		 }
	},
	methods: {
		 handleReset () {
			 this.$refs.esign.reset()
		 },
		 handleGenerate () {
			 this.$refs.esign.generate().then(res => {
			 this.resultImg = res
		 }).catch(err => {
		 	alert(err) // 画布没有签字时会执行这里 'Not Signned'
		 })
	}
}
插件说明:
| 属性 | 类型 | 默认值 | 说明 |
|---|---|---|---|
| width | Number | 800 | 画布宽度,即导出图片的宽度 |
| height | Number | 300 | 画布高度,即导出图片的高度 |
| lineWidth | Number | 4 | 画笔粗细 |
| lineColor | String | #000000 | 画笔颜色 |
| bgColor | String | 空 | 画布背景色,为空时画布背景透明, 支持多种格式 ‘#ccc’,‘#E5A1A1’,‘rgb(229, 161, 161)’,‘rgba(0,0,0,.6)’,‘red’ |
| isCrop | Boolean | false | 是否裁剪,在画布设定尺寸基础上裁掉四周空白部分 |
外加两个内置方方法:
清空画布
this.$refs.esign.reset()
生成图片
this.$refs.esign.generate().then(res => {
console.log(res) // base64图片
}).catch(err => {
alert(err) // 画布没有签字时会执行这里 ‘Not Signned’
})