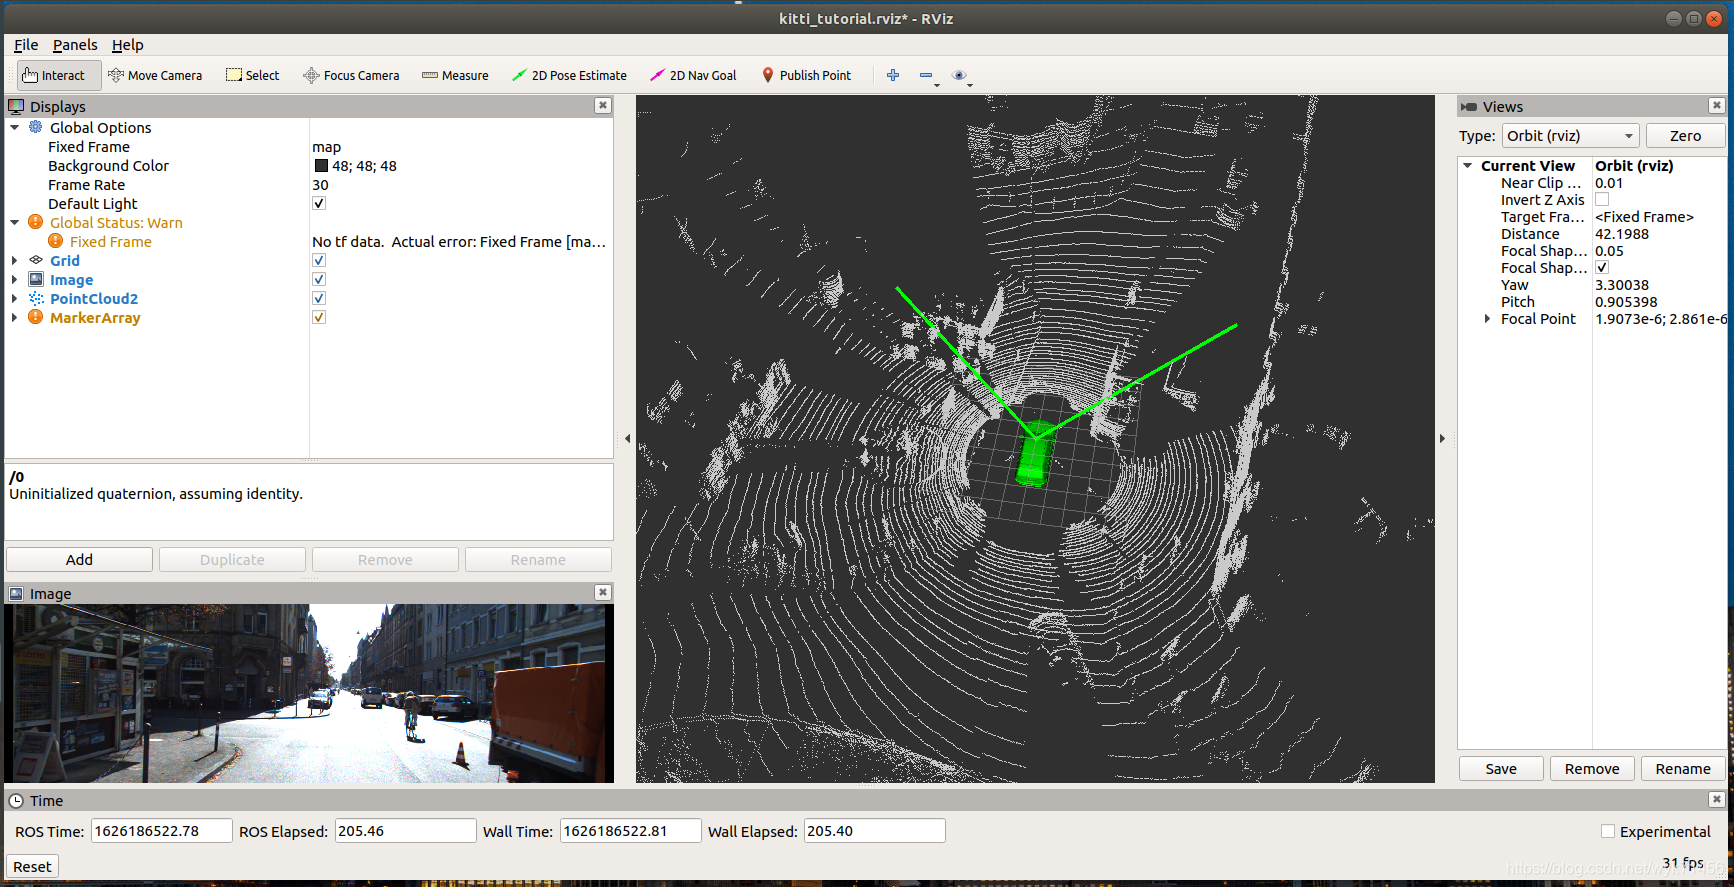
将两个marker放在一个MarkerArray中,然后一同发布:
publish_utils.py
#draw a ego-car model and lines of sight
def publish_ego_car(ego_car_pub):
    """Publish left and right 45 degree FOV lines and ego car model mesh"""
    marker_array = MarkerArray()

# draw a ego-car model
    marker = Marker()
    marker.header.frame_id = FRAME_ID
    marker.header.stamp = rospy.Time.now()

    marker.id = 0  #each marker have only one id.
    marker.action = Marker.ADD  #to tell marker the operation is add a new marker
    marker.lifetime = rospy.Duration() #marker's life time.how long it appears in the frame.
    marker.type = Marker.LINE_STRIP # marker's type.Today we use line_strip.

    marker.color.r = 0.0
    marker.color.g = 1.0
    marker.color.b = 0.0
    marker.color.a = 1.0 #apparent degree,transparency
    marker.scale.x = 0.2 #scale of line

    #marker's data
    marker.points = []
    marker.points.append(Point(10, -10, 0))
    marker.points.append(Point(0, 0, 0)) # (0,0,0)is the location of velodyne LiDAR
    marker.points.append(Point(10, 10, 0))

    marker_array.markers.append(marker)     # add marker into marker_array


#draw car model
    mesh_marker = Marker()  # build a class of Marker
    mesh_marker.header.frame_id = FRAME_ID
    mesh_marker.header.stamp = rospy.Time.now()

    mesh_marker.id = -1  # each marker have only one id.
    mesh_marker.action = Marker.ADD  # to tell marker the operation is add a new marker
    mesh_marker.lifetime = rospy.Duration()  # marker's life time.how long it appears in the frame.
    mesh_marker.type = Marker.MESH_RESOURCE  # marker's type.Today we use MESH_RESOURCE.
    # mesh_marker.mesh_resource = "package://kitti_tutorial/Audi R8/Audi R8.dae"
    mesh_marker.mesh_resource = "package://kitti_tutorial/Audi R8/BMW X5 4.dae"

    # set height
    mesh_marker.pose.position.x = 0.0
    mesh_marker.pose.position.y = 0.0
    mesh_marker.pose.position.z = -1.73

    # set rotation
    q = tf.transformations.quaternion_from_euler(np.pi / 2, 0, np.pi)
    mesh_marker.pose.orientation.x = q[0]
    mesh_marker.pose.orientation.y = q[1]
    mesh_marker.pose.orientation.z = q[2]
    mesh_marker.pose.orientation.w = q[3]

    mesh_marker.color.r = 0.0
    mesh_marker.color.g = 1.0
    mesh_marker.color.b = 0.0
    mesh_marker.color.a = 1.0

    mesh_marker.scale.x = 0.9
    mesh_marker.scale.y = 0.9
    mesh_marker.scale.z = 0.9

    marker_array.markers.append(mesh_marker)

    ego_car_pub.publish(marker_array)
kitti.py
if __name__ == '__main__':
    frame = 0
    rospy.init_node('litti_node',anonymous=True)
    cam_pub = rospy.Publisher('kitti_cam', Image, queue_size=10) #step 1: build a Publisher
    pcl_pub = rospy.Publisher('kitti_point_cloud', PointCloud2, queue_size=10)  #PointCloud2
    ego_pub = rospy.Publisher('Kitti_ego_car',MarkerArray,queue_size=10)
    # model_pub = rospy.Publisher('Kitti_car_model',Marker,queue_size=10)
    bridge = CvBridge()

    rate = rospy.Rate(10)
    while not rospy.is_shutdown():
        #picture read and publish
        image = read_camera(os.path.join(DATA_PATH,'image_02/data/%010d.png'%frame)) #step 2: read in data
        publish_camera(cam_pub,bridge,image)        #step 3: publish out.  Done!
        #point cloud read and publish
        point_cloud = read_point_cloud(os.path.join(DATA_PATH,'velodyne_points/data/%010d.bin'%frame))
        publish_point_cloud(pcl_pub,point_cloud)
        publish_ego_car(ego_pub)
        # publish_car_model(model_pub)

        rospy.loginfo("published")
        rate.sleep()
        frame+=1
        frame%=154
MarkerArray效果:

IMU数据:


IMU:速度,角速度,加速度等数据。参考这个资料README:
https://github.com/yanii/kitti-pcl
https://github.com/yanii/kitti-pcl/blob/master/KITTI_README.TXT

用Pandas读取IMU数据。Pandas可以把excel,csv等表格数据读取进入程序。
data_utils.py
IMU_COLUMN_NAMES = ['lat','lon','alt','roll','pitch','yaw','vn','ve', 'vf', 'vl', 'vu', 'ax', 'ay', 'az', 'af',
                    'al', 'au', 'wx', 'wy', 'wz', 'wf', 'wl', 'wu', 'posacc', 'velacc', 'navstat', 'numsats', 'posmode',
                    'velmode', 'orimode']

def read_imu(path):
    df = pd.read_csv(path,header = None, sep=' ')
    df.columns = IMU_COLUMN_NAMES
    return df
publish_utils.py
IMU_COLUMN_NAMES = ['lat','lon','alt','roll','pitch','yaw','vn','ve', 'vf', 'vl', 'vu', 'ax', 'ay', 'az', 'af',
                    'al', 'au', 'wx', 'wy', 'wz', 'wf', 'wl', 'wu', 'posacc', 'velacc', 'navstat', 'numsats', 'posmode',
                    'velmode', 'orimode']

def read_camera(path):
    return cv2.imread(path)

def read_point_cloud(path):
    return np.fromfile(path,dtype = np.float32).reshape(-1,4)

def read_imu(path):
    df = pd.read_csv(path,header = None, sep=' ')
    df.columns = IMU_COLUMN_NAMES
    return df
ROS的IMU数据用法:http://docs.ros.org/en/noetic/api/sensor_msgs/html/msg/Imu.html

kitti.py
imu_pub = rospy.Publisher('kitti_imu',Imu,queue_size=10)  #step 1: build a Publisher
imu_data = read_imu(os.path.join(DATA_PATH,'oxts/data/%010d.txt'%frame))  #step 2: read in data
publish_imu(imu_pub,imu_data)                                     		  #step 3: publish out.  Done!
IMU数据的可视化显示效果:
