uiautomator
uiautomator 是python的安卓自动化测试模块,需要在android4.1+(API 16~30)的版本上工作,只需要通过adb连接android设备,不需要在android设备上安装别的东西。
安装uiautomator
pip install uiautomator2
为了更好的写自动化脚本,需要在安卓设备中定位图标位置,在此需要安装weditor包
pip install weditor
此外为了模拟安卓设备,需要安装个模拟器,现在安装“雷电模拟器”,可以自行在网上下载。
 现在需要使用adb工具找到模拟器设备,
ADB前置条件:
1.安装Android SDK,并将Android_HOME environment设置为正确路径。
2.在设备上启用ADB设置,并使用usb将android设备与PC连接。
3.允许在设备设置上从未知源安装应用程序。
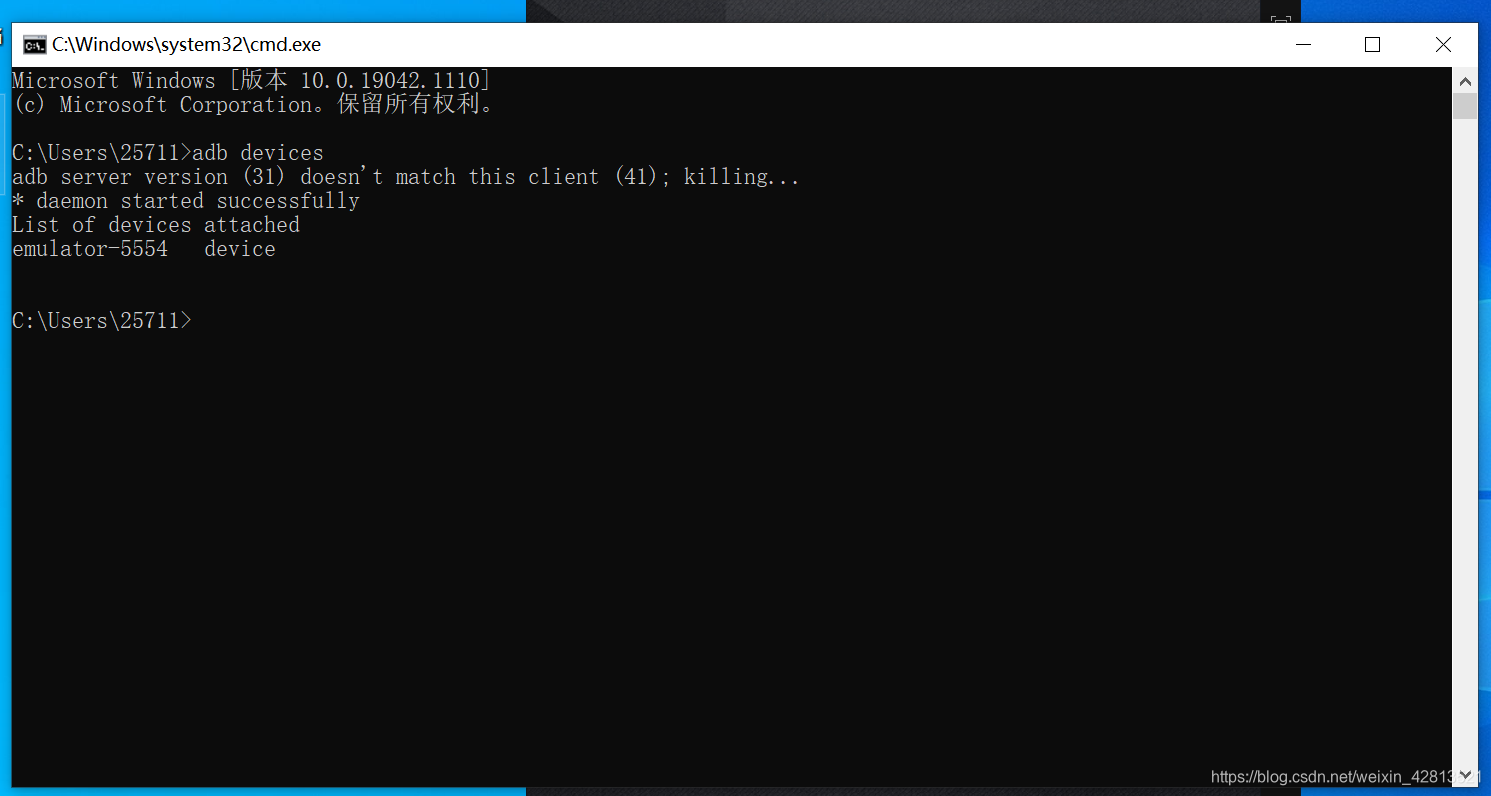
在cmd中输入:
adb devices
即可得到设备的信息,下图就是说明设备已经连接上了。

有了上面的工具就可以进行安卓设备的测试了!
连接方法:
1.通过WIFI连接,这需要你的设备在同一个网络下:
假设设备的ip为11.1.1.1
import uiautomator2 as u2
d = u2.connect('http://11.1.1.1')
2.USB,使用设备的序列号进行连接,这样在连接多个设备的时候就可以有选择的测试某个设备:
from uiautomator import Device
d = Device('emulator-5554')
Note:在下面的例子里,我们使用d代表安卓设备
基本API的使用
本部分通过一些简单的例子展示了设备的一些操作。
检索设备信息
import  uiautomator2 as u2
d=u2.connect(r'emulator-5554')
print(d.info)
下面是运行的结果
 设备的关键事件操作
安卓设备的开关
# 打开屏幕
d.screen.on()
# 关上屏幕
d.screen.off()
#解锁屏幕
d.unlock()
检查设备是开还是关
d.info.get('screenOn') # 要求android >= 4.4
按键操作
d.press("home") # 按下home键
d.press("back") # 按下back键的常规方式
d.press(0x07, 0x02) # 按下编码 0x07('0') 和 0x02(META ALT)
此外还支持以下按键操作:
home back left right up down center menu search enter delete ( or del) recent (recent apps)
volume_up volume_down volume_mute camera power
设备的手势交互
点击屏幕
# click (x, y) on screen(x,y)为点击点的坐标
d.click(x, y)
长时间点击屏幕
# long click (x, y) on screen
d.long_click(x, y)
d.long_click(x, y, 0.5) #长按0.5s 默认`在这里插入代码片`
滑动屏幕
# swipe from (sx, sy) to (ex, ey)
d.swipe(sx, sy, ex, ey)
# swipe from (sx, sy) to (ex, ey) with 10 steps
d.swipe(sx, sy, ex, ey, steps=10)
d.swipe(sx, sy, ex, ey, 0.5) # 滑动0.5s默认
拖拽屏幕
# drag from (sx, sy) to (ex, ey)
d.drag(sx, sy, ex, ey)
# drag from (sx, sy) to (ex, ey) with 10 steps
d.drag(sx, sy, ex, ey, steps=10)
d.drag(sx, sy, ex, ey, 0.5) # 默认拖拽0.5s
屏幕操作
检索方向
orientation=d.orientation
设置方向
d.set_orientation("n") # 或"natural"
d.set_orientation("l") # 或"left"
d.set_orientation("r") # 或"right"
冻结/解冻旋转
# 冻结旋转
d.freeze_rotation()
# 取消冻结旋转
d.freeze_rotation(False)
截图
#屏幕截图并保存到本地文件
d.screenshot("C:/Users/25711/Desktop/kg/demo.png")

#或者获取PIL.Image格式,但是需要安装pillow
image=d.screenshot()
image.save("C:/Users/25711/Desktop/kg/demo.png")

#还可以获取opencv格式,但是需要安装numpy和cv2
import cv2
image=d.screenshot(format='opencv')
cv2.imwrite("C:/Users/25711/Desktop/kg/demo.png",image)
存储窗口层次结构
#获取转储的内容(unicode)
xml=d.dump_hierarchy()
打开通知或快速设置
d.open_notification()
d.open_quick_setting()
推送和提取文件
将文件推送到设备
#将文件推送到设备的文件夹
d.push("foot.txt","/data/")
#推动并重命名
d.push("foo.txt"."/data/data.txt")
#推送fileobj
with open("foo.txt","rb") as f:
	d.push(f,"/data/")
#推送文件并修改文件模式
d.push("foo.sh","/data/local/tmp/",mode=0o755)
从设备中提取文件
d.pull("/data/tmp.txt","tmp.txt")
#设备中不存在的文件会引发FileNotFondErr
d.pull("/data/some_not_exist.txt","tmp.txt")
APP管理
APP的安装
目前仅支持从url安装
d.app_install(url)
APP启动
d.app_start("包名")
#例如 微博
APP停止
#执行强制停止
d.app_stop("包名")
#执行应用清除
d.app_clear("包名")
停止所有APP的运行
#停止所有app
d.app_stop_all()
#停止除了(包名)之外的所有应用
d.app_stop_all(excludes=["包名"])
选择器Selecor
选择器用于识别当前窗口中的特定对象
# 要选text是'Clock',className 是'android.widget.TextView' 的元素
d(text='Clock', className='android.widget.TextView')
选择器支持以下的参数
? text, textContains, textMatches, textStartsWith
? className, classNameMatches
? description, descriptionContains, descriptionMatches, descriptionStartsWith
? checkable, checked, clickable, longClickable
? scrollable, enabled,focusable, focused, selected
? packageName, packageNameMatches
? resourceId, resourceIdMatches
? index, instance
获取儿孙和同级对象
儿孙级
d(className="android.widget.ListView").child(text="Bluetooth")
同级
#获取sibling或child of sibling
d(text="Google").sibling(className="android.widget.ImageView")
通过text或description或instance,获取儿孙级的对象
# 获取儿孙中符合类名"android.widget.LinearLayout",text包含"Bluetooth"
d(className="android.widget.ListView", resourceId="android:id/list").child_by_text("Bluetooth", className="android.widget.LinearLayout")

# 允许页面滚动搜索获得儿孙对象
d(className="android.widget.ListView", resourceId="android:id/list")
 .child_by_text(
    "Bluetooth",
    allow_scroll_search=True,
    className="android.widget.LinearLayout"
  )
相对位置
我们可以使用相对位置的方法获取视图中的对象:left,right,top,bottom
d(A).left(B) 表示选择A左侧的B
d(A).right(B) 表选择A 右侧的B
d(A).up(B), 表示选择A上方的B.
d(A).down(B), 表示选择在A下面的B.
因此对于“WIFI”开关,我们可以编写以下的代码:
# 选择"Wi Fi"右侧的"switch"
d(text="Wi Fi").right(className="android.widget.Switch").click()
多个实例
有时候屏幕上包含多个相同特点的多个对象,那么我们将在选择器中使用“instance”属性
d(text="Add new",instance=0)
uiautomator也提供了类似列表的方法来处理类似的元素对象
#获取当前屏幕上带有文本“Add new”的元素的总数
d(text="Add new").count
#或者
len(d(text="Add new"))

#通过inde获取元素实例
d(text="Add new")[0]
d(text="Add new")[1]
...

#循环版本
for data in d(text="Add new"):
	data.info
在使用迭代器的时候,必须保证屏幕不变,否则会出现ui not found error
获取ui对象的状态和信息
检查制定ui对象是否存在
d(text="Setting").exists #如果存在,则为True,否则False
d.exists(text="Settings")
检索制定ui对象的信息
d(text="Settings").info
设置/清除可编辑字段的text
d(text="Settings").clear_text()
d(text="Settings").set_text("my text..")
对指定ui执行click
单击指定ui object
#点击ui对象的中心
d(text="Settings").click()
#最长等待时间为10秒,并单击,超时没有显示会报错
d(text="Settings").click(timeout=10)
#click别名,键盘操作的短名
d(text="Settings").tap()
长按指定ui对象
#长按指定的ui object
d(text="Setting").long_click()
指定ui object手势动作
将对象拖动到定点或另一个对象
#拖动ui object到point(x,y)
d(text="Setting").drag_to(x,y,duration=0.5)
#拖动ui object到另一个ui object(中心)
d(text="Settings").drag_to(text="Clock",duration=0.25)
两点手势
d(text="Settings").gesture((sx1, sy1), (sx2, sy2), (ex1, ey1), (ex2, ey2)) # s起点,e终点
制定ui object 两点手势
支持两种手势
in 从边缘到中心
out 从中心到边缘
#从边缘到中心
d(text="Settings").pinch_in(percent=100,steps=10)
#从中心到边缘
d(text="Settings").pinch_out()
等待指定的ui对象出现或消失
#等待ui对象出现
d(text="Settings").wait(timeout=3.0)
#等待ui object消失
d(text="Settings").wait_gone(timeout=1.0)
对(可滚动)ui对象执行fling
Fling(飞滑)一般用于水平或垂直翻页,可能的属性:horiz 或vert
forward 或backward 或toBegining 或toEnd
# fling默认垂直向前
d(scrollable=True).fling()
# fling水平向前
d(scrollable=True).fling.horiz.forward()
# fling垂直向后
d(scrollable=True).fling.vert.backward()
# 垂直fling到开始
d(scrollable=True).fling.h或iz.toBeginning(max_swipes=1000)
# 垂直fling到末尾
d(scrollable=True).fling.toEnd()
对(可滚动)ui对象执行scroll
可能的属性: horiz 或 vert forward 或 backward 或 toBeginning 或 toEnd, 或 to
# scroll 默认垂直向前
d(scrollable=True).scroll(steps=10)
# scroll水平向前
d(scrollable=True).scroll.h或iz.forward(steps=100)
# scroll垂直向后
d(scrollable=True).scroll.vert.backward()
# 水平scroll到开始
d(scrollable=True).scroll.h或iz.toBeginning(steps=100, max_swipes=1000)
# 垂直scroll到末尾
d(scrollable=True).scroll.toEnd()
# scroll 向前垂直,直到出现指定ui object
d(scrollable=True).scroll.to(text="Security")