目录
简介
uiautomator2是一个python库,用于Android的UI自动化测试,其底层基于Google uiautomator,Google提供的uiautomator库可以获取屏幕上任意一个APP的任意一个控件属性,并对其进行任意操作。
实现过程
- 在移动设备上安装atx-agent(守护进程), 随后atx-agent启动uiautomator2服务(默认7912端口)进行监听
- 执行制定的操作,通过USB进行有线连接或者pc端和手机设备在同一局域网下进行无线连接
- 执行测试脚本(相当于发送HTTP请求到移动设备的server端)
环境安装
安装库
pip install --pre uiautomator2
pip install pillow ??// 如果需要截图使用这个库
安装sdk
见python-App自动化环境搭建(安装Android SDK)
adb工具包谷歌官方下载地址:https://developer.android.google.cn/studio/releases/platform-tools
最新Google官方版下载地址(访问后直接下载):
安装守护进程atx-agent
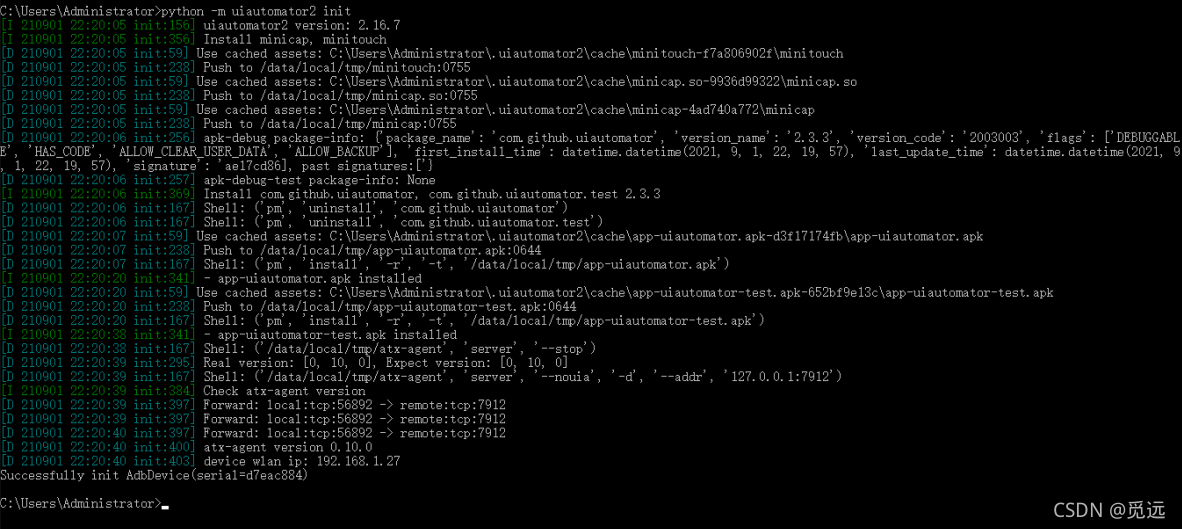
USB连接手机设备后,开启开发者模式并允许调试,命令行中执行adb devices -l查找连接的设备号,确保手机设备已连接,执行下面的命令会自动安装本库所需要的设备端程序:uiautomator-server,atx-agent,openstf / minicap,openstf / minitouch
python -m uiautomator2 init? ? ? ?//? init是在所有USB连接电脑的手机上都安装uiautomator2
python -m uiautomator2 init --mirror --serial $SERIAL? ? //?指定手机安装uiautomator2, 用 --mirror
python -m uiautomator2 init --mirror? ? ?//??国内的镜像安装提高安装速度
提示“Successfully init AdbDevice(serial=d7eac884) ”表示安装成功
安装weditor
界面元素查找工具(python-App自动化数据配置及运行中有两种方法:Android Sdk包中的?uiautomateviewer?和 Appium Desktop 中的?Appium Inspector),前面这两种方法都需要链接数据线,但是在uiautomator2可以在同一局域网下无线操作,所以使用新的工具而不需要连接数据线更加方便。?uiautomator2提供了weditor工具来解决这个问题。
安装方法:pip?install --pre --upgrade weditor
使用方法:python?-m weditor????// 执行之后会在默认浏览器中打开网页


