一、环境搭建
安装pyqt5
pip install pyqt5
安装pyqt5-tools
pip install pyqt5-tools
配置工具
1、配置QtDesigner
- 配置路径 settings–>Tools–>External Tools
- 点击 + ,创建工具
 - 配置项
Name:自定义
Program: D:\Code\python\config\venv\Lib\site-packages\qt5_applications\Qt\bin\designer.exe
Working directory:$FileDir$
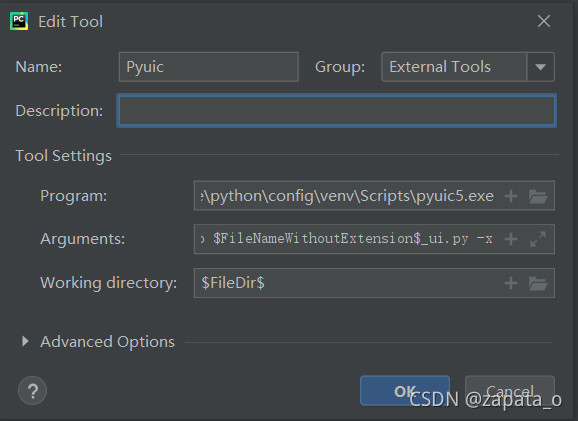
2、配置pyuic

Name:Pyuic
Program:D:\Code\python\config\venv\Scripts\pyuic5.exe
Arguments:$FileName$ -o $FileNameWithoutExtension$_ui.py -x
Working directory:$FileDir$
3、配置pyqrc

Name : pyqrc
Program:D:\Code\python\config\venv\Scripts\pyrcc5.exe
Arguments:$FileName$ -o $FileNameWithoutExtension$_rc.py
Working:$FileDir$
二、案例(登录界面)
1、开发前说明
- 注意:
(1)写代码前把项目的根目录设置为 root (后期导包不会标红,导包也会有提示)

(2)在UI目录上打开qtDedigner(这样创建的文件自动到这个目录下)
 - 前后端分离
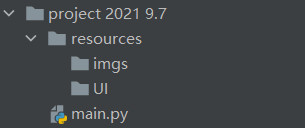
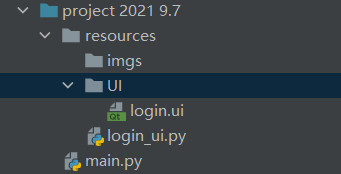
- 目录结构

2、创建ui文件
- 打开 qtDesigner
- 用Widget模板创建
Widget、Main Window、Dialog 区别
Widget:空白窗体
Main Window:在widget的基础上多了顶部工具栏,底部状态栏
Dialog:对话框
- 保存 、命名 (我命名为login)
 - 拖动组件
用到的组件是QPushButton 、 label、lineEdit

3、转代码
- ui ----> py
 - login_ui.py 拖到 resources 目录下

4、建立业务代码
- 在project 2021 9.7 下 建立LoginPane,并书写如下代码
from PyQt5.QtWidgets import QWidget,QApplication
from resources.login_ui import Ui_Form
import sys
class LoginPane(QWidget):
def __init__(self,parent=None):
super().__init__(parent)
self.ui = Ui_Form()
self.ui.setupUi(self)
if __name__ == '__main__':
app = QApplication(sys.argv)
loginpane = LoginPane()
loginpane.show()
sys.exit(app.exec_())
| 


