- find_element_by_id,通过id属性查找元素,返回一个webElement对象
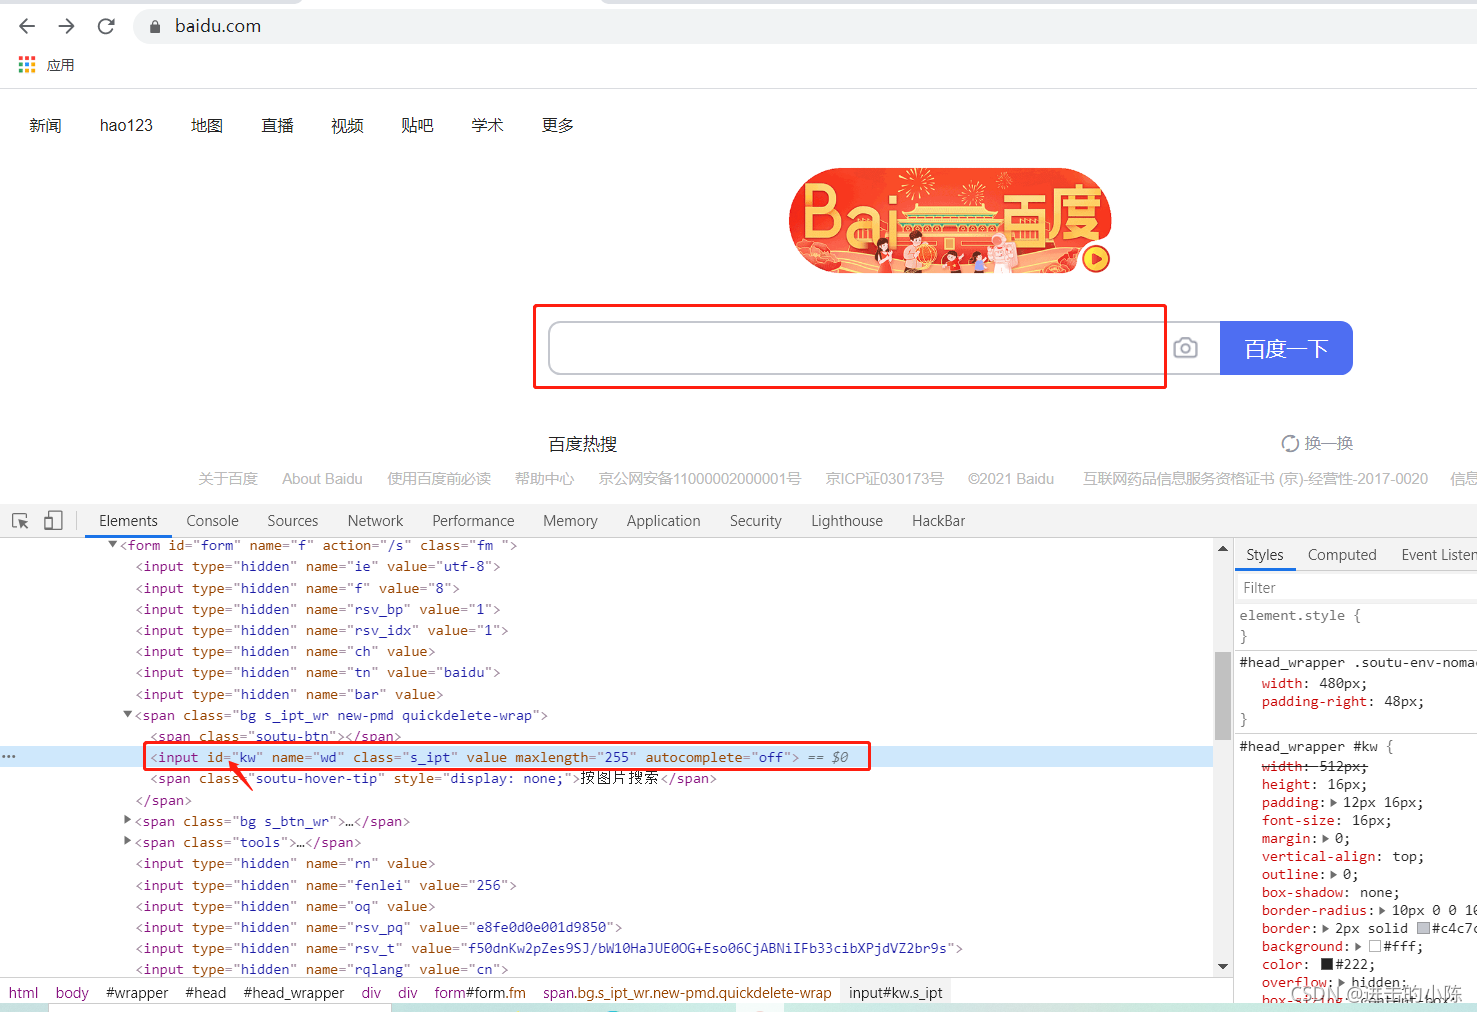
我们以百度首页为例子,访问百度首页,打开开发者管理工具,定位到输入框,查看输入框的属性,有一个id的属性:

通过find_element_by_id查找这个元素:
chrome_driver.find_element_by_id('kw')
使用这个方法定位输入框并输入内容:
from selenium import webdriver


# 创建谷歌浏览器对象
chrome_driver = webdriver.Chrome()
# 访问百度
chrome_driver.get("http://www.baidu.com")
# 查找输入框,返回webElement对象
text_input = chrome_driver.find_element_by_id('kw')
# 输入内容test
text_input.send_keys("test")
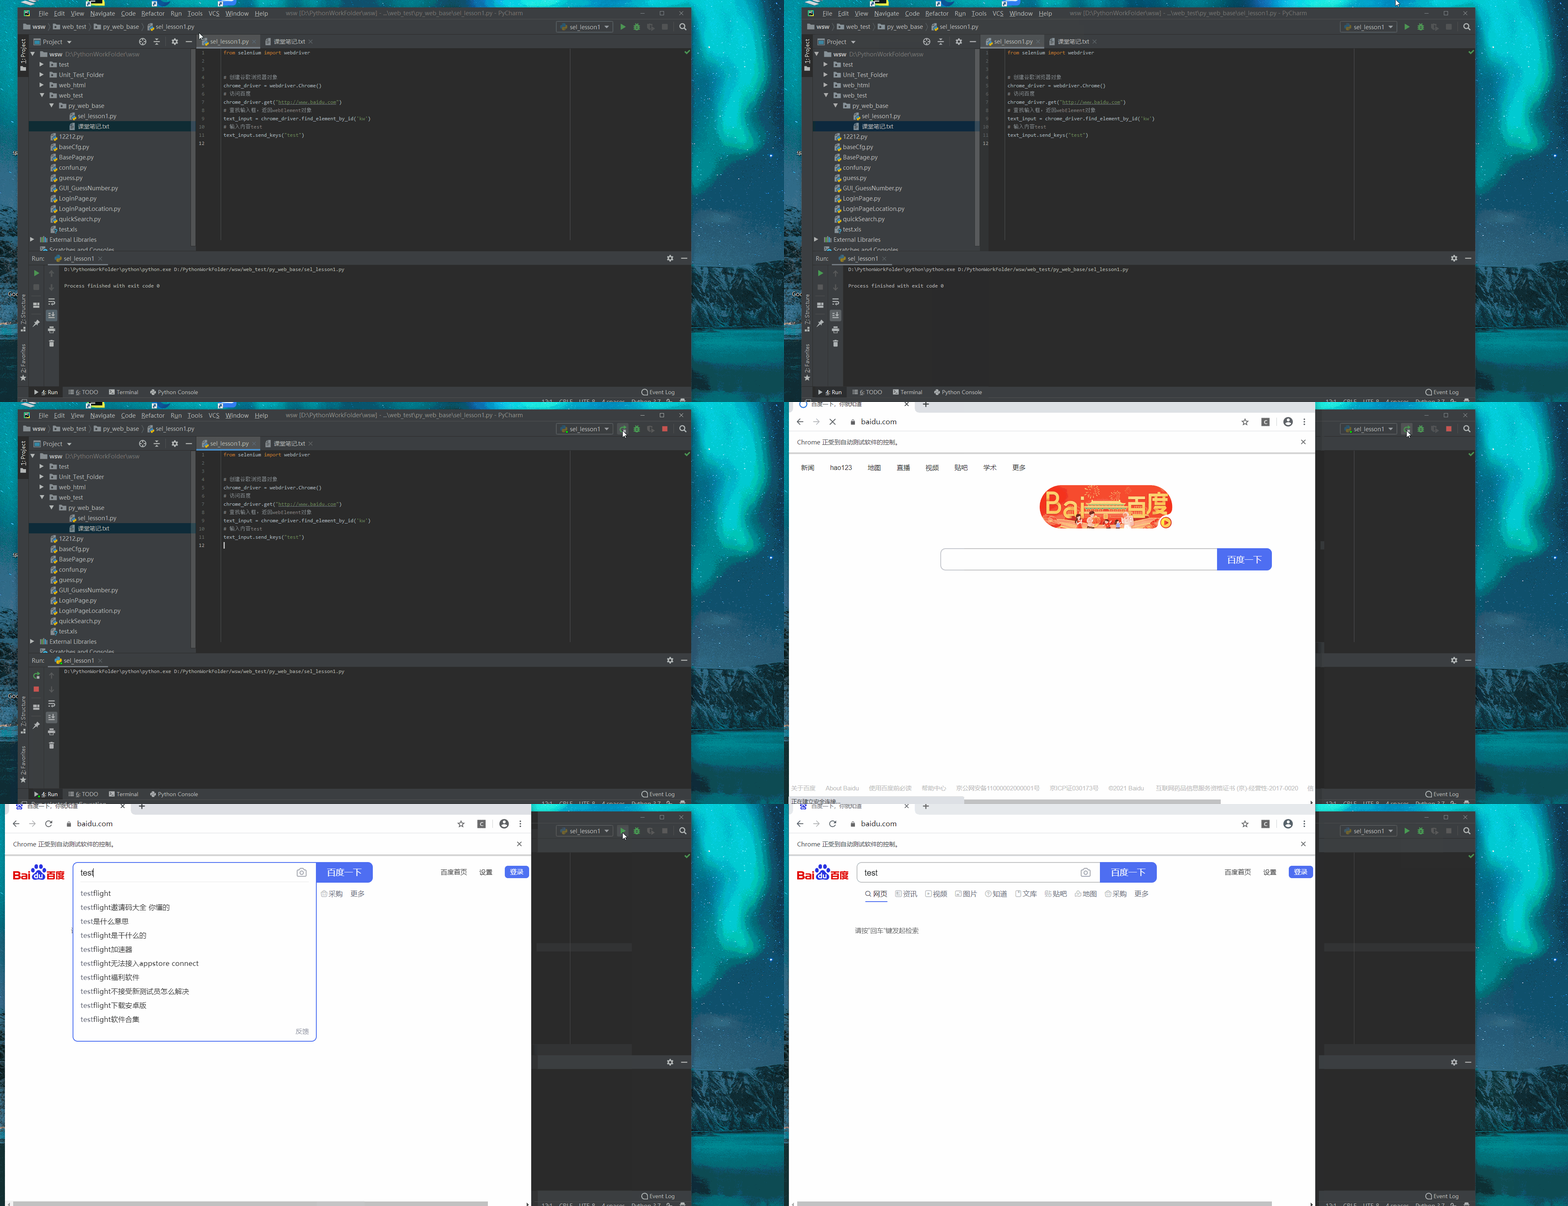
效果如下:

- find_elements_by_id则是返回通过id查找到的所有元素列表,分别打印一下,结果如下:

*PS: 注意使用find_element[s]_by_id这种方式时,要保证属性id的值是不变的,如果是可变的,就不可以使用这种方式。
- find_element_by_name, 通过name属性查找
还是以百度首页为例子,查看输入框的属性,有一个name的属性:

chrome_driver.find_element_by_name('wd')
使用这个方法定位输入框并输入test:
from selenium import webdriver


# 创建谷歌浏览器对象
chrome_driver = webdriver.Chrome()
# 访问百度
chrome_driver.get("http://www.baidu.com")
# 查找输入框,返回webElement对象
text_input = chrome_driver.find_element_by_name('wd')
# 输入内容test
text_input.send_keys("test")
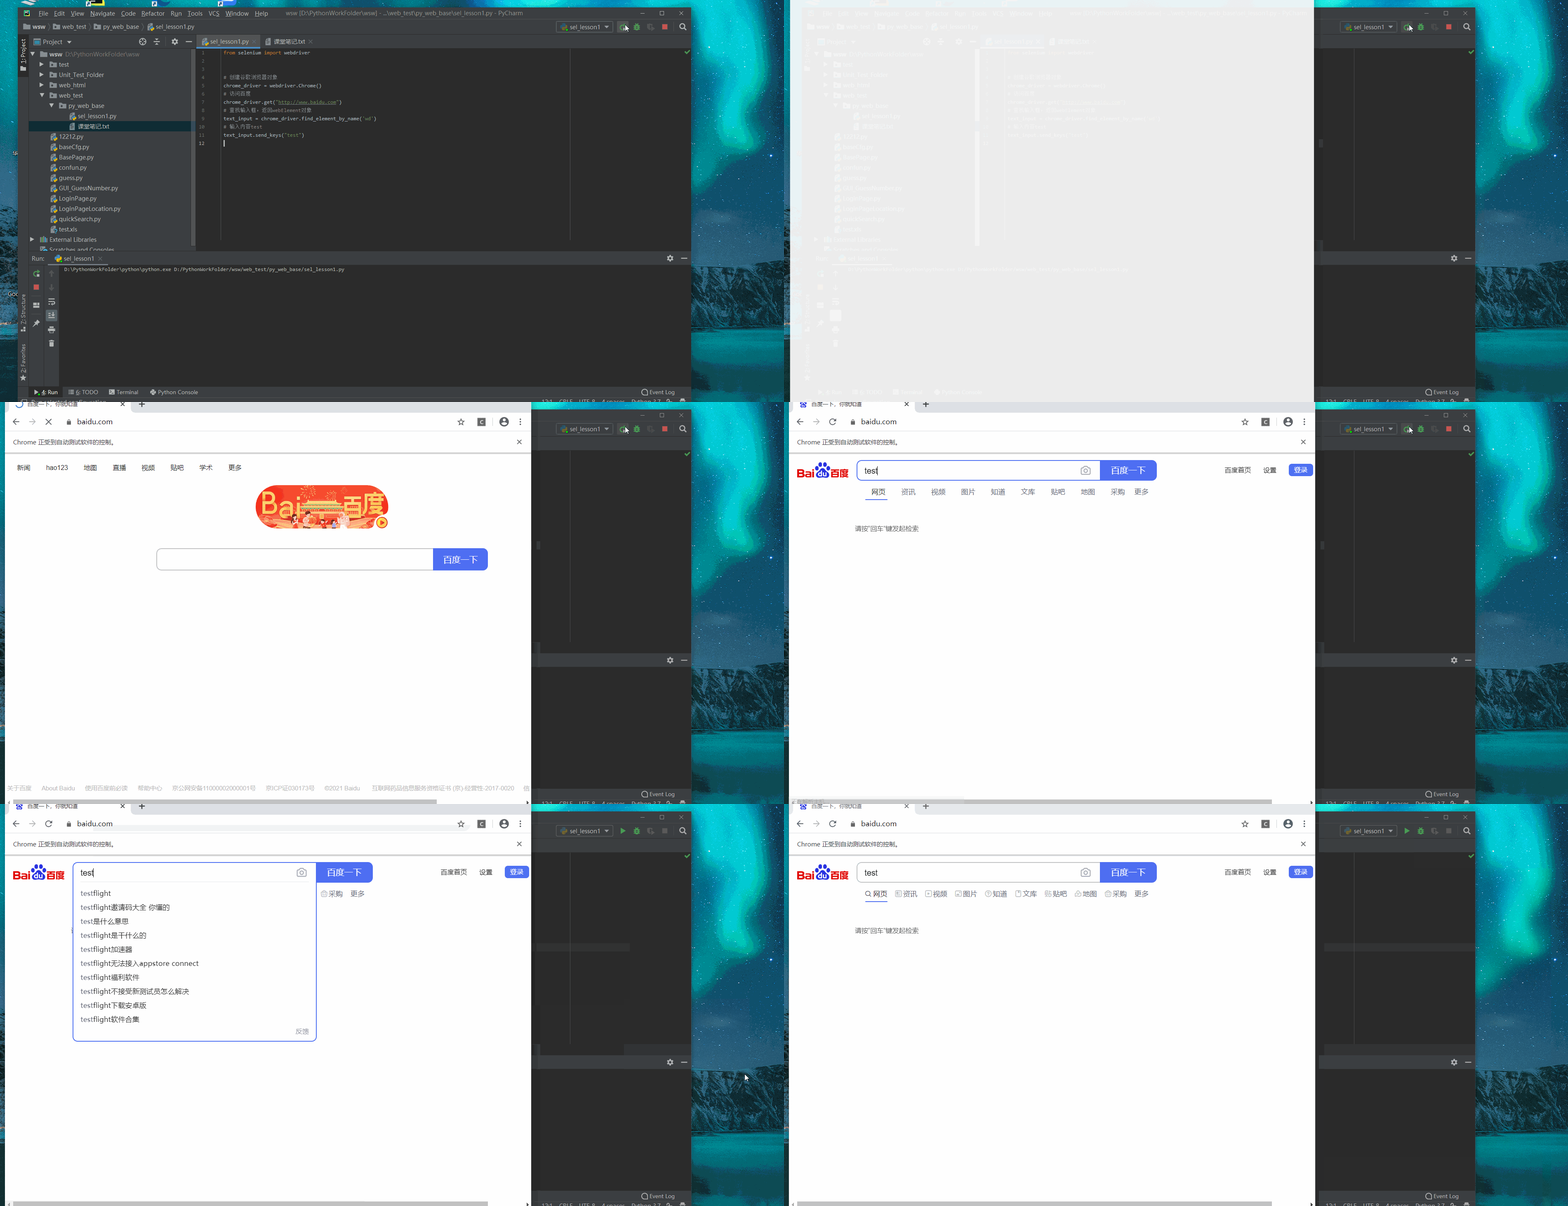
效果:

-
find_elements_by_name,则是返回通过name查找到的所有元素列表,分别打印一下,结果如下:

-
通过标签名称tag_name查找元素。但一般web网页会重复使用标签名称,所以使用起来并不方便。通过tag_name查找时,有两种方式,find_element_by_tag_name和find_elements_by_tag_name。
find_element_by_tag_name查找的是在DOM页面当中,匹配到的第一个元素。find_elements_by_tag_name查找所有符合标签名称,并返回列表。
通过这两种方式查找元素,并打印出来:
from selenium import webdriver


# 创建谷歌浏览器对象
chrome_driver = webdriver.Chrome()
# 访问百度
chrome_driver.get("http://www.baidu.com")
# 通过标签名称查找元素,在DOM页面当中,匹配到的第一个元素
text_input = chrome_driver.find_element_by_tag_name("input")
print(text_input)
# 返回列表, 返回webElement对象,返回所有符合标签名称的列表
text_inputs = chrome_driver.find_elements_by_tag_name("input")
print(text_inputs)
结果:

- 通过class_name查找元素。这个和tag_name是一样的,因为在网页中,class_name可能并不唯一的,所以在实际项目中,并不怎么去使用。通过class_name查找时,也是有两种方式,find_element_by_class_name和find_elements_by_class_name。
find_element_by_class_name查找的是在DOM页面当中,匹配到的第一个元素。find_elements_by_class_name查找所有符合标签名称,并返回列表。
from selenium import webdriver


# 创建谷歌浏览器对象
chrome_driver = webdriver.Chrome()
# 访问百度
chrome_driver.get("http://www.baidu.com")
# 通过标签名称查找元素,在DOM页面当中,匹配到的第一个元素
text_input = chrome_driver.find_element_by_class_name('s_ipt')
print(text_input)

text_inputs = chrome_driver.find_elements_by_class_name('s_ipt')
print(text_inputs)
结果:

- 针对超链接定位元素,有两个专门的方法,一个是by_link_text,一个是by_partial_link_text。
*find_element_by_link_text,find_elements_by_link_text是完全匹配超链接文字。至于这两个的区别,同上,一个返回单一元素,一个返回列表。
from selenium import webdriver


# 创建谷歌浏览器对象
chrome_driver = webdriver.Chrome()
# 访问百度
chrome_driver.get("http://www.baidu.com")
#
text_input = chrome_driver.find_element_by_link_text("新闻")
print(text_input)

text_inputs = chrome_driver.find_elements_by_link_text("新闻")
print(text_inputs)

*find_element_by_partial_link_text,find_elements_by_partial_link_text则是模糊匹配。区别同上:
from selenium import webdriver


# 创建谷歌浏览器对象
chrome_driver = webdriver.Chrome()
# 访问百度
chrome_driver.get("http://www.baidu.com")
#
text_input = chrome_driver.find_element_by_partial_link_text("123")
print(text_input)

text_inputs = chrome_driver.find_elements_by_partial_link_text("123")
print(text_inputs)

- xpath定位,属于万能定位方式。同样有find_element_by_xpath()和find_elements_by_xpath()两个方法。两者的区别同上。重点是给方法传入的xpath路径。

根据xpath路径定位,分为绝对定位和相对定位。绝对定位则是根据绝对路径去定位元素,从根目录开始,相对定位则是按照相对路径去定位元素。
注意,在实际项目中,基本不用绝对路径,因为兼容性太差,太过于依赖位置。所以,大多数定位都是用的相对定位。
我们继续以百度首页的输入框为例,当我们用绝对路径去定位时,它的xpath路径为(下面写的均为xpath路径,需要作为参数传入):
/html/body/div[1]/div[1]/div[5]/div/div/form/span[1]/input
用相对路径,通过属性id定位(相对定位均以//开头。*代表匹配所有。):
//*[@id="kw"]
或者:
//input[@id="kw"]
相对定位其实说白了,就是根据条件找元素。先不关心这个元素的位置在哪,跟谁有父子关系,就根据自身特征去定位元素,当自身元素不够明确,无法准确定位时,才会向上定位。比如上面定位输入框时,因为属性id是唯一的,所以我们可以直接使用属性id定位到,加入属性id值不是唯一的,那么我们通过上面的xpath可能会定位到多个元素,这时候,我们就可以通过层级进行定位:
//form[@id="form"]/span/input[@id="kw"]
在使用xpath定位时,还可以使用逻辑运算进行定位:and, or
比如上面的输入框,还可以这么定位:
//input[@id="kw" and name="wd"]
除了使用属性进行定位,还可以使用文本内容进行定位。但是使用此种方法要注意文本内容需要固定不变。
比如百度首页的“百度热搜”,在任何时候,文本值都是不变的,所以就可以使用文本值进行定位:

//*[text()="百度热搜"]
通过这个text()="…"定位时,文本内容是完全匹配的,我们还可以通过contains()进行包含匹配属性/文本内容。
contains()函数的使用形式为:contains(@属性/text(), 被包含的内容)。
比如百度首页,有的class属性后会有多个值,这个时候,如果使用class属性时,就不适合使用“=”,而是使用contains()函数结合class的一个具有代表性的值进行定位:

//span[contains(@class, "quickdelete-wrap")]
也可以包含文本值,定位“百度热搜”:
//div[contains(text(), "百度热")]
用starts-with定位,顾名思义,就是以元素的开始字符进行匹配,继续以百度首页的输入框为例:
//input[starts-with(@id, "k")]
结果:

还有一种轴定位方法,这种主要应用于web中的表格样式的数据列,通过组合来定位元素。轴定位的语法格式为:
已知的元素/轴名称::标签名称[@属性=“值”]
例如://div//table//td//preceding::td
ancestor:祖先节点,包括父节点
parent:父节点
preceding:当前元素节点标签之前的所有节点。(根据html页面的先后顺序)
preceding-sibling:当前元素节点标签之前的所有兄弟节点。
following:当前元素节点标签之后的所有节点(根据html页面的先后顺序)
following-sibling:当前元素标签之后的所有兄弟节点
为了更好理解,比如下面的网页,想要通过排名这个元素找到城市这个元素:

通过观察上面的html元素,首先定位到排名为1的这个元素上:
//div[@class="rank"]/table/tbody/tr[1]/td[1]
再继续观察,可以发现排名和城市,属于兄弟关系,且城市在后,先找出排名后面所有的弟弟元素:
//div[@class="rank"]/table/tbody/tr[1]/td[1]//following-sibling::td
找到了四个弟弟:

再继续观察,发现所有的弟弟元素中,只有城市有子级span,我们通过这个特性,定位到城市:
//div[@class="rank"]/table/tbody/tr[1]/td[1]//following-sibling::td//span

还可以通过多个轴名称进行定位,比如,还是刚才的网页,这次我们通过排名1去定位排名2:

第一步,定位到排名1的图片:
//img[@src="/images/5g/no1.png"]
然后根据观察,发现我们需要找到它的祖父节点:
//img[@src="/images/5g/no1.png"]//parent::td//parent::tr
找到祖父节点后,观察排名2的元素的祖父节点为同级关系:
//img[@src="/images/5g/no1.png"]//parent::td//parent::tr//following-sibling::tr
定位到祖父节点后继续定位排名2的元素:
//img[@src="/images/5g/no1.png"]//parent::td//parent::tr//following-sibling::tr//img[@src="/images/5g/no2.png"]

selenium除了以上这几种定位方式,还有一个css样式定位,后续研究。