前言
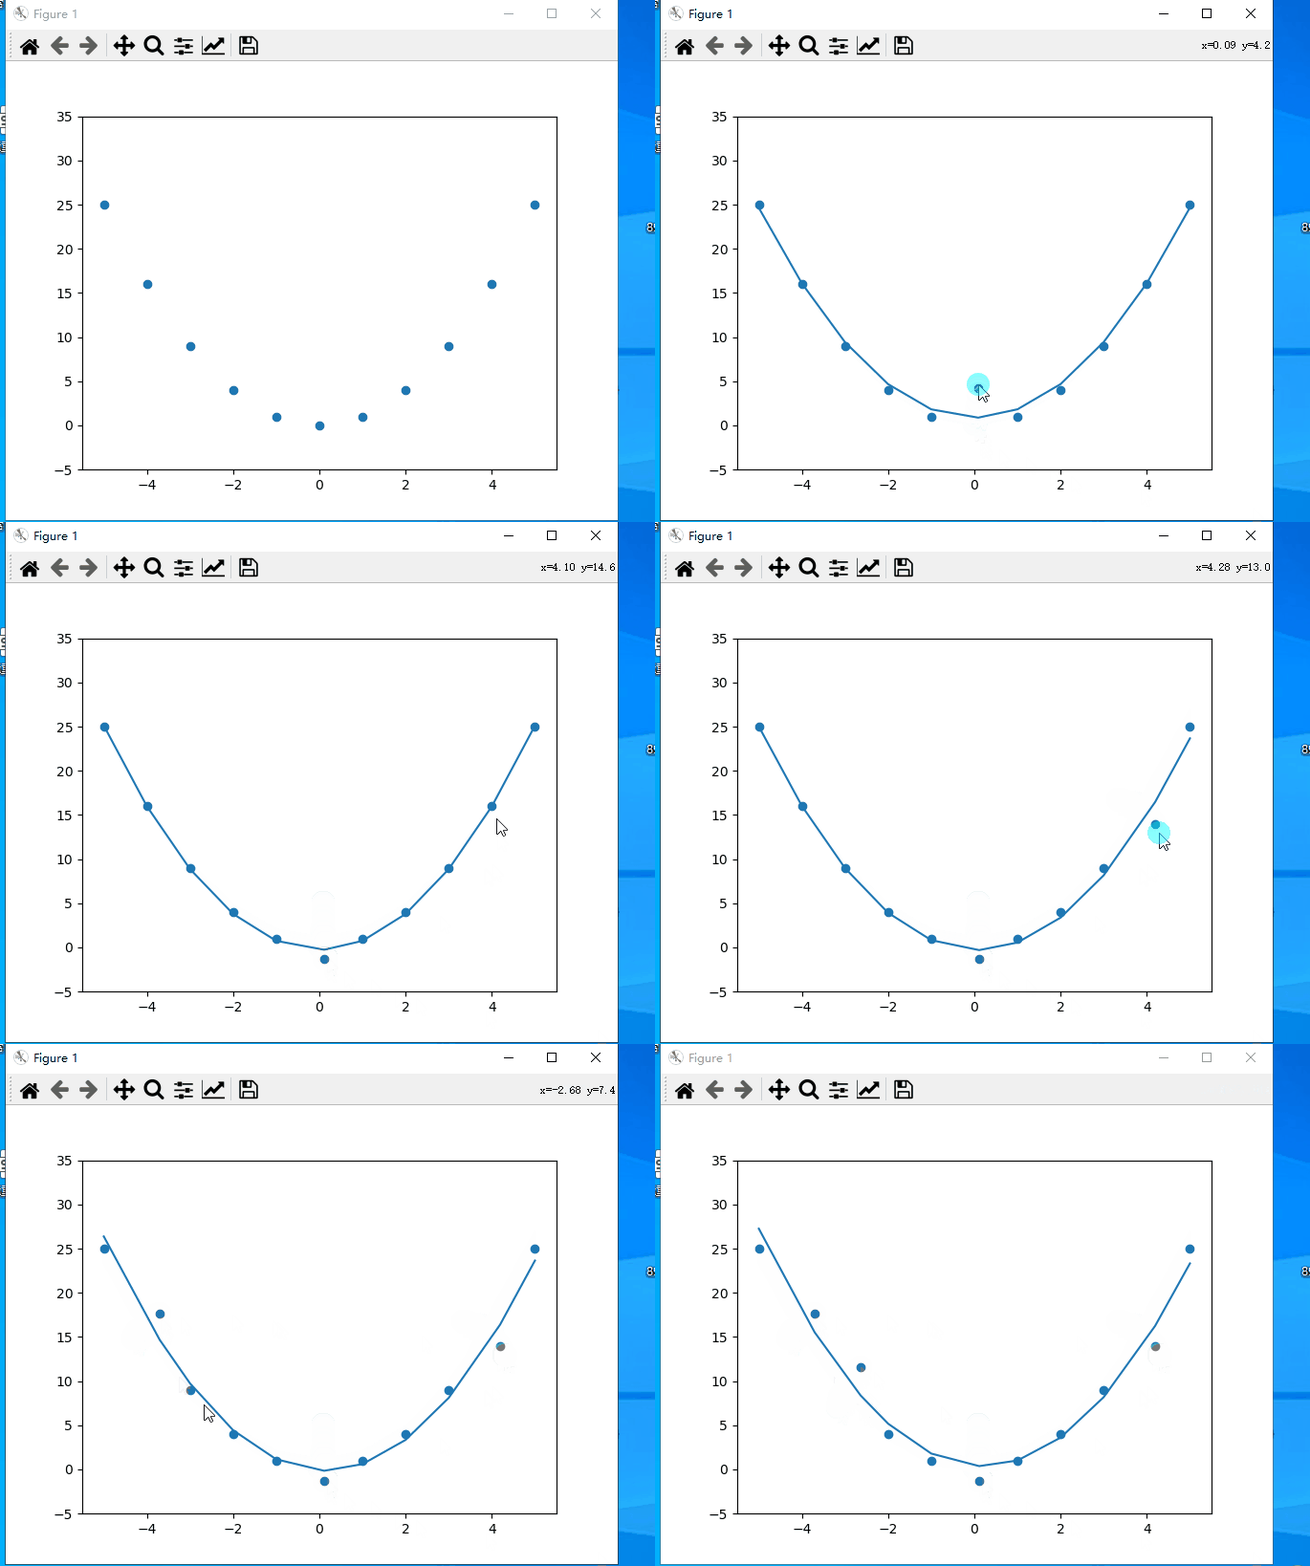
用matplotlib制作一个鼠标拖动点移动改变曲线形状的效果
一、效果预览

二、代码
最近时间精力有限,不能程序每一步都写的很详细,以下是全部代码,带有一定的注释:
import matplotlib.pyplot as plt#导入画图的包matplotlib
import numpy as np
from scipy.optimize import curve_fit#导入拟合曲线方程的包

#先生成一群点,把点画出来
fig, ax = plt.subplots()
x = np.array([-5,-4,-3,-2,-1,0, 1,2,3,4,5]).astype(np.float64)#点的横坐标,放在一个数组里面
y = np.square(x).astype(np.float64)#y=x^2,根据x生成y的坐标,我这里用的二次曲线方程
plt.ylim(-5, 35)#坐标系y轴范围
ax.scatter(x,y)#画成散点图

# 忽略除以0的报错
np.seterr(divide='ignore', invalid='ignore')

# 二阶曲线方程
def func_2(x, a, b, c):
    return a * np.power(x, 2) + b * x + c

# 鼠标点击事件  函数里面又绑定了一个鼠标移动事件,所以生成的效果是鼠标按下并且移动的时候
def on_button_press(event):
    fig.canvas.mpl_connect('motion_notify_event', on_button_move)

#on_button_move 鼠标移动事件
def on_button_move(event,y=y):
    if event.button==2:#1、2、3分别代表鼠标的左键、中键、右键,我这里用的是鼠标中键,根据自己的喜好选择吧
        x_mouse, y_mouse= event.xdata, event.ydata#拿到鼠标当前的横纵坐标

        ind=[]#这里生成一个列表存储一下要移动的那个点
        #计算一下鼠标的位置和图上点的位置距离,如果距离很近就移动图上那个点
        for i in range(len(x)):
            #计算一下距离 图上每个点都和鼠标计算一下距离
            d = np.sqrt((x_mouse -x[i] ) ** 2 + (y_mouse -y[i]) ** 2)
            if d<0.8:#这里设置一个阈值,如果距离很近,就把它添加到那个列表中去
                ind.append(i)

        if ind:#如果ind里面有元素,说明当前鼠标的位置距离图上的一个点很近
            #通过索引ind[0]去改变当前这个点的坐标,新坐标是当前鼠标的横纵坐标(这样给人的感觉就是这个点跟着鼠标动了)
            y[ind[0]] = y_mouse
            x[ind[0]] = x_mouse

            #然后根据所有点拟合出来一个二次方程曲线
            popt2, pcov2 = curve_fit(func_2, x, y)
            a2 = popt2[0]
            b2 = popt2[1]
            c2 = popt2[2]
            yvals2 = func_2(x, a2, b2, c2)

            #拟合好了以后把曲线画出来
            ax.cla()
            plt.ylim(-5, 35)
            ax.scatter(x, y)
            ax.plot(x, yvals2)
            fig.canvas.draw_idle()  # 重新绘制整个图表,所以看到的就是鼠标移动点然后曲线也跟着在变动

#鼠标释放事件,鼠标松开的时候,就把上面鼠标点击并且移动的关系解绑  这样鼠标松开的时候 就不会拖动点了
def on_button_release(event):
    fig.canvas.mpl_disconnect( fig.canvas.mpl_connect('motion_notify_event', on_button_move))  # 鼠标释放事件

fig.canvas.mpl_disconnect(fig.canvas.manager.key_press_handler_id)  # 取消默认快捷键的注册,
fig.canvas.mpl_connect('button_press_event', on_button_press)#鼠标点击事件
fig.canvas.mpl_connect('button_release_event', on_button_release)#鼠标松开
plt.show()#显示图像
总结
如果您发现我写的有错误,欢迎在评论区批评指正!