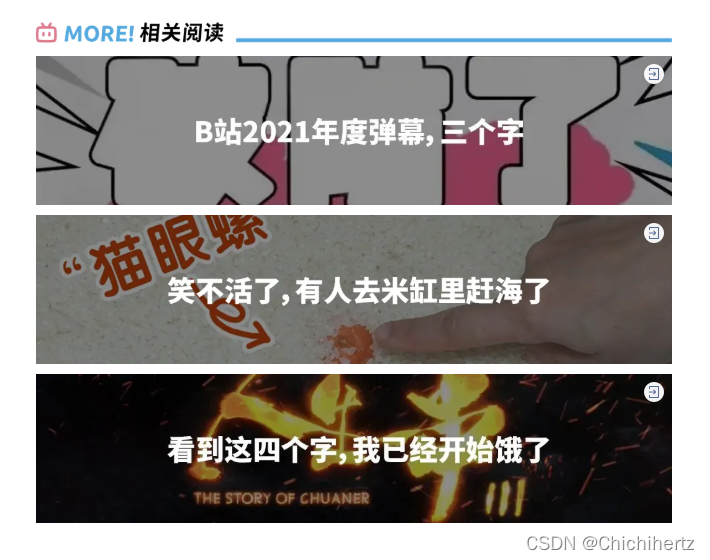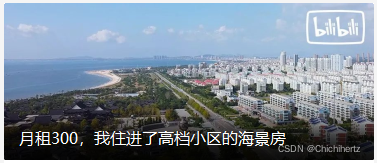
起因是看到了b站的往期推荐,觉得这种图片应该能批量处理。
本文只是在校大学生的一次尝试,代码也是各处搜罗来的,谢谢提供这些代码的大佬!
代码基本没有优化,也还有很多不完善的地方,希望各位大佬指正。
代码:
import re
import sys
import cv2
import requests
from lxml import etree
from PIL import ImageFont, ImageDraw, Image
import numpy as np

# 获取文章封面图
print("<一键制作微信尾部往期精选图>")
URL = input("输入网址:")
try:
    response = requests.get(URL, timeout=3)
except:
    try:
        print("连接失败,请检查输入网址是否正确")
        URL = input("请重新输入网址:")
        response = requests.get(URL, timeout=3)
    except:
        print("连接失败,请稍后再试")
        input("输入任意字符退出")
        sys.exit()
data = response.text
url = re.findall('msg_cdn_url = "(.*?)"', data, re.I | re.S | re.M)
imageUrl = url[0]

# 获取网页源代码及获取标题
html = requests.get(URL)
etree_html = etree.HTML(html.text)
content = etree_html.xpath('//*[@id="activity-name"]/text()')

for each in content:
    replace = each.replace('\n', '').replace(' ', '')
    if replace == '\n' or replace == '':
        continue
    else:
        print(replace)

# 保存文章封面图到本地
file_name = './chache/cover.jpg'
res = requests.get(imageUrl)
with open(file_name, 'wb') as f:
    f.write(res.content)
print("封面图已保存")

# 对封面图进行裁剪操作
img = cv2.imread('./chache/cover.jpg')
imgheight = img.shape[0]
imgwidth = img.shape[1]
cropped = img[int((imgheight / 2) - 120):int((imgheight / 2) + 120), 0:int(imgwidth)]


# 对封面图进行压暗操作
def imgBrightness(img1, c, b):
    rows, cols, channels = img1.shape
    blank = np.zeros([rows, cols, channels], img1.dtype)
    rst = cv2.addWeighted(img1, c, blank, 1 - c, b)
    return rst


chagelight = imgBrightness(cropped, 0.4, 3)

# 导出处理完成的封面图
cv2.imwrite("./chache/cover_cut.jpg", chagelight)

# 绘制文字信息
# 读取图片
pil_image = Image.open("./chache/cover_cut.jpg")
# pil_image 接收住这个图片对象
# width 为图片的宽, height为图片的高
width, height = pil_image.size

# 生成一张尺寸为 width * height  背景色为白色的图片
bg = Image.new('RGB', (width, height), color=(255, 255, 0))

bg.paste(pil_image, (0, 0))  # 写入底图

word = replace  # 写入的文字
# word = word.decode('utf-8')  # 这里吧文本就是编下码, 有时候从数据库中拿出来的数据写入的时候会乱码
# 使用ImageFout.truetype("字体", "文字大小(像素px)")
SimHei = "./font/font.TTF"  # 一个字体文件
font = ImageFont.truetype(SimHei, 35)  # 设置字体和大小
# 计算出要写入的文字占用的像素
w, h = font.getsize(word)  #
# 创建一个可以在给定图像上绘图的对象
draw = ImageDraw.Draw(bg)
draw.text(((width - w) / 2, (height - h) / 2), word, fill="#ffffff", font=font)
# 剔除标点符号
punctuation = '!,;:?"\'、,;|. '
def removePunctuation(text):
    text = re.sub(r'[{}]+'.format(punctuation), ' ', text)
    return text.strip()
name = removePunctuation(replace)
# 保存画布
bg.save('往期推荐完成_' + str(name) + '.png', "PNG")
原理:
1、通过链接获取封面图
2、通过链接获取网页源代码,在源代码里面获取到当前推文的标题
3、保存文章封面图至本地
4、对保存的封面图进行裁剪
5、对封面图进行压暗
6、绘制文字
实现效果:


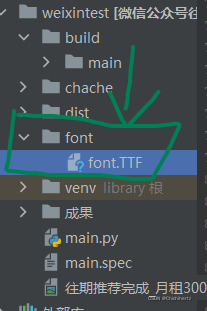
?项目文件夹内需要有font目录存放一个字体文件。我用的字体是迷你简粗宋。
