文章目录
前言:
学习模板的目的:用于前台展示 使用 vue
页面跳转由后台控制
前后端分离 前端 template 需要导入render_template
一、简单模板
from flask import Flask,render_template
app = Flask(__name__)
@app.route('/')
def login():
	# 注意模板的路径,如果是在templates的demo文件夹下,这需要写成demo/index.html
    return render_template('index.html')

if __name__ == '__main__':
    app.run(debug=True)
<!DOCTYPE html>
<html lang="en">
<head>
    <meta charset="UTF-8">
    <title>Title</title>
</head>
<body>
    <input id="kw" name="wd" class="s_ipt" value maxlength="255" autocomplete="off">
</body>
</html>

注意:一定要将存放模板的文件夹设置为templates(默认原生的文件名)
如果要更改默认的文件夹名templates,需要在此处指定,且性创建的文件名要和这的一致
app = Flask(__name__,template_folder='template')
二、模板传参
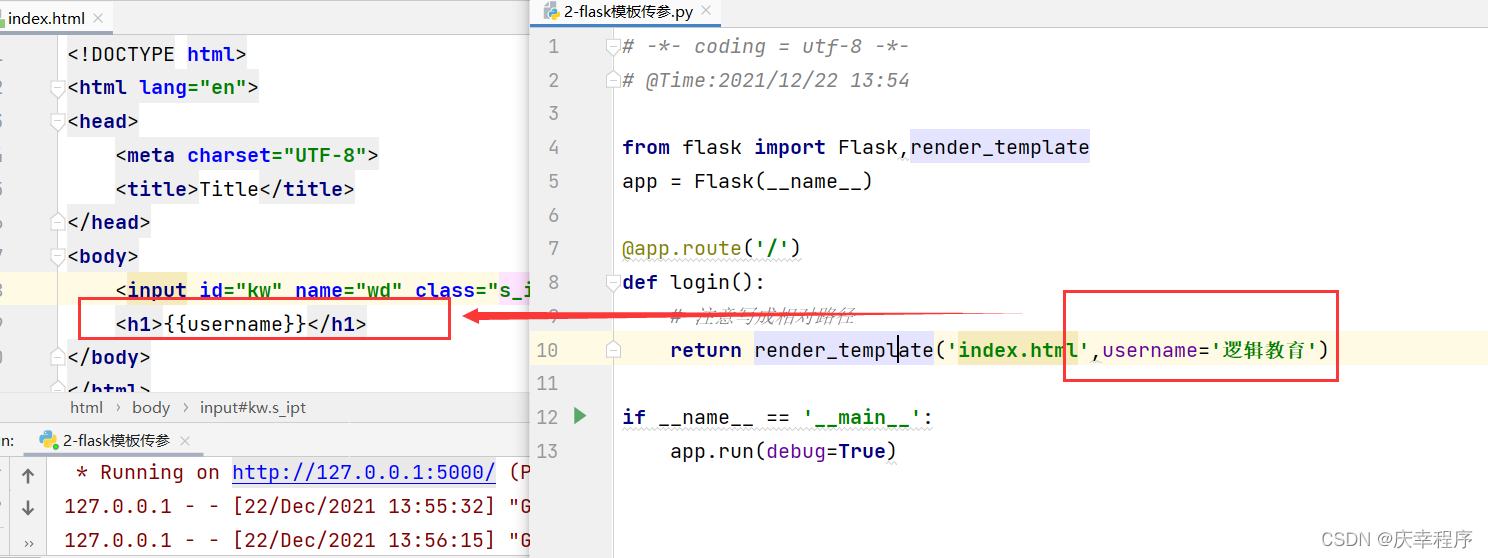
可以传指定的参数,交由前端页面进行展示

若传多个参数,可以将多个参数写成字典格式进行传递
return render_template('index.html',context=context)

使用
**context可以做到拆包的功能(见下)
三、jinja2内置过滤器
Jinja2模板过滤器 相当于一个函数,将变量传入到过滤器中,然后过滤器根据自己的功能,再返回到响应的值,之后再讲结果渲染到页面中。
# 绑定路由
@app.route('/')
def index():
    context = {
        'username':'xiaohuahua',
        'age':-18,
        'city':'hebei',
        'es':"<script>alert('hello')</script>",
        "books":['java','python','html'],
        'book':{'java':4},
        'shuzhi':89.0,
        'kong':' ioi ',
        'chang':'中国 河北省 廊坊市'
    }
    return render_template('jinjia_demo.html',**context)
    <p>首页</p>
    <h1>{{ username }}</h1>
    <!--  过滤器 | 左边是待处理的参数,右侧是函数  -->
    <!--  abs过滤器 返回数值的绝对值  -->
    <h1>{{ age|abs }}</h1>
    <!--  默认过滤器  -->
    <h1>{{ name|default('这个人很懒,什么都没有留下')}}</h1>
<!--    <h1>{{ es }}</h1>-->
    <!-- 关闭转义功能-->
    {% autoescape off %}
    <p>{{ es }}</p>
    {% endautoescape %}
    <!--  关闭转义功能,方法二   -->
    <h1>{{ es|safe }}</h1>


题外话:Pycharm设置HTML文件自动补全代码或标签
https://blog.csdn.net/qq_35556064/article/details/80333083
还是直接用flask创建文件夹子吧,就不用烦以上事情了。
    <!-- 数值换算 转为int类型 转为float类型 -->
    {{shuzhi|int}}
    {{shuzhi|float}}
    <!--  变量转为字符串  -->
    {{shuzhi|string}}

    <!--  字符串  全部大写 全部小写-->
    {{city|upper}}
    {{city|lower}}
    <!--替换-->
    {{city|replace(city,'新疆')}}

    <!--截取指定长度的字符串 例如微博显示一些数据后,再以...显示代表其余内容-->
    <p>{{username|truncate(length=4)}}</p>

    <!--提取HTML标签里的信息 alert('hello')-->
    <p>{{es|striptags}}</p>
    <!--trim截取字符串前面和后面的空白字符-->
    <p>{{kong|trim}}</p>

    <!--  计算长字符串中单词个数  根据空格划分 -->
    {{chang|wordcount}}
待学!!!!!!!!!!!!!
    <!-- format 格式化字符串-->
    <!--  待做  -->
    <!-- join 拼接字符串-->
    <!--  待做  -->
小技巧

- if快捷键
{% if $END$ %}
{% endif %}
- while快捷键
{% while %}
{% endwhile %}
- autoescape关闭转义功能
{% autoescape off %}
$END$
{% endautoescape %}
四、Jinja2自定义过滤器
通用过滤器
关键点如下:
@app.template_filter('my_filter')
def my_filter(value):
	pass
# 绑定路由
@app.route('/')
def index():
    context = {
        'username':'hello xiaohuahua',
    }
    return render_template('jinjia_demo.html',**context)

# 自定义过滤器
@app.template_filter('my_filter')
def my_filter(value):
    return value.replace('hello','byebye')
    <!--自定义过滤器的使用-->
    <p>{{username|my_filter}}</p>

自定义时间过滤器
关注点:导包、条件判断、日期使用方式、自定义过滤器
{{now_time|handle_time}}
|前面是进行过滤的参数,后面试过滤的函数
时间戳可以进行加减操作
from flask import Flask,render_template,Response
from datetime import datetime

# 绑定路由
@app.route('/')
def index():
    context = {
        'now_time': datetime(2021,12,22,15,30,0)
    }
    return render_template('jinjia_demo.html',**context)

@app.template_filter('handle_time')
# now_time 传递过来后就是time
def handle_time(time):
#     小于1分钟,传入刚刚,大于一分小于1小时,xxx分钟之前,大于1小时小于24,xxx小时之前
    now = datetime.now()
    # 获取总秒数
    time_stamp = (now - time).total_seconds()
    if isinstance(time,datetime):
        if time_stamp<60:
            return '刚刚'
        elif 60<=time_stamp<=60*60:
            return '%s分钟之前'%int(time_stamp/60)
        elif 60*60<time_stamp<=60*60*24:
            return '%s小时之前'%int(time_stamp/(60*60))
    else:
        return time
<p>博客发表时间{{now_time|handle_time}}</p>

五、控制语句
所有的控制语句都是放在
{%...%}中,并且有一个语句{% endxxx %}来进行结束,Jinja中常用的控制语句有if/for..in..
1-if 语句
if语句和python中的类似,可以使用>,<,<=,>=,==,!=来进行判断,也可以通过and,or,not,()来进行逻辑合并操作
context = {
    'username': 'xioahuahuas',
    'age': 18,
    'books':['java','python','html','js'],
    'bookss':{
        'python':999,
        'java':888
    }
}
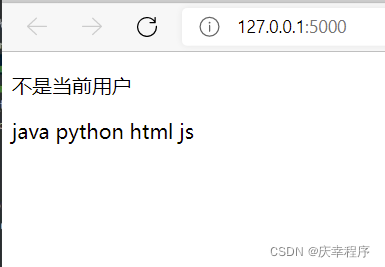
    {% if username=='xioahuahua' %}
    <p>{{username}}</p>
    {% else %}
    <p>不是当前用户</p>
    {% endif %}
2-for…in语句
for循环可以遍历任何一个序列包括列表、字典、元组。并且可以进行反向遍历 如果序列没有值,也可以进入到else中。
列表
    <!--  进行for循环 -->
    {% for book in books %}
    {{book}}
    {% endfor %}

当 ‘books2’:[],时
    <!--  如果列表中没有值,执行else里面的数据  -->
    {% for book in books2%}
    {{book}}
    {% else %}
    没有值
    {% endfor %}
    <br>
输出“没有值”
遍历字典
注意字典名.items()
    <!--遍历字典-->
    {% for key,value in bookss.items() %}
    <p>{{key}}--{{value}}</p>
    {% endfor %}

空字典 ‘bookss2’:{},输出空字典对应的值
    {% for key,value in bookss2.items() %}
    {{key}}
    {% else %}
    这是一个空字典
    {% endfor %}
小技巧:
<hr>分割线 <br>换行
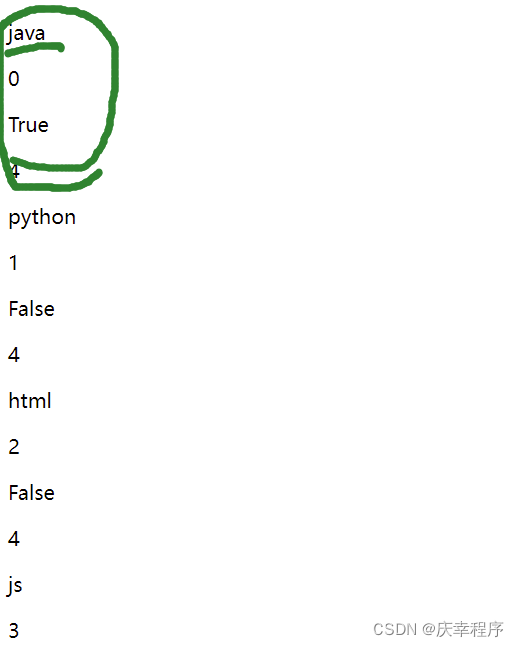
获取当前遍历状态

    {% for book in books %}
    <p>{{book}}</p>
    <!--  默认索引从1开始  -->
<!--    <p>{{loop.index}}</p>-->
    <!--  索引从0开始  -->
    <p>{{loop.index0}}</p>
    <!--  是否是第一次迭代  -->
    <p>{{loop.first}}</p>
    <!--  获取序列的长度  -->
    <p>{{loop.length}}</p>
    {% else %}
    {% endfor %}

六、宏
作用:相当于类里面创建一个方法,可以在本html页面进行多次调用使用,也可以导入到其它HTML,实例化进行使用
优点:高效、便利
6-0 宏的基本模板
注意:()里面的参数都需要加 '' ,记得添加
定义宏
    {% macro 宏的名字('参数1','参数2',...)%}
    html代码 中可有对应的参数1 参数2 ....
    {% endmacro %}

使用宏
在本页面 {{ 宏的名字('参数1','参数2',....) }}
在本页面 {{ 宏的名字('参数1','参数2',....) }}
在本页面 {{ 宏的名字('参数1','参数2',....) }}

在其它页面,需要导入宏
{% import 'macro.html' as macro %}
进行调用     {{ macro.宏的名字('参数1','参数2',...)}}
导入宏的方式2
{% from 'macro.html' import 宏的名字 %}

{{ 宏的名字('参数1','参数2')}}
6-1 在自己的HTML中使用宏(以下宏均为input为例)
    {% macro input(name, value='', type='text') %}
    <input type="{{ type }}",name="{{name}}",value="{{ value }}">
    {% endmacro %}
    <table>
        <tr>
            <td>用户名:</td>
            <td>{{ input('username') }}</td>
        </tr>
        <tr>
            <td>密码:</td>
            <td>{{ input('password',type='password') }}</td>

        </tr>
    </table>

6-2 在其它页面使用宏
在html页面的第一行导入宏,相对路径,并起别名
{% import 'macro.html' as macro %}
其次,在对应的位置,进行调用即可
    <!--使用marco.html里面定义的宏-->
    {{ macro.input('username')}}
    {{ marco.input('username')}}
另一种也在第一行导入宏,并在需要位置可多次使用宏的方法
{% from 'macro.html' import input %}

{{ input('password')}}
6-3 如果传入宏对应的值
使用宏的地方的值,都为此值
令name=username,已在py文件中定义context中'username': 'xioahuahuas',。
    {% macro input(name, value='', type='text') %}
    <input type="{{ type }}",name="{{username}}",value="{{ value }}">
    {% endmacro %}
调用宏,进行使用时,若传入的参也是username
{% import 'macro.html' as macro with context %}

    <!--使用marco.html里面定义的宏-->
    {{ macro.input('username')}}

七、include与set传参
7-1 include的复用
可以写整块内容,想比较宏来讲,可复用的模板内容更多
概念:include语句可以把一个模板引入到另外一个模板中,类似于把一个模板的代码copy到另外一个模板的指定位置
作用:复用代码,提高效率
关键点:针对的是模板,如一些网站固定的开头和结尾模板
使用:{% include '相对路径' %}放在需要的位置即可!
{% include 'common/header.html' %}
python页面中
# muban.html 与 article.html均复用着header.html与footer.html中的内容
@app.route('/')
def index():
    context = {
        'username':'hauhua'
    }
    return render_template('muban.html',**context)

@app.route('/article')
def article():
    return render_template('article.html')
common文件夹下的复用文件
- footer.html文件
-<div class="footer">这是尾部</div> - header.html文件
<!DOCTYPE html>
<html lang="en">
<head>
    <meta charset="UTF-8">
    <title>Title</title>
</head>
<body>
<!-- 存放公共的代码,如这里存放公共的列表-->
  <ul>
    <li>国际</li>
    <li>军事</li>
    <li>时事</li>
    <li>娱乐</li>
  </ul>
</body>
<style lang="scss">
    ul{
        display: flex;
        list-style: none;
    }
    ul li{
        margin-right: 10px;
    }
</style>
</html>
可以在其它编辑器中写好代码,复制黏贴过来,提高效率!
7-2 全局set设置与局部set设置以及context携带的参数
位置:在HTML页面中
作用:直接创建语句,方便在模板html中添加变量
注意:set 中 的变量会作为全局变量,将函数中传递的独有参数给覆盖掉!
<!--注意以下注释是无效的 只能删除-->
<!--全局概念-->
<!--{% set username = 'xioahu323ahua' %}-->
<!--使用include中定义的模板-->
{% include 'common/header.html' %}
<hr>
  <h2>模板include可复用:以此开头和结尾为例</h2>
    <!--如果加上全局变量,一切以全局变量里的为主 没有加,则按照context传递来的参数为主-->
    <p>username:{{username}}</p>

    <!-- 局部概念 -->
    <!--只在局部内生效,外面的同样参数名的数值,看是否是context,还是全部变量里的-->
    {% with %}
        {% set username = '???' %}
        <p>{{username}}</p>
    {% endwith %}
7-3 with局部中字符串、字典、列表的赋值方式
作用:
1、可以局部使用变量,不受全局以及视图函数中自定义携带的context字典的影响
2、可以进行普通的字典、列表的赋值
    <!-- 局部概念 -->
    <!--只在局部内生效,外面的同样参数名的数值,看是否是context,还是全部变量里的-->
    <p>字符串的赋值方式一</p>
    {% with %}
        {% set username = '???' %}
        <p>{{username}}</p>
    {% endwith %}

    <!--也可以直接使用with的foo在里面传递参数-->
    <p>字符串的赋值方式二</p>
    {% with foo='这是局部的' %}
        {{ foo }}
    {% endwith %}

    <p>字典的赋值1</p>
    {% with foo = {'name':'Amy'}%}
        {% for key,value in foo.items() %}
            <p>键:{{ key }}</p>
            <p>值:{{ value }}</p>
        {% endfor %}
    {% endwith %}

    <p>字典的赋值2</p>
    {% with foo = {'name':'Amy'} %}
        {% for value in foo.values() %}
            <p>值:{{ value }}</p>
        {% endfor %}
    {% endwith %}

    <p>列表的赋值</p>
    {% with foo = [1,2,3] %}
        {% for f in foo %}
            {{ f }}
        {% endfor %}
    {% endwith %}

7-4 使用视图函数中携带的context中的参数
{% import 'macro.html' as macro with context %}
代码说明:control.html是视图函数中的模板,context是该视图函数携带的参数。该行代码的意思是,继承自定义marco宏模板并另起别名为maro,且导入视图函数中的context字典。

