一、python下载
百度云:链接:https://pan.baidu.com/s/1lUbH9ohPMZBXW_7OkCTItA?
??????????????提取码:sen1
二、安装python环境
(一)、打开安装包3.7.4
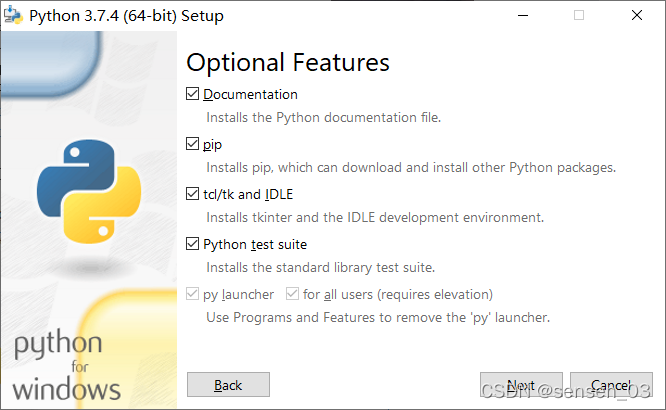
1、按图勾选
此时我们选中Customize?installon(自定义安装,这样可以修改安装路径)下边两项要勾选
?????????????? ?
?
2、在这里全部勾选
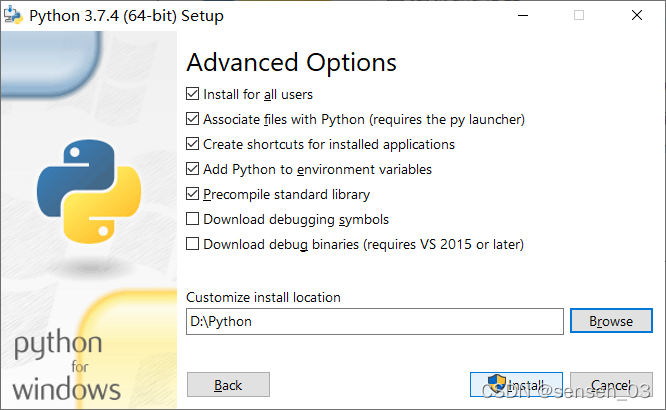
?3、在这里我们除了最后两项,全部勾选,下面的安装路径可以由我们自己修改,好了就可以点击Install
?4、win? + R打开cmd
输入 python --version
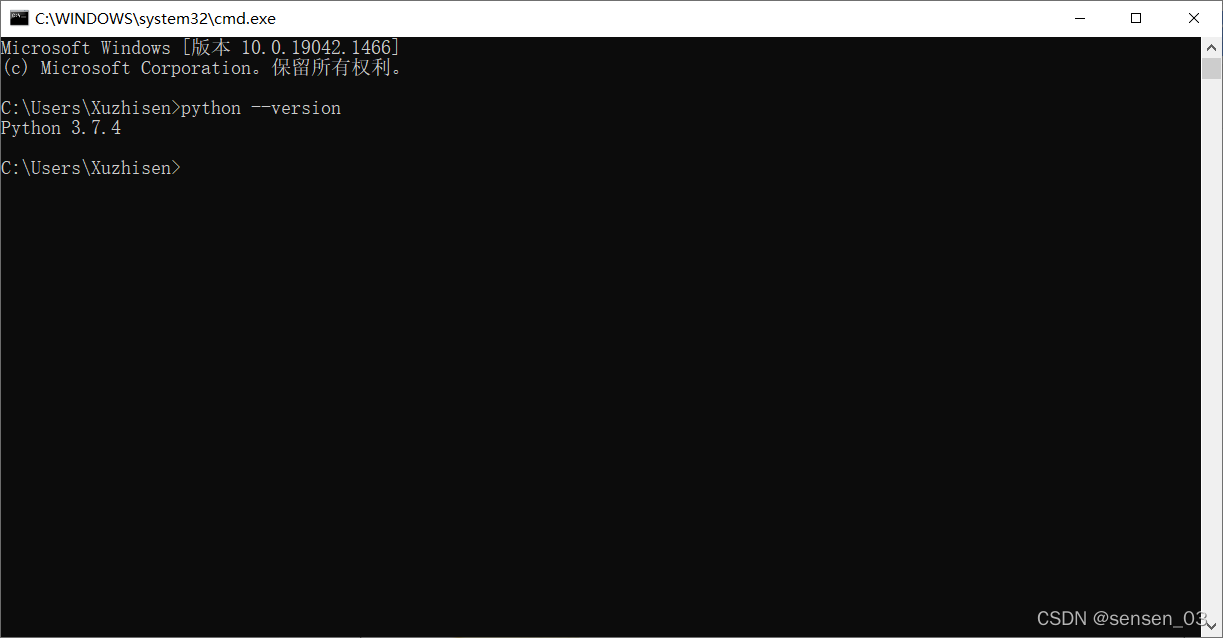
出现3.7.4版本安装成功
三、安装notebook
?一、打开cmd 输入
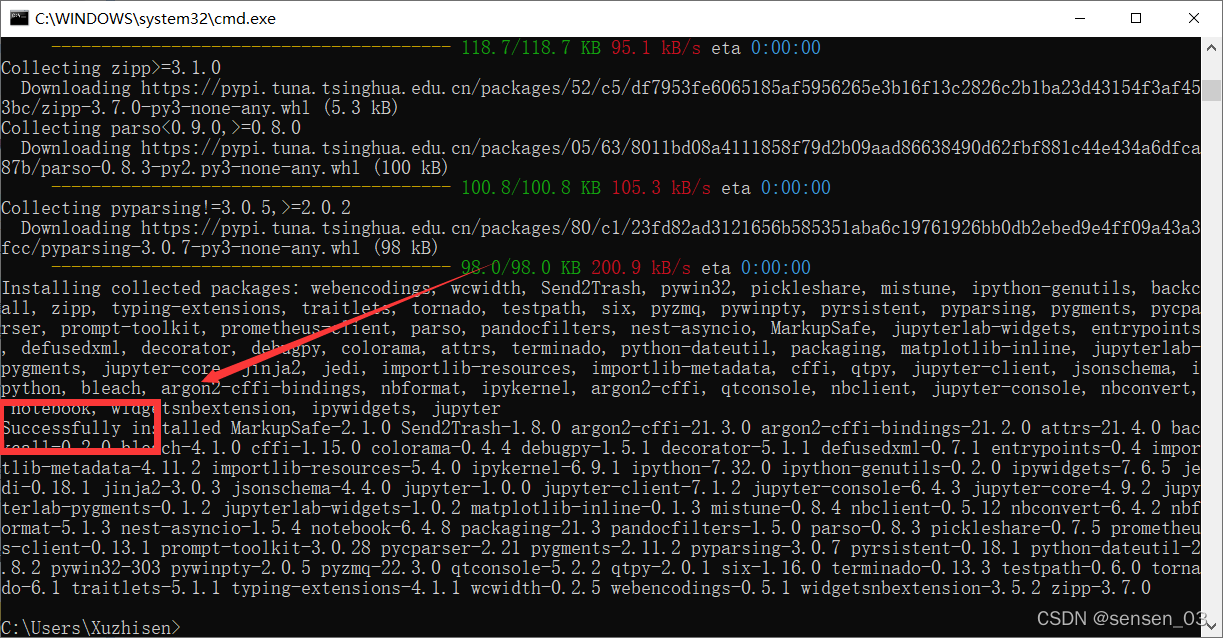
1、这里建议用第二个镜像,下载速度会更快
pip install jupyter notebook
或者 pip install -i https://pypi.tuna.tsinghua.edu.cn/simple jupyter notebook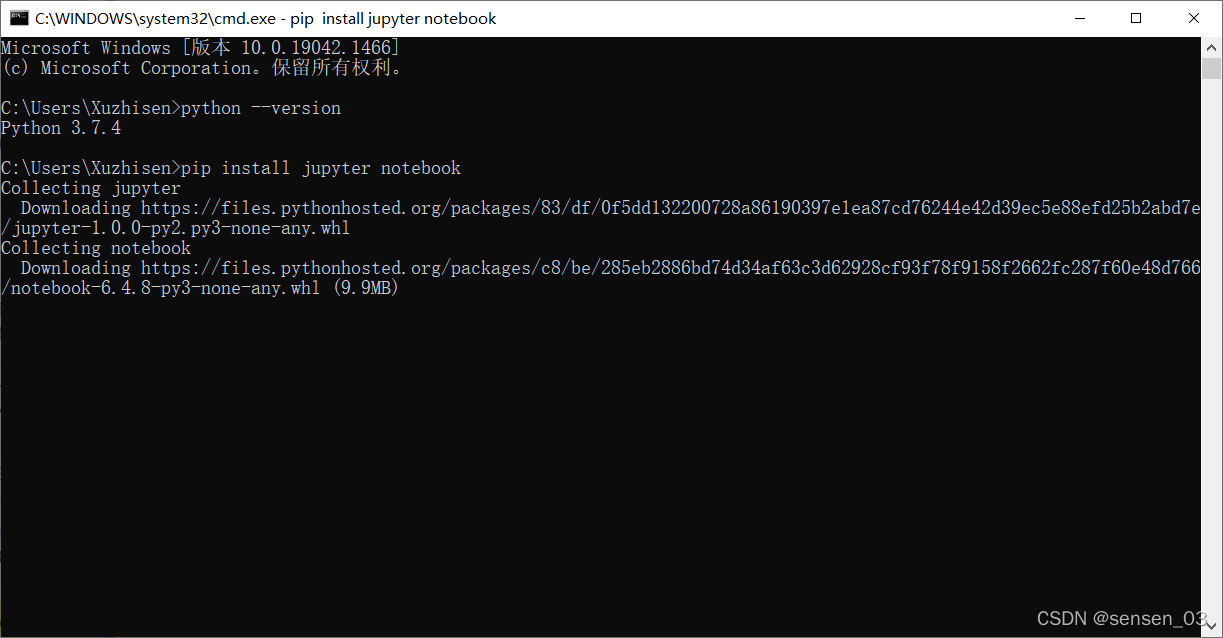
?2、可能遇到的问题,提示你pip版本太低,需要升级

?3、下载过程巨慢,建议干会别的
下载成功会出现
二、更改存储目录:?
1、查看jupyter notebook.exe所在目录
# 在cmd下用下面的命令查看所在目录
jupyter notebook --generate-config

?2、打开上面查找到的路径目录
打开CTRL + F 搜索 c.NotebookApp.notebook_dir
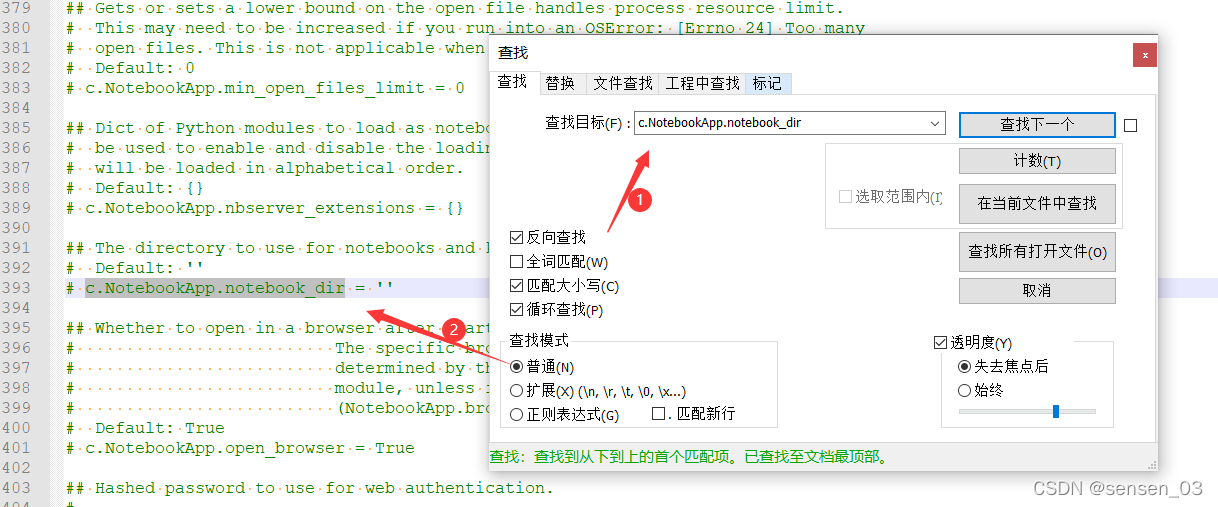
3、去掉注释符#,添加自定义存储目录(需要提前创建好存放的文件夹目录)
c.NotebookApp.notebook_dir = 'D:\Python\notebook'

4、启动
jupyter notebook
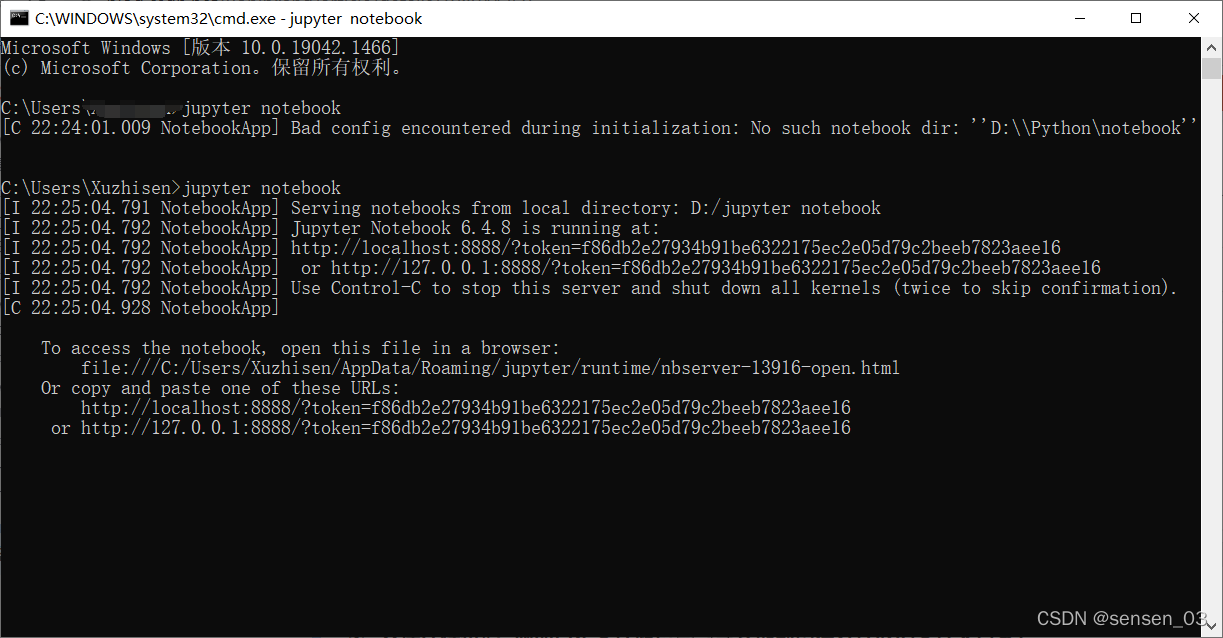
?启动后会自动跳转到 http://localhost:8888/tree 地址
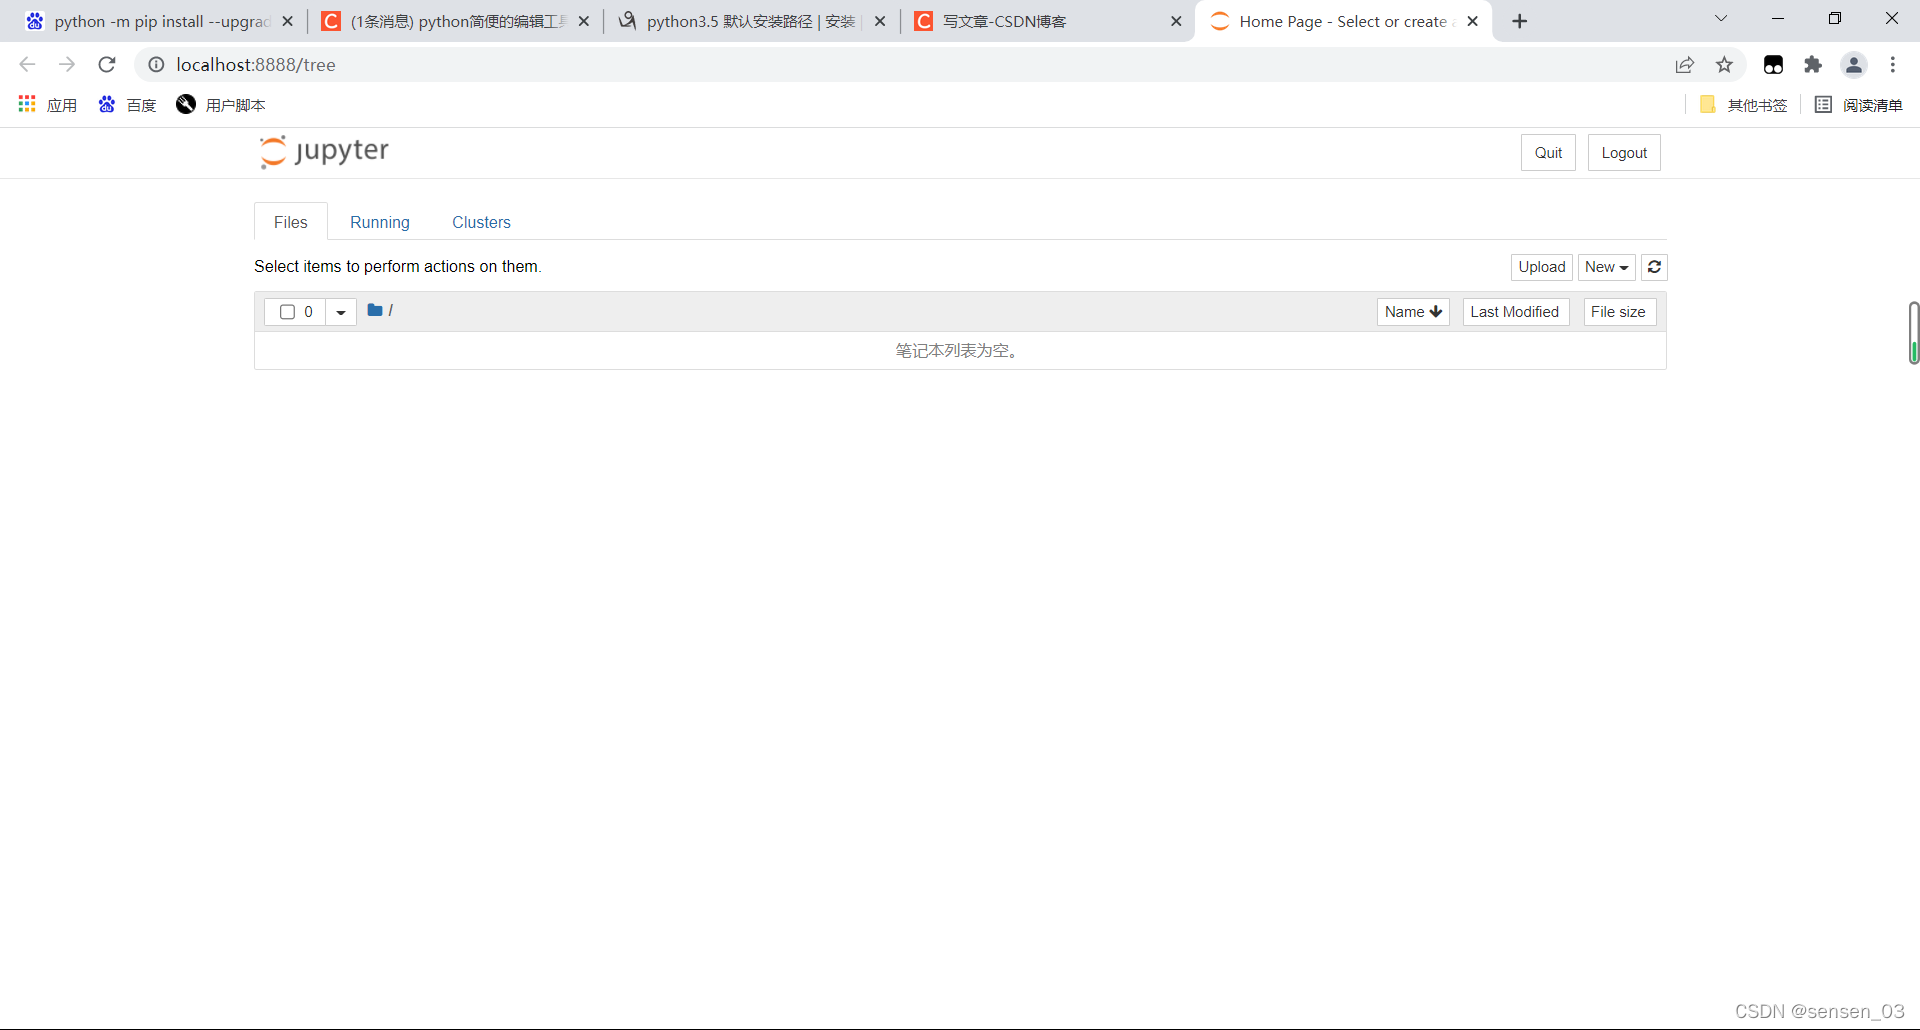
四、简单的使用
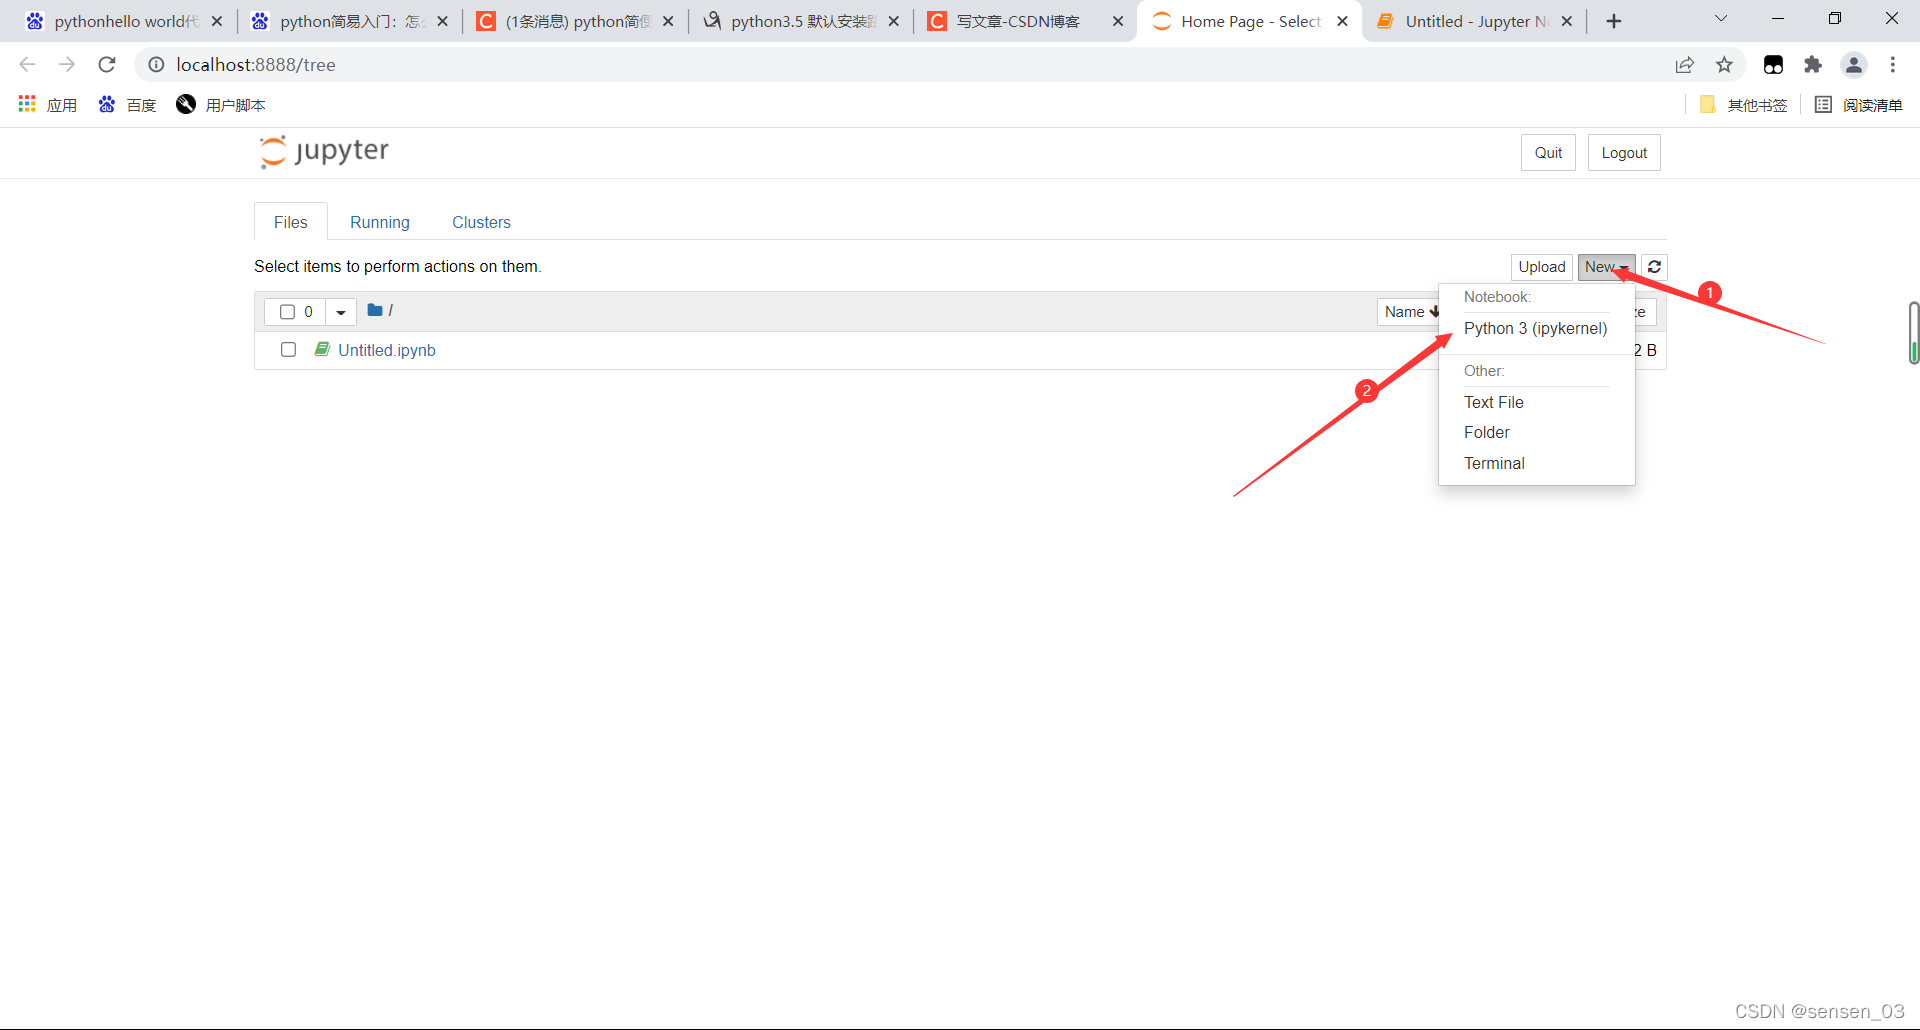
1、创建一个新的python3文件
?
?
print('hello world')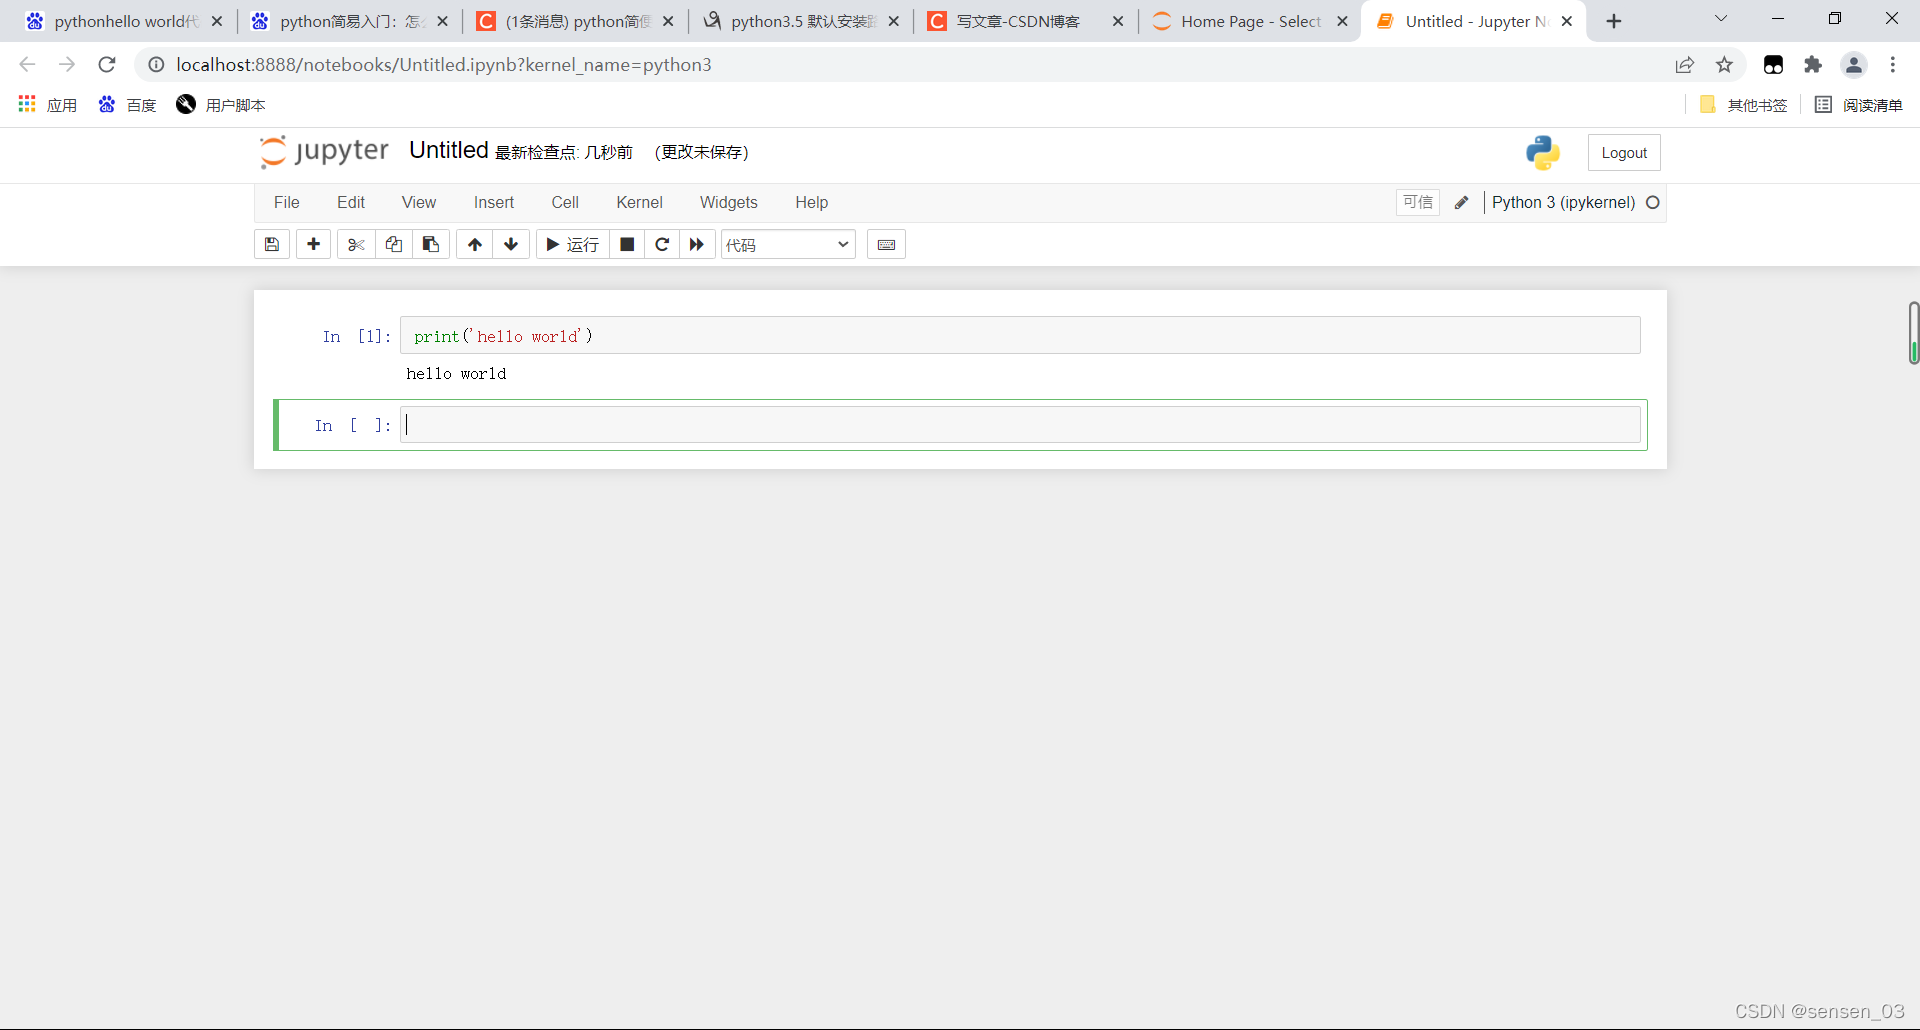
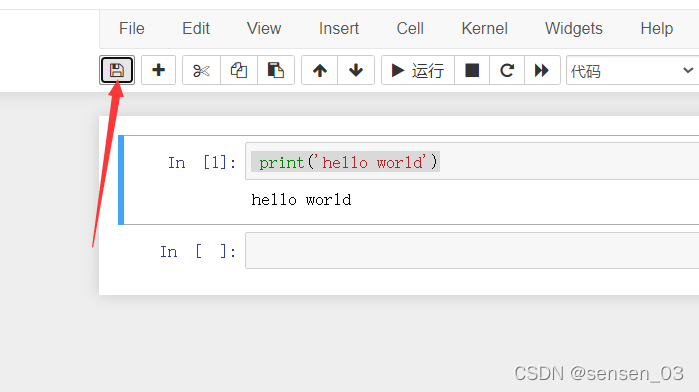
2、编辑后进行保存
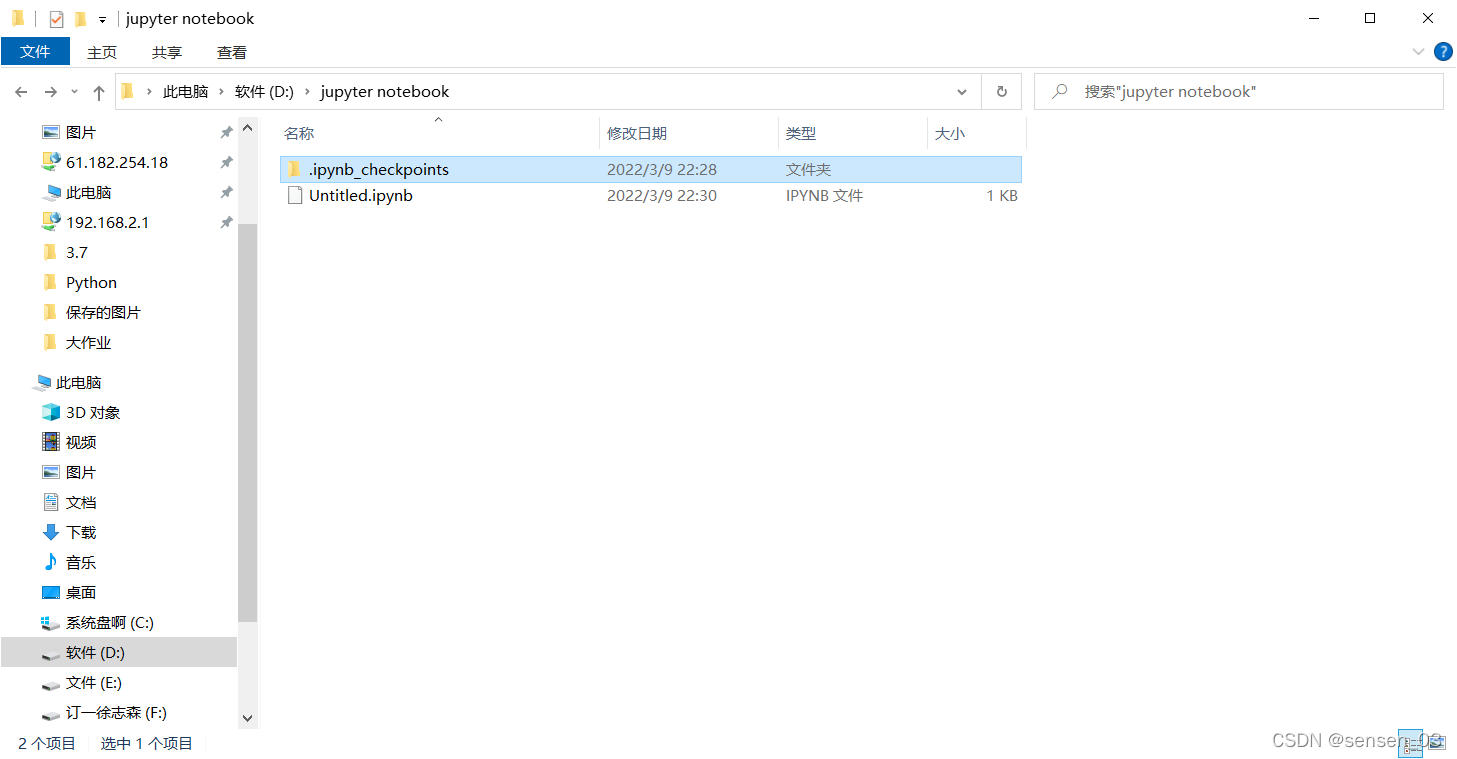
?3、在刚才我们设置的那个目录下’D:/jupyter notebook’就可以看到刚才保存的文件了,这样文件可以永久保存了
windows bat脚本启动
创建jupyter.bat文件,添加以下内容,以管理员方式启动即可
?
start jupyter notebook