前面我们已经成功地在yen项目上运行的我们自己的数据集。
但是效果比较差, 分析原因可能有以下两点。
1、 用于训练的数据集分辨率过低
2、超参数使用不巧当
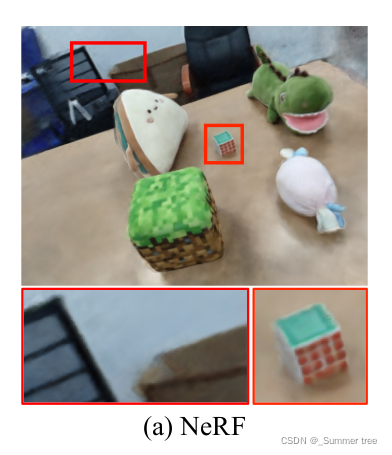
Learning Object-Compositional Neural Radiance Field for Editable Scene Rendering论文中记录的效果
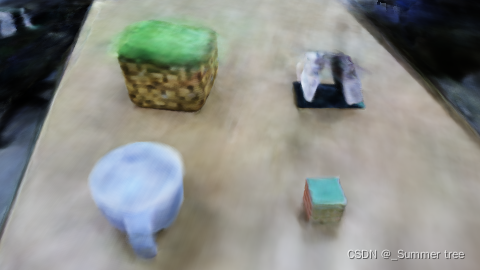
我们自己运行出来的效果。
文章目录
- 目标
- args.config
- Debug 调试获取数据情况
- load_llff.py `_load_data()`
- load_llff.py `_minify()`
- load_llff.py `load_llff_datad()`
- load_llff.py `render_path_spiral()`
- run_nerf.py `train()`
- run_nerf.py `create_nerf()`
- run_nerf_helpers.py `class NeRF()`
- run_nerf_helpers.py `get_rays_np()`
- run_nerf.py ` render()`
- run_nerf.py `batchify_rays()`
- run_nerf.py `render_rays()`
- run_nerf.py `raw2outputs()`
- run_nerf.py `render_path()`
- 总结
目标
通过阅读yen源码,尝试回答以下问题或达成的目的。
- config.txt 文件中,各个参数的含义。
- 了解代码中重要变量的含义极其计算方式
- 调整分辨率前后通过COLMAP计算出来的poses和bds是一样的吗?
- 论文中那些定量的指标是哪里计算的,并且输出在哪里
- render_pose 和pose有什么关系。
- load_llff_data()的参数recenter?
方法:所以准备在pycharm中配置解释器,通过设置断点来查看数据详情。
args.config
直到我把train()的全流程都走完了之后,才意识到一个重要的东西: 我应该先看args!!!
基本参数
 	parser.add_argument('--config', is_config_file=True,
                        help='config file path') # 生成config.txt 文件
    parser.add_argument("--expname", type=str,
                        help='experiment name') # 指定实验名称
    parser.add_argument("--basedir", type=str, default='./logs/',
                        help='where to store ckpts and logs') #指定输出目录
    parser.add_argument("--datadir", type=str, default='./data/llff/fern',
                        help='input data directory') # 指定数据目录
training options
	parser.add_argument("--netdepth", type=int, default=8,
                        help='layers in network')   # 网络的深度(层数)
    parser.add_argument("--netwidth", type=int, default=256,
                        help='channels per layer')  # 网络的宽度,也就是每一层的神经元个数
    parser.add_argument("--netdepth_fine", type=int, default=8,
                        help='layers in fine network')
    parser.add_argument("--netwidth_fine", type=int, default=256,
                        help='channels per layer in fine network')
    parser.add_argument("--N_rand", type=int, default=32*32*4,  # batch_size,光束的数量。
                        help='batch size (number of random rays per gradient step)')
    parser.add_argument("--lrate", type=float, default=5e-4,  # 学习率
                        help='learning rate')
    parser.add_argument("--lrate_decay", type=int, default=250,  # 指数学习率衰减(1000 步)
                        help='exponential learning rate decay (in 1000 steps)')
    parser.add_argument("--chunk", type=int, default=1024*32,  # 并行处理的光线数量,如果内存不足则减少
                        help='number of rays processed in parallel, decrease if running out of memory')
    parser.add_argument("--netchunk", type=int, default=1024*64,  # 通过网络并行发送的点数,如果内存不足则减少
                        help='number of pts sent through network in parallel, decrease if running out of memory')
    parser.add_argument("--no_batching", action='store_true',  # 一次只能从 1 张图像中获取随机光线
                        help='only take random rays from 1 image at a time')
    parser.add_argument("--no_reload", action='store_true',  # 不要从保存的 ckpt 重新加载权重
                        help='do not reload weights from saved ckpt')
    parser.add_argument("--ft_path", type=str, default=None,  # 为粗略网络重新加载特定权重 npy 文件
                        help='specific weights npy file to reload for coarse network')
rendering options
	parser.add_argument("--N_samples", type=int, default=64,  # 每条射线的粗样本数
                        help='number of coarse samples per ray')
    parser.add_argument("--N_importance", type=int, default=0, # 每条射线的附加精细样本数
                        help='number of additional fine samples per ray')
    parser.add_argument("--perturb", type=float, default=1., # 设置为 0. 无抖动,1. 抖动
                        help='set to 0. for no jitter, 1. for jitter')
    parser.add_argument("--use_viewdirs", action='store_true',
                        help='use full 5D input instead of 3D')
    parser.add_argument("--i_embed", type=int, default=0,  #为默认位置编码设置 0,为无设置 -1
                        help='set 0 for default positional encoding, -1 for none')
    parser.add_argument("--multires", type=int, default=10,  # 多分辨率。 位置编码的最大频率的 log2(3D 位置)
                        help='log2 of max freq for positional encoding (3D location)')
    parser.add_argument("--multires_views", type=int, default=4,  # 位置编码的最大频率的 log2(2D 方向)
                        help='log2 of max freq for positional encoding (2D direction)')
    parser.add_argument("--raw_noise_std", type=float, default=0.,  #  噪音方差
                        help='std dev of noise added to regularize sigma_a output, 1e0 recommended')

    parser.add_argument("--render_only", action='store_true',  # 不要优化,重新加载权重和渲染 render_poses 路径
                        help='do not optimize, reload weights and render out render_poses path')
    parser.add_argument("--render_test", action='store_true',  # 渲染测试集而不是 render_poses 路径
                        help='render the test set instead of render_poses path')
    parser.add_argument("--render_factor", type=int, default=0,  # 下采样因子以加快渲染速度,设置为 4 或 8 用于快速预览
                        help='downsampling factor to speed up rendering, set 4 or 8 for fast preview')
training options
	parser.add_argument("--precrop_iters", type=int, default=0, # 对主要作物进行培训的步骤数
                        help='number of steps to train on central crops')
    parser.add_argument("--precrop_frac", type=float, # ?
                        default=.5, help='fraction of img taken for central crops')
dataset options
 	parser.add_argument("--dataset_type", type=str, default='llff',
                        help='options: llff / blender / deepvoxels')
    parser.add_argument("--testskip", type=int, default=8,  # 将从测试/验证集中加载 1/N 图像,这对于像 deepvoxels 这样的大型数据集很有用
                        help='will load 1/N images from test/val sets, useful for large datasets like deepvoxels')
加载llff类型数据集的参数
	parser.add_argument("--factor", type=int, default=8,  # LLFF 图像的下采样因子
                        help='downsample factor for LLFF images')
    parser.add_argument("--no_ndc", action='store_true',   #如果是store_false,则默认值是True,如果是store_true,则默认值是False
                        help='do not use normalized device coordinates (set for non-forward facing scenes)')  #不要使用标准化的设备坐标(为非前向场景设置
    parser.add_argument("--lindisp", action='store_true',# 在视差而不是深度中线性采样 ?
                        help='sampling linearly in disparity rather than depth')
    parser.add_argument("--spherify", action='store_true',   # 球体的
                        help='set for spherical 360 scenes') # 设置为球形 360 场景
    parser.add_argument("--llffhold", type=int, default=8,  # 将每 1/N 个图像作为 LLFF 测试集,论文使用 8
                        help='will take every 1/N images as LLFF test set, paper uses 8')
logging/saving options
	parser.add_argument("--i_print",   type=int, default=100,
                        help='frequency of console printout and metric loggin')
    parser.add_argument("--i_img",     type=int, default=500,
                        help='frequency of tensorboard image logging')
    parser.add_argument("--i_weights", type=int, default=10000,
                        help='frequency of weight ckpt saving')
    parser.add_argument("--i_testset", type=int, default=50000,
                        help='frequency of testset saving')
    parser.add_argument("--i_video",   type=int, default=50000,
                        help='frequency of render_poses video saving')
Debug 调试获取数据情况
我们测试的是desk2这个数据集。
其中包含了151张图像。
load_llff.py _load_data()
-
从
poses_bounds.npy提取的原始数据poses_arr, size = 151 x 17 .
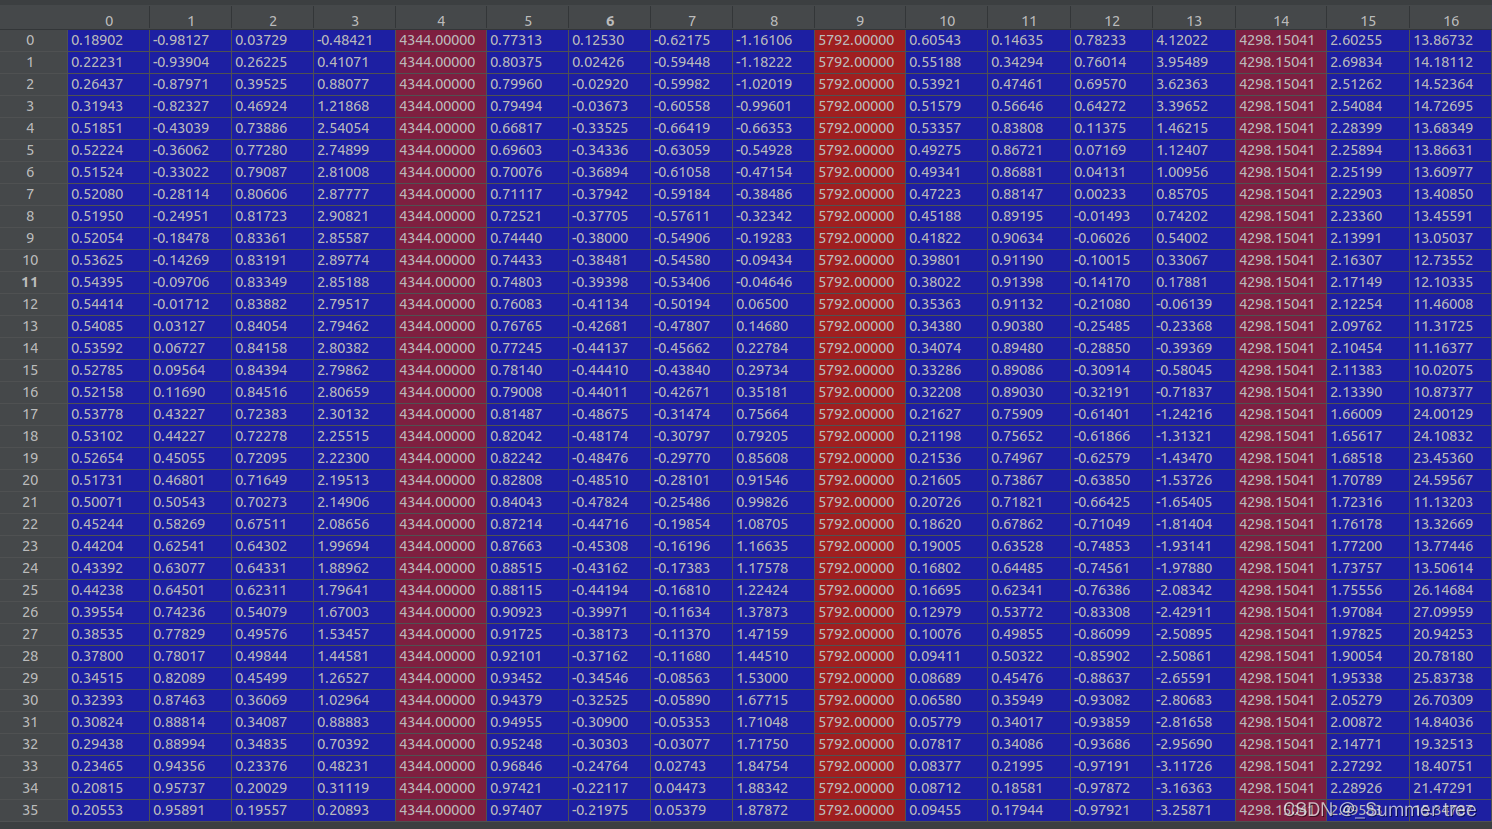
-
poses = poses_arr[:, :-2].reshape([-1, 3, 5]).transpose([1,2,0])(3, 5, 151), poses[0] ↓

-
bds = poses_arr[:, -2:].transpose([1,0])(2,151)

-
img0 = [os.path.join(basedir, 'images', f) for f in sorted(os.listdir(os.path.join(basedir, 'images'))) \ if f.endswith('JPG') or f.endswith('jpg') or f.endswith('png')][0]查看单张图片的情况。'.img0 = /data/img_desk2/images/0000.jpg' -
sh = imageio.imread(img0).shape单张图片的shape, (4344, 5792, 3) . -
-
imgfileslist类型,包含了目标数据的路径。 -
再次获取图片的shape ( sh = (543,724,3))
-
poses[:2, 4, :] = np.array(sh[:2]).reshape([2, 1])shape(3,5,151) poses[0] ↓

-
poses[2, 4, :] = poses[2, 4, :] * 1./factorshape(3,5,151) poses[0] ↓

-
imgs = imgs = [imread(f)[...,:3]/255. for f in imgfiles]读取所有的图像数据,并把值控制在0-1之间。

-
imgs = np.stack(imgs, -1)转为了array类型,shape (543, 727,3,1,151)

-
return poses, bds, imgs
load_llff.py _minify()
这个函数主要负责创建 目标分别率的数据集。
- 检查目标路径是否存在,若存在直接return。
args = ' '.join(['mogrify', '-resize', resizearg, '-format', 'png', '*.{}'.format(ext)])
        print(args)
        os.chdir(imgdir) # 修改当前工作目录
        check_output(args, shell=True)
        os.chdir(wd)
- 通过以上操作,创建了目标数据集。
load_llff.py load_llff_datad()
poses, bds, imgs = _load_data(basedir, factor=factor)
	poses = np.concatenate([poses[:, 1:2, :], -poses[:, 0:1, :], poses[:, 2:, :]], 1)
    poses = np.moveaxis(poses, -1, 0).astype(np.float32)
    imgs = np.moveaxis(imgs, -1, 0).astype(np.float32)
    images = imgs
    bds = np.moveaxis(bds, -1, 0).astype(np.float32)
-
接下来对数据进行如上的处理,得到的结果如下:
- bds 是 151 *2 规模的。

- images 是 (151,543,727,3) 分别对应(图片张数、高、宽、通道)
- poses 是(151,3,5),也就是说,对于每张图片,它的opose是个 3*5的数据。

- bds 是 151 *2 规模的。
-
sc = 1. if bd_factor is None else 1./(bds.min() * bd_factor)sc :进行边界放缩的比例, = 0.859302 -
poses 进行边界放缩之后 即
poses[:,:3,3] *= sc,如下

-
bds *=sc之后,所有的值都缩小了。 即边界缩小了。

    if recenter:
        poses = recenter_poses(poses)
- 执行
poses = recenter_poses(poses)之后,poses (shape 151,3,5)的值如下: 这个操作修改了前四列的值,保持最后一列值不变。 (要弄清楚每列的含义)。 最后一列是图像的(高,宽,焦距)

		c2w = poses_avg(poses)  # 3x5
        print('recentered', c2w.shape)
        print(c2w[:3,:4])

        ## Get spiral
        # Get average pose
        up = normalize(poses[:, :3, 1].sum(0))   # 3x1

        # Find a reasonable "focus depth" for this dataset
        close_depth, inf_depth = bds.min()*.9, bds.max()*5. # 1.19999, 1116.4336
        dt = .75
        mean_dz = 1./(((1.-dt)/close_depth + dt/inf_depth))  # 4.656
        focal = mean_dz  #焦距

        # Get radii for spiral path  半径
        shrink_factor = .8
        zdelta = close_depth * .2
        tt = poses[:,:3,3] # ptstocam(poses[:3,3,:].T, c2w).T
        rads = np.percentile(np.abs(tt), 90, 0)  # 求90百分位的数值
        c2w_path = c2w
        N_views = 120
        N_rots = 2
        if path_zflat:  # false
#             zloc = np.percentile(tt, 10, 0)[2]
            zloc = -close_depth * .1
            c2w_path[:3,3] = c2w_path[:3,3] + zloc * c2w_path[:3,2]
            rads[2] = 0.
            N_rots = 1
            N_views/=2

        # Generate poses for spiral path
        render_poses = render_path_spiral(c2w_path, up, rads, focal, zdelta, zrate=.5, rots=N_rots, N=N_views)
-
通过以上代码获取
render_poses,其中-
c2w = poses_avg(poses)shapa( 3,5 ) , 相当于汇合了所有的图像,值如下:

-
中间数值如下:

-
tt = poses[:,:3,3],取所有poses的三列,shape (151,3)

-
rads = np.percentile(np.abs(tt), 90, 0)# 求90百分位的数值

-
render_poses = render_path_spiral(c2w_path, up, rads, focal, zdelta, zrate=.5, rots=N_rots, N=N_views)是个list,长度为120 (由N_view确定),每个元素为(3,5), 这一点和poses是一样的。
-
-
render_poses = np.array(render_poses).astype(np.float32)转为array,shape (120,3,5), render_poses[0]

-
再次计算c2w
c2w = poses_avg(poses). 和之前的对比了一下,数值上是一模一样的。

-
dists = np.sum(np.square(c2w[:3,3] - poses[:,:3,3]), -1)shape 151

-
i_test = np.argmin(dists) # 取值最小的索引值为83,HOLDOUT view is 83。 -
return images, poses, bds, render_poses, i_test。 此时 images (151, 543,724,3), poses (151,3,5) ,bds (151,2) render_poses( 120,3,5) , i_test = 83
load_llff.py render_path_spiral()
render_path_spiral()中 的hwf = c2w[:,4:5]

- 获得的第一个render_poses 。
render_poses.append(np.concatenate([viewmatrix(z, up, c), hwf], 1))

return render_poses # 类型是list。
run_nerf.py train()
-
images, poses, bds, render_poses, i_test = load_llff_data(args.datadir, args.factor, recenter=True, bd_factor=.75, spherify=args.spherify)此时 images (151, 543,724,3), poses (151,3,5) ,bds (151,2) render_poses( 120,3,5) , i_test = 83. -
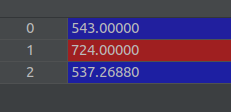
hwf = poses[0,:3,-1]
-
poses = poses[:,:3,:4], 下面是poses[0]

-
Loaded llff (151, 543, 724, 3) (120, 3, 5) [543. 724. 537.2688] ./data/img_desk2
-
Auto LLFF holdout
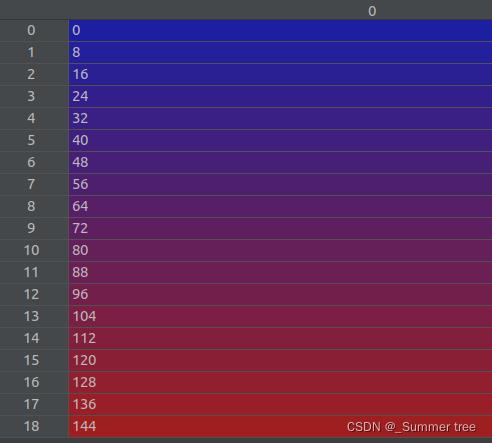
i_test = np.arange(images.shape[0])[::args.llffhold]之后,i_test变成了下面这个样子。 也就是说,获取了多个测试样本。 ,声明里面也没有默认值,
		i_val = i_test  # 验证集和测试集相同
        i_train = np.array([i for i in np.arange(int(images.shape[0])) if
                        (i not in i_test and i not in i_val)])  # 把剩下的部分当做训练集
- 通过上述代码获取验证集和训练集。
- 定义边界 near = 0. far = 1.
    H, W, focal = hwf
    H, W = int(H), int(W)
    hwf = [H, W, focal]
- 重新获取hwf的值, list 类型, [543, 724, 537.2688]
    if K is None: # 前文自己定义为空的。
        K = np.array([
            [focal, 0, 0.5*W],
            [0, focal, 0.5*H],
            [0, 0, 1]
        ])
- 定义k, shape (3,3), 值如下:

Create log dir and copy the config file
os.makedirs(os.path.join(basedir, expname), exist_ok=True)创建log目录f = os.path.join(basedir, expname, 'args.txt')参数文件args.txt
    with open(f, 'w') as file:
        for arg in sorted(vars(args)):
            attr = getattr(args, arg)
            file.write('{} = {}\n'.format(arg, attr))
- 把所有的参数都写到文件里面。
Create nerf model
render_kwargs_train, render_kwargs_test, start, grad_vars, optimizer = create_nerf(args)创建模型。- start= 0
- optimizer

- render_kwargs_test 是个dist 类型,9个元素

- render_kwargs_train 也是个dist类型, 9个元素。

- grad_vars 是个list,长度 为48
global_step = startbds_dict = { 'near' : near, 'far' : far, }表示为字典。render_kwargs_train.update(bds_dict)更新render_kwargs_train,字典的update操作, 更新之后,render_kwargs_train变为11个元素的字典。即在末尾添加了'near' = near, 'far' = far,render_kwargs_test.update(bds_dict)
Move testing data to GPU
render_poses = torch.Tensor(render_poses).to(device)
Prepare raybatch tensor if batching random rays
use_batching = true 的情况下
rays = np.stack([get_rays_np(H, W, K, p) for p in poses[:,:3,:4]], 0)获取光束。从函数来看,和poses有关。 shape(151,2,543,724,3) ,也就是[N, ro+rd, H, W, 3]rays_rgb = np.concatenate([rays, images[:,None]], 1), shape (151, 3, 543, 724, 3), 也就是[N, H, W, ro+rd+rgb, 3]。rays_rgb = np.transpose(rays_rgb, [0,2,3,1,4])调换了位置,[N, H, W, ro+rd+rgb, 3],shape(151, 543, 724, 3, 3)rays_rgb = np.stack([rays_rgb[i] for i in i_train], 0)只获取train images的部分。 shape(132, 543, 724, 3, 3) ,总的数量由151 变为了 132。rays_rgb = np.reshape(rays_rgb, [-1,3,3])[(N-1)HW, ro+rd+rgb, 3],shape (51893424, 3, 3) 。 这就相当于获得了51893424个光束。 (这里其实不是N-1, 因为测试样本并不只有一个)np.random.shuffle(rays_rgb)打乱这个光束的顺序。 shape不变。
Move training data to GPU
    if use_batching:
        images = torch.Tensor(images).to(device)
    poses = torch.Tensor(poses).to(device)
    if use_batching:
        rays_rgb = torch.Tensor(rays_rgb).to(device)
开始进入训练的迭代
start = start + 1
    for i in trange(start, N_iters):
Sample random ray batch
if use_batching
batch = rays_rgb[i_batch:i_batch+N_rand] # [B, 2+1, 3*?]N_rand = 1024, batch 的shapetorch.Size([1024, 3, 3])batch = torch.transpose(batch, 0, 1)转换0和1维,shapetorch.Size([3, 1024, 3])也就是说,[od+rd+rgb, 1024, 3], 最后一个3还是表示的通道。batch_rays, target_s = batch[:2], batch[2],batch_raysshapetorch.Size([2, 1024, 3]),也就是[od+rd, 1024, 3]。target_sshapetorch.Size([1024, 3])对应的是rgb。
render
rgb, disp, acc, extras = render(H, W, K, chunk=args.chunk, rays=batch_rays, verbose=i < 10, retraw=True, **render_kwargs_train)返回渲染出的 一个 batch的 rgb ,disp(视差图),acc (不透明度), extras (其他信息)。- rgb shape
torch.Size([1024, 3])刚好可以好target_s对应上。 - disp shape 1024,和1024个光束对应。
- acc shape 1024, 对应1024个光束
- extras 是一个dict,含有5个元素,具体如下:

- rgb shape
img_loss = img2mse(rgb, target_s)求rgb损失, 值为0.0663。 其中img2mse = lambda x, y : torch.mean((x - y) ** 2)也就是均方误差MSEtrans = extras['raw'][...,-1]shapetorch.Size([1024, 128])这个值,后面好像并没有用到。psnr = mse2psnr(img_loss), 值为11.7821 。 其中mse2psnr = lambda x : -10. * torch.log(x) / torch.log(torch.Tensor([10.]))
        if 'rgb0' in extras:
            img_loss0 = img2mse(extras['rgb0'], target_s)
            loss = loss + img_loss0
            psnr0 = mse2psnr(img_loss0)
- rgb0 是extras的一个元素, 这里用extras[‘rgb0’]和target_s 求了损失,并把这个损失加在了整体的损失上,也就是说,loss = img_loss+img_loss0.
		loss.backward()
        optimizer.step()

        # NOTE: IMPORTANT!
        ###   update learning rate   ###
        decay_rate = 0.1
        decay_steps = args.lrate_decay * 1000
        new_lrate = args.lrate * (decay_rate ** (global_step / decay_steps))
        for param_group in optimizer.param_groups:
            param_group['lr'] = new_lrate
- 以上是模型training的常规操作。
保存checkpoint
        if i%args.i_weights==0:
            path = os.path.join(basedir, expname, '{:06d}.tar'.format(i))
            torch.save({
                'global_step': global_step,
                'network_fn_state_dict': render_kwargs_train['network_fn'].state_dict(),
                'network_fine_state_dict': render_kwargs_train['network_fine'].state_dict(),
                'optimizer_state_dict': optimizer.state_dict(),
            }, path)
            print('Saved checkpoints at', path)  # 保存checkpoint。
- 保存形式为
tar压缩包, 内容是一个字典,包含以上字段。
输出mp4 视频
 if i%args.i_video==0 and i > 0:
            # Turn on testing mode
            with torch.no_grad():
                rgbs, disps = render_path(render_poses, hwf, K, args.chunk, render_kwargs_test)
            print('Done, saving', rgbs.shape, disps.shape)
            moviebase = os.path.join(basedir, expname, '{}_spiral_{:06d}_'.format(expname, i))
            imageio.mimwrite(moviebase + 'rgb.mp4', to8b(rgbs), fps=30, quality=8)
            imageio.mimwrite(moviebase + 'disp.mp4', to8b(disps / np.max(disps)), fps=30, quality=8)
- 这里可以看出来,
render_pose是可以用来合成360旋转的视频的。 - 函数
render_path()返回的是rgb,和对应的密度disps。 - 看到这里明白
spiral的 含义了。指的是视频中的螺旋旋转。 to8b具体实现为to8b = lambda x : (255*np.clip(x,0,1)).astype(np.uint8)
保存测试数据集
       if i%args.i_testset==0 and i > 0:
            testsavedir = os.path.join(basedir, expname, 'testset_{:06d}'.format(i))
            os.makedirs(testsavedir, exist_ok=True)
            print('test poses shape', poses[i_test].shape)
            with torch.no_grad():
                render_path(torch.Tensor(poses[i_test]).to(device), hwf, K, args.chunk, render_kwargs_test, gt_imgs=images[i_test], savedir=testsavedir)
            print('Saved test set')
- 可以看出,主要还是用的
render_path()函数,但给的参数和上面不同,后面我们再具体了解这个函数 。
render _only
首先,这个参数,要在运行命令中加, --render_only
    if args.render_only:
        print('RENDER ONLY')
        with torch.no_grad():
            if args.render_test:
                # render_test switches to test poses
                images = images[i_test]
            else:
                # Default is smoother render_poses path
                images = None

            testsavedir = os.path.join(basedir, expname, 'renderonly_{}_{:06d}'.format('test' if args.render_test else 'path', start))
            os.makedirs(testsavedir, exist_ok=True)
            print('test poses shape', render_poses.shape)

            rgbs, _ = render_path(render_poses, hwf, K, args.chunk, render_kwargs_test, gt_imgs=images, savedir=testsavedir, render_factor=args.render_factor)
            print('Done rendering', testsavedir)
            imageio.mimwrite(os.path.join(testsavedir, 'video.mp4'), to8b(rgbs), fps=30, quality=8)

            return
- 这种情况下,还需要判断是否
render_test, 也就是是否指定render的对象。 如果是,images 就是所有的测试样本,否则渲染的是一个路径。 - 通过
rgbs, _ = render_path(render_poses, hwf, K, args.chunk, render_kwargs_test, gt_imgs=images, savedir=testsavedir, render_factor=args.render_factor)返回的rgb - 然后通过
imageio.mimwrite(os.path.join(testsavedir, 'video.mp4'), to8b(rgbs), fps=30, quality=8)转为视频。
至此,这个train() 函数就完结了。
下面我们需要以此了解train() 中调用的几个重要函数。
run_nerf.py create_nerf()
函数调用方法render_kwargs_train, render_kwargs_test, start, grad_vars, optimizer = create_nerf(args) 。
Instantiate NeRF’s MLP model.
embed_fn, input_ch = get_embedder(args.multires, args.i_embed)现在对于一头雾水,先做记录。 input_ch = 63 , embed_fn 是一个函数, 声明为embed = lambda x, eo=embedder_obj : eo.embed(x)model = NeRF(D=args.netdepth, W=args.netwidth, input_ch=input_ch, output_ch=output_ch, skips=skips, input_ch_views=input_ch_views, use_viewdirs=args.use_viewdirs).to(device)构建模型。 解读模型的内部结构可以更清楚的知道参数的含义。grad_vars = list(model.parameters())可以理解为模型的梯度变量。类型为list
if args.N_importance > 0:
    model_fine = NeRF(D=args.netdepth_fine, W=args.netwidth_fine,
                      input_ch=input_ch, output_ch=output_ch, skips=skips,
                      input_ch_views=input_ch_views, use_viewdirs=args.use_viewdirs).to(device)
   grad_vars += list(model_fine.parameters())
N_importence>0的时候,表示需要fine network ,所以这里就创建了一个model_fine. 与前面创建的model不同的是,给出D和W不同。 在config给的默认值里面,二者都是 8x256.network_query_fn = lambda inputs, viewdirs, network_fn : run_network(inputs, viewdirs, network_fn, embed_fn=embed_fn, embeddirs_fn=embeddirs_fn, netchunk=args.netchunk)声明了一个方法,暂时不明白什么含义。
Create optimizer
optimizer = torch.optim.Adam(params=grad_vars, lr=args.lrate, betas=(0.9, 0.999))
Load checkpoints
if args.ft_path is not None and args.ft_path!='None':
    ckpts = [args.ft_path]
else:
    ckpts = [os.path.join(basedir, expname, f) for f in sorted(os.listdir(os.path.join(basedir, expname))) if 'tar' in f]
- 默认从checkpoint中恢复训练。
model.load_state_dict(ckpt['network_fn_state_dict'])
if model_fine is not None:
    model_fine.load_state_dict(ckpt['network_fine_state_dict'])
- 加载模型。
render_kwargs_train = {
    'network_query_fn' : network_query_fn,      #函数
    'perturb' : args.perturb,     # 默认为1 抖动。
    'N_importance' : args.N_importance,      # fine-network,在光束上的采样数量。
    'network_fine' : model_fine,
    'N_samples' : args.N_samples,        # 每条射线的粗样本数
    'network_fn' : model,
    'use_viewdirs' : args.use_viewdirs,       # use full 5D input instead of 3D      (原来是3d坐标,现在加上视角方向就是5D了)
    'white_bkgd' : args.white_bkgd,      # 用于bender类型的数据, 设置为在白色 bkgd 上呈现合成数据(始终用于 dvoxels)
    'raw_noise_std' : args.raw_noise_std,        #噪音方差
}
- 声明
render_kwargs_train字典。
render_kwargs_test = {k : render_kwargs_train[k] for k in render_kwargs_train}
render_kwargs_test['perturb'] = False
render_kwargs_test['raw_noise_std'] = 0.
render_kwargs_test先从render_kwargs_train那进行拷贝,然后修改了两个值。return render_kwargs_train, render_kwargs_test, start, grad_vars, optimizer。
run_nerf_helpers.py class NeRF()
这个类型用于创建modle。
_init_()
self.D = D
        self.W = W
        self.input_ch = input_ch  # 输入的通道
        self.input_ch_views = input_ch_views # 输入通道的视角, 值为 0
        self.skips = skips  # [4]
        self.use_viewdirs = use_viewdirs

        self.pts_linears = nn.ModuleList(
            [nn.Linear(input_ch, W)] + [nn.Linear(W, W) if i not in self.skips else nn.Linear(W + input_ch, W) for i in range(D-1)])

        ### Implementation according to the official code release (https://github.com/bmild/nerf/blob/master/run_nerf_helpers.py#L104-L105)
        self.views_linears = nn.ModuleList([nn.Linear(input_ch_views + W, W//2)])

        ### Implementation according to the paper
        # self.views_linears = nn.ModuleList(
        #     [nn.Linear(input_ch_views + W, W//2)] + [nn.Linear(W//2, W//2) for i in range(D//2)])

        if use_viewdirs:
            self.feature_linear = nn.Linear(W, W)
            self.alpha_linear = nn.Linear(W, 1)
            self.rgb_linear = nn.Linear(W//2, 3)
        else:
            self.output_linear = nn.Linear(W, output_ch)
self.pts_linears = nn.ModuleList( [nn.Linear(input_ch, W)] + [nn.Linear(W, W) if i not in self.skips else nn.Linear(W + input_ch, W) for i in range(D-1)]), 319 = 256+ 63 (input_ch)
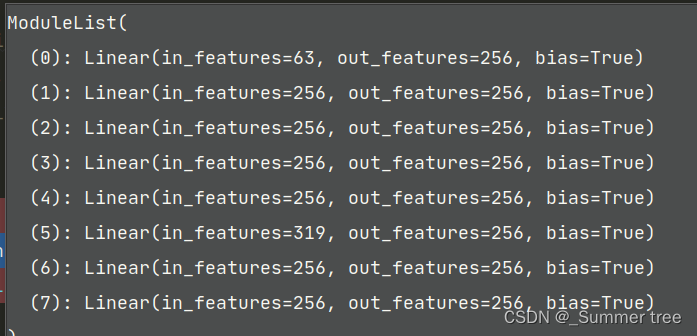
self.views_linears = nn.ModuleList([nn.Linear(input_ch_views + W, W//2)])结构为:ModuleList( (0): Linear(in_features=283, out_features=128, bias=True) )283 = 256 + 27 (input_ch_views).self.feature_linear = nn.Linear(W, W)为:Linear(in_features=256, out_features=256, bias=True)self.alpha_linear = nn.Linear(W, 1)为:Linear(in_features=256, out_features=1, bias=True)self.rgb_linear = nn.Linear(W//2, 3)为:Linear(in_features=128, out_features=3, bias=True)
forward()

- alpha 层输出的是密度
- rgb 层对应的是颜色。
- 实验中n = 65536, 一个batch 是1024个光束,也就是说一个光束采样64个点。
- 暂时没有看出来 feature 层输出了干了什么。
run_nerf_helpers.py get_rays_np()
获得光束的方法。
调用rays = np.stack([get_rays_np(H, W, K, p) for p in poses[:,:3,:4]], 0) 返回得到的光束是 [N, ro+rd, H, W, 3]
def get_rays_np(H, W, K, c2w):
    i, j = np.meshgrid(np.arange(W, dtype=np.float32), np.arange(H, dtype=np.float32), indexing='xy')
    dirs = np.stack([(i-K[0][2])/K[0][0], -(j-K[1][2])/K[1][1], -np.ones_like(i)], -1)
    # Rotate ray directions from camera frame to the world frame
    rays_d = np.sum(dirs[..., np.newaxis, :] * c2w[:3,:3], -1)  # dot product, equals to: [c2w.dot(dir) for dir in dirs]
    # Translate camera frame's origin to the world frame. It is the origin of all rays.
    rays_o = np.broadcast_to(c2w[:3,-1], np.shape(rays_d))
    return rays_o, rays_d
i, j = np.meshgrid(np.arange(W, dtype=np.float32), np.arange(H, dtype=np.float32), indexing='xy')meshgrid 生成网格点坐标矩阵.-
i 和 j doushi 543 x 724 的array。


-
猜测 i ,j 应该分辨表示图片每个像素的 xy坐标
-
dirs = np.stack([(i-K[0][2])/K[0][0], -(j-K[1][2])/K[1][1], -np.ones_like(i)], -1)shape (543,724,3), 其中k 值如下:

将光线方向从相机框架旋转到世界框架
rays_d = np.sum(dirs[..., np.newaxis, :] * c2w[:3,:3], -1)shape (543,724,3)
将相机框架的原点转换为世界框架。 它是所有光线的起源。
rays_o = np.broadcast_to(c2w[:3,-1], np.shape(rays_d))shape (543,724,3)return rays_o, rays_d
run_nerf.py render()
调用方式 rgb, disp, acc, extras = render(H, W, K, chunk=args.chunk, rays=batch_rays, verbose=i < 10, retraw=True, **render_kwargs_train) 返回的是光束对应的rgb, 视差图,不透明度。 输入 batch_rays 是(2,1024,3)
参数说明
Args:
H: int. Height of image in pixels.
W: int. Width of image in pixels.
focal: float. Focal length of pinhole camera.
chunk: int. Maximum number of rays to process simultaneously. Used to
control maximum memory usage. Does not affect final results.
rays: array of shape [2, batch_size, 3]. Ray origin and direction for
each example in batch.
c2w: array of shape [3, 4]. Camera-to-world transformation matrix. (坐标转化矩阵)
ndc: bool. If True, represent ray origin, direction in NDC coordinates.
near: float or array of shape [batch_size]. Nearest distance for a ray.
far: float or array of shape [batch_size]. Farthest distance for a ray.
use_viewdirs: bool. If True, use viewing direction of a point in space in model.
c2w_staticcam: array of shape [3, 4]. If not None, use this transformation matrix for
camera while using other c2w argument for viewing directions.
Returns:
rgb_map: [batch_size, 3]. Predicted RGB values for rays.
disp_map: [batch_size]. Disparity map. Inverse of depth. (视差图,深度的倒数)
acc_map: [batch_size]. Accumulated opacity (alpha) along a ray. (光线累计的不透明度)
extras: dict with everything returned by render_rays().
provide ray directions as input
viewdirs = rays_dshape (1024 ,3)viewdirs = viewdirs / torch.norm(viewdirs, dim=-1, keepdim=True)shape (1024 ,3)viewdirs = torch.reshape(viewdirs, [-1,3]).float()shape (1024 ,3)
Create ray batch
rays_o = torch.reshape(rays_o, [-1,3]).float()
rays_d = torch.reshape(rays_d, [-1,3]).float()

near, far = near * torch.ones_like(rays_d[...,:1]), far * torch.ones_like(rays_d[...,:1])
rays = torch.cat([rays_o, rays_d, near, far], -1)
- rays_o,rays_d 都是1024 x 3
- near,for都是 1024 x 1
- rays 是 1024 x 8 . (3+3+1+1)
if use_viewdirs: rays = torch.cat([rays, viewdirs], -1)此时rays 是 1024 x 11 . (8+3)
Render and reshape
-
all_ret = batchify_rays(rays, chunk, **kwargs)dict 类型,8个元素

-
k_extract = ['rgb_map', 'disp_map', 'acc_map'] -
ret_list = [all_ret[k] for k in k_extract] ret_dict = {k : all_ret[k] for k in all_ret if k not in k_extract}是出去除去k_extract之外的其他元素。
-
return ret_list + [ret_dict]
run_nerf.py batchify_rays()
调用 all_ret = batchify_rays(rays, chunk, **kwargs) 。 chunk是并行处理的光束数量。 rays 是 1024x11.
all_ret = {}
for i in range(0, rays_flat.shape[0], chunk):
    ret = render_rays(rays_flat[i:i+chunk], **kwargs)
    for k in ret:
        if k not in all_ret:
            all_ret[k] = []
        all_ret[k].append(ret[k])

all_ret = {k : torch.cat(all_ret[k], 0) for k in all_ret}
return all_ret
ret = render_rays(rays_flat[i:i+chunk], **kwargs)dict类型,数量8

all_ret = {k : torch.cat(all_ret[k], 0) for k in all_ret}1024 x 8。 ret 是一个chunk的结果,all_ret 是一个batch的结果。

run_nerf.py render_rays()
调用 ret = render_rays(rays_flat[i:i+chunk], **kwargs)
“”"Volumetric rendering.
Args:
ray_batch: array of shape [batch_size, …]. All information necessary
for sampling along a ray, including: ray origin, ray direction, min
dist, max dist, and unit-magnitude viewing direction.
network_fn: function. Model for predicting RGB and density at each point
in space. 用于预测每个点的 RGB 和密度的模型
network_query_fn : function used for passing queries to network_fn.
N_samples: int. Number of different times to sample along each ray. 每条射线上的采样次数
retraw: bool. If True, include model’s raw, unprocessed predictions.
lindisp: bool. If True, sample linearly in inverse depth rather than in depth.
perturb: float, 0 or 1. If non-zero, each ray is sampled at stratified
random points in time. 1 则每条射线都以分层采样随机时间点
N_importance: int. Number of additional times to sample along each ray. 每条射线上的额外采样数
These samples are only passed to network_fine.
network_fine: “fine” network with same spec as network_fn.
white_bkgd: bool. If True, assume a white background.
raw_noise_std: …
verbose: bool. If True, print more debugging info.
Returns:
rgb_map: [num_rays, 3]. Estimated RGB color of a ray. Comes from fine model.
disp_map: [num_rays]. Disparity map. 1 / depth.
acc_map: [num_rays]. Accumulated opacity along each ray. Comes from fine model.
raw: [num_rays, num_samples, 4]. Raw predictions from model.
rgb0: See rgb_map. Output for coarse model.
disp0: See disp_map. Output for coarse model.
acc0: See acc_map. Output for coarse model.
z_std: [num_rays]. Standard deviation of distances along ray for each
sample.
函数初始值
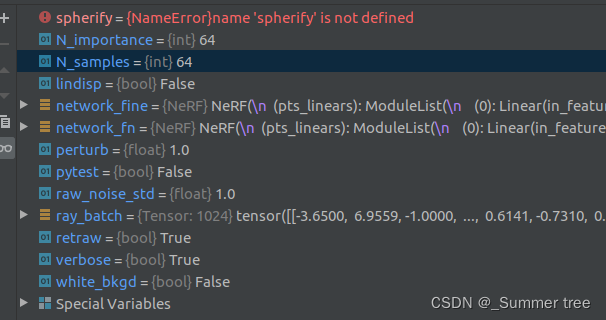
从ray_batch 中提取需要用的数据
N_rays = ray_batch.shape[0]     # 光束数量
rays_o, rays_d = ray_batch[:,0:3], ray_batch[:,3:6] # [N_rays, 3] each
viewdirs = ray_batch[:,-3:] if ray_batch.shape[-1] > 8 else None       # N_rays,3
bounds = torch.reshape(ray_batch[...,6:8], [-1,1,2])
near, far = bounds[...,0], bounds[...,1] # [-1,1]
t_vals = torch.linspace(0., 1., steps=N_samples)64,取N_sample个点,在每个光束上。
if not lindisp:      # 确定采样方式
    z_vals = near * (1.-t_vals) + far * (t_vals)
else:
    z_vals = 1./(1./near * (1.-t_vals) + 1./far * (t_vals))

z_vals = z_vals.expand([N_rays, N_samples])               # 1024 x 64
- 这一个batch的所有光束的采样点,1024 x 64.
获取样本之间的间隔
mids = .5 * (z_vals[...,1:] + z_vals[...,:-1])   # 1024,63  (64个点,63个线段)
upper = torch.cat([mids, z_vals[...,-1:]], -1)   #  1024 x 64  具体用来做什么还不是很明白。
lower = torch.cat([z_vals[...,:1], mids], -1)   # 1024 x 64
-
t_rand = torch.rand(z_vals.shape)1024 x64

-
z_vals = lower + (upper - lower) * t_rand对z_vals进行调整。 1024 x 64

-
pts = rays_o[...,None,:] + rays_d[...,None,:] * z_vals[...,:,None] # [N_rays, N_samples, 3]则是最终要给网络的参数,shape是 1024,63,3
raw = run_network(pts)
raw = network_query_fn(pts, viewdirs, network_fn)根据输入 pts, viewdirs, 进行前向计算。 raw应该是 (1024,64,4),最后一个维是 RGB+ 密度。rgb_map, disp_map, acc_map, weights, depth_map = raw2outputs(raw, z_vals, rays_d, raw_noise_std, white_bkgd, pytest=pytest)这一步相当于是在做volum render,将光束颜色合成点。
下面是考虑fine network的部分。 判断条件是, N_importance > 0
 if N_importance > 0:

     rgb_map_0, disp_map_0, acc_map_0 = rgb_map, disp_map, acc_map     # 保存前面的计算值

     # 重新采样光束上的点。
     z_vals_mid = .5 * (z_vals[...,1:] + z_vals[...,:-1])
     z_samples = sample_pdf(z_vals_mid, weights[...,1:-1], N_importance, det=(perturb==0.), pytest=pytest)
     z_samples = z_samples.detach()

     z_vals, _ = torch.sort(torch.cat([z_vals, z_samples], -1), -1)
     pts = rays_o[...,None,:] + rays_d[...,None,:] * z_vals[...,:,None] # [N_rays, N_samples + N_importance, 3]  (新的取样点)

     run_fn = network_fn if network_fine is None else network_fine
       raw = run_network(pts, fn=run_fn)
     raw = network_query_fn(pts, viewdirs, run_fn)      # raw应该是  (1024,64,4),最后一个维是 RGB+ 密度。
     # 计算最终的     rgb_map, disp_map, acc_map, weights, depth_map  信息
     rgb_map, disp_map, acc_map, weights, depth_map = raw2outputs(raw, z_vals, rays_d, raw_noise_std, white_bkgd, pytest=pytest)

 ret = {'rgb_map' : rgb_map, 'disp_map' : disp_map, 'acc_map' : acc_map}
最后把信息都保存在ret 里面做返回。ret 信息如下:

run_nerf.py raw2outputs()
调用 rgb_map, disp_map, acc_map, weights, depth_map = raw2outputs(raw, z_vals, rays_d, raw_noise_std, white_bkgd, pytest=pytest) 。
“”“Transforms model’s predictions to semantically meaningful values. 模型的预测转换为语义上有意义的值
Args:
raw: [num_rays, num_samples along ray, 4]. Prediction from model. 模型的预测
z_vals: [num_rays, num_samples along ray]. Integration time. 整合时间
rays_d: [num_rays, 3]. Direction of each ray. 光束的方向。
Returns:
rgb_map: [num_rays, 3]. Estimated RGB color of a ray. 光束颜色
disp_map: [num_rays]. Disparity map. Inverse of depth map. 视差图
acc_map: [num_rays]. Sum of weights along each ray. 密度
weights: [num_rays, num_samples]. Weights assigned to each sampled color. 每个采样点的颜色权重
depth_map: [num_rays]. Estimated distance to object. 到物体的估计距离(深度)
“””
函数初始值
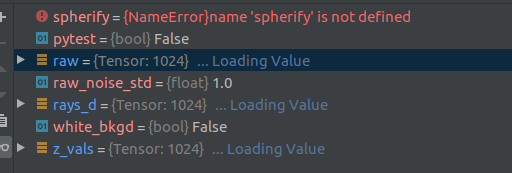
dists = z_vals[...,1:] - z_vals[...,:-1](2014,63) 两个采样点之间的距离?dists = torch.cat([dists, torch.Tensor([1e10]).expand(dists[...,:1].shape)], -1)(1024,64)dists = dists * torch.norm(rays_d[...,None,:], dim=-1)(1024,64)rgb = torch.sigmoid(raw[...,:3])(1024,64,3) 获取模型 预测的每个点的颜色。noise = torch.randn(raw[...,3].shape) * raw_noise_std噪音处理。 (1024,64) 随机噪音给每个采样点。alpha = raw2alpha(raw[...,3] + noise, dists)给密度加噪音,在进行raw2alpha = lambda raw, dists, act_fn=F.relu: 1.-torch.exp(-act_fn(raw)*dists)处理。 shape为(1024,64)weights = alpha * torch.cumprod(torch.cat([torch.ones((alpha.shape[0], 1)), 1.-alpha + 1e-10], -1), -1)[:, :-1]颜色权重的计算。 shape应该为(1024,64)rgb_map = torch.sum(weights[...,None] * rgb, -2) # [N_rays, 3]光束的颜色(1024,3)depth_map = torch.sum(weights * z_vals, -1)深度图 1024disp_map = 1./torch.max(1e-10 * torch.ones_like(depth_map), depth_map / torch.sum(weights, -1))视差图 1024acc_map = torch.sum(weights, -1)密度 1024return rgb_map, disp_map, acc_map, weights, depth_map
run_nerf.py render_path()
调用 rgbs, disps = render_path(render_poses, hwf, K, args.chunk, render_kwargs_test) 根据render_pose进行渲染,得到120个视角的图像,然后再合成 mp4。
调用 render_path(torch.Tensor(poses[i_test]).to(device), hwf, K, args.chunk, render_kwargs_test, gt_imgs=images[i_test], savedir=testsavedir) 根据事先划分出来的测试集,进行渲染,并将结果报错在指定目录下。
调用 if args.render_only :
args.render_test:render_poses = np.array(poses[i_test])pose取测试样本的 else 取生成的render_pose.- 根据指定目录保存 渲染的图像
- 保存 mp4。
函数初始值

def render_path(render_poses, hwf, K, chunk, render_kwargs, gt_imgs=None, savedir=None, render_factor=0):

    H, W, focal = hwf

    if render_factor!=0:
        # Render downsampled for speed
        H = H//render_factor
        W = W//render_factor
        focal = focal/render_factor

    rgbs = []
    disps = []

    t = time.time()
    for i, c2w in enumerate(tqdm(render_poses)):  # 这个pose 计算RGB等信息。
        print(i, time.time() - t)
        t = time.time()
        rgb, disp, acc, _ = render(H, W, K, chunk=chunk, c2w=c2w[:3,:4], **render_kwargs)  # 543, 724,3
        rgbs.append(rgb.cpu().numpy())      # 汇总
        disps.append(disp.cpu().numpy())          # 汇总
        if i==0:
            print(rgb.shape, disp.shape)

        """
        if gt_imgs is not None and render_factor==0:
            p = -10. * np.log10(np.mean(np.square(rgb.cpu().numpy() - gt_imgs[i])))
            print(p)
        """

        if savedir is not None:
            rgb8 = to8b(rgbs[-1])
            filename = os.path.join(savedir, '{:03d}.png'.format(i))
            imageio.imwrite(filename, rgb8)


    rgbs = np.stack(rgbs, 0)
    disps = np.stack(disps, 0)

    return rgbs, disps
总结
基本上到这里为止,整个项目的重要代码都以及分析完了。
脑子里还是有点胡,还有些问题没有想明白,下面还需要梳理一下。
训练过程全梳理如下:

具体的问题解答,放到下次分析里面啦。
【完结】