Selenium 自学系列
Selenium 自学系列(一) Selenium第一个例子及交互原理
文章目录
Selenium 背景
Selenium 是一个web的UI自动化测试工具,本质是通过驱动浏览器,模拟用户的操作
Selenium 目前有3个版本,最新版本为Selenium 3
Selenium 1.x :Selenium RC
Selenium 2.x :WebDriver + selenium1.x
Selenium 3.x :只支持 WebDriver,去掉Selenium RC
Selenium 1 主要组成部件就是Selenium RC,工作原理就是通过JavaScript函数来操作浏览器,缺点是运行速度慢
Selenium 2 与Selenium 1 最大的区别是加入了Web Driver
WebDriver是直接调用浏览器原生API来操作浏览器页面元素,所以在运行WebDriver 时 需要有浏览器(IE,Firefox等)内核的驱动,使用前需提前下载好对应浏览器的WebDriver。并且每一个浏览器都有自己的一套API接口信息,所以在使用Selenium 时要提前安装好对应浏览器的驱动
由于WebDriver 使用的是浏览器原生的API,比Selenium RC通过注入JavaScript函数来操作浏览器速度大大提高。从 Selenium 3 开始已经不再支持Selenium RC
WebDriver也有缺点,不同的浏览器厂商,对Web元素的操作和呈现或多或少会有差异,这就直接导致了Selenium WebDriver要分浏览器厂商不同,而提供不同的实现
Selenium 3 支持了Edge和safari 浏览器原生驱动,Edge驱动由微软提供,Safari原生驱动由Apple提供
Selenium 的第一个例子
要想使用Selenium,需要3样东西。分别是浏览器,WebDriver ,测试脚本
安装PC浏览器
PC浏览器我们电脑上一般都已经安装好了,比如Chrome浏览器
下载WebDriver
WebDriver 我们需要提前下载到电脑上,不同的浏览器需要下载不同的WebDriver,如Chrome浏览器 需要下载chromedriver。常见浏览器的WebDriver下载地址如下:
- Chrome http://npm.taobao.org/mirrors/chromedriver/
- FireFox https://github.com/mozilla/geckodriver/releases
- Edge https://developer.microsoft.com/en-us/micrsosft-edage/tools/webdriver
- Safari https://webkit.org/blog/6900/webdriver-support-in-safari-10/
编写测试脚本
以Python编写Selenium测试脚本为例子,在电脑上安装Python 3.x 环境后,用命令pip install selenium安装selenium
from selenium import webdriver
import time

# 启动WebDriver,地址填写本地下载的WebDriver的路径
driver = webdriver.Chrome("/Users/yangzi/Downloads/chromedriver")

#访问百度
driver.get("http://www.baidu.com")

#定位元素,并进行相应操作
driver.find_element("id","kw").send_keys("测试开发学习路线通关大厂")
driver.find_element("id","su").click()

time.sleep(5)
# 释放资源, 退出浏览器
driver.quit()
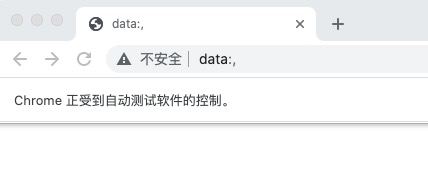
执行完上述脚本,我们可以看到Chrome浏览器自动被打开,并访问百度官网,搜索关键词“测试开发学习路线通关大厂”,展示搜索后的结果,5s以后关闭浏览器

是不是感觉很神奇,下篇文章我会给大家详细介绍上面每一行代码的含义。在正式学习Selenium之前,先带大家从源码上理解Selenium WebDriver 的交互原理
Selenium WebDriver 交互原理
WebDriver的交互按照CS模式(Client客户端与Server服务器)来设计
-
WebDriver首先创建一个浏览器Web服务,作为Remote Server,Remote Server还需要依赖原生的浏览器驱动(如 IEDriver.dll,chromedriver.exe),封装成浏览器操作的API,用来定位元素等等
-
Remote Server启动后就会等待Client发送请求并做出相应处理
-
那么 Client 是什么呢?Client 就是我们的自动化测试脚本中的关于浏览器操作的代码,测试脚本中的对浏览器的所有操作,比如打开浏览器、寻找定位元素,点击都会发送HTTP请求给Remote Server
-
Remote Server接受请求,并调用已封装好的
浏览器的原生API执行相应操作,执行完毕后,在Response中返回执行状态、返回值等信息
从源码分析 Selenium WebDriver
我们再从从源码层面解读一下WebDriver 的原理,以Python为例
from selenium import webdriver

driver = webdriver.Chrome("/Users/yangzi/Downloads/chromedriver")
当我们创建webdriver.Chrome()对象后,会执行WebDriver类的构造方法__init__,__init__方法代码如下
class WebDriver(ChromiumDriver):
    """
    Controls the ChromeDriver and allows you to drive the browser.
    You will need to download the ChromeDriver executable from
    http://chromedriver.storage.googleapis.com/index.html
    """

    def __init__(self, executable_path=DEFAULT_EXECUTABLE_PATH, port=DEFAULT_PORT,
                 options: Options = None, service_args=None,
                 desired_capabilities=None, service_log_path=DEFAULT_SERVICE_LOG_PATH,
                 chrome_options=None, service: Service = None, keep_alive=DEFAULT_KEEP_ALIVE):
        """
        Creates a new instance of the chrome driver.
        Starts the service and then creates new instance of chrome driver.

        :Args:
         - executable_path - Deprecated: path to the executable. If the default is used it assumes the executable is in the $PATH
         - port - Deprecated: port you would like the service to run, if left as 0, a free port will be found.
         - options - this takes an instance of ChromeOptions
         - service - Service object for handling the browser driver if you need to pass extra details
         - service_args - Deprecated: List of args to pass to the driver service
         - desired_capabilities - Deprecated: Dictionary object with non-browser specific
           capabilities only, such as "proxy" or "loggingPref".
         - service_log_path - Deprecated: Where to log information from the driver.
         - keep_alive - Deprecated: Whether to configure ChromeRemoteConnection to use HTTP keep-alive.
        """
        if executable_path != 'chromedriver':
            warnings.warn('executable_path has been deprecated, please pass in a Service object',
                          DeprecationWarning, stacklevel=2)
        if chrome_options:
            warnings.warn('use options instead of chrome_options',
                          DeprecationWarning, stacklevel=2)
            options = chrome_options
        if keep_alive != DEFAULT_KEEP_ALIVE:
            warnings.warn('keep_alive has been deprecated, please pass in a Service object',
                          DeprecationWarning, stacklevel=2)
        else:
            keep_alive = True
        if not service:
            service = Service(executable_path, port, service_args, service_log_path)

        super(WebDriver, self).__init__(DesiredCapabilities.CHROME['browserName'], "goog",
                                        port, options,
                                        service_args, desired_capabilities,
                                        service_log_path, service, keep_alive)
看到非常关键的代码,这里填写了WebDriver可执行文件的执行路径、端口等信息,但并没有启动服务
service = Service(executable_path, port, service_args, service_log_path)
继续往下面看,WebDriver类的构造方法__init__当中的最后一句,会继续执行WebDriver父类ChromiumDriver的构造方法,这里我直接列出ChromiumDriver类构造方法里面的关键代码,该代码启动了Web服务,监听来自客户端的连接
self.service = service
self.service.start()
通过上面3行代码,我们可以得出结论:调用ChromeDriver可执行文件(Mac为Unix可执行文件,Win为exe)能运行ChromeDriver
所以Selenium先启动了ChromeDriver。当然,我们可以手工启动ChromeDriver来模拟这个启动过程
手动启动ChromeDriver 有两种方式:
- 第一种方法 : 进入已经下载好的ChromeDriver目录,以mac终端为例,在命令行中输入命令
./chromedriver(若设置了环境变量,在任意目录下输入chromedriver命令均可)

- 第二种方法:直接点击ChromeDriver可执行文件
启动了WebDriver之后,我们需要告诉WebDriver打开浏览器。Selenium的源码里这一过程如下:
    def start_session(self, capabilities: dict, browser_profile=None) -> None:
        """
        Creates a new session with the desired capabilities.

        :Args:
         - capabilities - a capabilities dict to start the session with.
         - browser_profile - A selenium.webdriver.firefox.firefox_profile.FirefoxProfile object. Only used if Firefox is requested.
        """
        if not isinstance(capabilities, dict):
            raise InvalidArgumentException("Capabilities must be a dictionary")
        if browser_profile:
            if "moz:firefoxOptions" in capabilities:
                capabilities["moz:firefoxOptions"]["profile"] = browser_profile.encoded
            else:
                capabilities.update({'firefox_profile': browser_profile.encoded})
        w3c_caps = _make_w3c_caps(capabilities)
        parameters = {"capabilities": w3c_caps,
                      "desiredCapabilities": capabilities}
        response = self.execute(Command.NEW_SESSION, parameters)
        if 'sessionId' not in response:
            response = response['value']
        self.session_id = response['sessionId']
        self.caps = response.get('value')

        # if capabilities is none we are probably speaking to
        # a W3C endpoint
        if not self.caps:
            self.caps = response.get('capabilities')
定位到这一句关键代码,继续往里看就是能看到这一过程的核心就是就是向localhost:9515/session发送1个POST请求,Body部分为Json对象
response = self.execute(Command.NEW_SESSION, parameters)
    def execute(self, command, params):
        """
        Send a command to the remote server.

        Any path substitutions required for the URL mapped to the command should be
        included in the command parameters.

        :Args:
         - command - A string specifying the command to execute.
         - params - A dictionary of named parameters to send with the command as
           its JSON payload.
        """
        command_info = self._commands[command]
        assert command_info is not None, 'Unrecognised command %s' % command
        path = string.Template(command_info[1]).substitute(params)
        if isinstance(params, dict) and 'sessionId' in params:
            del params['sessionId']
        data = utils.dump_json(params)
        url = f"{self._url}{path}"
        return self._request(command_info[0], url, body=data)
self._request(command_info[0], url, body=data)
该HTTP发送完毕后Chrome 就可以打开,我们通过可以手动模拟这个过程
先确保Chromedriver是在运行中(保证Web服务启动),然后打开Postman,构造1个POST请求,路径是localhost:9515/session。在Body里选择raw和JSON(application/json), 填入以下Json字符串
{"capabilities": {"firstMatch": [{}], "alwaysMatch": {"browserName": "chrome", "pageLoadStrategy": "normal", "goog:chromeOptions": {"extensions": [], "args": []}}}, "desiredCapabilities": {"browserName": "chrome", "pageLoadStrategy": "normal", "goog:chromeOptions": {"extensions": [], "args": []}}}
Postman点击Send发送请求后,几秒之后chrome浏览器可以正常启动,并且postman的response里会有大致如下的返回值
{
    "value": {
        "capabilities": {
            "acceptInsecureCerts": false,
            "browserName": "chrome",
            "browserVersion": "100.0.4896.127",
            "chrome": {
                "chromedriverVersion": "99.0.4844.51 (d537ec02474b5afe23684e7963d538896c63ac77-refs/branch-heads/4844@{#875})",
                "userDataDir": "/var/folders/kw/7g8s910x4jq7_qkkdp225xxc0000gp/T/.com.google.Chrome.QpBj3f"
            },
            "goog:chromeOptions": {
                "debuggerAddress": "localhost:62445"
            },
            "networkConnectionEnabled": false,
            "pageLoadStrategy": "normal",
            "platformName": "mac os x",
            "proxy": {},
            "setWindowRect": true,
            "strictFileInteractability": false,
            "timeouts": {
                "implicit": 0,
                "pageLoad": 300000,
                "script": 30000
            },
            "unhandledPromptBehavior": "dismiss and notify",
            "webauthn:extension:credBlob": true,
            "webauthn:extension:largeBlob": true,
            "webauthn:virtualAuthenticators": true
        },
        "sessionId": "9340d6df81f54a8d6add0a67ca7c9c56"
    }
}
可以看到浏览器就被自动打开了,上面Postman的返回结果里最重要的就是sessionId,sessionId存放在cookie里面,后面所有跟浏览器的交互都是基于该id进行

小结
当我们执行以下两行代码后,Selenium 会启动WebDriver进程绑定某个端口,作为Remote Server,Remote Server这时会在后台监听Client的HTTP请求。同时发送HTTP请求操作WebDriver打开了浏览器
from selenium import webdriver

driver = webdriver.Chrome("/Users/yangzi/Downloads/chromedriver")
继续编写下面的代码,其源码本质都是发送HTTP请求,当WebDriver接收到请求时,会处理请求并操作浏览器
#访问百度
driver.get("http://www.baidu.com")

#定位元素,并进行相应操作
driver.find_element("id","kw").send_keys("测试开发学习路线通关大厂")
driver.find_element("id","su").click()
这下子我们彻底弄明白了Selenium WebDriver 交互原理
-
首先启动WebDriver并绑定特定端口开启Web服务,当作Remote Server
-
Client 首次请求会创建1个Session,向remote server发送HTTP请求启动浏览器,Remote Server解析请求,完成相应操作并返回response
-
启动浏览器后,Client Cookie携带sessin id ,再次给Remote Server 发送HTTP请求,操作浏览器,定位页面元素等等
-
解析response,判断脚本是否继续还是结束

下一篇文章会给大家介绍,Selenium 定位元素的8种方式,如果你觉得这篇文章还不错的话,麻烦点一下【赞】和【在看】让更多同学看到
可以观看B站【测开小课堂】,提前了解下篇文章内容
