今天来实现一套前后端分离的人体(车辆)属性检测系统。其中后端主要是用python(flask)来实现主要算法以及数据存储等),前端用vue实现,主要实现数据上传与数据展示功能
一 、主要算法实现
① 目标检测算法
该演示平台主要是检测视频与图像中的人,车信息。
采用yolov5算法来实现目标检测。具体流程可以参照如下文章,这里就不做详细讲解啦
https://blog.csdn.net/reset2021/article/details/124408740?spm=1001.2014.3001.5502
主要注意事项,就是标注数据是需要考虑检测的目标对象(车,人),并且是要检测人体
② 人体属性识别
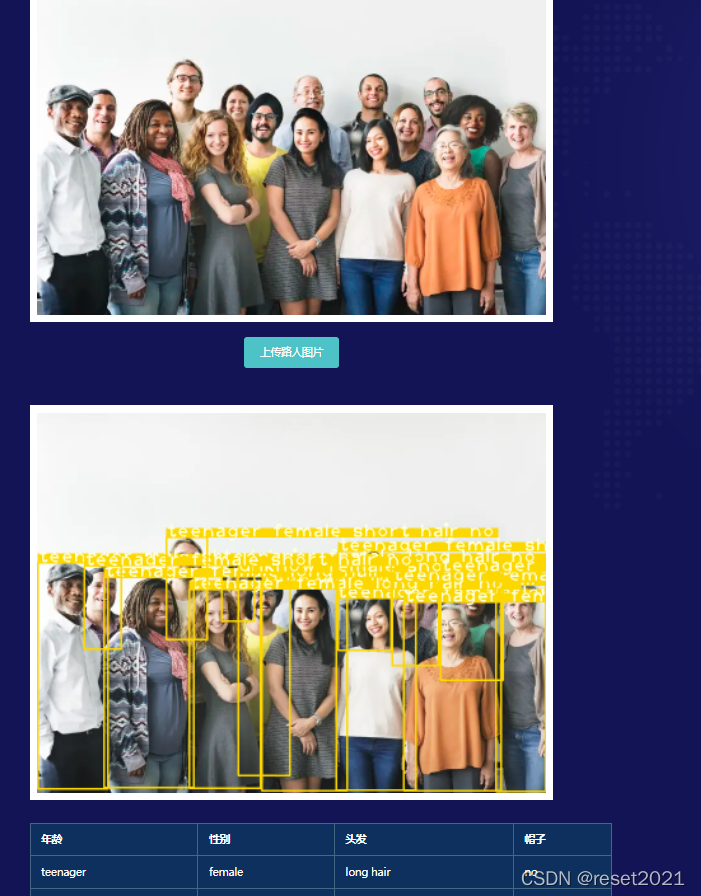
对上述检测出来的人体进行属性识别,设计实现了一个多标签的分类问题,具体实现过程将在另外博客中单讲。
结果如下(这里主要展示的是年龄,性别,帽子状态(是否戴帽子),头发长度四个属性)

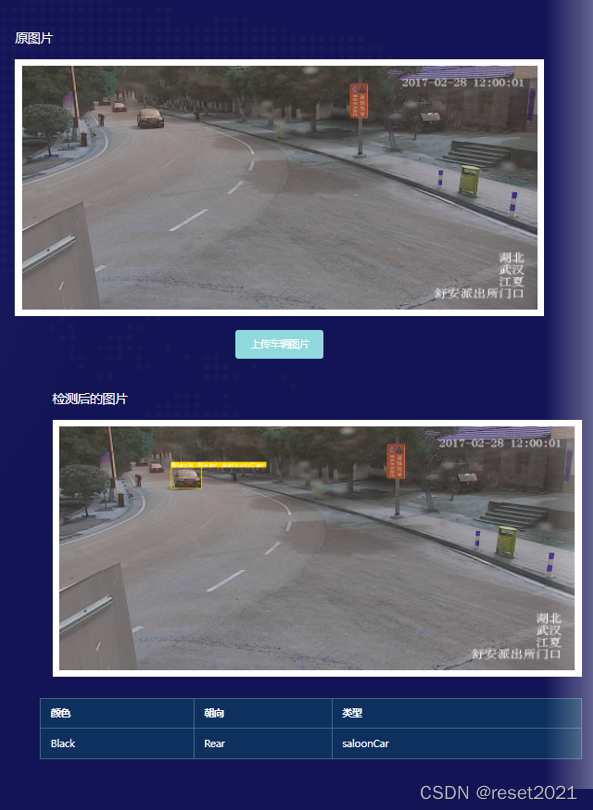
③?对上述检测出来的车辆进行属性识别,设计实现了一个多标签的分类问题,具体实现过程将在另外博客中单讲。
结果如下(这里主要展示的是颜色,朝向以及类别三个属性)

二 、前后端部署
① 前端部署
前端主要实现视频,图像的上传,以及视频,图像检测后的结果展示,并且对相应数据进行统计,最终展示对应的检测图片的相关属性内容
主体代码实现如下所示:
<template>
  <div id="Content">
    <div class="inputWrap">
      <el-radio-group v-model="radio">
        <el-radio-button label="视频检测"></el-radio-button>
        <el-radio-button label="图片检测"></el-radio-button>
      </el-radio-group>
      <el-upload
        class="uploadBtn"
        accept="video/mp4"
        action="http://127.0.0.1:5003/video_upload"
        :disabled="!isVideo"
        :on-success="handleSuccess"
      >
        <el-button type="primary" plain>上传视频</el-button>
      </el-upload>
    </div>

    <div class="mainWrap">
      <div class="left">
        <div class="imgWrap">
          <el-image :src="personUrl"></el-image>
        </div>
        <div class="btnWrap">
          <el-upload
            class="uploadBtn"
            accept="image/*"
            action="http://127.0.0.1:5003/person_predict"
            :on-success="handlePerson"
          >
            <el-button type="primary">上传路人图片</el-button>
          </el-upload>
        </div>
<!--        <el-button class="btn" style="margin-left: 20px;">上传路人图片</el-button>-->
      </div>
      <div class="video">
        <img src="url_for('video_upload')">
      </div>
      <div class="right">
        <div class="imgWrap">
          <el-image :src="carUrl"></el-image>
        </div>
        <div class="btnWrap">
          <el-upload
            class="uploadBtn"
            accept="image/*"
            action="http://127.0.0.1:5003/vehicle_predict"
            :on-success="handleCar"
          >
            <el-button type="primary">上传车辆图片</el-button>
          </el-upload>
        </div>
      </div>
    </div>

    <div class="analysisWrap">
      <div class="left" v-if="personUrl1">
        <div class="imgWrap">
          <el-image :src="personUrl1"></el-image>
        </div>
      </div>
      <div style="width: 40%;"></div>
      <div class="right" v-if="carUrl1">
        <div class="imgWrap">
          <el-image :src="carUrl1"></el-image>
        </div>
      </div>
    </div>

    <div class="tableWrap">
      <div class="left">
        <table v-if="tableData1.length">
          <tr>
            <th>年龄</th>
            <th>性别</th>
            <th>头发</th>
            <th>帽子</th>
          </tr>
          <tr v-for="(item, index) in tableData1" :key="index">
            <td>{{item.age}}</td>
            <td>{{item.gender}}</td>
            <td>{{item.hairlength}}</td>
            <td>{{item.wearinghat}}</td>
          </tr>
        </table>
      </div>
      <div id="main"></div>
      <div class="right">
        <table v-if="tableData2.length">
          <tr>
            <th>颜色</th>
            <th>朝向</th>
            <th>类型</th>
          </tr>
          <tr v-for="(item, index) in tableData2" :key="index">
            <td>{{item.color}}</td>
            <td>{{item.direction}}</td>
            <td>{{item.type}}</td>
          </tr>
        </table>
      </div>
    </div>
  </div>
</template>

<script>
② 后端实现
后端借助flask来实现。
主函数的实现如下:
if __name__ == '__main__':

    files = [
        'uploads', 'tmp/uploads',video_root_path,picture_root_path,video_video_source_dir,video_source_dir,video_predict_dir,picture_source_dir,picture_predict_dir,
        video_source_person_dir,video_source_vehicle_dir,video_predict_person_dir,video_predict_vehicle_dir,video_predict_other_dir,picture_source_person_dir,
        picture_source_vehicle_dir,picture_predict_person_dir,picture_predict_vehicle_dir
    ]

    for ff in files:
        if not os.path.exists(ff):
            os.makedirs(ff)


    init_database()


    app.run(host='0.0.0.0', port=port, debug=True)
其中init_database为数据库初始化接口,主要实现对视频、图像中的目标对象的相关属性的存储。
后端的作用主要是为前端提供相应的调用接口,在该演示平台中,主要包含视频展示接口,图片处理接口(行人,车辆),数据查询接口
1)视频展示接口
由于视频的处理需要每一帧处理,然后同步展示到前端,所以需要将视频处理为流的形式
def gen(camera):
    """Video streaming generator function."""
    yield b'--frame\r\n'
    while True:
        frame = camera.get_frame()
        yield b'Content-Type: image/jpeg\r\n\r\n' + frame + b'\r\n--frame\r\n'

@app.route('/video_feed')
def video_feed():
    """Video streaming route. Put this in the src attribute of an img tag."""

    return Response(gen(camera_show),
               mimetype='multipart/x-mixed-replace; boundary=frame')
这个与前端的是对应的。
action="http://172.16.26.29:5003/video_upload"2)人体属性识别接口
@app.route('/person_predict', methods=['GET', 'POST'])
def person_query():

    print("person_predict")
    file = request.files['file']

    if file and allowed_file(file.filename):
        src_path = os.path.join(app.config['UPLOAD_FOLDER'], file.filename)

        file.save(src_path)

        dist_name = get_time_id() + "_" + file.filename
        person_image_path = os.path.join(picture_source_person_dir, dist_name)
        shutil.copyfile(src_path, person_image_path)


        file_info = person_image_path.split("/")[-1]
        person_pred_url = video_predict_person_dir + file_info

        person.person_predict.c_main(person_image_path,dbpath,person_picture_table,person_pred_url)

        person_info_list = person_info_query(dbpath,person_picture_table,person_image_path)

        return jsonify({'status': 1,
                        'person_url': 'http://127.0.0.1:' + str(port) + '/' + person_image_path,
                        'person_pred_url': 'http://127.0.0.1:' + str(port) + '/' + person_pred_url,
                        'person_info':  person_info_list})

    return jsonify({'status': 0})
该接口返回三个参数,原始图片路径,检测后(画框与属性)图片路径,以及相应的属性数据。
2)车辆属性识别接口
该接口与上述人体属性识别接口类似,这里就不做过多的赘述啦
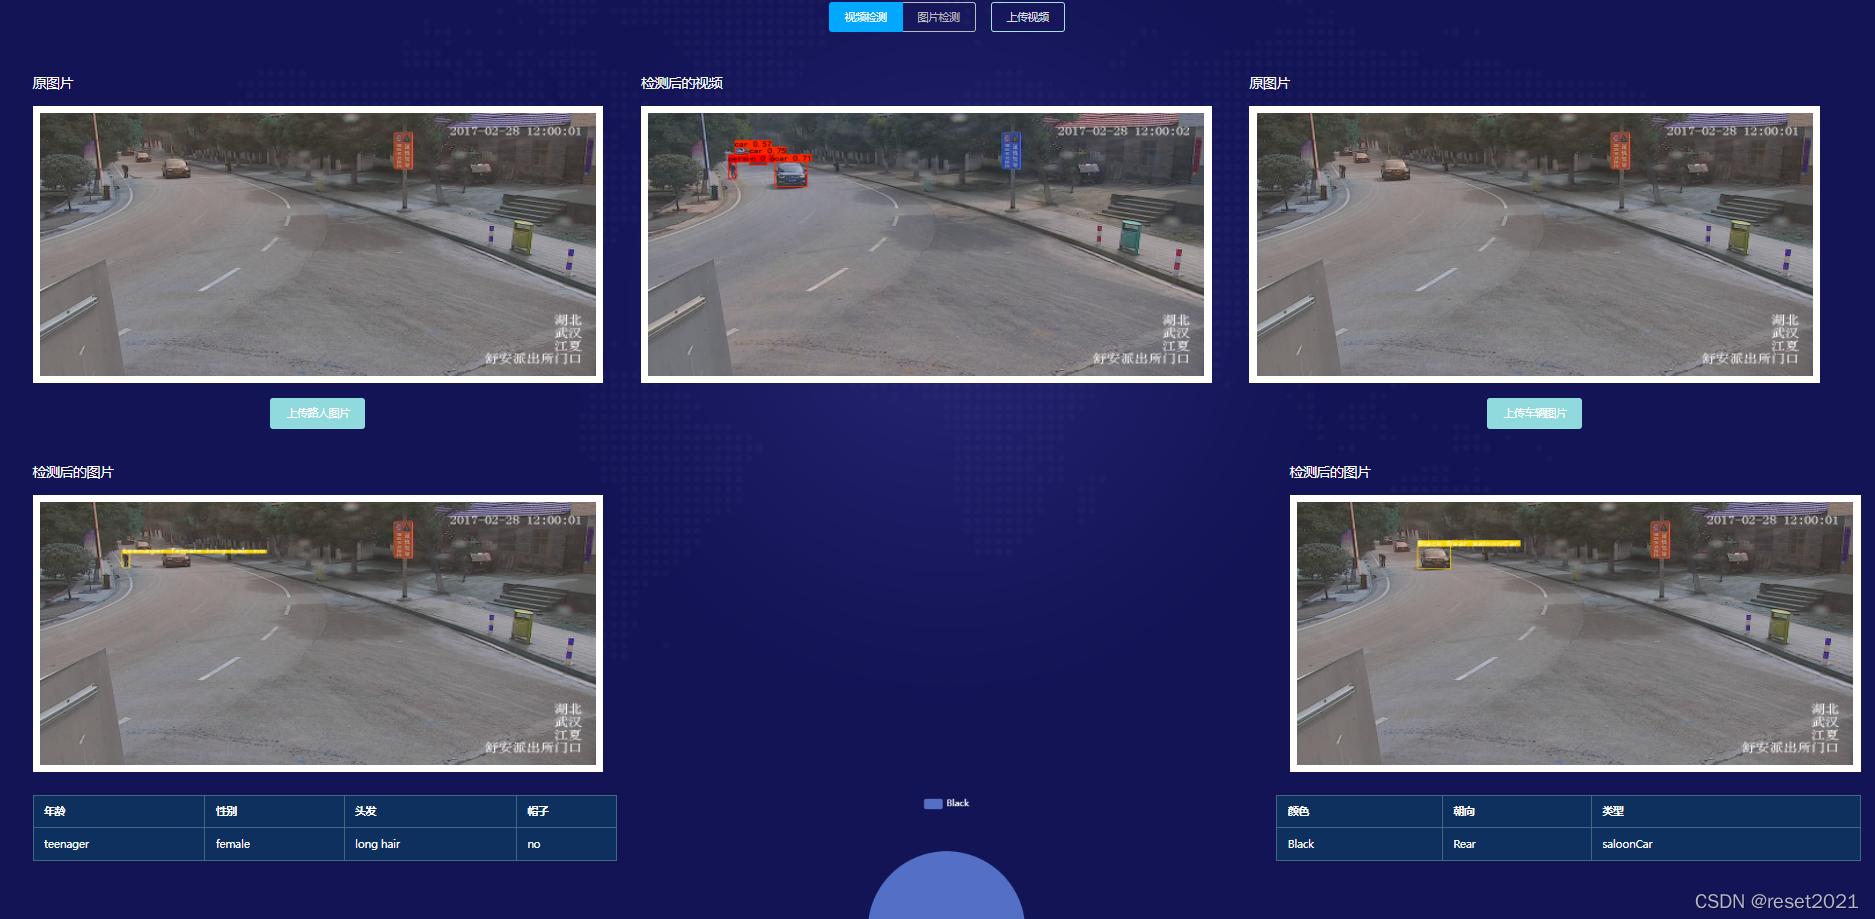
整体效果如下所示

前端展示截图有点小问题,下一个版本改进后。
