前言:首先,这是关于python3爬虫的内容。
先思考一个问题,就是在做python爬虫的时候,是否需要用到类似于Django框架?我认为,是不要的,因为一旦使用,那么很多的精力就要消耗在如何去熟悉框架API、配置上去,而非聚焦于如何处理爬虫爬取过程中的问题处理。
当然,为此可能付出的代价就是自己要去写配置文件、orm、可能的server接口等,但这些应该都是比较容易处理的,也更能锻炼对于python基础的掌握,而不是上来就是框架,被框架束缚。
1. 环境与配置
1.1. 创建一个pure python项目
- 选择Pure Python,取名
MyMoney
New environment using代表的是创建一个新的python虚拟环境,这个是为了隔离各个项目对python包的依赖,存放于venv目录
Base interpreter是解释器,选择python3的版本
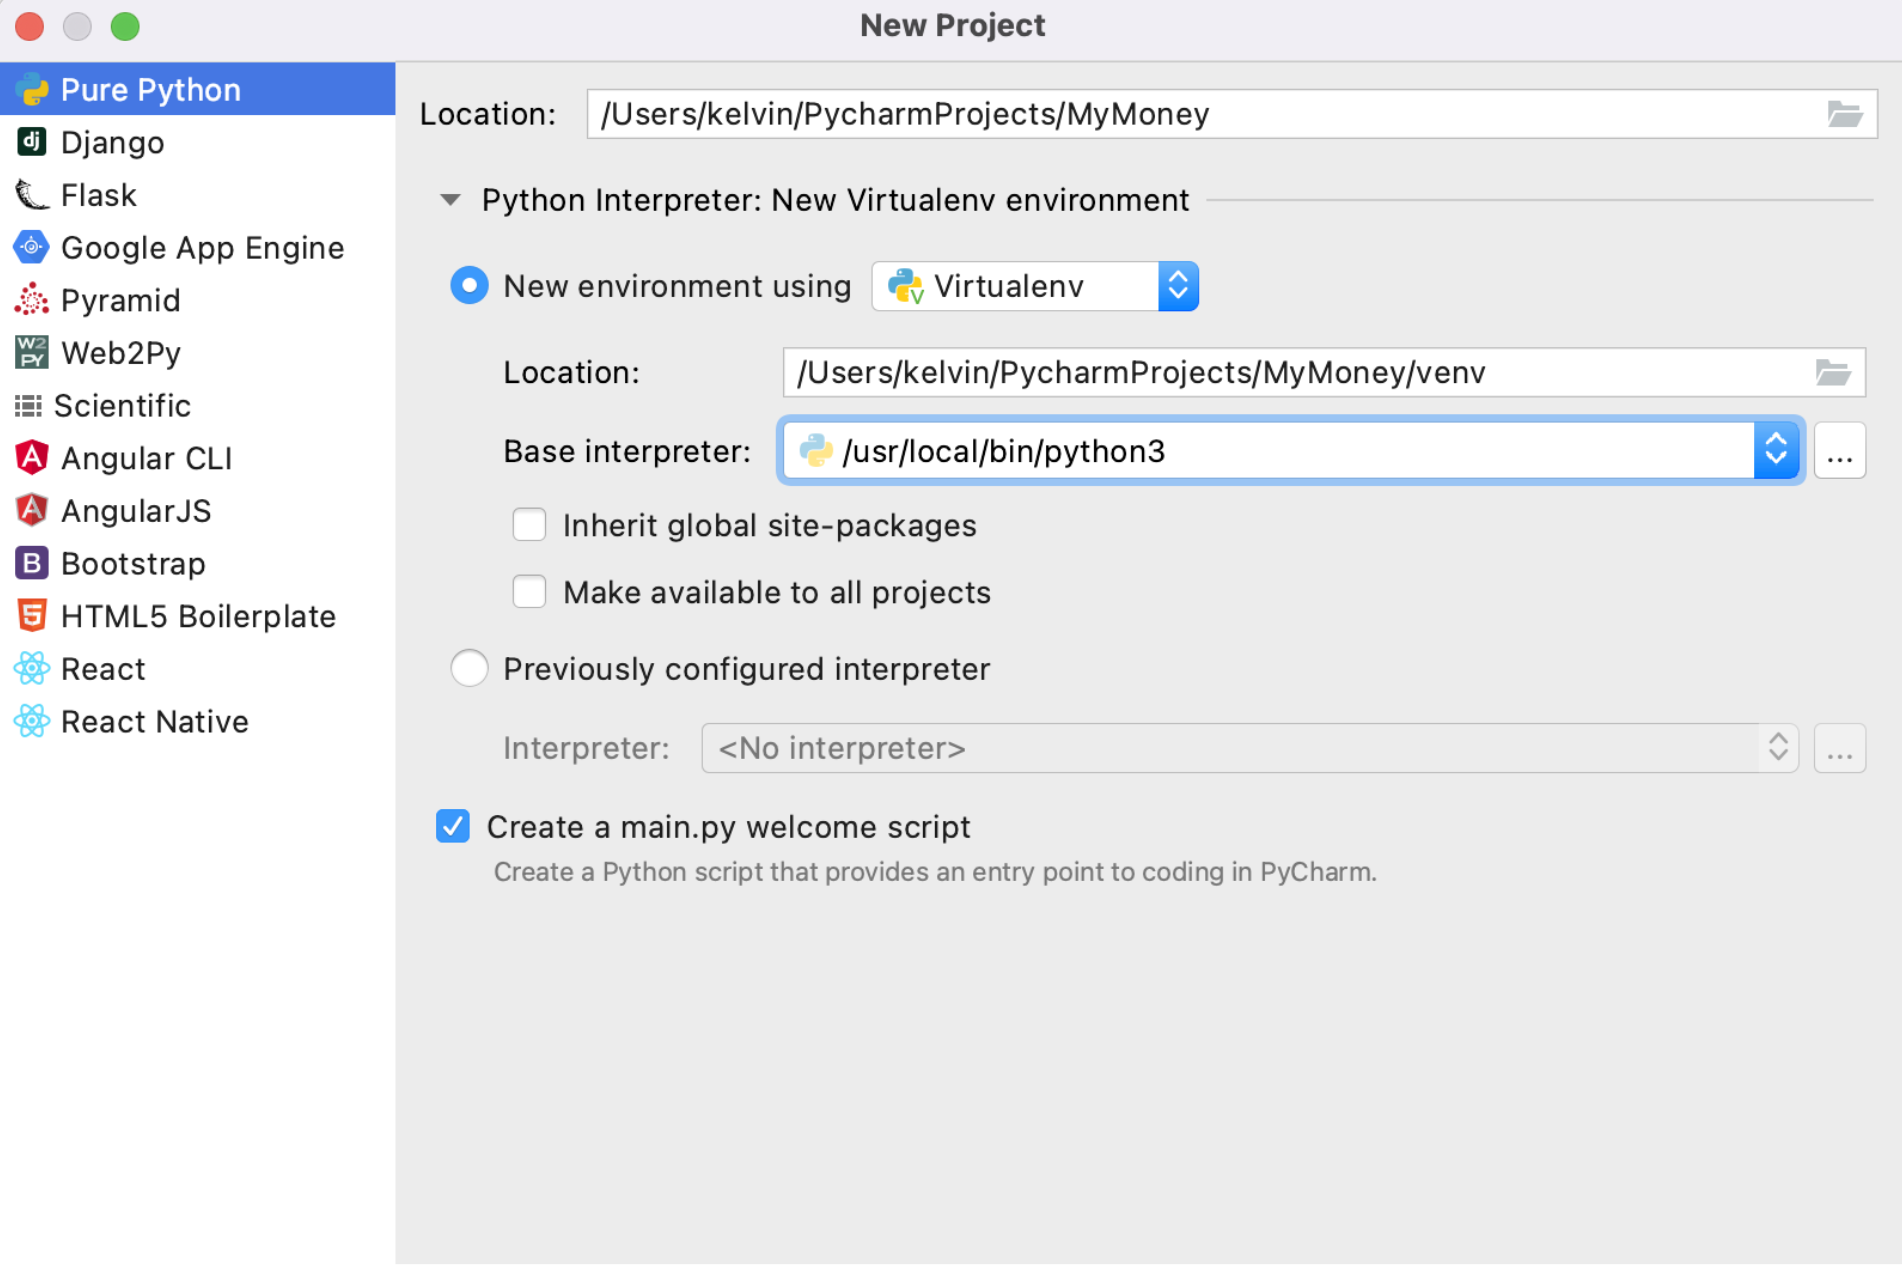
比较干净,什么也没有,开始动工!因为之前已经调研了很久的selenium、requests等,所以下面比较多的是代码的转移、整理、加工的工作,在这个新工程里从0开始。
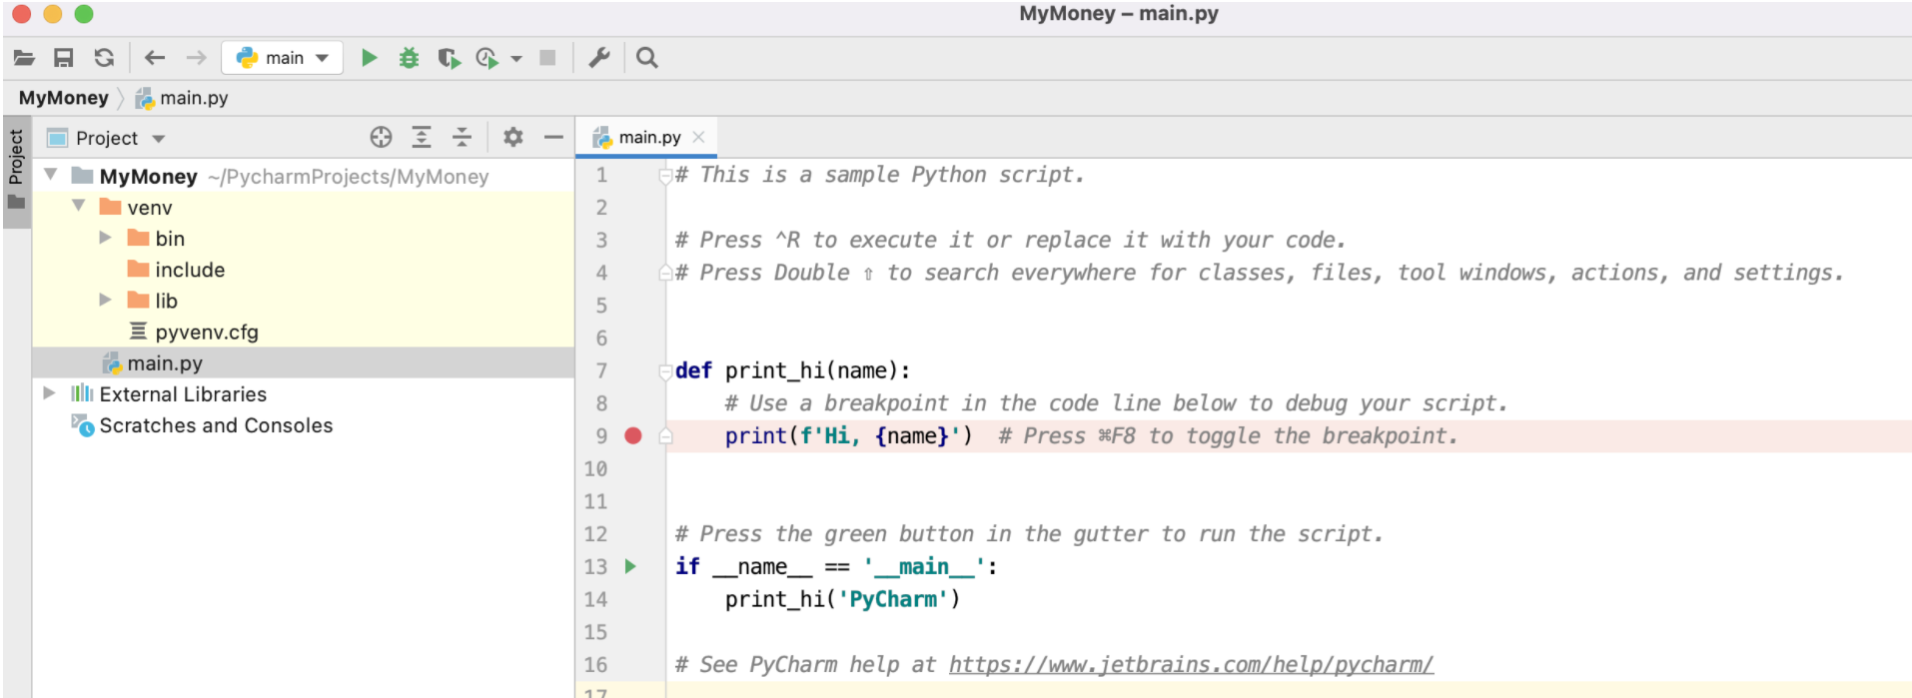
- 还要为这个项目做好版本管理,在gitee上创建项目并上传代码。
 1007  git init
 1008  touch README.md
 1009  git add .
 1010  git commit -m "first commit"
 1011  git remote add origin https://gitee.com/kelvin11/my-money.git
 1012  git push -u origin "master"
原项目没有.gitignore,需要自己添加
# Byte-compiled / optimized / DLL files
__pycache__/
*.py[cod]
*$py.class

# C extensions
*.so

# Distribution / packaging
.Python
build/
develop-eggs/
dist/
downloads/
eggs/
.eggs/
lib/
lib64/
parts/
sdist/
var/
wheels/
*.egg-info/
.installed.cfg
*.egg
MANIFEST

# PyInstaller
#  Usually these files are written by a python script from a template
#  before PyInstaller builds the exe, so as to inject date/other infos into it.
*.manifest
*.spec

# Installer logs
pip-log.txt
pip-delete-this-directory.txt

# Unit test / coverage reports
htmlcov/
.tox/
.coverage
.coverage.*
.cache
nosetests.xml
coverage.xml
*.cover
.hypothesis/
.pytest_cache/

# Translations
*.mo
*.pot

# Django stuff:
*.log
local_settings.py
db.sqlite3

# Flask stuff:
instance/
.webassets-cache

# Scrapy stuff:
.scrapy

# Sphinx documentation
docs/_build/

# PyBuilder
target/

# Jupyter Notebook
.ipynb_checkpoints

# IPython
profile_default/
ipython_config.py

# pyenv
.python-version

# celery beat schedule file
celerybeat-schedule

# SageMath parsed files
*.sage.py

# Environments
.env
.venv
env/
venv/
ENV/
env.bak/
venv.bak/

# Spyder project settings
.spyderproject
.spyproject

# Rope project settings
.ropeproject

# mkdocs documentation
/site

# mypy
.mypy_cache/
.dmypy.json
dmypy.json

.idea
至此,一个pure python项目就创建好并上到git了。
思考:下一步要做什么呢?直接上代码?
的确是,不过代码是什么类型的代码呢?我认为是配置库要先使用起来,毕竟,不管是连接db还是写一些项目变量,都需要配置文件。python项目的配置库,是通过什么三方库实现的呢?
就是使用:configparser。用法参考网上的博客:https://www.cnblogs.com/tester-blog/p/14814105.html,据此,集成到代码中
再思考:我们准备用什么数据库?
一般可能上mysql,这里其实也考虑用mongodb,毕竟,mongodb跟爬虫更搭,而且,我们的项目中也不适合存在2种db类型,那只能是mongodb和mysql二选一了,目前考虑先上mongodb。
1.2. 集成configparser
在python 3 中ConfigParser模块名已更名为configparser
read(filename) #读取配置文件,直接读取ini文件内容

sections() #获取ini文件内所有的section,以列表形式返回['log', 'mysql']

options(sections) #获取指定sections下所有options ,以列表形式返回['host', 'port', 'user', 'password']

items(sections) #获取指定section下所有的键值对,[('host', '127.0.0.1'), ('port', '3306'), ('user', 'root'), ('password', '123456')]

get(section, option) #获取section中option的值,返回为string类型
# 获取指定的section下的option <class 'str'> 127.0.0.1

getint(section,option) # 返回int类型
getfloat(section, option)  # 返回float类型
getboolean(section,option) # 返回boolen类型
-
一个简单的使用demo
[log]
name = demo
level = INFO
file_ok = True
file_name = demo.log

[mysql]
host=127.0.0.1
port=3306
user=root
password=123456
from configparser import ConfigParser # 实例化对象 con = ConfigParser() con.read("conf.ini",encoding="utf-8") # 获取指定的section和option值 val = con.get("log","name") print('获取指定的section下的option', type(val), val) # 获取所有section section = con.sections() print("获取配置文件所有的section",section) # 获取所有options option= con.options("mysql") print("获取配置文件所有的option",option) # 获取指定section下所有的键值对,返回的是一个列表 item = con.items("mysql") print('获取指定section下所有的键值对', item) # 将列表转化成字典 # item = dict(con.items("mysql")) # print(item["user"]) # for key,val in item.items(): # print(key,"=",val)
1.3. 集成selenium
关乎selenium的驱动下载、api,参考博客:https://zhuanlan.zhihu.com/p/111859925
在我们的项目中,先使用一个MySelenium.py来进行可行性与连通性验证。
1.3.1. pycharm安装selenium包
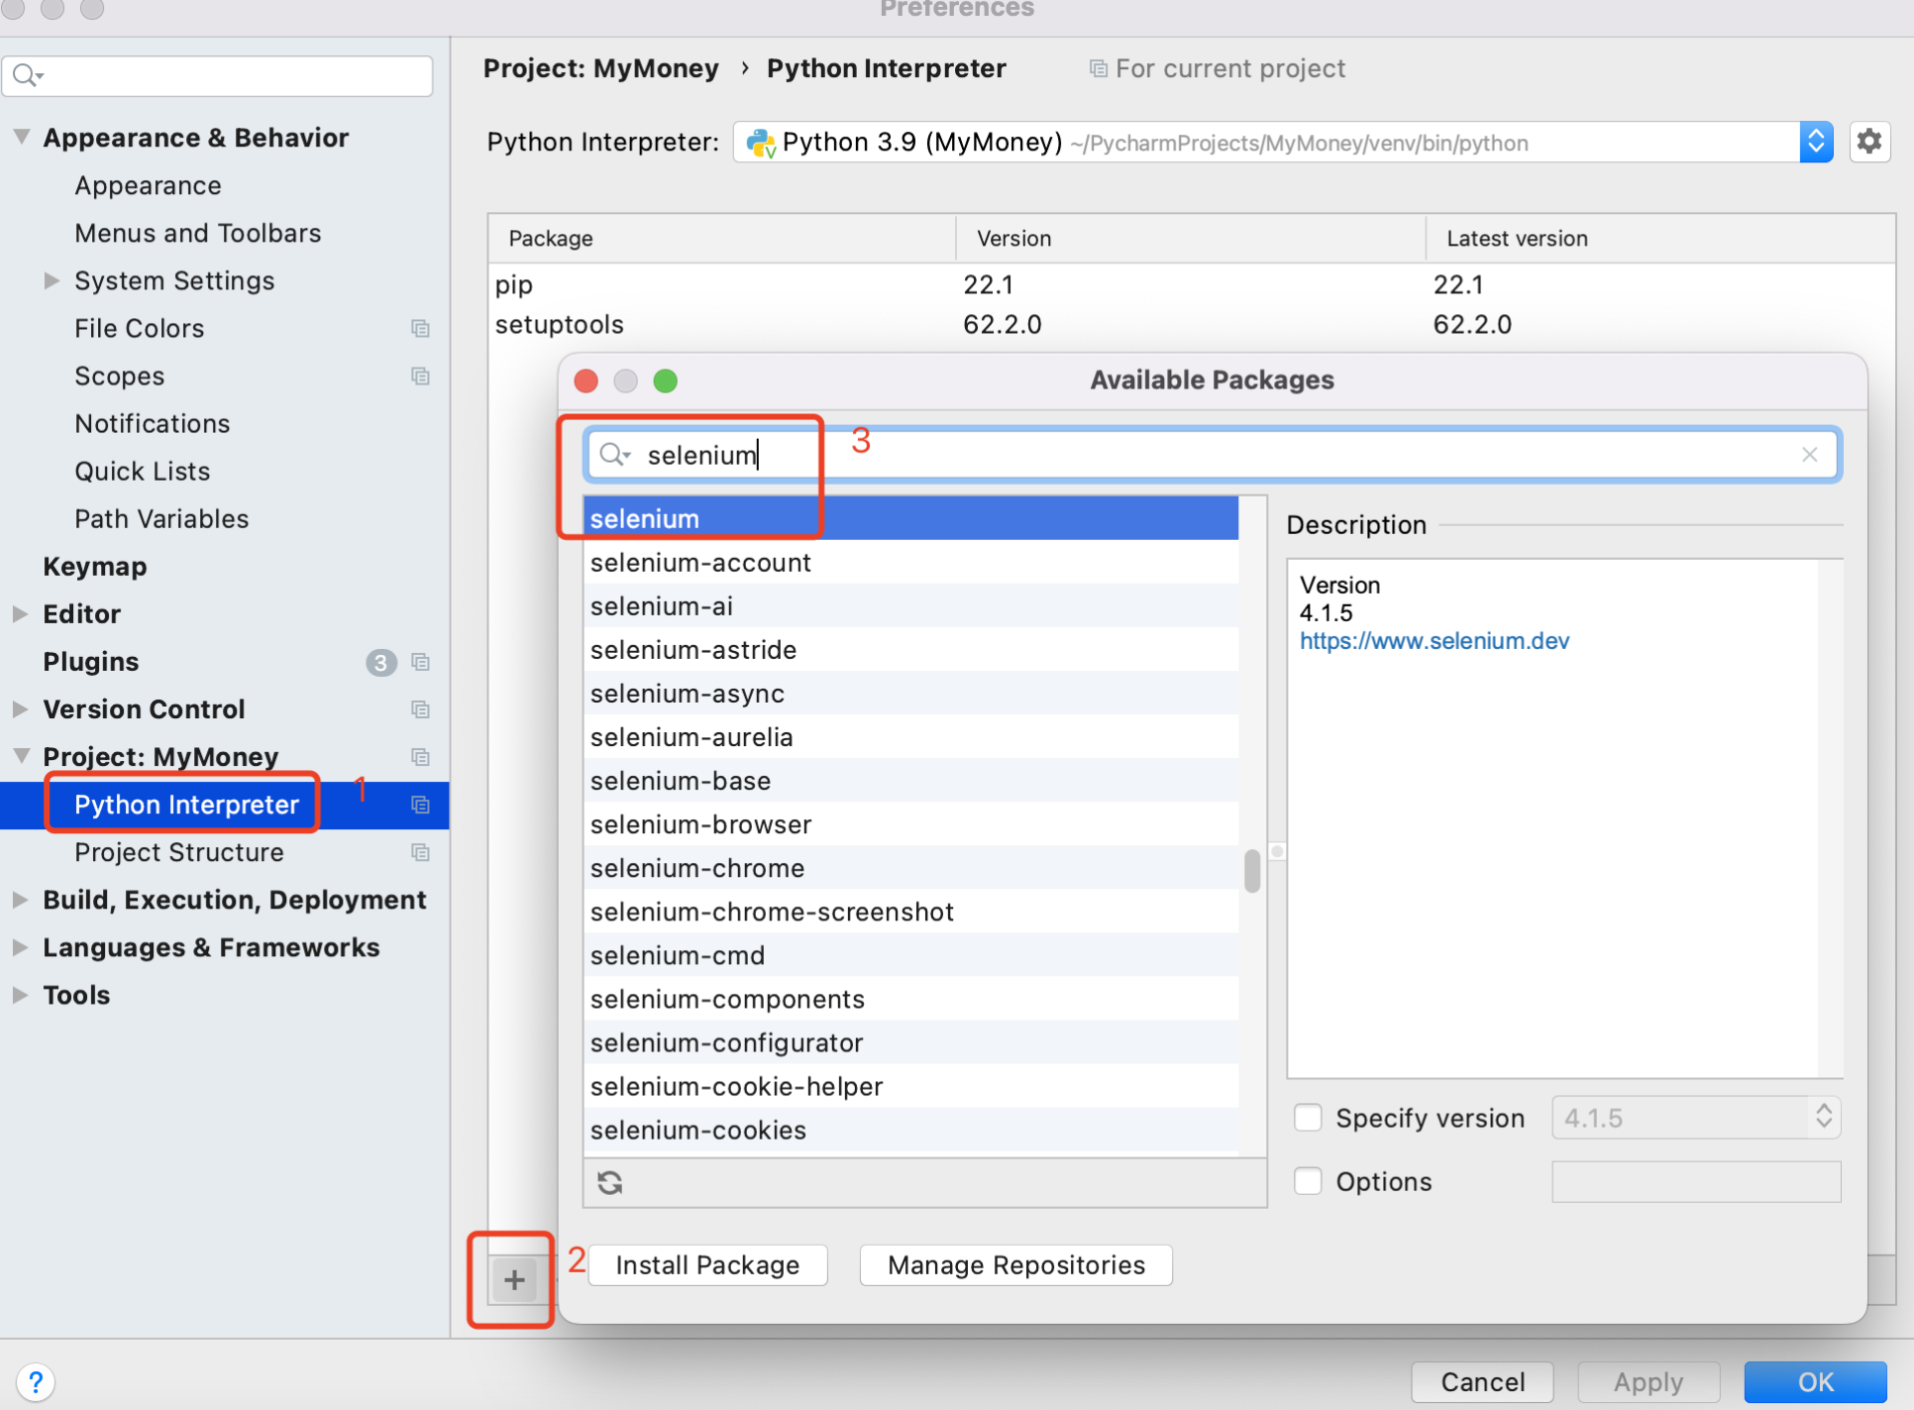
1.3.2. 下载自己chrome浏览器版本对应的驱动
下载地址:https://registry.npmmirror.com/binary.html?path=chromedriver/
找一下自己chrome浏览器版本:
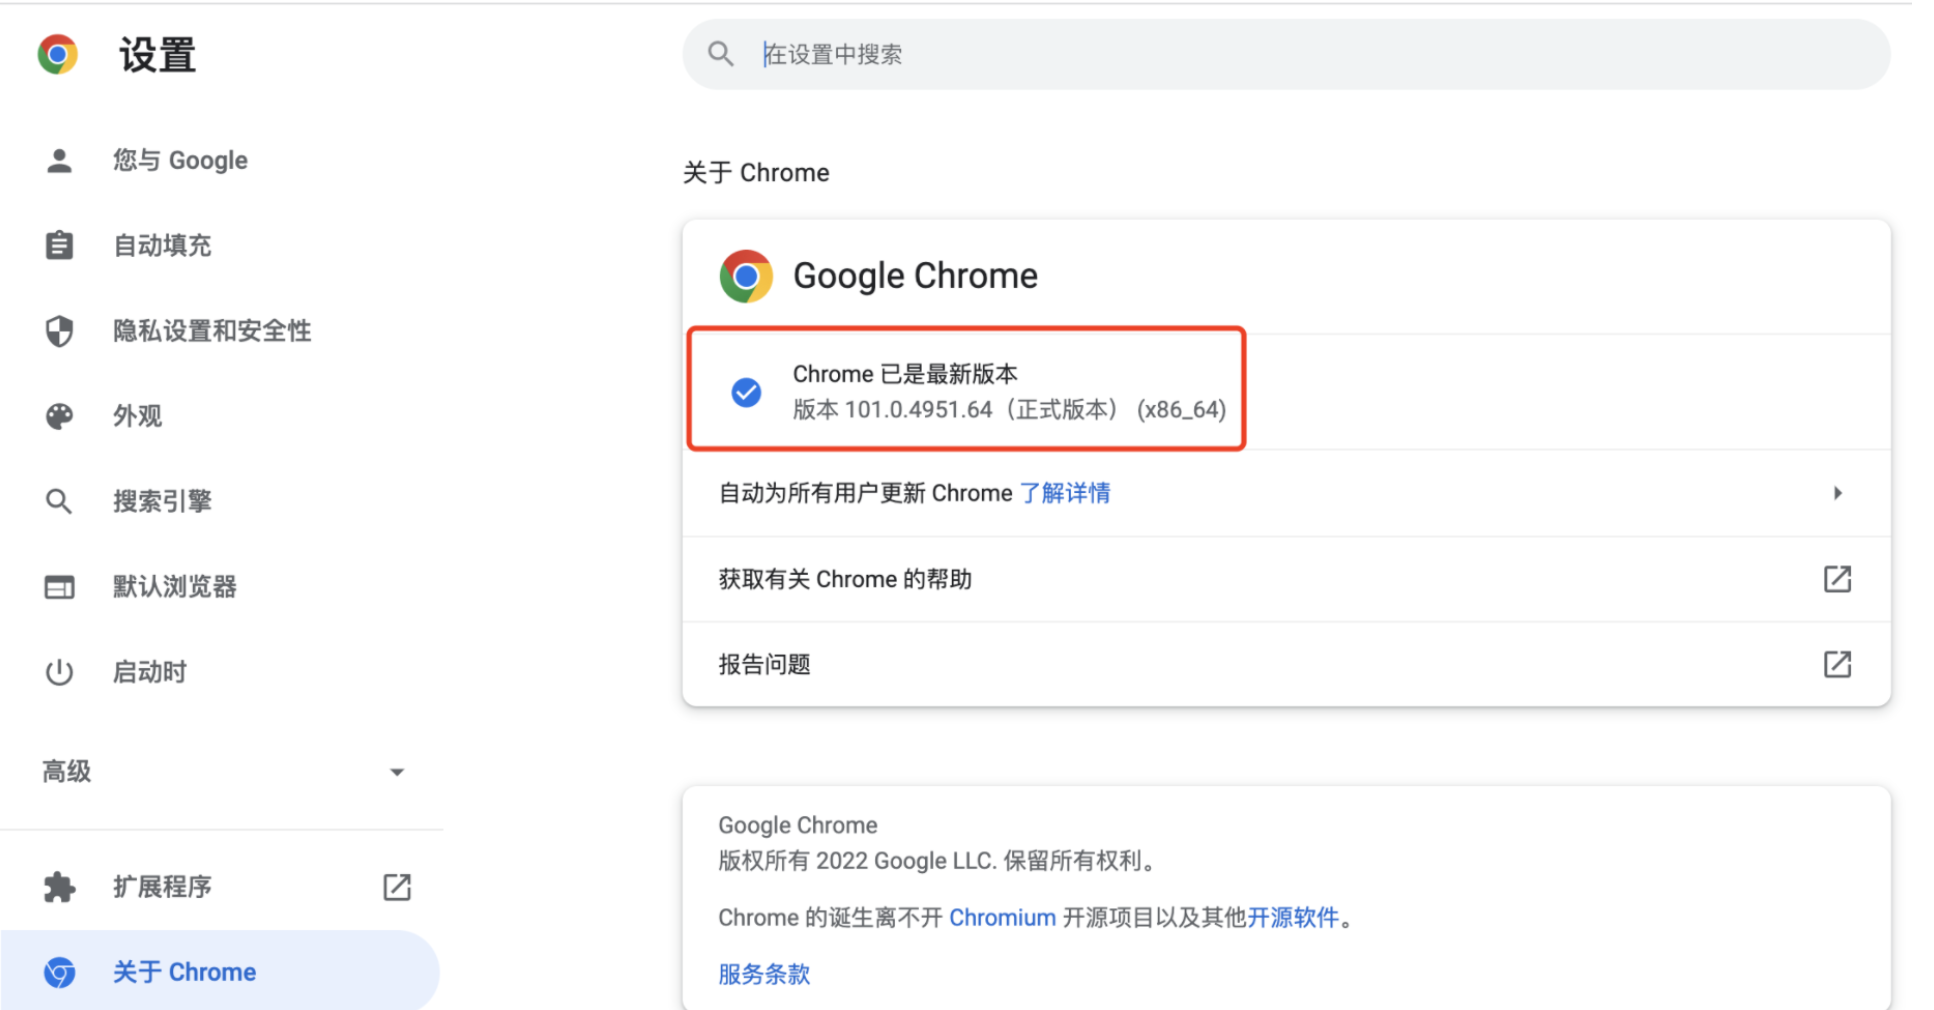
发现,并没有完全对应的,先找个相对匹配的较新版本:
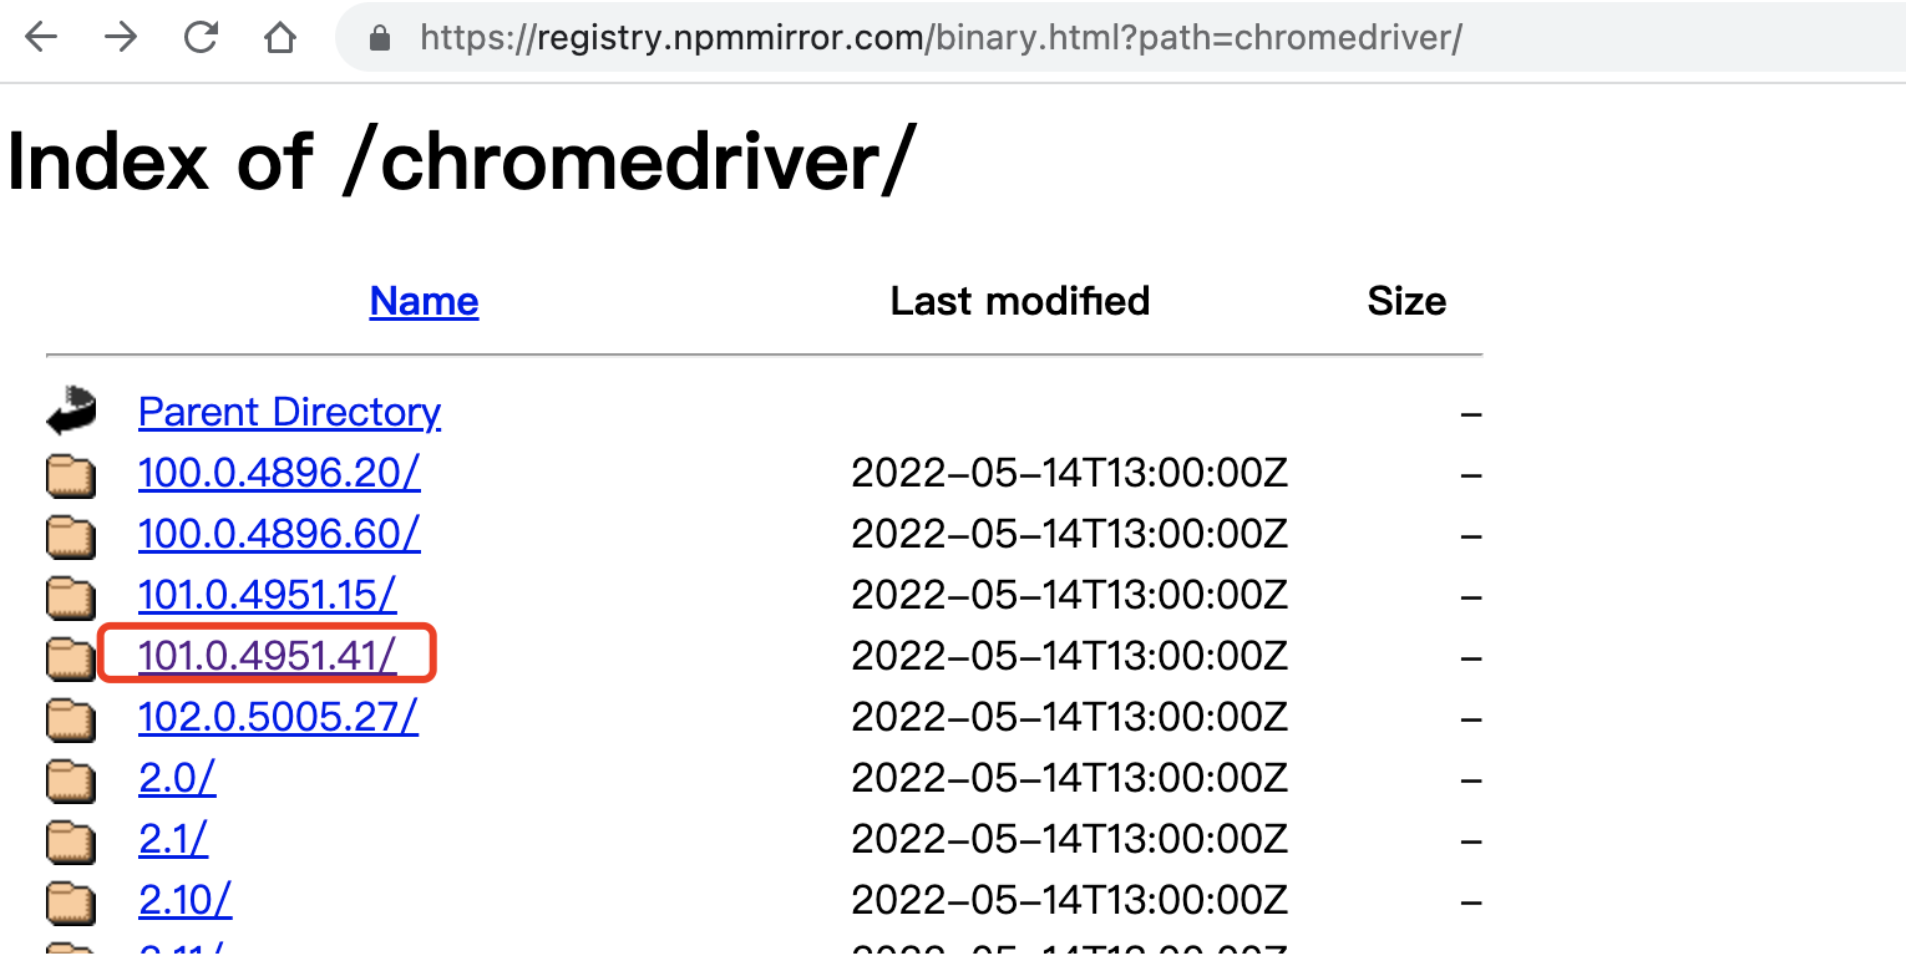
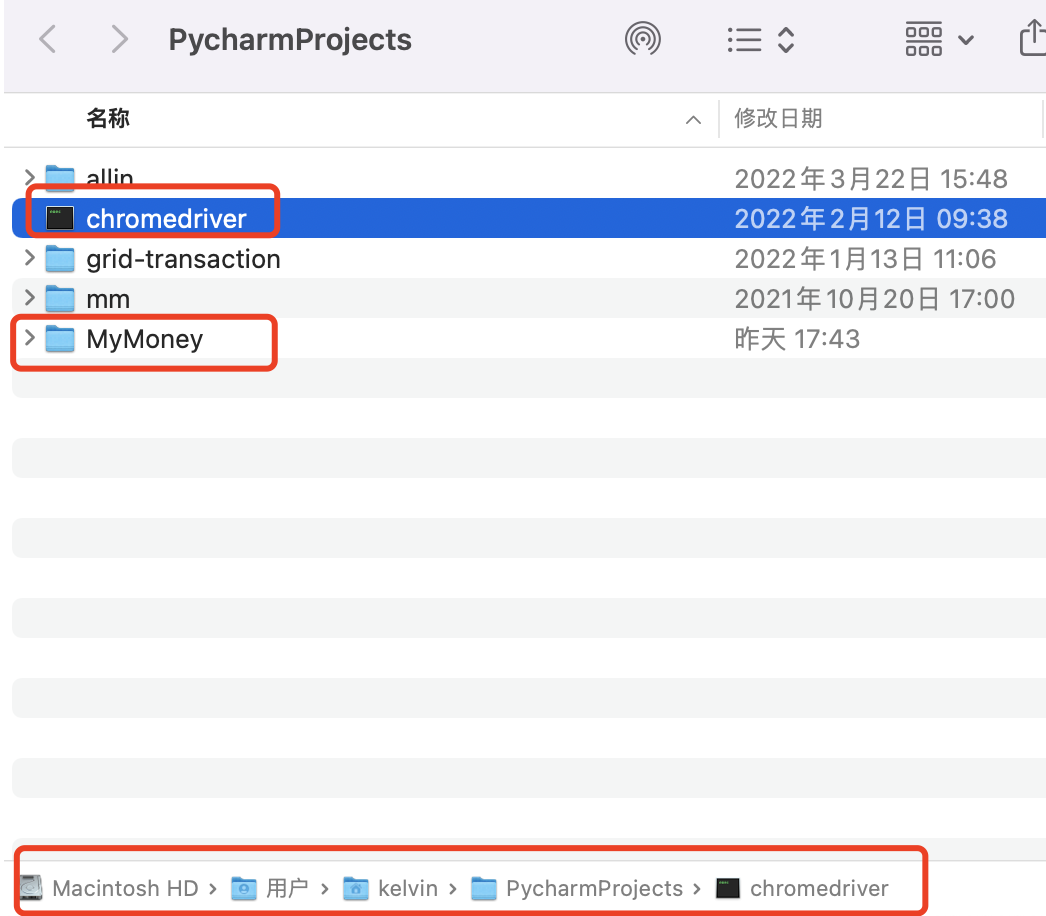
我把下载的驱动文件放在了跟MyMoney项目同级的目录下,即:/Users/kelvin/PycharmProjects/chromedriver
1.3.3. 编写python、selenium、chrome连通性代码
背景:python爬虫,如果遇到了完全无从下手的接口,那selenium将是一个很好的选择,它帮助我们用浏览器的视角,来查看页面信息,我们要做的,就是使用selenium API来打开浏览器、点击,然后对于展示出来的页面,使用xpath来提取页面信息。
python+selenium最简单的代码,只有3行
from selenium import webdriver
driver = webdriver.Chrome(r"/Users/kelvin/PycharmProjects/chromedriver")    # Chrome浏览器,地址就是驱动存放的地址
driver.get("https://www.baidu.com")  # 打开网页
运行,就可以看到python代码调起了chrome浏览器并访问了百度:
可以看到,有个小的提示,“Chrome正收到自动测试软件的控制”,这个就是指的selenium了。

至此,我们简单的集成selenium的工作就完成了,后面就是对selenium的参数调整(爬虫伪装)以及真正使用一些工具来达到我们爬取数据的目的。
1.4. 集成requests
request简单用法的参考博客:https://blog.csdn.net/m0_58086930/article/details/121162071
背景:为什么有了selenium之后,还要再集成requests呢?其实这是此2者的特性不同所决定的。
当比如遇到了无法绕过的验证码,那么人为介入并提供可视化UI将是一个比较好的解决方案;另一方面,当我们已经一马平川,就等着批量从已分析出的接口中提取数据的时候,那requests将是一个利器。
我们能想到的一个case,就是通过selenium登录、浏览并定位到特定的页面,此时我们已经可以拿到cookie,那么,批量调取接口拿数据的时候,将cookie set进去并通过requests进行快速调用,那就免去了登录的困扰并且提高了交互效率(无需浏览器加载页面html、css、js等资源)。
-
requests百度一下
上来,肯定还是要先装requests包
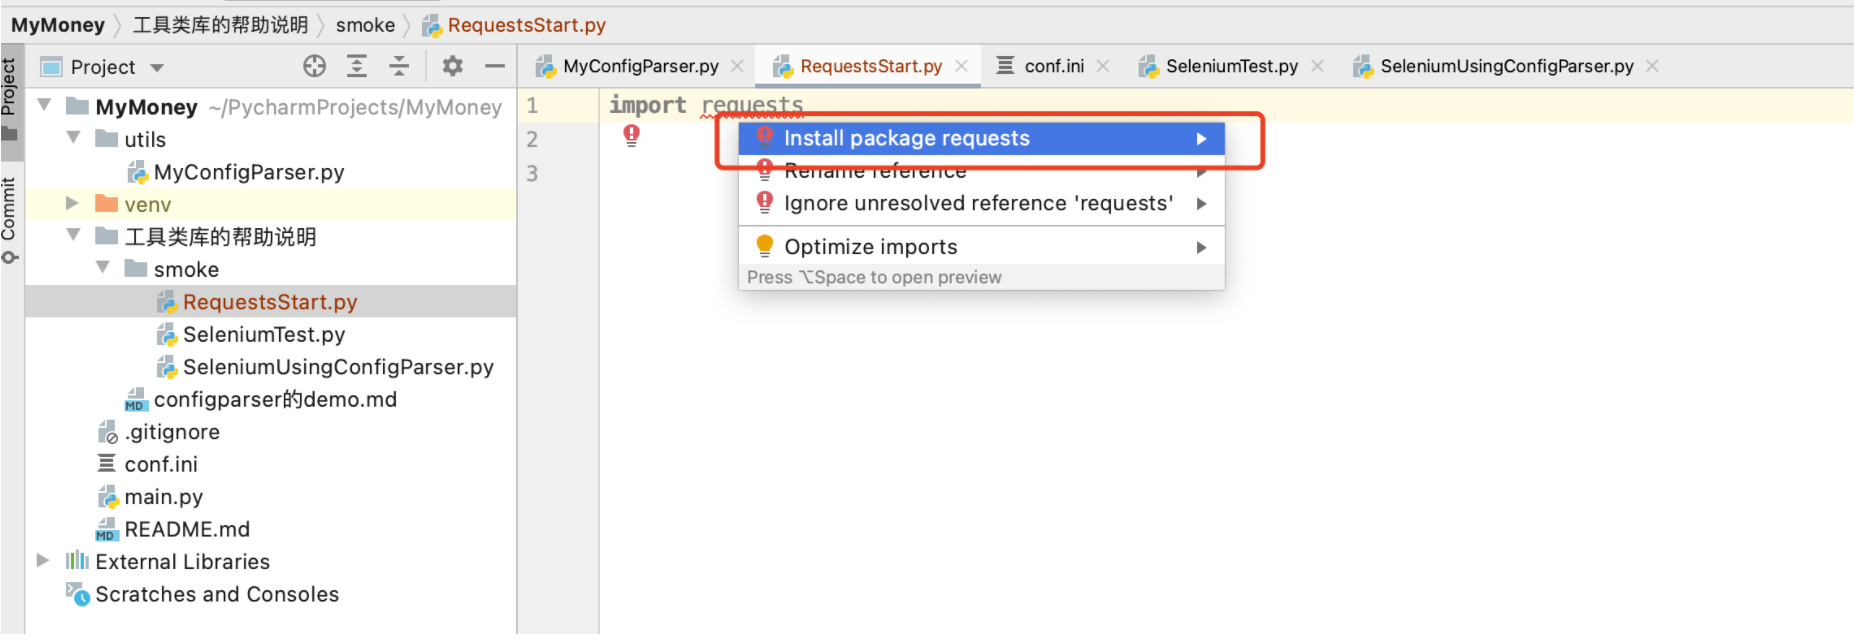
然后开始愉快的写代码,我希望是3行就能搞定最好:
import requests
res = requests.get("https://baidu.com")
res.encoding = "utf-8"
print(res.text)
悲剧了,4行才搞定…打印的结果是如下,如果不够直观,可以保存到baidu.html,然后用浏览器打开
<!DOCTYPE html> <!--STATUS OK--><html> <head><meta http-equiv=content-type content=text/html;charset=utf-8><meta http-equiv=X-UA-Compatible content=IE=Edge><meta content=always name=referrer><link rel=stylesheet type=text/css href=http://s1.bdstatic.com/r/www/cache/bdorz/baidu.min.css><title>百度一下,你就知道</title></head> <body link=#0000cc> <div id=wrapper> <div id=head> <div class=head_wrapper> <div class=s_form> <div class=s_form_wrapper> <div id=lg> <img hidefocus=true src=//www.baidu.com/img/bd_logo1.png width=270 height=129> </div> <form id=form name=f action=//www.baidu.com/s class=fm> <input type=hidden name=bdorz_come value=1> <input type=hidden name=ie value=utf-8> <input type=hidden name=f value=8> <input type=hidden name=rsv_bp value=1> <input type=hidden name=rsv_idx value=1> <input type=hidden name=tn value=baidu><span class="bg s_ipt_wr"><input id=kw name=wd class=s_ipt value maxlength=255 autocomplete=off autofocus></span><span class="bg s_btn_wr"><input type=submit id=su value=百度一下 class="bg s_btn"></span> </form> </div> </div> <div id=u1> <a href=http://news.baidu.com name=tj_trnews class=mnav>新闻</a> <a href=http://www.hao123.com name=tj_trhao123 class=mnav>hao123</a> <a href=http://map.baidu.com name=tj_trmap class=mnav>地图</a> <a href=http://v.baidu.com name=tj_trvideo class=mnav>视频</a> <a href=http://tieba.baidu.com name=tj_trtieba class=mnav>贴吧</a> <noscript> <a href=http://www.baidu.com/bdorz/login.gif?login&tpl=mn&u=http%3A%2F%2Fwww.baidu.com%2f%3fbdorz_come%3d1 name=tj_login class=lb>登录</a> </noscript> <script>document.write('<a href="http://www.baidu.com/bdorz/login.gif?login&tpl=mn&u='+ encodeURIComponent(window.location.href+ (window.location.search === "" ? "?" : "&")+ "bdorz_come=1")+ '" name="tj_login" class="lb">登录</a>');</script> <a href=//www.baidu.com/more/ name=tj_briicon class=bri style="display: block;">更多产品</a> </div> </div> </div> <div id=ftCon> <div id=ftConw> <p id=lh> <a href=http://home.baidu.com>关于百度</a> <a href=http://ir.baidu.com>About Baidu</a> </p> <p id=cp>©2017 Baidu <a href=http://www.baidu.com/duty/>使用百度前必读</a> <a href=http://jianyi.baidu.com/ class=cp-feedback>意见反馈</a> 京ICP证030173号 <img src=//www.baidu.com/img/gs.gif> </p> </div> </div> </div> </body> </html>
图片
<img src=//www.baidu.com/img/gs.gif>是由于使用的//这种形式导致去寻找的文件没找到而加载不出来,这种用法挺多,在抓淘宝数据的时候,也遇到了同样的方式,暂时先放一下,集中注意力。先搞这么多,主要是为了引入requests,后面需要用到post的方式进行请求数据,再用案例来说明。
1.5. 集成MongoDB
背景:爬虫很多时候遇到的是非结构化数据或者说、数据比较多和乱、以python结构数据居多。为了不丢失数据,我们选择用MongoDB来作为数据存储。另外,即使是一个html,我们也可以将其存放于MongoDB中,以便后期的二次加工处理。
MongoDB菜鸟教程:https://www.runoob.com/python3/python-mongodb.html
-
使用docker安装mongodb
docker pull mongo:latest
docker images
# 我们可以使用以下命令来运行 mongo 容器
docker run -itd --name mongo -p 27017:27017 mongo --auth
# 进入容器设置admin密码
docker exec -it mongo mongo admin
# 创建一个名为 admin,密码为 liukun520 的用户。
db.createUser({ user:'admin',pwd:'liukun520',roles:[ { role:'userAdminAnyDatabase', db: 'admin'},"readWriteAnyDatabase"]});
# 尝试使用上面创建的用户信息进行连接。
db.auth('admin', 'liukun520')
# 上面输出结果为1
如果是在云主机上创建的容器,要开27017端口
-
MongoDB基本使用
26行数据,描述了MongoDB的CRUD,应该算是足够简单了。更多的MongoDB API还是先看看菜鸟教程。https://www.runoob.com/python3/python-mongodb.html
import pymongo
# MongoDB连接的元数据
mongo_meta = {'host': 'my.tengxun', 'port': '27017', 'user_name': 'admin', 'password': 'liukun520', 'db': 'admin'}
# 创建数据库连接
myclient = pymongo.MongoClient('mongodb://%s:%s@%s:%s/' % (mongo_meta['user_name'], mongo_meta['password'], mongo_meta['host'], mongo_meta['port']))
# 查询
db_record = myclient["mymoney_db"]["cny"].find_one({"name": "刘坤"})
if db_record:
    print('当前有一笔钱:' + str(db_record))
# 删除
myclient["mymoney_db"]["cny"].delete_one({"name": "刘坤"})
print('删除成功')
db_record = myclient["mymoney_db"]["cny"].find_one({"name": "刘坤"})
if db_record is None:
    print('没有找到"刘坤"的钱,开始凭空印钱!')
    # 新增
    # 在db:mymoney_db下创建集合collection:cny,并初始化一个文档document:{"name": "刘坤", "money": "9999999"}
    mydict = {"name": "刘坤", "money": "9999999"}
    insert_result = myclient["mymoney_db"]["cny"].insert_one(mydict)
    print('印钱结束,主键id:' + str(insert_result.inserted_id))
    # 更新
    myquery = {"name": "刘坤"}
    newvalues = {"$set": {"money": "1000000000"}}
    myclient["mymoney_db"]["cny"].update_one(myquery, newvalues)
    db_record = myclient["mymoney_db"]["cny"].find_one({"name": "刘坤"})
    print('更新之后的数据是:' + str(db_record))
2. 目标背景介绍(xdclass.net)
站点:https://xdclass.net/#/index
无意中发现的一个站点,其登录接口也比较简单,正好适合requests和selenium的实操。
2.1. 目标1:获取列表信息(Reqeusts GET方式)
2.1.1. 分析
我们找到一个模块,页面上是视频推荐 -> 挑战20k月薪面试必备。
对应的接口数据,通过F12分析,是get请求了一个url,如下图:
method: get
url: https://api.xdclass.net/pub/api/v1/web/index_card
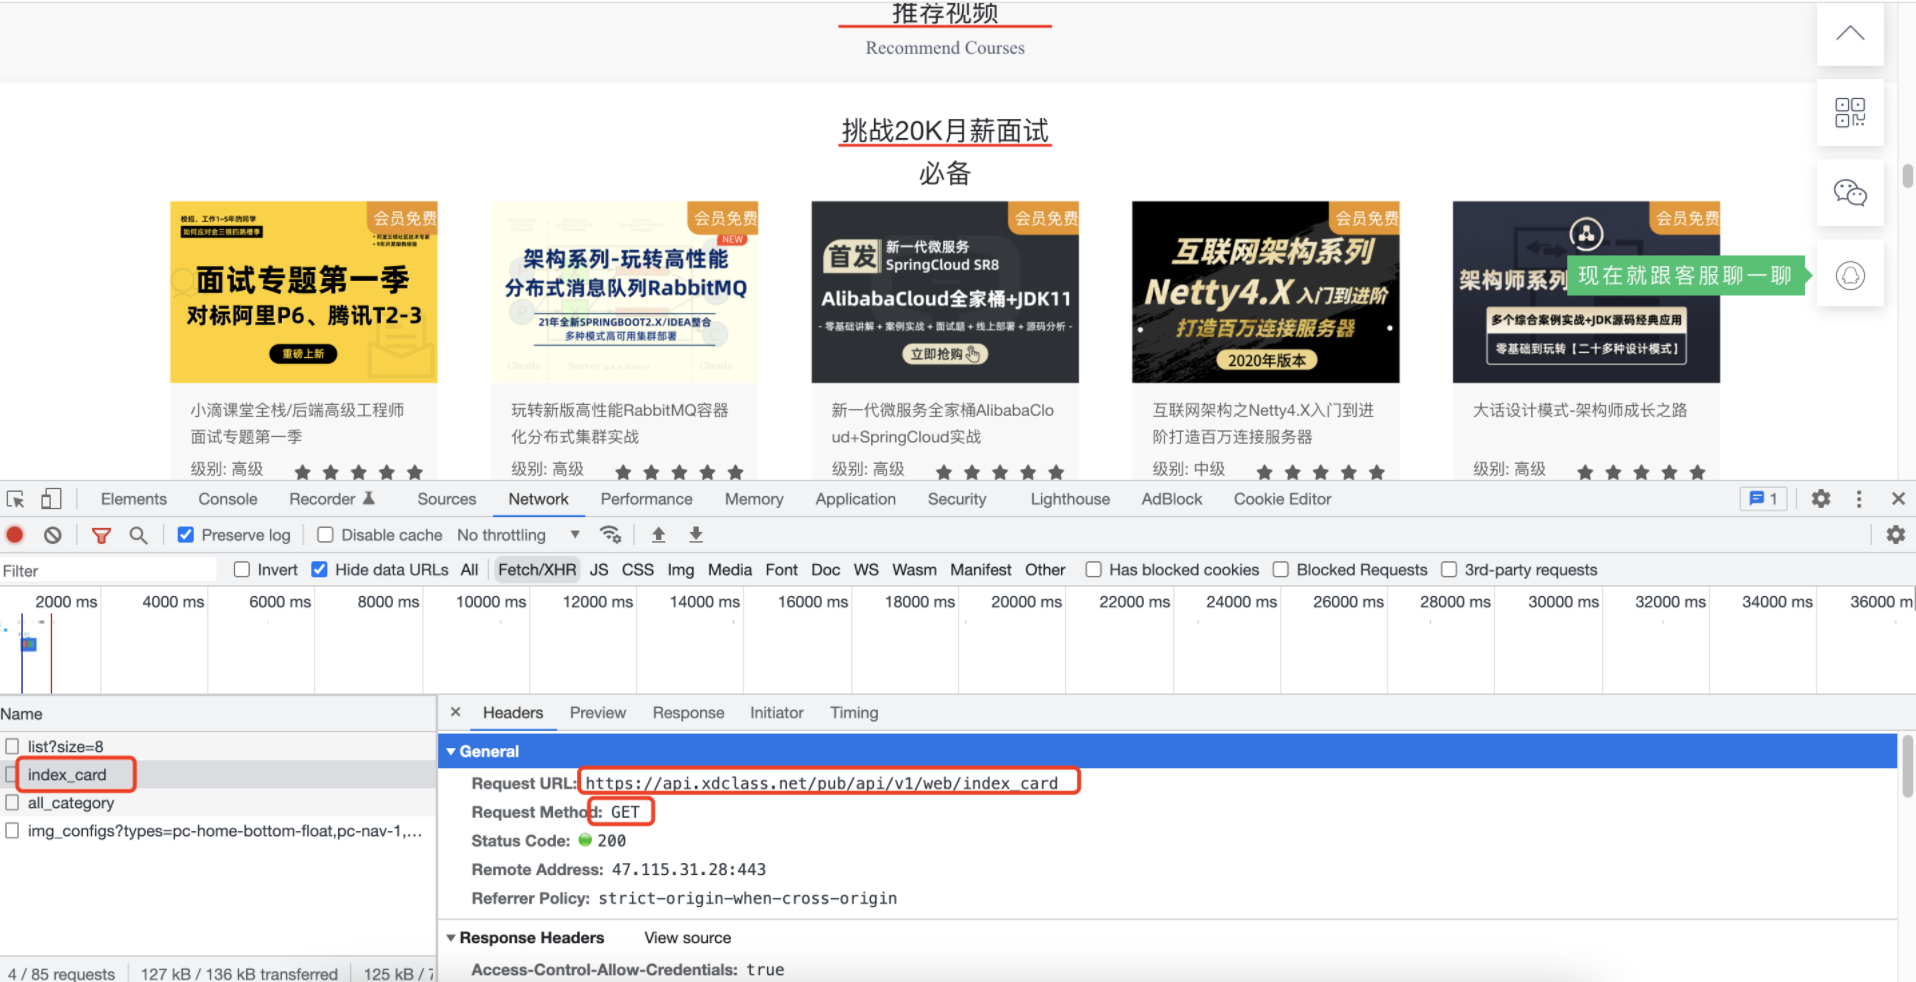
response: json格式,具体取数路径见下图

2.1.2. 实现
-
主程序代码很简单
from utils.requests import RequestsUtil

res = RequestsUtil.do_request('https://api.xdclass.net/pub/api/v1/web/index_card', "get")
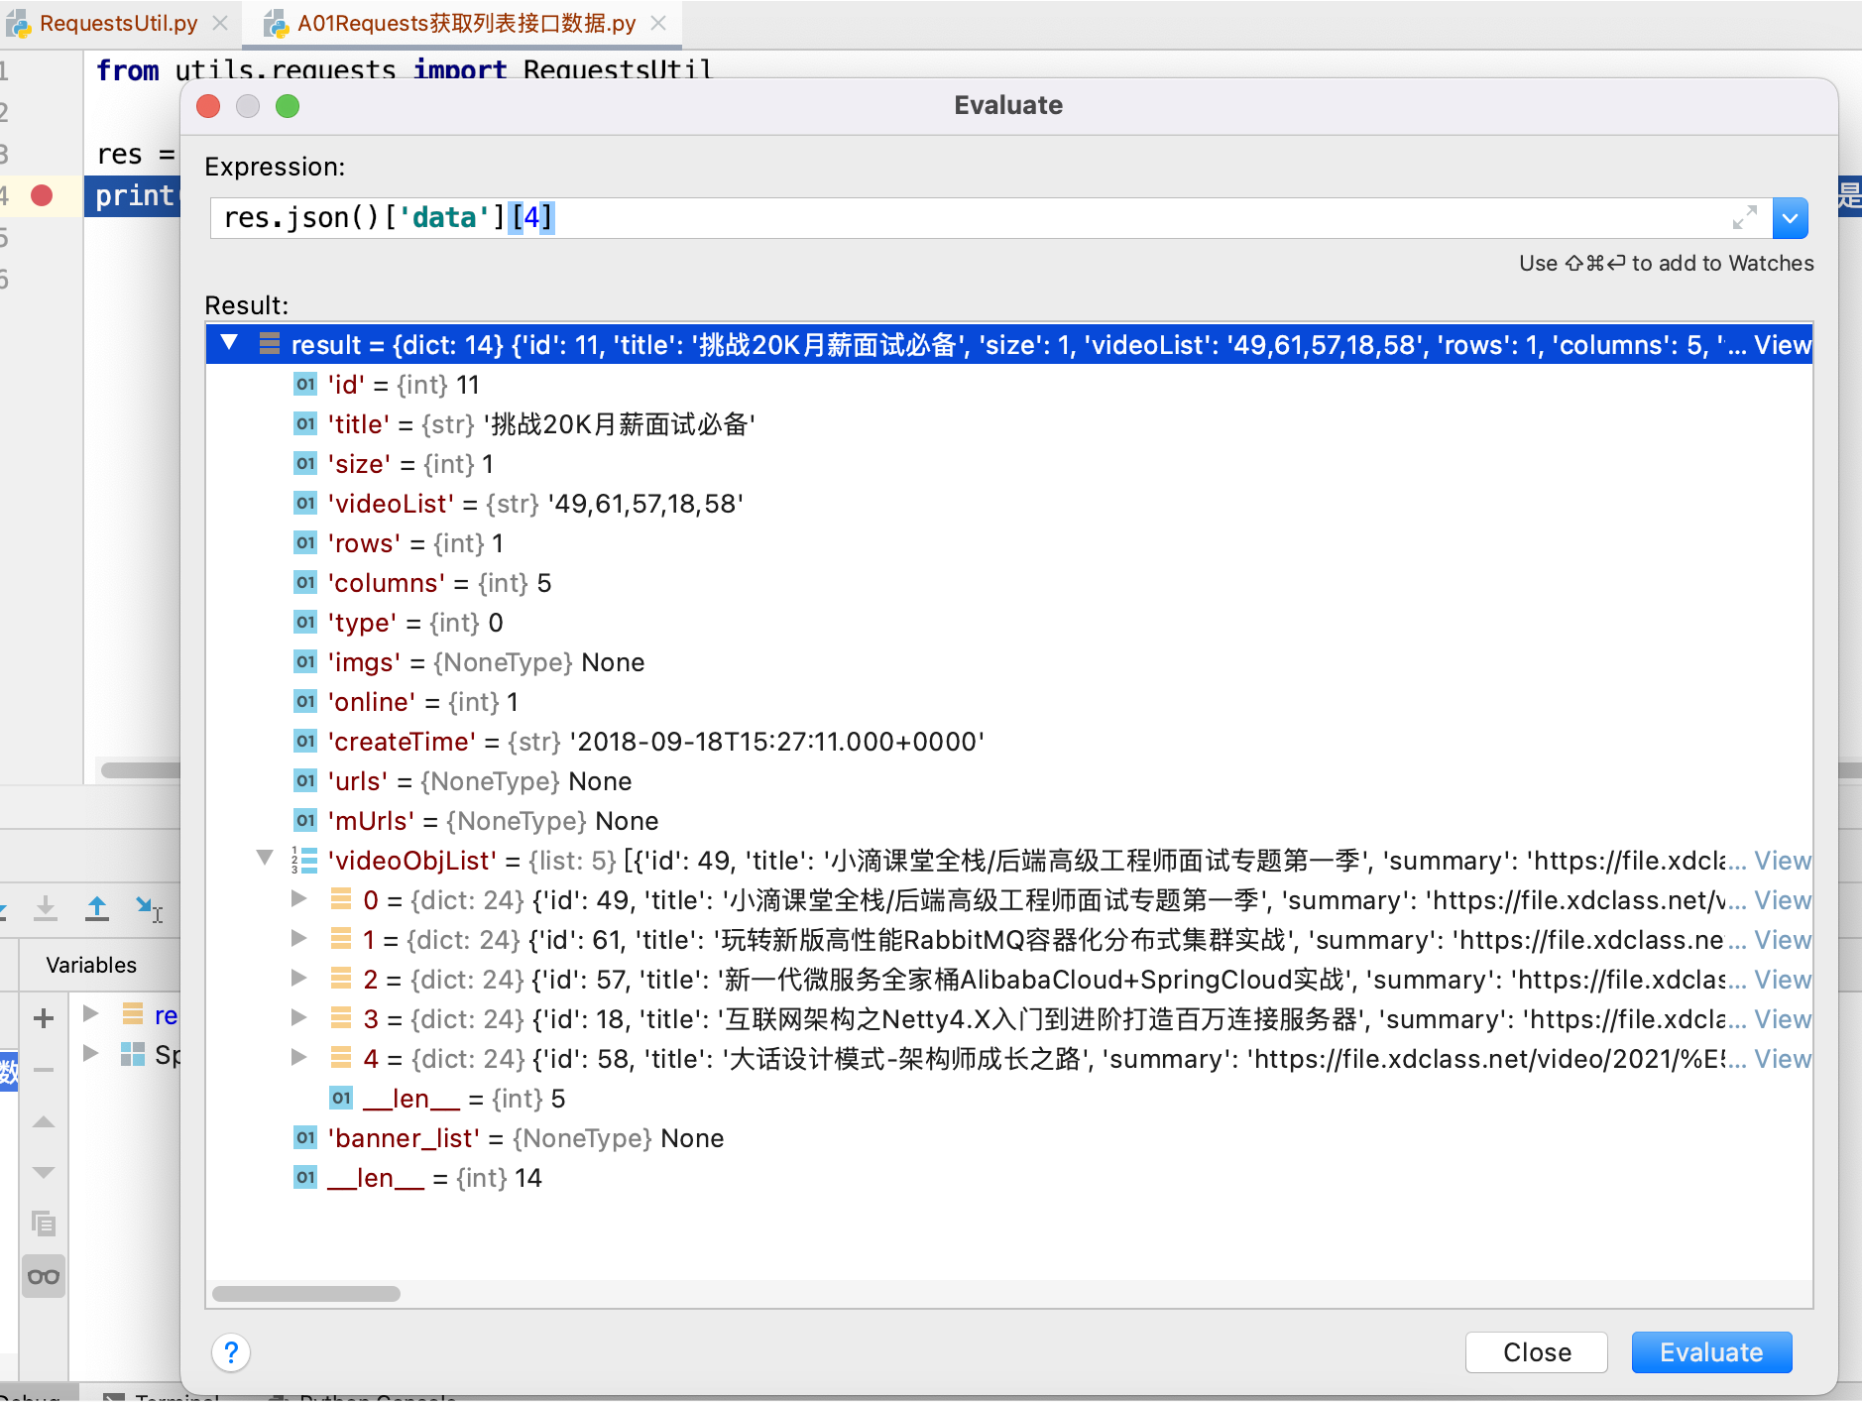
print(res.json()['data'][4]) # .json()会将返回的数据转成字典,['data']是取其中data结构数据,拿到的是list,list中第4项是"挑战20K月薪面试必备"
打印的结果是dict,如下:
-
其中用到了 RequestsUtil
# coding=utf-8
import requests


def do_request(url, method, params=None, content_type=None, headers=None):
    """

    :param url:
    :param method: get或post,不区分大小写
    :param params: 字典类型
    :param content_type: 如果是json,那么填写 application/json
    :param headers:
    :return: 如果确定返回的数据格式是json,那么可以通过 res.json() 方法转成字典格式
    """
    try:
        if method.lower() == "get":
            result = requests.get(url=url, params=params, headers=headers)#.json()
            return result
        elif method.lower() == "post":
            if content_type == "application/json":
                result = requests.post(url=url, json=params,
                                       headers=headers)#.json()  # Response响应结果类可以调用json()方法转成字典格式
            else:
                result = requests.post(url=url, data=params,
                                       headers=headers)#.json()  # 转成dict字典,后面才可以执行result["key"]
            return result
        else:
            print("method is not allowed")

    except Exception as e:
        print("请求异常:{0}".format(e))
2.2. 目标2: 登录(Requests POST方式)
2.2.1. 分析
先从首页点击“登录”,看到如下界面:
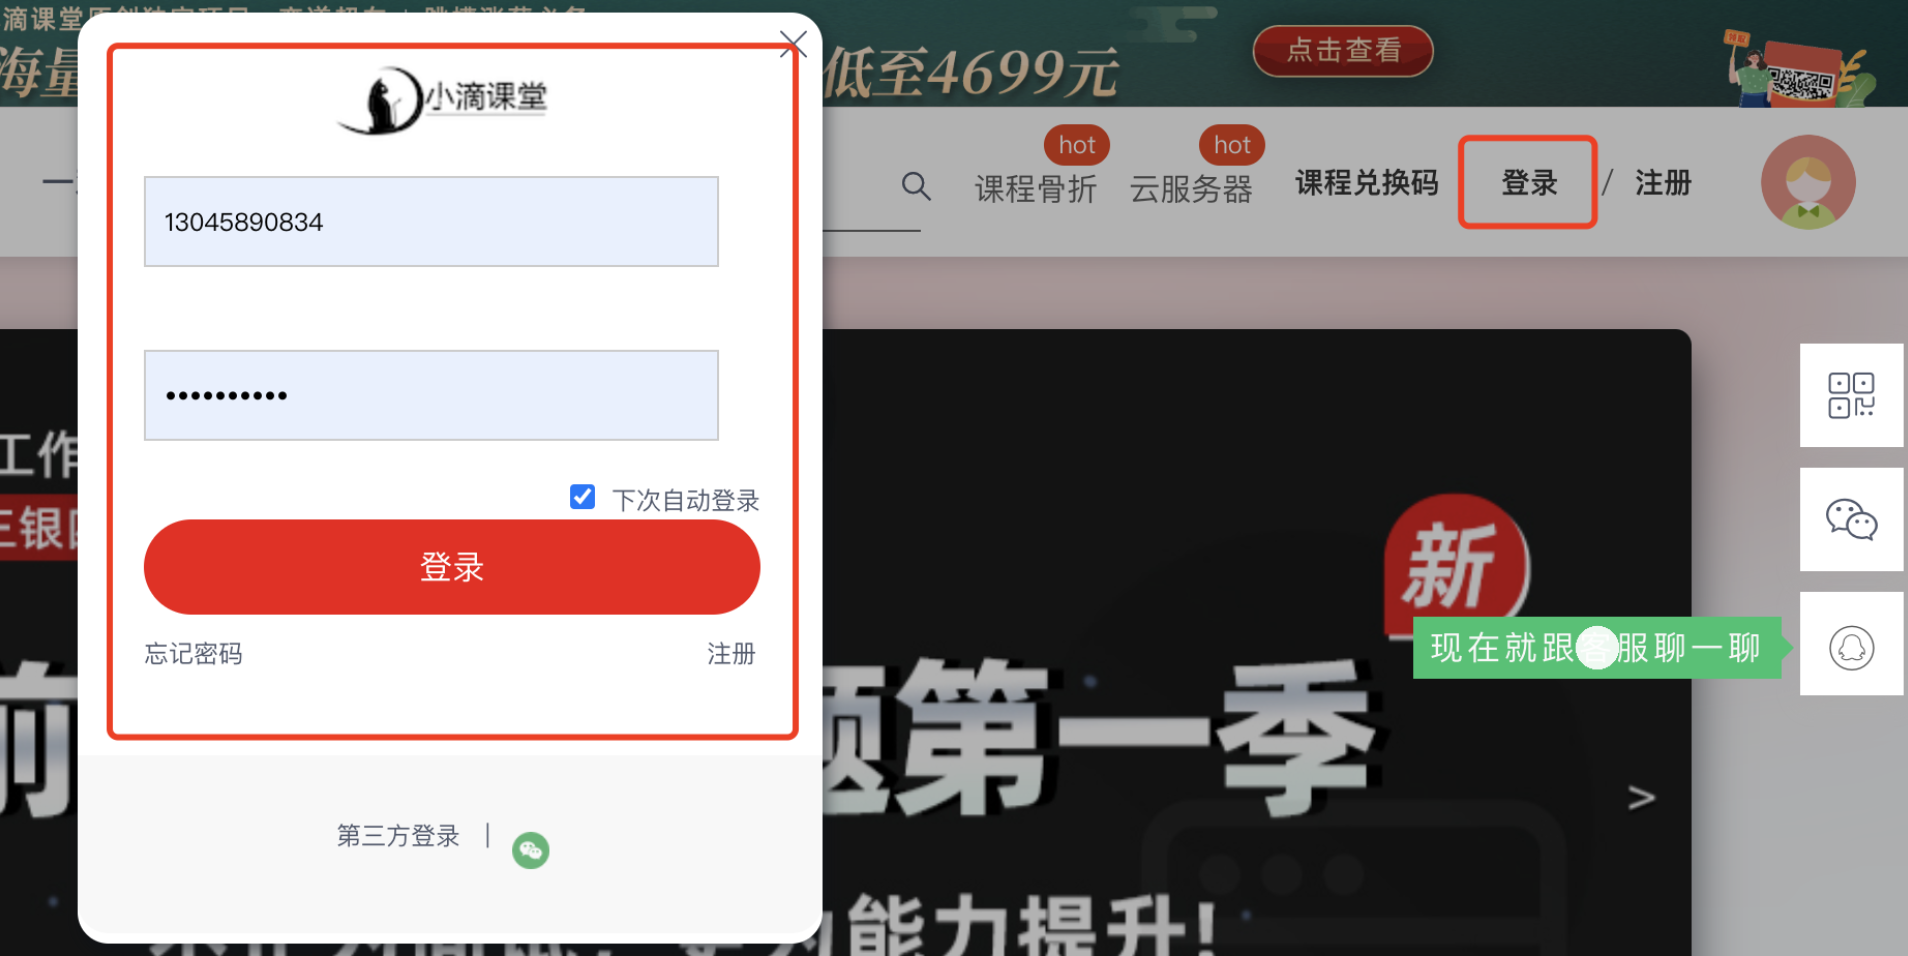
点击登录,是向后端发送下面的post请求(Payload是简单的表单数据):
Request URL: https://api.xdclass.net/pub/api/v1/web/web_login
Request Method: POST
Payload: (Form Data)
	phone: 13045890834
	pwd: hdc@328216
2.2.2. 实现
主程序代码也很简单
from utils.requests import RequestsUtil

url = "https://api.xdclass.net/pub/api/v1/web/web_login"
data = {"phone": "13045890834", "pwd": "hdc@328216"}
result = RequestsUtil.do_request(url, "post", params=data, content_type="application/x-www-form-urlencoded")
print(result.text)  # 结果请求成功
打印的结果是:
{"code":0,"data":{"head_img":"https://xd-video-pc-img.oss-cn-beijing.aliyuncs.com/xdclass_pro/default/head_img/14.jpeg","name":"hudechao","token":"xdclasseyJhbGciOiJIUzI1NiJ9.eyJzdWIiOiJ4ZGNsYXNzIiwicm9sZXMiOiIxLDIiLCJpbWciOiJodHRwczovL3hkLXZpZGVvLXBjLWltZy5vc3MtY24tYmVpamluZy5hbGl5dW5jcy5jb20veGRjbGFzc19wcm8vZGVmYXVsdC9oZWFkX2ltZy8xNC5qcGVnIiwiaWQiOjY3ODQxMDMsIm5hbWUiOiJodWRlY2hhbyIsImlhdCI6MTY1MzYxNTAzNSwiZXhwIjoxNjU0MjE5ODM1fQ.w94qknq2jZSJG3RFUU8MlBf7JlVMu3TxdPtEYlisOMA"},"msg":null}
可以看出,就是用户的基本信息。
2.3. 目标3:访问个人中心(Reqeusts GET方式)
2.3.1. 分析
点击头像,进入到个人中心
查找接口的做法,还是只能根据页面展示的信息,从接口的响应中去寻找,最后我们找到了这个

这个接口的基本信息是:
Request URL: https://api.xdclass.net/user/api/v1/video_record/page?token=xdclasseyJhbGciOiJIUzI1NiJ9.eyJzdWIiOiJ4ZGNsYXNzIiwicm9sZXMiOiIxLDIiLCJpbWciOiJodHRwczovL3hkLXZpZGVvLXBjLWltZy5vc3MtY24tYmVpamluZy5hbGl5dW5jcy5jb20veGRjbGFzc19wcm8vZGVmYXVsdC9oZWFkX2ltZy8xNC5qcGVnIiwiaWQiOjY3ODQxMDMsIm5hbWUiOiJodWRlY2hhbyIsImlhdCI6MTY1MzYxNTM2NCwiZXhwIjoxNjU0MjIwMTY0fQ.vDG_qhVcvWNCMFgapxcm_a3YoMMI1DA8v5UOw-fIWUI
Request Method: GET
Payload: Query String Parameters,也就是放在get请求头部的token信息,只要拼接好get请求就可以了。

这里看起来,只要带一个token参数就可以了,而token,就是上面登录时候就有返回。
2.3.2. 实现
主程序代码:
from utils.requests_util import RequestsUtil

# 第1步:登录
url = "https://api.xdclass.net/pub/api/v1/web/web_login"
data = {"phone": "13045890834", "pwd": "hdc@328216"}
result = RequestsUtil.do_request(url, "post", params=data, content_type="application/x-www-form-urlencoded")
print('登录结果\n' + result.text)  # 结果请求成功
user_token = result.json()['data']['token']

# 第2步:访问个人中心。开始拼接个人中心get请求的url
query_data = {'token', user_token}
personal_center_url = 'https://api.xdclass.net/user/api/v1/video_record/page'
#   方式1,参数形式(有问题:应该是对参数token值又进行了一次urlencode,导致获取不到结果,这个站点,直接把token值拼在后面请求就好了,就是用方式2)
# personal_center_result = RequestsUtil.do_request(personal_center_url, 'get', params=query_data)
# print(personal_center_result.text)
#   方式2,拼接url
personal_center_url = personal_center_url + "?token=" + user_token
personal_center_result = RequestsUtil.do_request(personal_center_url, 'get')
print('个人中心请求结果\n' + personal_center_result.text)
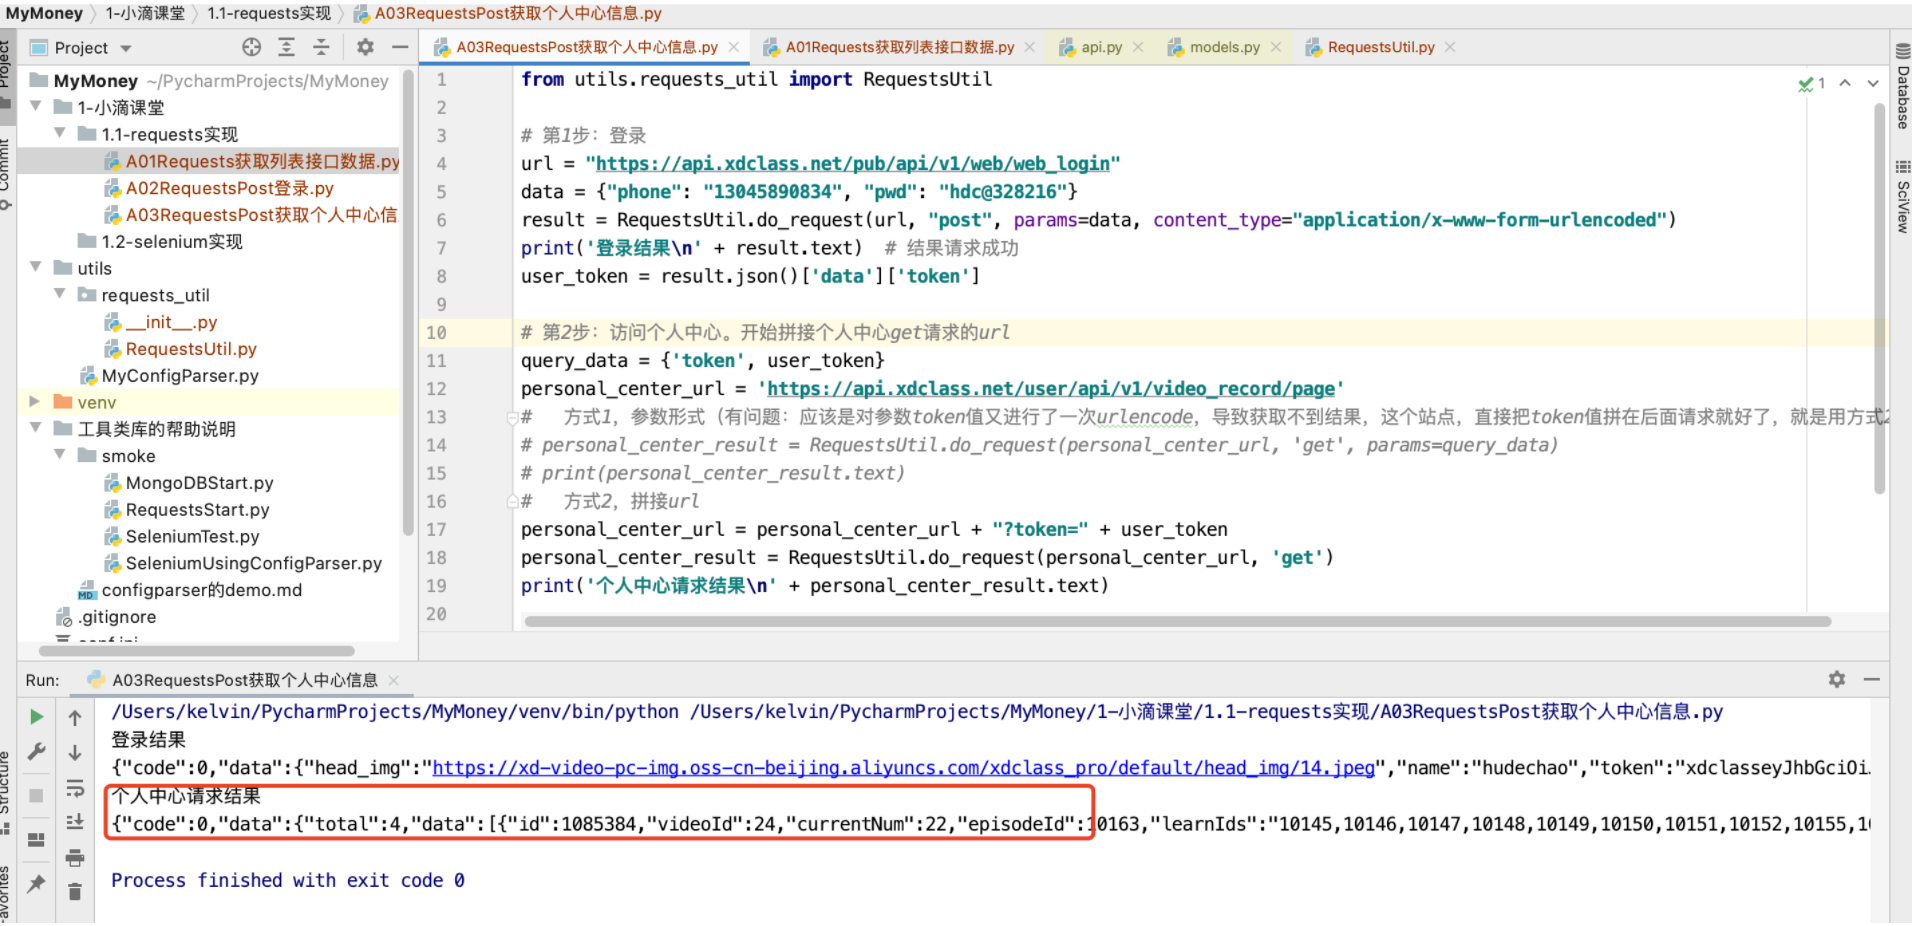
打印的结果:
至此,其实比较关键的是requests对于cookie的操作,可惜这个站点基本没用到,所以考虑用ruoyi系统来实现。
3. 目标背景介绍(若依ruoyi)
3.1. 目标1:若依登录(Requests POST方式)
3.1.1. 分析
为了简单,我们先把若依的验证码功能关掉,就是下面图标注的地方,如果不关,那需要我们识别计算。
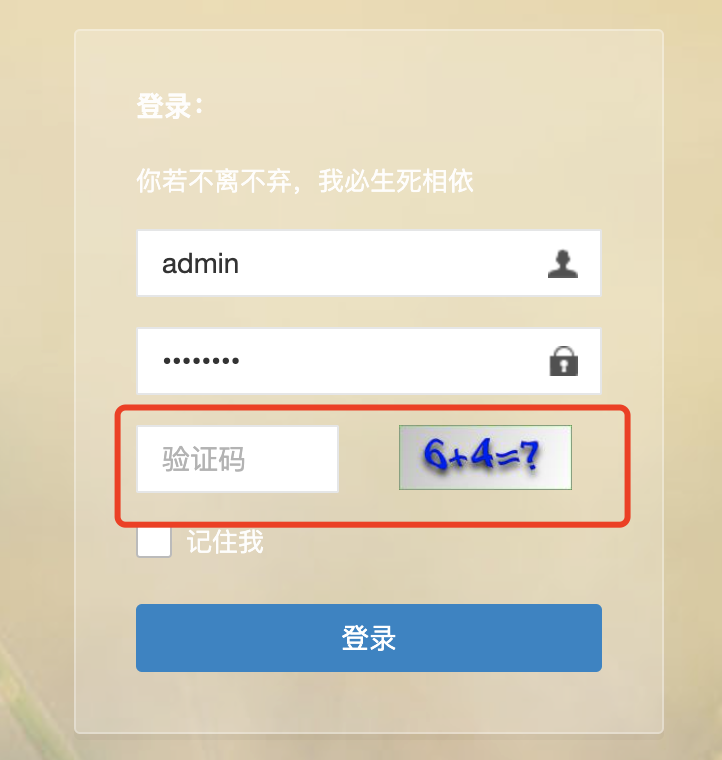
关闭的办法:
shiro:
  user:
    # 登录地址
    loginUrl: /login
    # 权限认证失败地址
    unauthorizedUrl: /unauth
    # 首页地址
    indexUrl: /index
    # 验证码开关(这里改为false,就没有验证码了)
    captchaEnabled: false
    # 验证码类型 math 数组计算 char 字符
    captchaType: math
3.1.2. 实现探索
主程序代码:
from utils.requests_util import RequestsUtil

url = "http://localhost:8888/login"
data = {"username": "admin", "password": "admin123", "rememberMe": "false"}
result = RequestsUtil.do_request(url, "post", params=data, content_type="application/x-www-form-urlencoded")
print('登录结果\n' + result.text)
result = RequestsUtil.do_request('http://localhost:8888/index', "get") # 访问首页内容,查看是否是登录页
print('访问首页\n' + result.text)
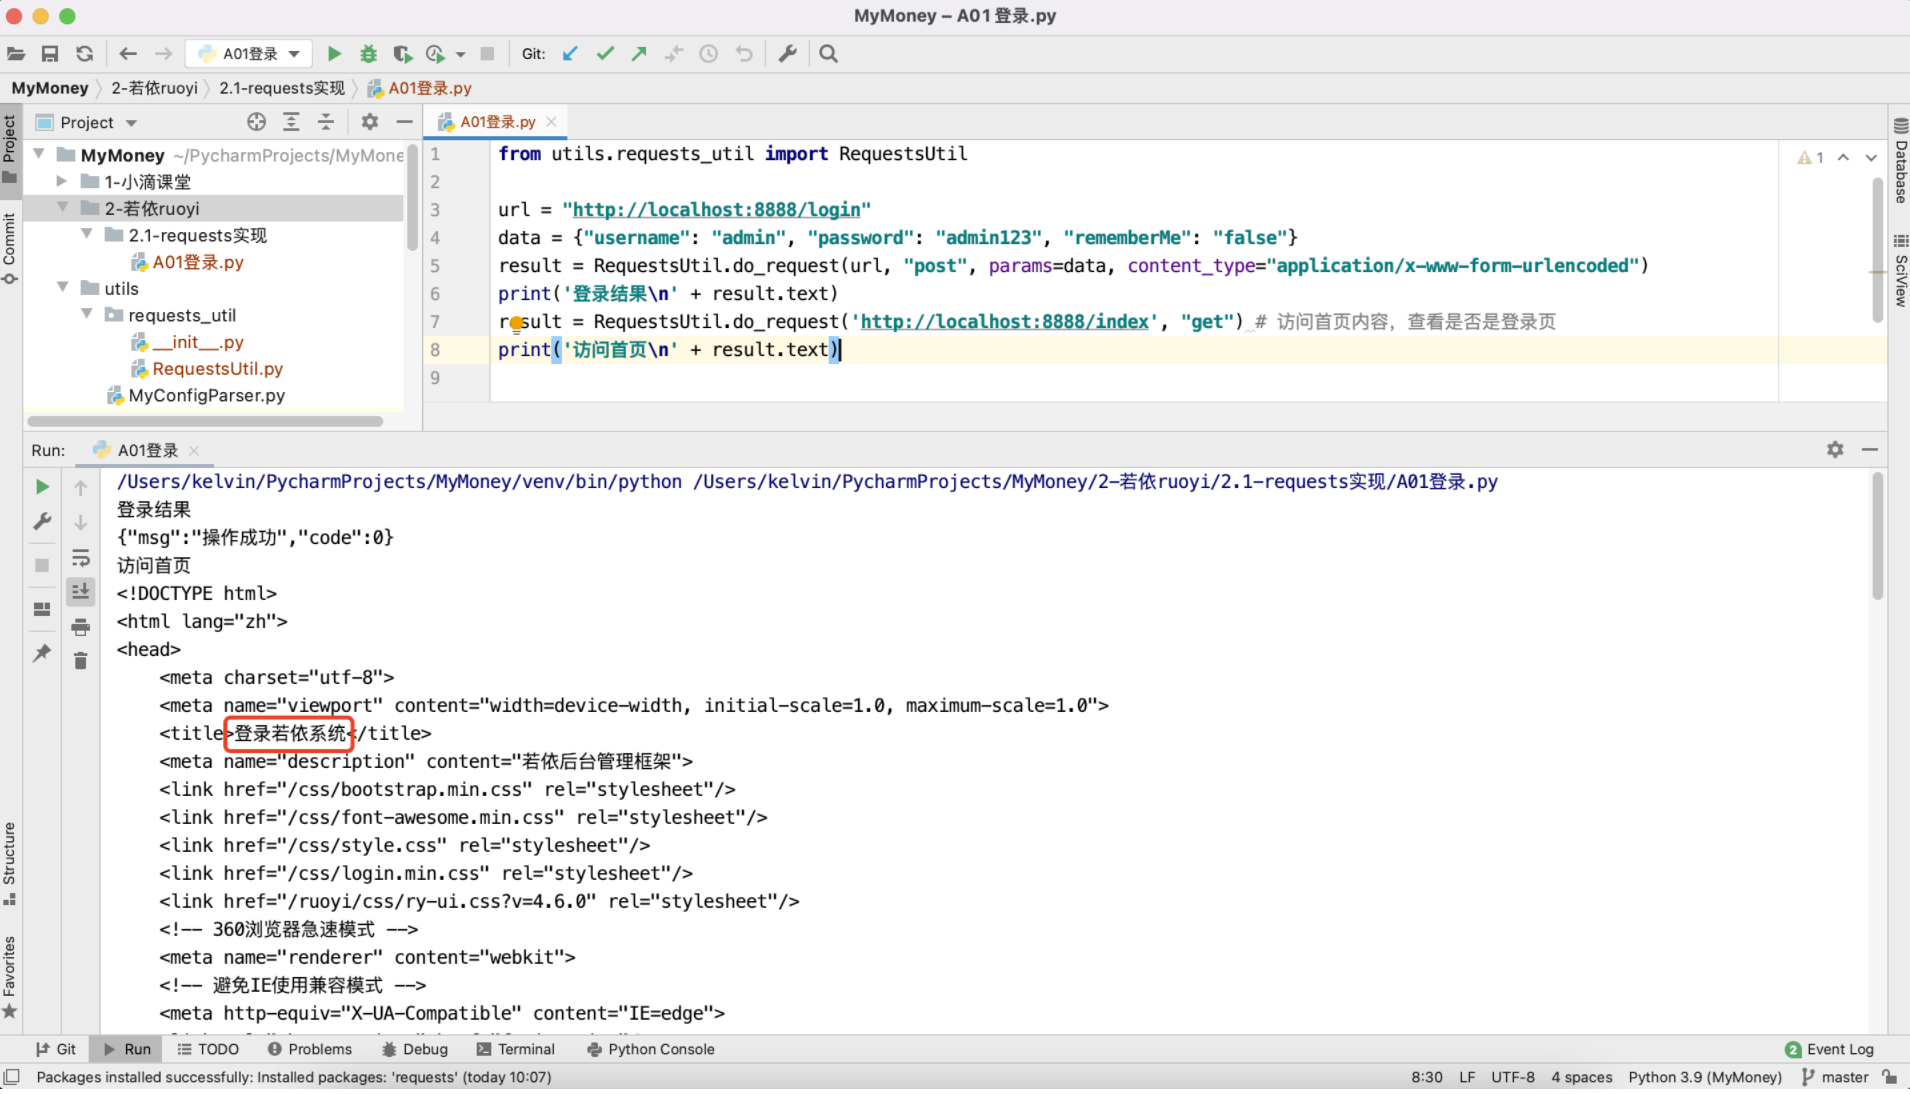
为什么访问http://localhost:8888/index还是返回的登录页呢?其实很简单,因为我们访问的时候没有携带会话cookie信息。
研究一下浏览器,在登录后访问首页,都携带了什么信息。
3.1.3. 验证登录信息(cookie-editor插件)
-
准备内容
- 在chrome和火狐
- 分别安装插件,名字叫做“cookie-editor”
-
验证步骤
-
先在chrome登录若依(我是本地启动的,localhost:8888)
-
chrome登录后,使用cookie-editor导出cookie(默认是会被复制到剪贴板的)
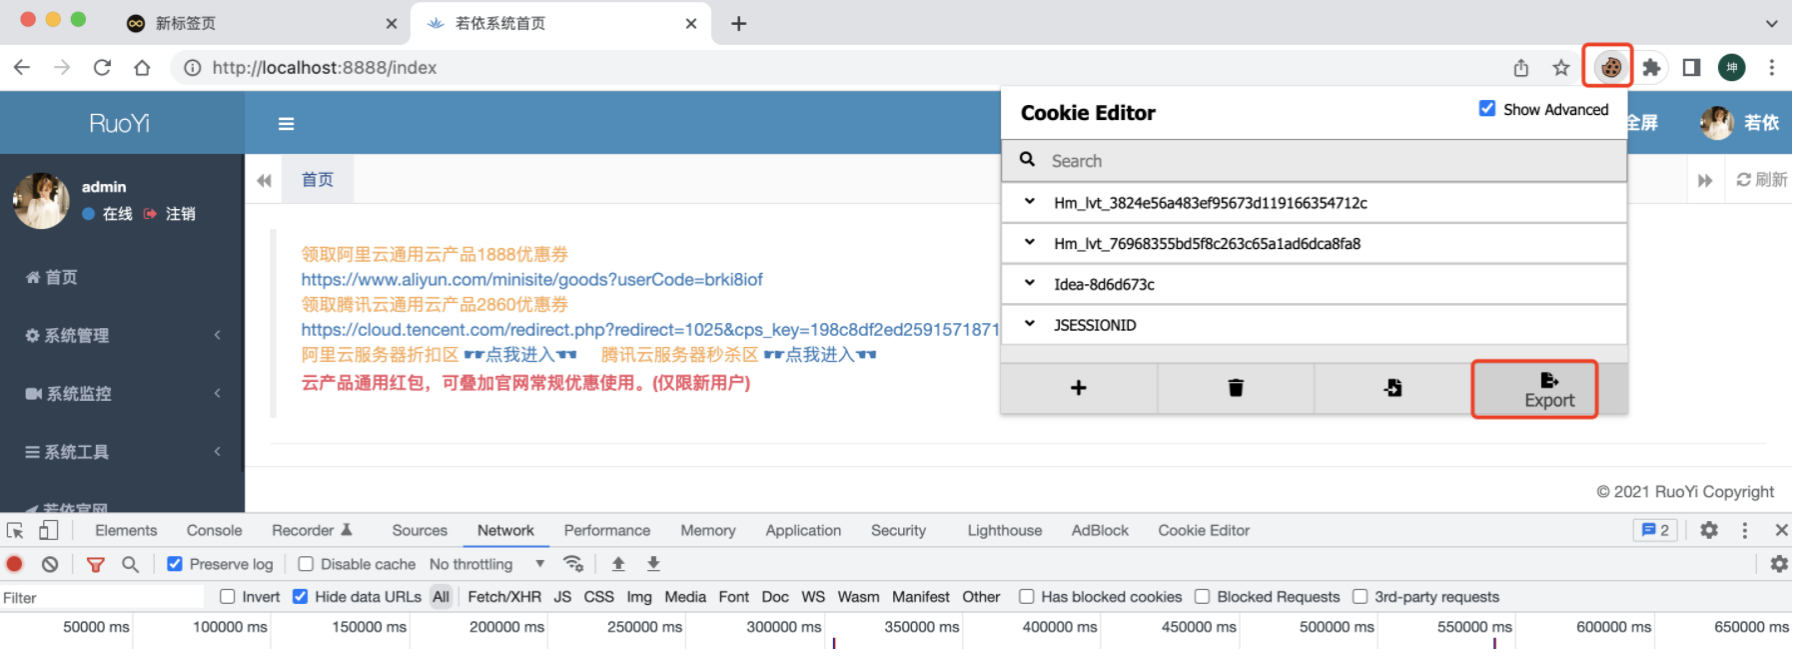
-
打开火狐,并访问若依,localhost:8888,默认是会跳转到登录页面
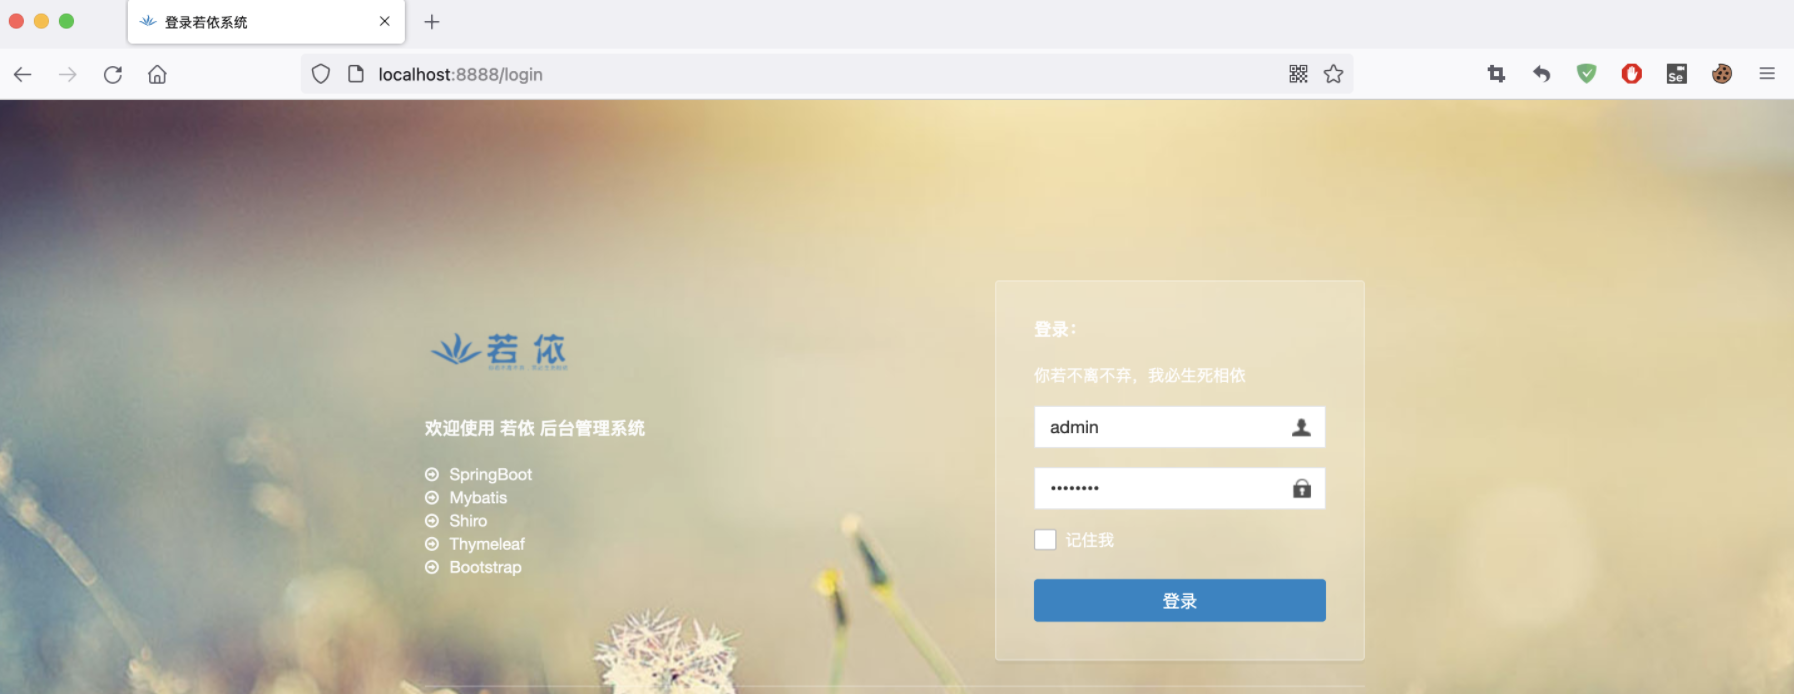
-
点开火狐的cookie-editor插件,点击导入
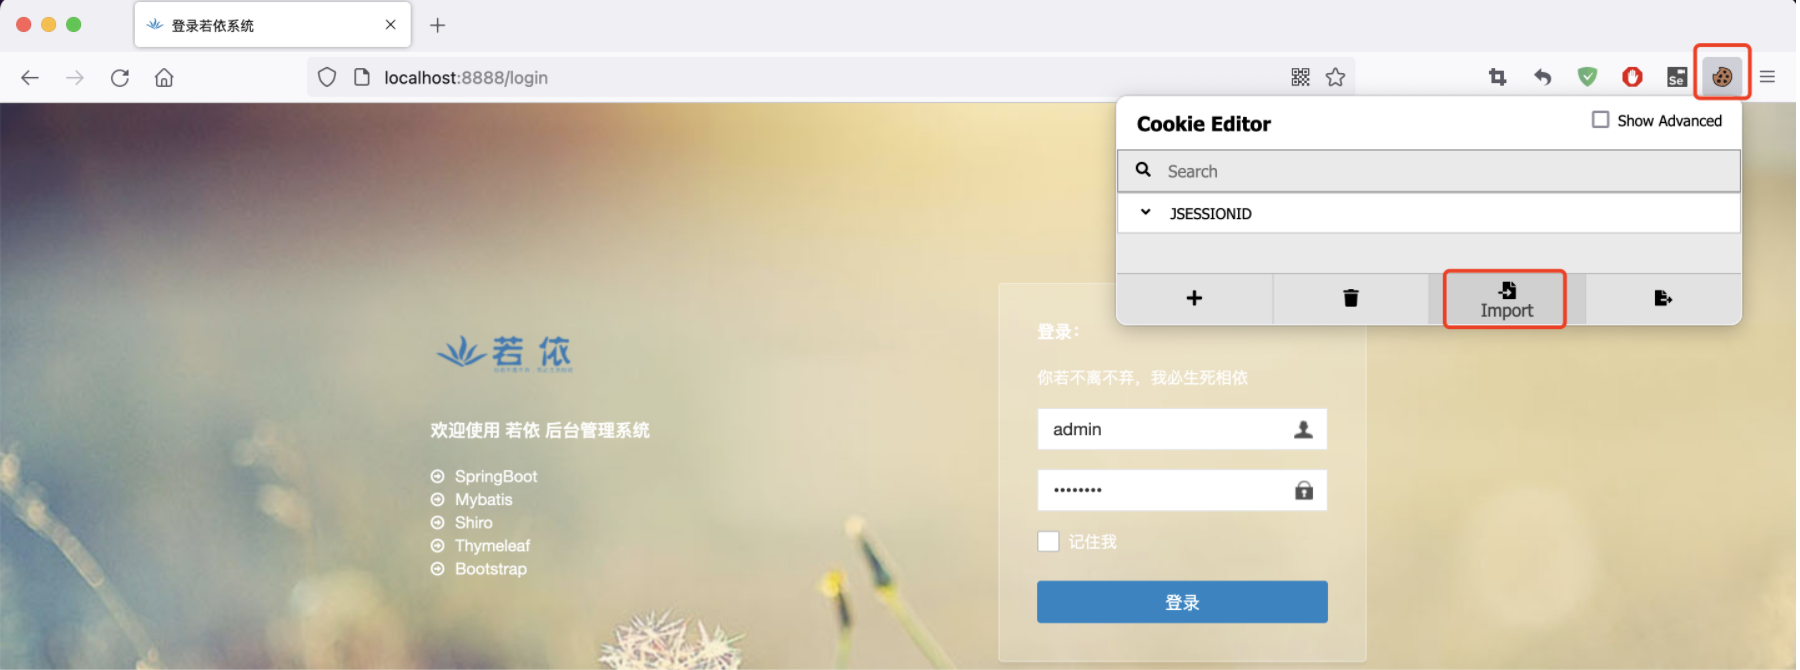
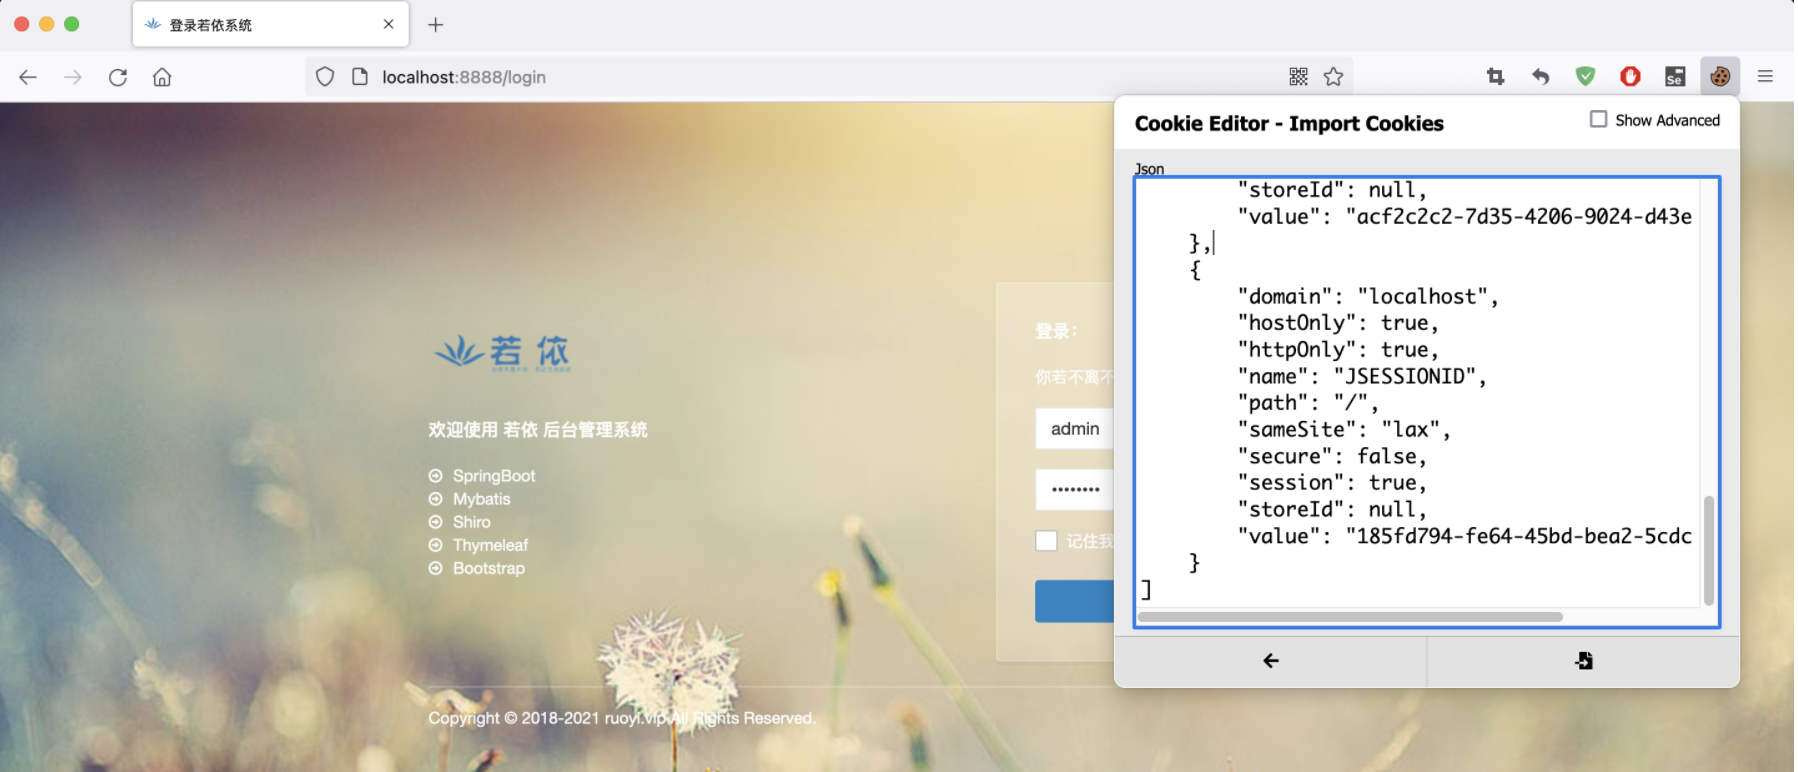
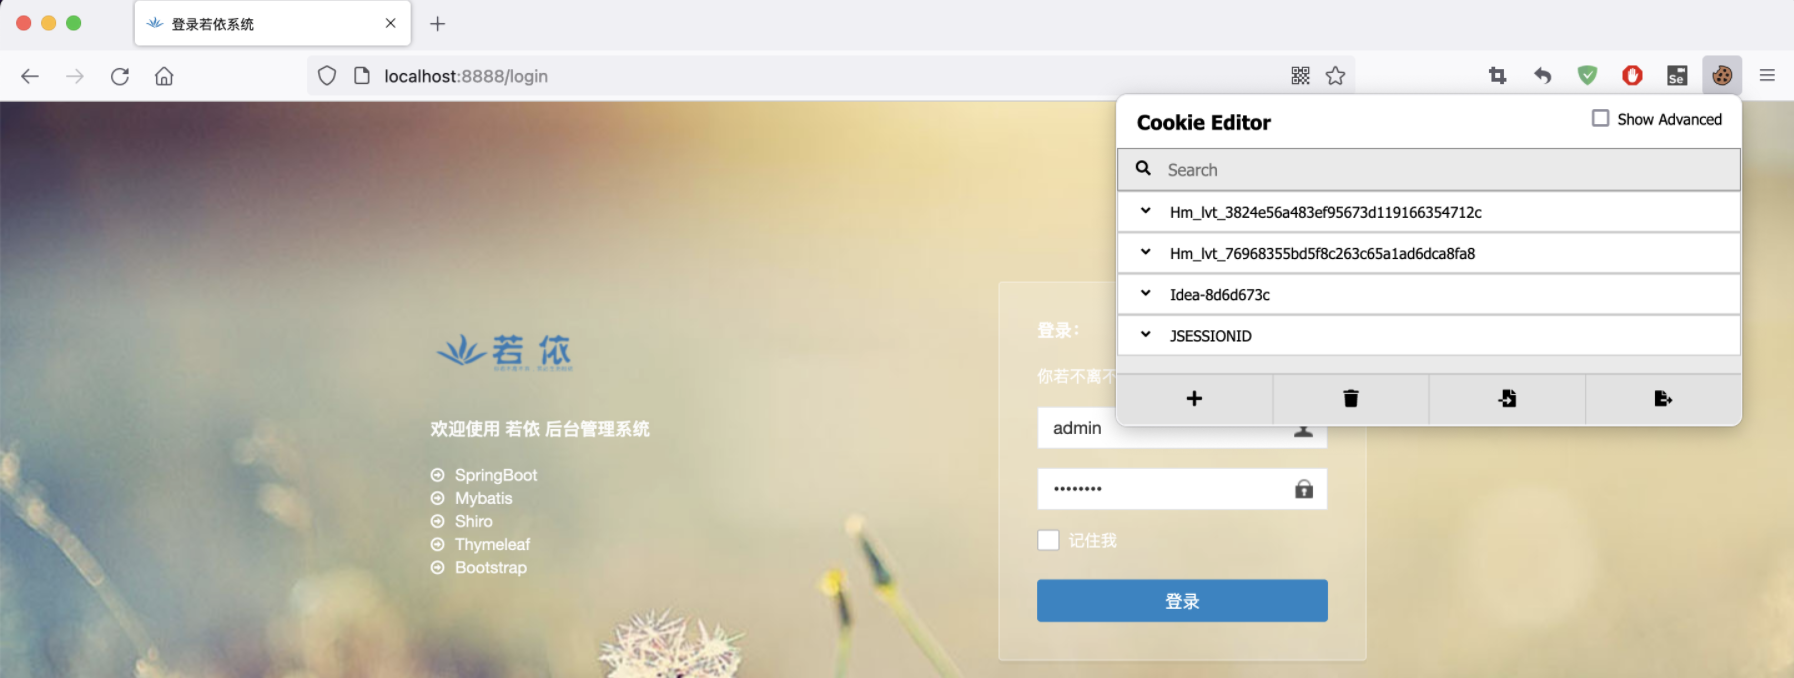
此时,我们把浏览器头部/login去掉,直接访问localhost:8888,可以看到会跳转到首页
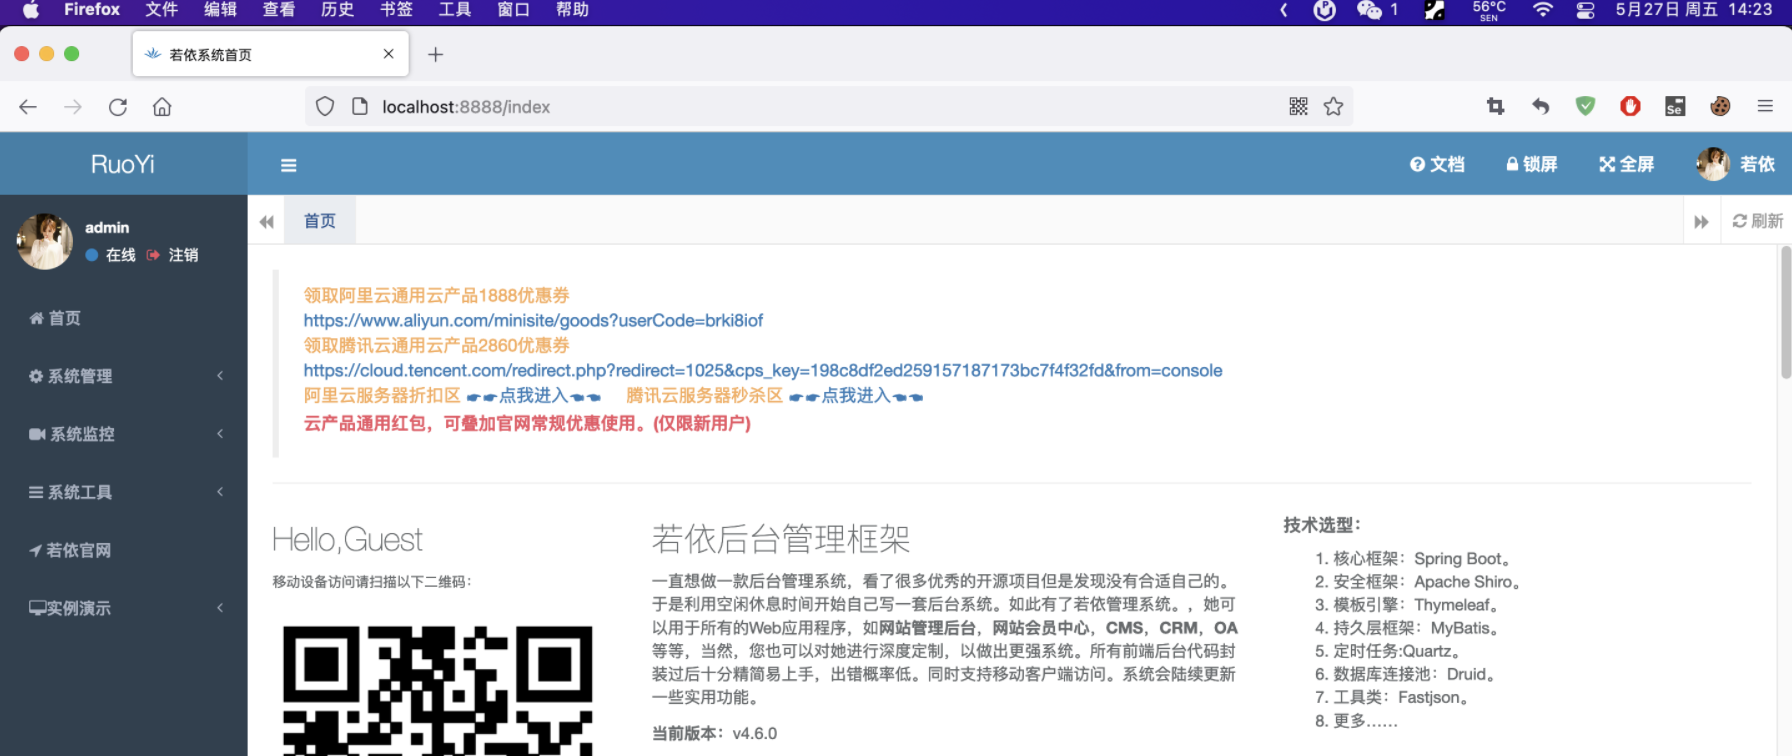
我们再更近一步,确认一下是不是JSESSIONID这个cookie来登录的,删掉其他的cookie,看看是否还是登录状态:

其他cookie都删除,只保留JSESSIONID,刷新页面仍正常访问!
所以到这里,我们知道,如果要是登录状态,cookie要携带这个JSESSIONID。
-
3.1.4. 登录(Requests 携带cookie)
主程序代码:
import requests as requests
from utils.requests_util import RequestsUtil

url = "http://localhost:8888/login"
data = {"username": "admin", "password": "admin123", "rememberMe": "false"}
login_result = RequestsUtil.do_request(url, "post", params=data, content_type="application/x-www-form-urlencoded")
print('登录结果\n' + login_result.text)
# 下面开始处理cookie
cookies = login_result.cookies # 获取登录后的所有cookie信息
index_result = requests.get('http://localhost:8888/index', cookies=cookies) # 访问index页面,携带login获取到的cookie
print('访问首页\n' + index_result.text)
执行的结果,可以看到跟不携带cookie是不同的,有了登录人的信息:
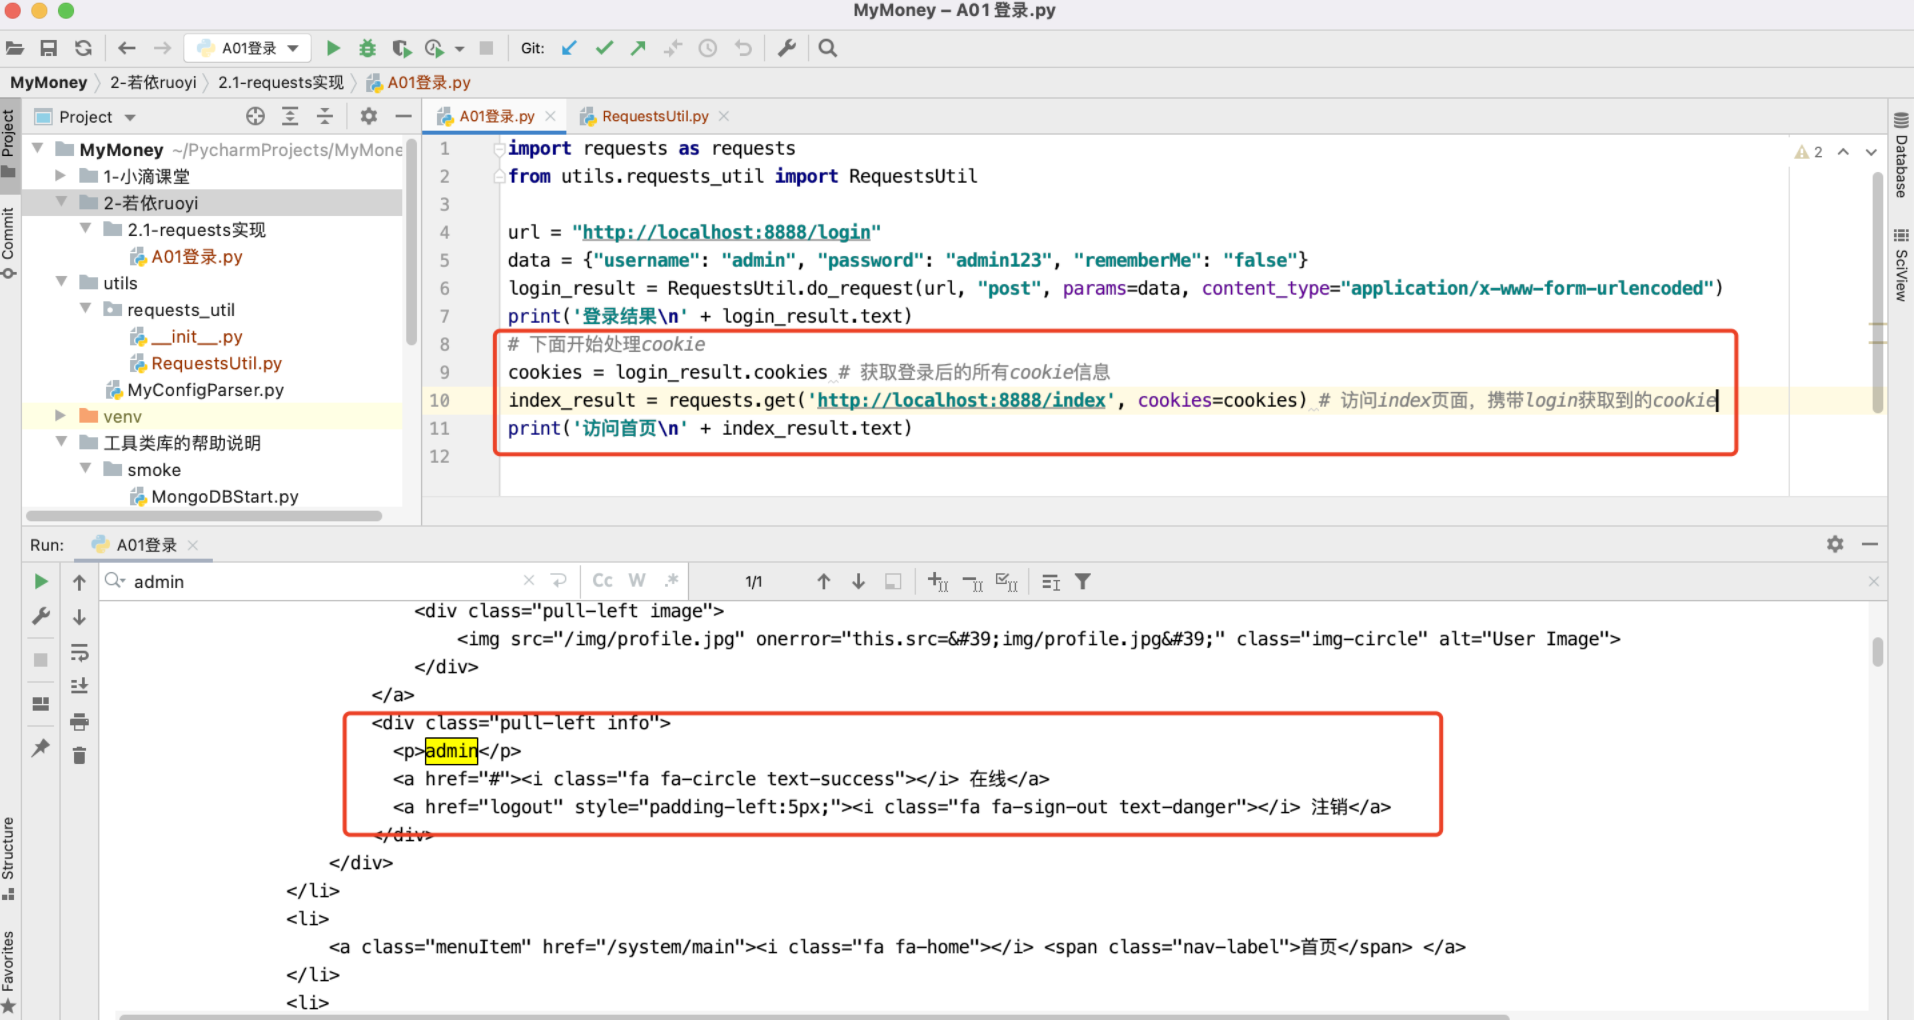
从代码实现来看,感觉使用requests的api也比较简单,后面考虑使用原生的api进行实现。
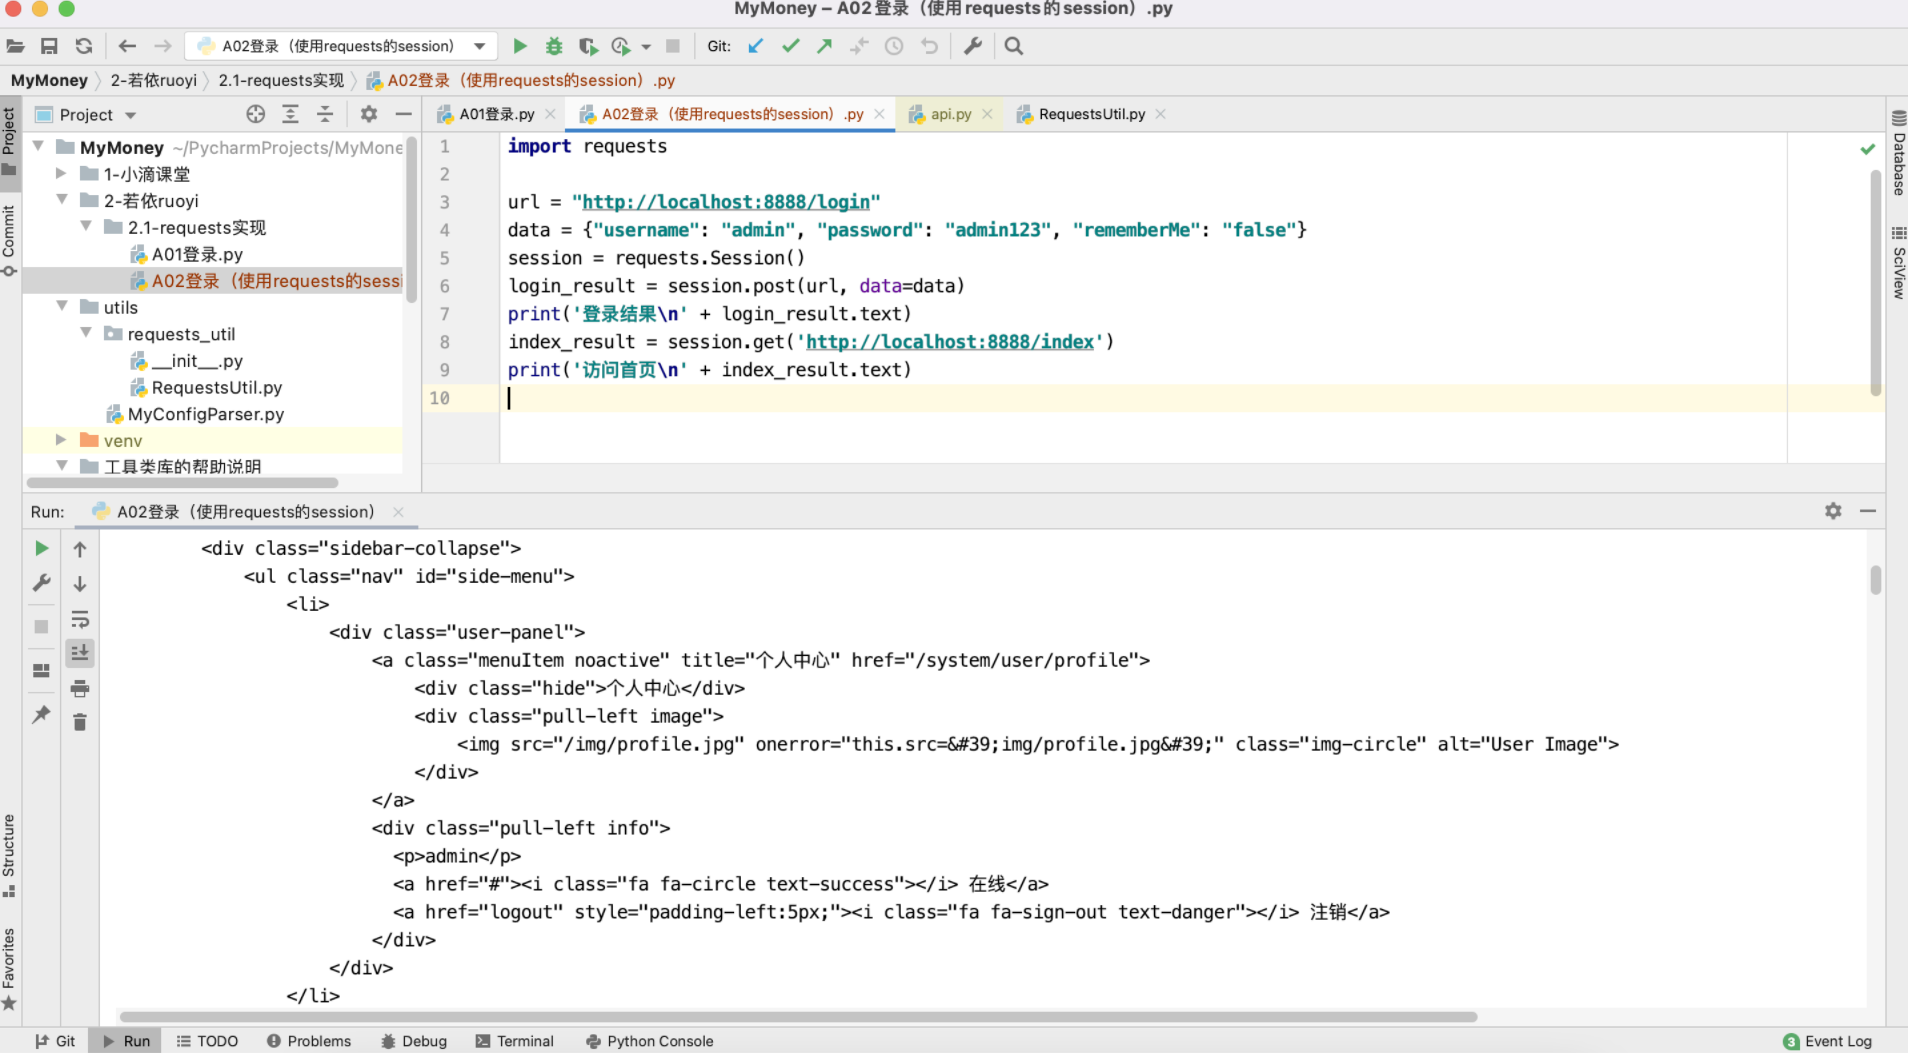
登录(requests 使用 Session())
对于requets,还可以使用session机制,就不需要手动设置cookie了
import requests

url = "http://localhost:8888/login"
data = {"username": "admin", "password": "admin123", "rememberMe": "false"}
session = requests.Session()
login_result = session.post(url, data=data)
print('登录结果\n' + login_result.text)
index_result = session.get('http://localhost:8888/index')
print('访问首页\n' + index_result.text)
运行结果也是OK的,这种方法就比较简单易用:
4. 目标背景介绍(siwei.me)
站点: http://siwei.me/
这是一个在学习vue.js的时候书上(《vue.js快速入门》)提到的一个站点,用来演示做http请求与跨域相关只是介绍的,正好用来做python的requests模块功能的连通性验证。
列表:http://siwei.me/interface/blogs/all
查看详情:http://siwei.me/interface/blogs/show?id=1244
4.1. 目标1:使用requests获取列表all
4.1.1. 分析
4.1.2. 实现
5. 工具的配置、使用
5.1. requests、selemium保存和设置cookie
https://www.cnblogs.com/x00479/p/14254004.html
