前言
水文章,又来水文章,走过路过的客官可以来看一看,如果喜欢可以接着往下看,下面我将介绍一个链接数据库的可视化登录窗口,这回是用python码的,保准一看就会哦,接下来上效果图,客官大老爷们可以看下满不满意,这其实是我爬虫系统的一部分,但我觉得这个模块先讲比较合适,所以我开始阐述。
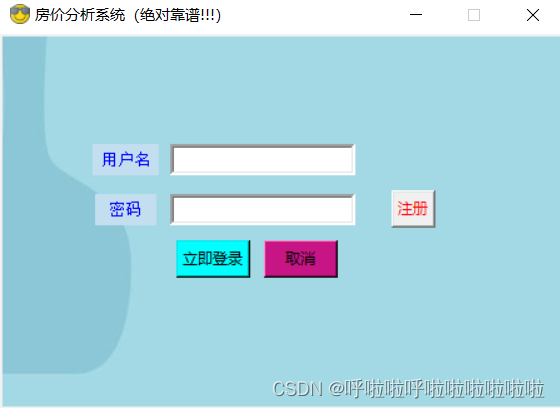
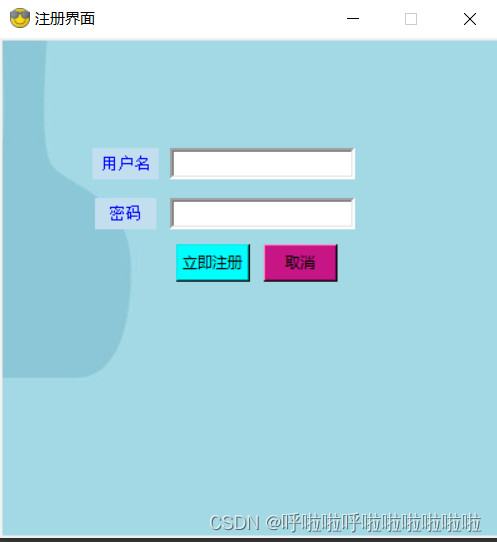
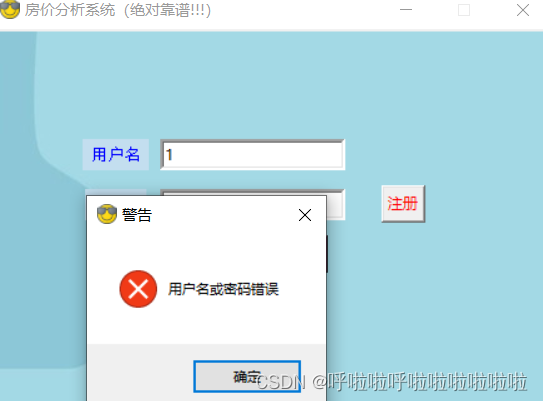
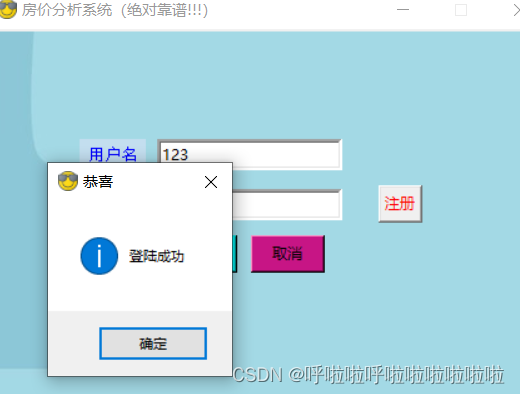
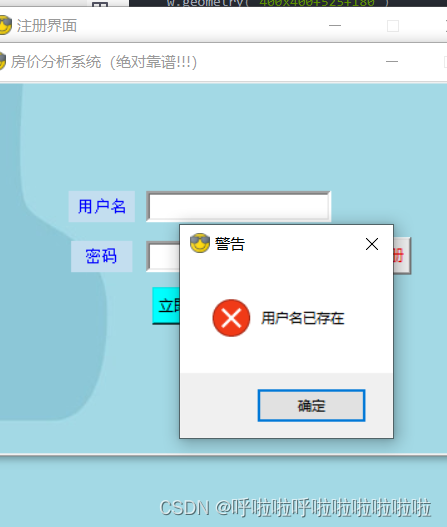
如果感觉不满意,可以打道回府了,如果感觉满意,可以继续往下看,偶吼吼,不喜勿喷
一、首先配置数据库
本作采取的是mysql的数据库,版本为5.5,首先我们要做的事创造数据库,这个数据叫denglu
,然后设计表,这个表叫用户信息,这个表带有三个属性用户名、密码、权限,可以看我的图进行设计,


这样基本配置就弄好了,可以先手动往数据库里面添加一条信息,像我的话,我添加的是

权限这一部分我是为了后续,进入管理员界面和普通人员界面进行设计的这里不做要求。
二、设计链接部分
已经完成了数据库的设计接下来就要完善可视化页面
代码如下:
zhu=tk.Tk()
canvas = Canvas(zhu, width=450,height=300)
zhu.geometry("450x300+500+200")
zhu.title("房价分析系统(绝对靠谱!!!)")
zhu.resizable(0, 0)
zhu.iconbitmap('E:\\chuangkou\\img\\07.ico')
canvas.pack()
photo = PhotoImage(file='E:\\chuangkou\\img\\3.png')
entry_user=Entry(zhu, borderwidth=3)
entry_passwd=Entry(zhu, borderwidth=3, show='*')
canvas.create_image(0, 0, image=photo)
canvas.create_window(100, 100, window=Label(zhu, font=('宋体', 10), text='用户名', justify='left', padx=5, pady=4, fg="blue",bg="#C3DEEF"))
canvas.create_window(100, 140, window=Label(zhu, font=('宋体', 10), width=5, text='密码', justify='left', padx=5, pady=4, fg="blue",bg="#C3DEEF"))
canvas.create_window(210, 100, window=entry_user)
canvas.create_window(210, 140, window=entry_passwd)
canvas.create_window(330, 140, window=Button(zhu, height=-2,text='注册', fg='red',command=zhuce))
canvas.create_window(170, 180, window=Button(zhu, width=7, bg='cyan', text='立即登录',command=login))
canvas.create_window(240, 180, window=Button(zhu, width=7, bg='mediumvioletred', text='取消',command=cancel))

zhu.mainloop()
我采用了画布的设计方式,然后上面的图标我采用了ico的图标进行生成

ico图片好像不支持上传,所以如果有需要可以问我拿,如果自己想设计,可以百度下,应该有很多获取的途径的,拿到ico图片不是很难的,不一定要我的,我只是给你一个思路。
背景我使用的是这张图片

然后其他的是各种布局,你单独运行这一段一定是会报错的,为什么呢,因为我们的功能还没有完善,
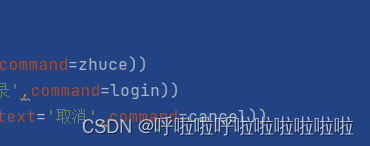
这后面的command,里面的命令还没有进行补充,接下来我们开始对里面的内容进行补充
三.完善对数据库的操作
首先保证能连接到数据库,写一个类用来实现这些,同时把对数据库的操作封装进去,因为代码内容很小所以在同一类中进行封装,并不一定追求高聚合低耦合的效果,这其实习惯不好,不喜欢不要喷哦
class MysqlSearch(object):
    def __init__(self):
        self.get_conn()

    # 获取连接
    def get_conn(self):
        try:
            self.conn = MySQLdb.connect(
                host='127.0.0.1',
                user='root',//输入你自己的用户名
                passwd='xxxx',//输入你自己的密码
                db='denglu',//这里是链接的数据库的名字
                charset='utf8'
            )
        except MySQLdb.Error as e:
            print('Error: %s' % e)

    # 关闭连接
    def close_conn(self):
        try:
            if self.conn:
                self.conn.close()
        except MySQLdb.Error as e:
            print('Error: %s' % e)

    # 获取用户信息(登录用)
    def get_userinfo(self):
        sql = 'SELECT * FROM 用户信息'

        # 使用cursor()方法获取操作游标
        cursor = self.conn.cursor()

        # 使用execute()方法执行SQL语句
        cursor.execute(sql)

        # 使用fetchall()方法获取全部数据
        result = cursor.fetchall()

        # 将数据用字典形式存储于result
        result = [dict(zip([k[0] for k in cursor.description], row)) for row in result]

        # 关闭连接
        cursor.close()
        self.close_conn()
        return result

    def insert_userinfo(self, a, b):
        #注册实现
        self.a = a
        self.b = b
        sql = 'SELECT * FROM 用户信息'
        cursor = self.conn.cursor()
        cursor.execute(sql)
        result = cursor.fetchall()
        result = [dict(zip([k[0] for k in cursor.description], row)) for row in result]
        ulist = []
        for item in result:
            ulist.append(item['用户名'])
        try:
            # sql = 'INSERT INTO 登陆账户(用户名,密码) VALUES(%s,%s)'
            cursor = self.conn.cursor()
            cursor.execute('INSERT INTO 用户信息(用户名,密码) VALUES(%s,%s)', (self.a, self.b))
            if self.a == '' or self.b == '':
                self.conn.rollback()
                messagebox.showerror('警告', message='注册失败')
            elif self.a in ulist:
                messagebox.showerror('警告', message='用户名已存在')
            else:
                # 提交事务
                self.conn.commit()
                messagebox.showinfo(title='恭喜', message='注册成功')
            cursor.close()
            self.close_conn()
        except:
            # 限制提交
            self.conn.rollback()
四.完善功能
完善那些按钮绑定的功能。
def cancel():
    zhu.quit()
这个完善的是取消功能
def login():
    obj = MysqlSearch()
    result = obj.get_userinfo()
    name = entry_user.get()
    pwd = entry_passwd.get()
    ulist = []
    plist = []
    olist = []
    for item in result:
        ulist.append(item['用户名'])
        plist.append(item['密码'])
        olist.append(item['权限'])
    deter = True
    for i in range(len(ulist)):
        while True:
            if name == ulist[i] and pwd == plist[i] :
                messagebox.showinfo(title='恭喜', message='登陆成功')  # 登陆成功则执行begin函数
                deter = False
                zhu.destroy()
            else:
                break
    while deter:
        messagebox.showerror('警告', message='用户名或密码错误')
        break
这一块完善的是登录的功能
def zhuce():
    def qu():
        w.destroy()
    def yan():
        register_name = entry_user2.get()
        register_pwd = entry_passwd2.get()
        obj_r = MysqlSearch()
        obj_r.insert_userinfo(register_name, register_pwd)
        w.destroy()
    w = tk.Toplevel()
    w.title('注册界面')
    c= Canvas(w, width=400, height=400)
    w.geometry('400x400+525+180')
    w.resizable(0, 0)
    w.iconbitmap('img\\07.ico')
    c.pack()
    p = PhotoImage(file='img\\3.png')
    c.create_image(0, 0, image=p)
    entry_user2 = Entry(w, borderwidth=3)
    entry_passwd2 = Entry(w, borderwidth=3, show='*')
    c.create_window(100, 100,
                         window=Label(w, font=('宋体', 10), text='用户名', justify='left', padx=5, pady=4, fg="blue",
                                      bg="#C3DEEF"))
    c.create_window(100, 140,
                         window=Label(w, font=('宋体', 10), width=5, text='密码', justify='left', padx=5, pady=4,
                                      fg="blue", bg="#C3DEEF"))
    c.create_window(210, 100, window=entry_user2)
    c.create_window(210, 140, window=entry_passwd2)
    c.create_window(170, 180, window=Button(w,width=7, bg='cyan', text='立即注册', command=yan))
    c.create_window(240, 180, window=Button(w,width=7, bg='mediumvioletred', text='取消', command=qu))
    w.mainloop()
这里完成的是注册功能,注意的是因为注册换了一个界面,所以在这里进行了设置,还设置了一个回退,我这里只讲大致概念,如果想听细节,可以给我反馈,我考虑出一个保姆级的教程。
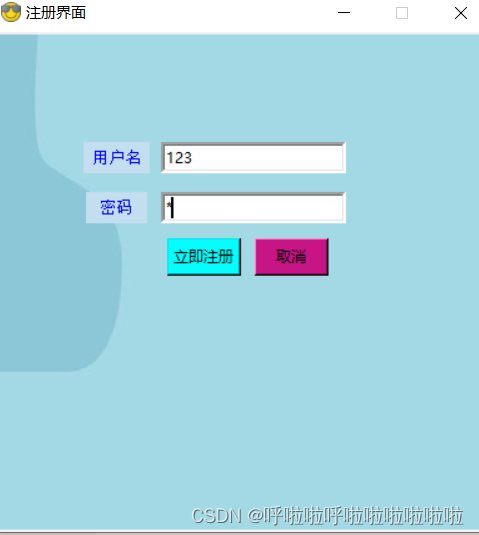
这样在细节处设置注册成功页面消失等,一个精致的登录窗口设置完成了,底下附赠所有源码。
总结
import tkinter as tk
from tkinter import *
import MySQLdb
from tkinter import messagebox
import os

class MysqlSearch(object):
    def __init__(self):
        self.get_conn()

    # 获取连接
    def get_conn(self):
        try:
            self.conn = MySQLdb.connect(
                host='127.0.0.1',
                user='root',//输入自己的
                passwd='xxxx',//输入自己的
                db='denglu',
                charset='utf8'
            )
        except MySQLdb.Error as e:
            print('Error: %s' % e)

    # 关闭连接
    def close_conn(self):
        try:
            if self.conn:
                self.conn.close()
        except MySQLdb.Error as e:
            print('Error: %s' % e)

    # 获取用户信息(登录用)
    def get_userinfo(self):
        sql = 'SELECT * FROM 用户信息'

        # 使用cursor()方法获取操作游标
        cursor = self.conn.cursor()

        # 使用execute()方法执行SQL语句
        cursor.execute(sql)

        # 使用fetchall()方法获取全部数据
        result = cursor.fetchall()

        # 将数据用字典形式存储于result
        result = [dict(zip([k[0] for k in cursor.description], row)) for row in result]

        # 关闭连接
        cursor.close()
        self.close_conn()
        return result

    def insert_userinfo(self, a, b):
        #注册实现
        self.a = a
        self.b = b
        sql = 'SELECT * FROM 用户信息'
        cursor = self.conn.cursor()
        cursor.execute(sql)
        result = cursor.fetchall()
        result = [dict(zip([k[0] for k in cursor.description], row)) for row in result]
        ulist = []
        for item in result:
            ulist.append(item['用户名'])
        try:
            # sql = 'INSERT INTO 登陆账户(用户名,密码) VALUES(%s,%s)'
            cursor = self.conn.cursor()
            cursor.execute('INSERT INTO 用户信息(用户名,密码) VALUES(%s,%s)', (self.a, self.b))
            if self.a == '' or self.b == '':
                self.conn.rollback()
                messagebox.showerror('警告', message='注册失败')
            elif self.a in ulist:
                messagebox.showerror('警告', message='用户名已存在')
            else:
                # 提交事务
                self.conn.commit()
                messagebox.showinfo(title='恭喜', message='注册成功')
            cursor.close()
            self.close_conn()
        except:
            # 限制提交
            self.conn.rollback()
def cancel():
    zhu.quit()
def login():
    obj = MysqlSearch()
    result = obj.get_userinfo()
    name = entry_user.get()
    pwd = entry_passwd.get()
    ulist = []
    plist = []
    olist = []
    for item in result:
        ulist.append(item['用户名'])
        plist.append(item['密码'])
        olist.append(item['权限'])
    deter = True
    for i in range(len(ulist)):
        while True:
            if name == ulist[i] and pwd == plist[i] :
                messagebox.showinfo(title='恭喜', message='登陆成功')  # 登陆成功则执行begin函数
                deter = False
                zhu.destroy()
            else:
                break
    while deter:
        messagebox.showerror('警告', message='用户名或密码错误')
        break

def zhuce():
    def qu():
        w.destroy()
    def yan():
        register_name = entry_user2.get()
        register_pwd = entry_passwd2.get()
        obj_r = MysqlSearch()
        obj_r.insert_userinfo(register_name, register_pwd)
        w.destroy()
    w = tk.Toplevel()
    w.title('注册界面')
    c= Canvas(w, width=400, height=400)
    w.geometry('400x400+525+180')
    w.resizable(0, 0)
    w.iconbitmap('img\\07.ico')
    c.pack()
    p = PhotoImage(file='img\\3.png')
    c.create_image(0, 0, image=p)
    entry_user2 = Entry(w, borderwidth=3)
    entry_passwd2 = Entry(w, borderwidth=3, show='*')
    c.create_window(100, 100,
                         window=Label(w, font=('宋体', 10), text='用户名', justify='left', padx=5, pady=4, fg="blue",
                                      bg="#C3DEEF"))
    c.create_window(100, 140,
                         window=Label(w, font=('宋体', 10), width=5, text='密码', justify='left', padx=5, pady=4,
                                      fg="blue", bg="#C3DEEF"))
    c.create_window(210, 100, window=entry_user2)
    c.create_window(210, 140, window=entry_passwd2)
    c.create_window(170, 180, window=Button(w,width=7, bg='cyan', text='立即注册', command=yan))
    c.create_window(240, 180, window=Button(w,width=7, bg='mediumvioletred', text='取消', command=qu))
    w.mainloop()

zhu=tk.Tk()
canvas = Canvas(zhu, width=450,height=300)
zhu.geometry("450x300+500+200")
zhu.title("房价分析系统(绝对靠谱!!!)")
zhu.resizable(0, 0)
zhu.iconbitmap('E:\\chuangkou\\img\\07.ico')
canvas.pack()
photo = PhotoImage(file='E:\\chuangkou\\img\\3.png')
entry_user=Entry(zhu, borderwidth=3)
entry_passwd=Entry(zhu, borderwidth=3, show='*')
canvas.create_image(0, 0, image=photo)
canvas.create_window(100, 100, window=Label(zhu, font=('宋体', 10), text='用户名', justify='left', padx=5, pady=4, fg="blue",bg="#C3DEEF"))
canvas.create_window(100, 140, window=Label(zhu, font=('宋体', 10), width=5, text='密码', justify='left', padx=5, pady=4, fg="blue",bg="#C3DEEF"))
canvas.create_window(210, 100, window=entry_user)
canvas.create_window(210, 140, window=entry_passwd)
canvas.create_window(330, 140, window=Button(zhu, height=-2,text='注册', fg='red',command=zhuce))
canvas.create_window(170, 180, window=Button(zhu, width=7, bg='cyan', text='立即登录',command=login))
canvas.create_window(240, 180, window=Button(zhu, width=7, bg='mediumvioletred', text='取消',command=cancel))

zhu.mainloop()
大致就是以上这些,如果有人喜欢我将继续更新这一系列,手把手教你打造一个房价爬虫系统偶吼吼,不喜欢就不要伤害了,手打不容易,请点赞鼓励么么哒
