1. 爬虫简介
爬虫一般指网络爬虫。 网络爬虫(又称为网页蜘蛛,网络机器人,在FOAF社区中间,更经常的称为网页追逐者),是一种按照一定的规则,自动地抓取万维网信息的程序或者脚本。另外一些不常使用的名字还有蚂蚁、自动索引、模拟程序或者蠕虫
大部分的软件 cs 或 bs,主流都是用 http 协议通信,实际上爬虫就是模拟发送 http 请求,例如 Postman 也可以模拟发送,爬虫则是在 python 中使用代码进行模拟发送请求。服务端把数据返回( html,xml,json ),在进行数据的清洗(re,bs4),清洗完后再入库(文件,mysql,redis,es,mongo)
mysql: tcp自定定制的协议
redis: tcp自定定制的协议
docker:http协议,符合resful规范
es:    http协议,符合resful规范
python 中使用
requests可以模拟浏览器的请求,比起之前用到的 urllib,requests 模块的 api 更加便捷(本质就是封装了urllib3)
注意:requests库发送请求将网页内容下载下来以后,并不会执行js代码,这需要我们自己分析目标站点然后发起新的request请求
安装:pip3 install requests
各种请求方式:常用的就是 requests.get() 和 requests.post()
>>> import requests
>>> r = requests.get('https://api.github.com/events')
>>> r = requests.post('http://httpbin.org/post', data = {'key':'value'})
>>> r = requests.put('http://httpbin.org/put', data = {'key':'value'})
>>> r = requests.delete('http://httpbin.org/delete')
>>> r = requests.head('http://httpbin.org/get')
>>> r = requests.options('http://httpbin.org/get')
2. requests 模块介绍
在 python 中模拟发送请求使用 requests 模块,或者使用 urllib 内置模块,但是其 api 使用复杂。
该模块不仅可以用作爬虫,在后端跟另一个服务交互,也需要使用它

例如公司有一个长链转成短链的服务(把很长的url链接生成短的url链接),可以申请一个域名,将长链和自
己设置的短链进行绑定在库中,并加到自己的域名,当访问短链时会重定向到长链所在地址。
2.1 requests get 请求
HTTP默认的请求方法就是GET
- 没有请求体
- 数据必须在1K之内
- GET请求数据会暴露在浏览器的地址栏中
GET请求常用的操作:
- 在浏览器的地址栏中直接给出 URL,那么就一定是 GET 请求
- 点击页面上的超链接也一定是 GET 请求
- 提交表单时,表单默认使用 GET 请求,但可以设置为 POST
基础使用
import requests

# res 中包含了响应体的内容<Response [200]>
res = requests.get('https://www.1biqug.com/')
添加 params 参数
import requests

# 类似于 https://www.cnblogs.com?name=xwx&age=19
res = requests.get('https://www.cnblogs.com/', params={'name':'xwx','age':19})
注意点:如果地址中包含中文则涉及到 url 的编码和解码,需要使用 urllib.parse.quote 和 urllib.parse.unquote 处理
例如路由中含 ‘谢帅哥’ 中文,复制下来为:
https://blog.csdn.net/m0_58987515?type=blog&name=%E8%B0%A2%E5%B8%85%E5%93%A5
from urllib import parse

url = '哈哈哈'
res = parse.quote(url)
print(res)
res = parse.unquote(url)
print(res)
添加请求头
常见的请求头参数有
| 参数 | 说明 |
|---|---|
| Host | 指明了服务器的域名及服务器监听的TCP端口号。 |
| Referer | 告诉服务器该网页是从哪个页面链接过来。 |
| Accept-Charset | 规定服务器处理表单数据所接受的字符集。(常用字符集有 UTF-8-Unicode等) |
| Accept-Language | 告知服务器用户代理能够处理的自然语言集。 |
| Authorization | 告知服务器客户端的Web认证信息。 |
| User-Agent | 告知服务器HTTP 客户端程序的信息。 |
解决简单的反扒需要获取 user-agent 添加到请求头中,如下示例
header = {
     'User-Agent': 'Mozilla/5.0 (Windows NT 10.0; Win64; x64) AppleWebKit/537.36 (KHTML, like Gecko) Chrome/103.0.0.0 Safari/537.36',
}
res = requests.get('https://dig.chouti.com/', headers=header)
print(res.text)
添加 cookie
添加了 cookie 后会有登录信息,才能操作登录后相关操作。
- 携带的方式一:放在请求头中
import requests
header = {
    'User-Agent': 'Mozilla/5.0 (Windows NT 10.0; Win64; x64) AppleWebKit/537.36 (KHTML, like Gecko) Chrome/103.0.0.0 Safari/537.36',
}
res = requests.post('https://dig.chouti.com/link/vote',
                    headers=header,
                    data={
                        'linkId': '35811284'
                    })
- 使用 cookies 参数
Cookie信息虽然包含在请求头里,但requests模块有单独的参数来处理他,headers={}内就不要放它了,cookie 是 CookieJar 的对象
import requests

Cookies={
	'user_session':'wGMHFJKgDcmRIVvcA14_Wrt_3xaUyJNsBnPbYzEL6L0bHcfc',
}

# github对请求头没有什么限制,我们无需定制user-agent,对于其他网站可能还需要定制
response=requests.get('https://github.com/settings/emails', cookies=Cookies)

print('378533872@qq.com' in response.text) #True
2.2 post 请求
POST请求
- 数据不会出现在地址栏中
- 数据的大小没有上限
- 有请求体
- 请求体中如果存在中文,需要使用URL编码
requests.post() 用法与 requests.get() 完全一致,特殊的是 requests.post() 有一个data参数,用来存放请求体数据
常见响应标头
| 标头 | 说明 |
|---|---|
| Keep-Alive | 表示 Connection 非持续链接的存活时间。 |
| Server | 包含有关原始服务器用来处理请求的软件的信息。 |
| Set-Cookie | 用于服务器向客户端发送 sessionID。 |
| Transfer-Encoding | 规定了传输报文主题时采用的编码方式。 |
| Location | 令客户端重定向至指定的URI。 |
| WWW-Authenticate | 表示服务器对客户端的认证信息。 |
携带数据
请求的数据格式有:from-data、urlencoded(默认)、json
import requests

# 在 data 中取
res = requests.post('http://www.aa7a.cn/user.php', data={
    'username': '111111',
    'password': '111111',
    'captcha': '111111',
    'remember': 1,
    'ref': 'http://www.aa7a.cn',
    'act': ' act_login',
})

# 登录成功的 cookie,是 cookieJar对象,可以看作是字典。(登录失败也会有cookie,但是少了)
print(res.cookies)
res1 = requests.get('http://www.aa7a.cn/', cookies=res.cookies)
print('123@qq.com' in res1.text)

携带 json 数据
携带 json 数据可以在 json 参数中,如下所示
res=requests.post('xxx', json={})
request.session
request.session 的作用是在整个过程中自动维护 cookie
session=requests.session()
# 使用session发送请求
session.post('http://www.aa7a.cn/user.php', data={
    'username': '123@qq.com',
    'password': '123',
    'captcha': 'aaaa',
    'remember': 1,
    'ref': 'http://www.aa7a.cn/user.php?act=logout',
    'act': ' act_login',
})
res1=session.get('http://www.aa7a.cn/')		# 登录成功后不需要在 get 方法中添加 cookies
print('123@qq.com' in res1.text)
2.3 response 属性
repsonse对象的属性和方法,是把 http 的响应封装成了 response
| 属性方法 | 说明 |
|---|---|
| respone.text | 响应体的字符串 |
| respone.content | 响应体二进制数据 |
| respone.status_code | 响应状态码 |
| respone.headers | 响应头 |
| respone.cookies | 响应的 cookie |
| respone.cookies.get_dict() | cookie 转成 dict |
| respone.cookies.items() | cookie 拿出 key 和 value |
| respone.url | 请求的地址 |
| respone.history | 列表,有重定向,里面放了重定向之前的地址 |
| respone.encoding | 响应编码格式 |
| respone.iter_content() | 下载图片,视频,需要使用它,可以使用 chunk_size 指定字节大小 |
with open('致命诱惑3.mp4','wb') as f:
	f.write(res.content)
	for line in res.iter_content(chunk_size=1024):  # 按1024字节写
		f.write(line)
2.4 编码问题
若出现中文乱码,可以指定编码的格式。大部分网站都是 utf-8 编码,老网站中文编码使用 gbk,gb2312。
respone = requests.get('http://www.autohome.com/news')
respone.encoding='gbk'
print(respone.text)  # 默认使用utf-8可能会导致中文乱码
2.5 获取二进制数据
response.content
response.iter_content(chunk_size=1024)
res=requests.get('https://gd-hbimg.huaban.com/e1abf47cecfe5848afc2a4a8fd2e0df1c272637f2825b-e3lVMF_fw658')
with open('a.png','wb') as f:
	f.write(res.content)
2.6 解析 json
import requests
response=requests.get('http://httpbin.org/get')

import json
res1=json.loads(response.text) #太麻烦

res2=response.json() #直接获取json数据

print(res1 == res2) #True
2.7 高级用法之 Cert Verification
高级用法之证书
#证书验证(大部分网站都是https)
import requests
respone=requests.get('https://www.12306.cn') #如果是ssl请求,首先检查证书是否合法,不合法则报错,程序终端


#改进1:去掉报错,但是会报警告
import requests
respone=requests.get('https://www.12306.cn',verify=False) #不验证证书,报警告,返回200
print(respone.status_code)

#改进2:去掉报错,并且去掉警报信息
import requests
from requests.packages import urllib3
urllib3.disable_warnings() #关闭警告
respone=requests.get('https://www.12306.cn',verify=False)
print(respone.status_code)

#改进3:加上证书
#很多网站都是https,但是不用证书也可以访问,大多数情况都是可以携带也可以不携带证书
#知乎\百度等都是可带可不带
#有硬性要求的,则必须带,比如对于定向的用户,拿到证书后才有权限访问某个特定网站
import requests
respone=requests.get('https://www.12306.cn',
                     cert=('/path/server.crt',
                           '/path/key'))
print(respone.status_code)
2.8 代理
代理简单来说就是使用别人的 IP 来访问资源,并返回到自己这。
import requests

proxies = {
    'http': '112.14.47.6:52024',
}
# 180.164.66.7
respone = requests.get('https://www.cnblogs.com/', proxies=proxies)
print(respone.status_code)
2.9 超时,认证,异常,上传文件
超时设置
import requests
respone = requests.get('https://www.baidu.com', timeout=0.0001)
异常处理
from requests.exceptions import *

try:
    r = requests.get('http://www.baidu.com', timeout=0.00001)
except ReadTimeout:
    print('===:')
except ConnectionError:  # 网络不通
    print('-----')
except Timeout:
    print('aaaaa')
except Exception:
    print('x')
上传文件
import requests

files = {'file': open('a.jpg', 'rb')}
respone = requests.post('http://httpbin.org/post', files=files)
print(respone.status_code)
3. 代理池
3.1 搭建简易代理池
可以使用 proxy_pool 来搭建简单的代理池,官网:proxy_pool
简易高效的代理池,提供如下功能:
- 定时抓取免费代理网站,简易可扩展。
- 使用 Redis 对代理进行存储并对代理可用性进行排序。
- 定时测试和筛选,剔除不可用代理,留下可用代理。
- 提供代理 API,随机取用测试通过的可用代理。
第一步:clone代码
	git clone git@github.com:jhao104/proxy_pool.git

第二步:安装依赖
	pip3 install -r requirements.txt

第三步:修改配置文件 settings.py
	DB_CONN = 'redis://127.0.0.1:6379/1'

第四步:启动项目
	# 启动爬虫程序
	python3 proxyPool.py schedule
	# web服务程序
	python3 proxyPool.py server

第五步:获取代理
	http://127.0.0.1:5010/get/

3.2 django 后端获取客户端的 ip
import requests

# 从代理池中取出一个IP
# 格式为
'''
{
    "anonymous":"",
    "check_count":1,
    "fail_count":0,
    "https":false,
    "last_status":true,
    last_time":"2022-08-01 17:47:29",
    "proxy":"183.250.163.175:9091",
    "region":"",
    "source":"freeProxy08/freeProxy06"
}
'''

res = requests.get('http://127.0.0.1:5010/get/').json()
print(res['proxy'])

# 拼接成完整代理地址
h = 'https' if res['https'] else h = 'http'

proxies = {
    h: res['proxy'],
}

# 通过代理地址访问个人服务器上的项目,显示IP地址
res1 = requests.get('http://121.4.75.248/gip/', proxies=proxies)
print(res1.text)
注意点:
- 服务器的sqlit3版本可能会出问题,可以提前配置好MySQL数据库去迁移文件。
- 部署端口的时候如果失败可以关闭nginx ** nginx -s stop**
- 部署的语句:python manage.py runserver 0.0.0.0:80
4. 小案例
4.1 爬取视频
以梨视频为例
import requests
import re

res = requests.get('https://www.pearvideo.com/category_loading.jsp?reqType=5&categoryId=5&start=0')
# print(res.text)

video_list = re.findall('<a href="(.*?)" class="vervideo-lilink actplay">', res.text)
print(video_list)
# https://www.pearvideo.com/video_1768482
for video in video_list:
    video_id = video.split('_')[-1]
    video_url = 'https://www.pearvideo.com/' + video
    header = {
        'User-Agent': 'Mozilla/5.0 (Windows NT 10.0; Win64; x64) AppleWebKit/537.36 (KHTML, like Gecko) Chrome/103.0.0.0 Safari/537.36',
        'Referer': video_url
    }
    res1 = requests.get('https://www.pearvideo.com/videoStatus.jsp?contId=%s&mrd=0.5602821872545047' % video_id,
                        headers=header
                        ).json()
    # print(res1['videoInfo']['videos']['srcUrl'])
    mp4_url = res1['videoInfo']['videos']['srcUrl']
    real_mp4_url = mp4_url.replace(mp4_url.split('/')[-1].split('-')[0], 'cont-%s' % video_id)
    print(real_mp4_url)
    # 下载视频
    res2 = requests.get(real_mp4_url)
    with open('video/%s.mp4' % video_id, 'wb') as f:
        for line in res2.iter_content(1024):
            f.write(line)

# 直接发送请求,拿不到视频,它是发送了ajax请求获取了视频,但是需要携带referer
# res=requests.get('https://www.pearvideo.com/video_1768482')
# print(res.text)


# https://video.pearvideo.com/mp4/third/20220729/     1659324669265     -11320310-183708-hd.mp4   # 不能播
# https://video.pearvideo.com/mp4/third/20220729/     cont-1768482      -11320310-183708-hd.mp4    #能播

# url='https://video.pearvideo.com/mp4/third/20220729/   1659324669265    -11320310-183708-hd.mp4'
其他:
- 关于全站爬取:更换分类id和起始爬取的数字即可
- 同步爬取,速度一般,加入线程(线程池),提高爬取速度
- 封 ip 问题(使用代理池)
- 视频处理(截取视频,拼接视频使用 ffmpeg 软件,通过命令调用软件
- python操作软件:subprocess 模块 执行 ffmpeg 的命令完成视频操作
- python模块操作 opencv(c写的,编译后,使用python调用),实现非常高级的功能(文件操作给视频加头去尾部)
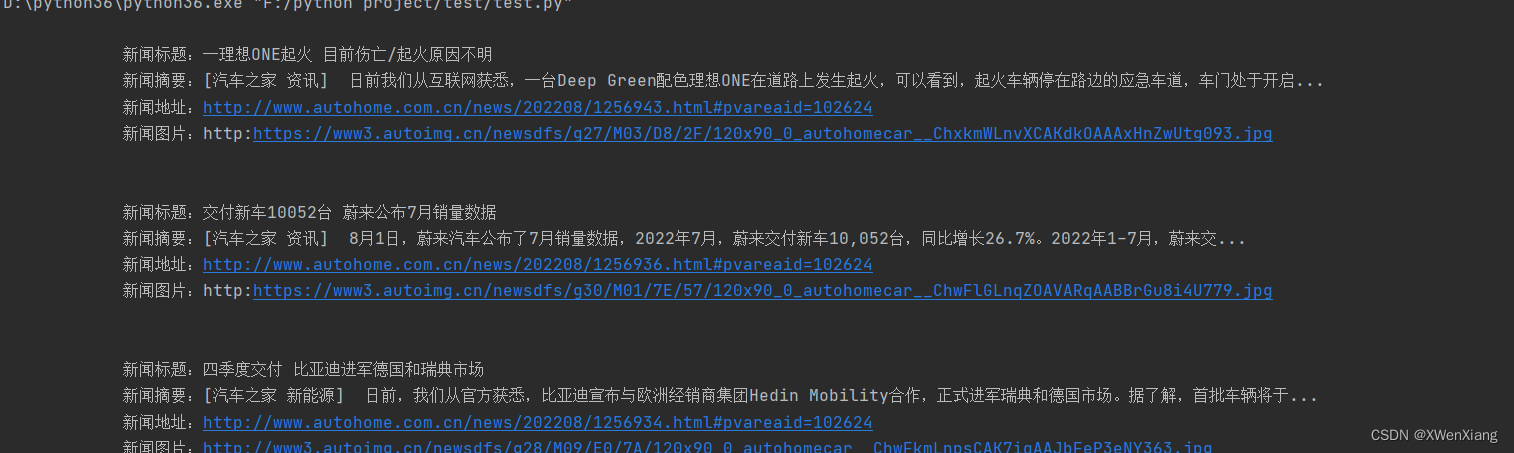
4.2 爬取新闻
以汽车之家为例。使用 bs4 解析
import requests
from bs4 import BeautifulSoup

res = requests.get('https://www.autohome.com.cn/news/1/#liststart')

# print(res.text)
# 之前使用re解析,解析这个比较麻烦,我们使用bs4解析
#  第一个参数是要解析的字符串(html,xml格式)
#  第二个参数是解析方式:html.parser
soup = BeautifulSoup(res.text, 'html.parser')

# 开始使用,查找内容
# 查找所有的类名为article的ul标签
ul_list = soup.find_all(name='ul', class_='article')
for ul in ul_list:
    li_list = ul.find_all(name='li')
    for li in li_list:
        h3 = li.find(name='h3')
        if h3:
            # 从h3中取出文本内容,新闻标题
            title = h3.text
            desc = li.find(name='p').text
            # url=li.find(name='a')['href']
            url = 'http:' + li.find(name='a').attrs['href']
            img = 'http:' + li.find(name='img')['src']

            print('''
            新闻标题:%s
            新闻摘要:%s
            新闻地址:%s
            新闻图片:%s
            ''' % (title, desc, url, img))
            # 1 把图片保存到本地
            # 2 把清洗过后的数据存到mysql中
            # 3 全站爬取变更页码数(https://www.autohome.com.cn/news/1/#liststart)
4.3 爬取哔站视频
'''

通过该程序下载的视频和音频是分成连个文件的,没有合成,
视频为:视频名_video.mp4
音频为:视频名_audio.mp4
修改url的值,换成自己想下载的页面节课
'''

# 导入requests模块,模拟发送请求
import requests
# 导入json
import json
# 导入re
import re

# 定义请求头
headers = {
    'Accept': '*/*',
    'Accept-Language': 'en-US,en;q=0.5',
    'User-Agent': 'Mozilla/5.0 (Macintosh; Intel Mac OS X 10_12_6) AppleWebKit/537.36 (KHTML, like Gecko) Chrome/63.0.3239.84 Safari/537.36'
}


# 正则表达式,根据条件匹配出值
def my_match(text, pattern):
    match = re.search(pattern, text)
    print(match.group(1))
    print()
    return json.loads(match.group(1))


def download_video(old_video_url, video_url, audio_url, video_name):
    headers.update({"Referer": old_video_url})
    print("开始下载视频:%s" % video_name)
    video_content = requests.get(video_url, headers=headers)
    print('%s视频大小:' % video_name, video_content.headers['content-length'])
    audio_content = requests.get(audio_url, headers=headers)
    print('%s音频大小:' % video_name, audio_content.headers['content-length'])
    # 下载视频开始
    received_video = 0
    with open('%s_video.mp4' % video_name, 'ab') as output:
        while int(video_content.headers['content-length']) > received_video:
            headers['Range'] = 'bytes=' + str(received_video) + '-'
            response = requests.get(video_url, headers=headers)
            output.write(response.content)
            received_video += len(response.content)
    # 下载视频结束
    # 下载音频开始
    audio_content = requests.get(audio_url, headers=headers)
    received_audio = 0
    with open('%s_audio.mp4' % video_name, 'ab') as output:
        while int(audio_content.headers['content-length']) > received_audio:
            # 视频分片下载
            headers['Range'] = 'bytes=' + str(received_audio) + '-'
            response = requests.get(audio_url, headers=headers)
            output.write(response.content)
            received_audio += len(response.content)
    # 下载音频结束
    return video_name


if __name__ == '__main__':
    # 换成你要爬取的视频地址
    url = 'https://www.bilibili.com/video/BV1QG41187tj?'
    # 发送请求,拿回数据
    res = requests.get(url, headers=headers)
    # 视频详情json
    playinfo = my_match(res.text, '__playinfo__=(.*?)</script><script>')
    # 视频内容json
    initial_state = my_match(res.text, r'__INITIAL_STATE__=(.*?);\(function\(\)')
    # 视频分多种格式,直接取分辨率最高的视频 1080p
    video_url = playinfo['data']['dash']['video'][0]['baseUrl']
    # 取出音频地址
    audio_url = playinfo['data']['dash']['audio'][0]['baseUrl']
    video_name = initial_state['videoData']['title']
    print('视频名字为:video_name')
    print('视频地址为:', video_url)
    print('音频地址为:', audio_url)
    download_video(url, video_url, audio_url, video_name)
5. BeautifulSoup4 介绍
Beautiful Soup 是一个可以从HTML或XML文件中提取数据的Python库.它能够通过你喜欢的转换器实现惯用的文档导航,查找,修改文档的方式.Beautiful Soup会帮你节省数小时甚至数天的工作时间.你可能在寻找 Beautiful Soup3 的文档,Beautiful Soup 3 目前已经停止开发,官网推荐在现在的项目中使用Beautiful Soup 4, 移植到BS4
#安装 Beautiful Soup
pip install beautifulsoup4

#安装解析器
Beautiful Soup支持Python标准库中的HTML解析器,还支持一些第三方的解析器,其中一个是 lxml .根据操作系统不同,可以选择下列方法来安装lxml:

$ apt-get install Python-lxml

$ easy_install lxml

$ pip install lxml

另一个可供选择的解析器是纯Python实现的 html5lib , html5lib的解析方式与浏览器相同,可以选择下列方法来安装html5lib:

$ apt-get install Python-html5lib

$ easy_install html5lib

$ pip install html5lib
下表列出了主要的解析器,以及它们的优缺点,官网推荐使用lxml作为解析器,因为效率更高. 在Python2.7.3之前的版本和Python3中3.2.2之前的版本,必须安装lxml或html5lib, 因为那些Python版本的标准库中内置的HTML解析方法不够稳定
| 解析器 | 使用方法 | 优势 | 劣势 |
|---|---|---|---|
| Python标准库 | BeautifulSoup(markup, “html.parser”) | Python的内置标准库 执行速度适中 文档容错能力强 | Python 2.7.3 or 3.2.2)前 的版本中文档容错能力差 |
| lxml HTML 解析器 | BeautifulSoup(markup, “lxml”) | 速度快 文档容错能力强 | 需要安装C语言库 |
| lxml XML 解析器 | BeautifulSoup(markup, [“lxml”, “xml”]) BeautifulSoup(markup, “xml”) | 速度快 唯一支持XML的解析器 | 需要安装C语言库 |
| html5lib | BeautifulSoup(markup, “html5lib”) | 最好的容错性 以浏览器的方式解析文档 生成HTML5格式的文档 | 速度慢 不依赖外部扩展 |
5.1 基本使用
html_doc = """
<html><head><title>The Dormouse's story</title></head>
<body>
<p class="title"><b>The Dormouse's story</b></p>

<p class="story">Once upon a time there were three little sisters; and their names were
<a href="http://example.com/elsie" class="sister" id="link1">Elsie</a>,
<a href="http://example.com/lacie" class="sister" id="link2">Lacie</a> and
<a href="http://example.com/tillie" class="sister" id="link3">Tillie</a>;
and they lived at the bottom of a well.</p>

<p class="story">...</p>
"""

#基本使用:容错处理,文档的容错能力指的是在html代码不完整的情况下,使用该模块可以识别该错误。使用BeautifulSoup解析上述代码,能够得到一个 BeautifulSoup 的对象,并能按照标准的缩进格式的结构输出
from bs4 import BeautifulSoup
soup=BeautifulSoup(html_doc,'lxml') #具有容错功能
res=soup.prettify() #处理好缩进,结构化显示
print(res)
5.2 遍历文档树
# 遍历文档树:即直接通过标签名字选择,特点是选择速度快,但如果存在多个相同的标签则只返回第一个
#1、用法
#2、获取标签的名称
#3、获取标签的属性
#4、获取标签的内容
#5、嵌套选择
#6、子节点、子孙节点
#7、父节点、祖先节点
#8、兄弟节点
#遍历文档树:即直接通过标签名字选择,特点是选择速度快,但如果存在多个相同的标签则只返回第一个
html_doc = """
<html><head><title>The Dormouse's story</title></head>
<body>
<p id="my p" class="title"><b id="bbb" class="boldest">The Dormouse's story</b></p>

<p class="story">Once upon a time there were three little sisters; and their names were
<a href="http://example.com/elsie" class="sister" id="link1">Elsie</a>,
<a href="http://example.com/lacie" class="sister" id="link2">Lacie</a> and
<a href="http://example.com/tillie" class="sister" id="link3">Tillie</a>;
and they lived at the bottom of a well.</p>

<p class="story">...</p>
"""

#1、用法
from bs4 import BeautifulSoup
soup=BeautifulSoup(html_doc,'lxml')
# soup=BeautifulSoup(open('a.html'),'lxml')

print(soup.p) #存在多个相同的标签则只返回第一个
print(soup.a) #存在多个相同的标签则只返回第一个

#2、获取标签的名称
print(soup.p.name)

#3、获取标签的属性
print(soup.p.attrs)
print(soup.p['class'])

#4、获取标签的内容
print(soup.p.string) # p下的文本只有一个时,取到,否则为None
print(soup.p.strings) #拿到一个生成器对象, 取到p下所有的文本内容
print(soup.p.text) #取到p下所有的文本内容
for line in soup.stripped_strings: #去掉空白
    print(line)

'''
如果tag包含了多个子节点,tag就无法确定 .string 方法应该调用哪个子节点的内容, .string 的输出结果是 None,如果只有一个子节点那么就输出该子节点的文本,比如下面的这种结构,soup.p.string 返回为None,但soup.p.strings就可以找到所有文本
<p id='list-1'>
    哈哈哈哈
    <a class='sss'>
        <span>
            <h1>aaaa</h1>
        </span>
    </a>
    <b>bbbbb</b>
</p>
'''

#5、嵌套选择
print(soup.head.title.string)
print(soup.body.a.string)

#6、子节点、子孙节点
print(soup.p.contents) #p下所有子节点
print(soup.p.children) #得到一个迭代器,包含p下所有子节点

for i,child in enumerate(soup.p.children):
    print(i,child)

print(soup.p.descendants) #获取子孙节点,p下所有的标签都会选择出来
for i,child in enumerate(soup.p.descendants):
    print(i,child)

#7、父节点、祖先节点
print(soup.a.parent) #获取a标签的父节点
print(soup.a.parents) #找到a标签所有的祖先节点,父亲的父亲,父亲的父亲的父亲...

#8、兄弟节点
print('=====>')
print(soup.a.next_sibling) #下一个兄弟
print(soup.a.previous_sibling) #上一个兄弟

print(list(soup.a.next_siblings)) #下面的兄弟们=>生成器对象
print(soup.a.previous_siblings) #上面的兄弟们=>生成器对象
5.3 搜索文档树
BeautifulSoup定义了很多搜索方法,这里着重介绍2个: find() 和 find_all()
5.3.1 五种过滤器
字符串、正则表达式、列表、True、方法
#搜索文档树:BeautifulSoup定义了很多搜索方法,这里着重介绍2个: find() 和 find_all() .其它方法的参数和用法类似
html_doc = """
<html><head><title>The Dormouse's story</title></head>
<body>
<p id="my p" class="title"><b id="bbb" class="boldest">The Dormouse's story</b>
</p>

<p class="story">Once upon a time there were three little sisters; and their names were
<a href="http://example.com/elsie" class="sister" id="link1">Elsie</a>,
<a href="http://example.com/lacie" class="sister" id="link2">Lacie</a> and
<a href="http://example.com/tillie" class="sister" id="link3">Tillie</a>;
and they lived at the bottom of a well.</p>

<p class="story">...</p>
"""

from bs4 import BeautifulSoup
soup=BeautifulSoup(html_doc,'lxml')

#1、五种过滤器: 字符串、正则表达式、列表、True、方法
#1.1、字符串:即标签名
print(soup.find_all('b'))

#1.2、正则表达式
import re
print(soup.find_all(re.compile('^b'))) #找出b开头的标签,结果有body和b标签

#1.3、列表:如果传入列表参数,Beautiful Soup会将与列表中任一元素匹配的内容返回.下面代码找到文档中所有<a>标签和<b>标签:
print(soup.find_all(['a','b']))

#1.4、True:可以匹配任何值,下面代码查找到所有的tag,但是不会返回字符串节点
print(soup.find_all(True))
for tag in soup.find_all(True):
    print(tag.name)
print(soup.find_all(id=True))

#1.5、方法:如果没有合适过滤器,那么还可以定义一个方法,方法只接受一个元素参数 ,如果这个方法返回 True 表示当前元素匹配并且被找到,如果不是则反回 False
def has_class_but_no_id(tag):
    return tag.has_attr('class') and not tag.has_attr('id')

print(soup.find_all(has_class_but_no_id))
5.3.2 find_all( name , attrs , recursive , text , **kwargs )
#2、find_all( name , attrs , recursive , text , **kwargs )
#2.1、name: 搜索name参数的值可以使任一类型的 过滤器 ,字符窜,正则表达式,列表,方法或是 True .
print(soup.find_all(name=re.compile('^t')))

#2.2、keyword: key=value的形式,value可以是过滤器:字符串 , 正则表达式 , 列表, True .
print(soup.find_all(id=re.compile('my')))
print(soup.find_all(href=re.compile('lacie'),id=re.compile('\d'))) #注意类要用class_
print(soup.find_all(id=True)) #查找有id属性的标签

# 有些tag属性在搜索不能使用,比如HTML5中的 data-* 属性:
data_soup = BeautifulSoup('<div data-foo="value">foo!</div>','lxml')
# data_soup.find_all(data-foo="value") #报错:SyntaxError: keyword can't be an expression
# 但是可以通过 find_all() 方法的 attrs 参数定义一个字典参数来搜索包含特殊属性的tag:
print(data_soup.find_all(attrs={"data-foo": "value"}))
# [<div data-foo="value">foo!</div>]

#2.3、按照类名查找,注意关键字是class_,class_=value,value可以是五种选择器之一
print(soup.find_all('a',class_='sister')) #查找类为sister的a标签
print(soup.find_all('a',class_='sister ssss')) #查找类为sister和sss的a标签,顺序错误也匹配不成功
print(soup.find_all(class_=re.compile('^sis'))) #查找类为sister的所有标签

#2.4、attrs
print(soup.find_all('p',attrs={'class':'story'}))

#2.5、text: 值可以是:字符,列表,True,正则
print(soup.find_all(text='Elsie'))
print(soup.find_all('a',text='Elsie'))

#2.6、limit参数:如果文档树很大那么搜索会很慢.如果我们不需要全部结果,可以使用 limit 参数限制返回结果的数量.效果与SQL中的limit关键字类似,当搜索到的结果数量达到 limit 的限制时,就停止搜索返回结果
print(soup.find_all('a',limit=2))

#2.7、recursive:调用tag的 find_all() 方法时,Beautiful Soup会检索当前tag的所有子孙节点,如果只想搜索tag的直接子节点,可以使用参数 recursive=False .
print(soup.html.find_all('a'))
print(soup.html.find_all('a',recursive=False))

'''
像调用 find_all() 一样调用tag
find_all() 几乎是Beautiful Soup中最常用的搜索方法,所以我们定义了它的简写方法. BeautifulSoup 对象和 tag 对象可以被当作一个方法来使用,这个方法的执行结果与调用这个对象的 find_all() 方法相同,下面两行代码是等价的:
soup.find_all("a")
soup("a")
这两行代码也是等价的:
soup.title.find_all(text=True)
soup.title(text=True)
'''
from bs4 import BeautifulSoup

c = 'asdasdasdnkajsdbadkasd'

res = BeautifulSoup(c, 'lxml')
print(res)
print(BeautifulSoup.find_all(res))


>> <html><body><p>asdasdasdnkajsdbadkasd</p></body></html>
>> [<html><body><p>asdasdasdnkajsdbadkasd</p></body></html>, <body><p>asdasdasdnkajsdbadkasd</p></body>, <p>asdasdasdnkajsdbadkasd</p>]
5.3.3 find( name , attrs , recursive , text , **kwargs )
#3、find( name , attrs , recursive , text , **kwargs )
find_all() 方法将返回文档中符合条件的所有tag,尽管有时候我们只想得到一个结果.比如文档中只有一个<body>标签,那么使用 find_all() 方法来查找<body>标签就不太合适, 使用 find_all 方法并设置 limit=1 参数不如直接使用 find() 方法.下面两行代码是等价的:

soup.find_all('title', limit=1)
# [<title>The Dormouse's story</title>]
soup.find('title')
# <title>The Dormouse's story</title>

唯一的区别是 find_all() 方法的返回结果是值包含一个元素的列表,而 find() 方法直接返回结果.
find_all() 方法没有找到目标是返回空列表, find() 方法找不到目标时,返回 None .
print(soup.find("nosuchtag"))
# None

soup.head.title 是 tag的名字 方法的简写.这个简写的原理就是多次调用当前tag的 find() 方法:

soup.head.title
# <title>The Dormouse's story</title>
soup.find("head").find("title")
# <title>The Dormouse's story</title>
5.4 CSS选择器
div    标签名
.类名   类名
#id     id号
div>p   div下紧邻的p标签
div p   div下所有的p标签
#该模块提供了select方法来支持css,详见官网:https://www.crummy.com/software/BeautifulSoup/bs4/doc/index.zh.html#id37
html_doc = """
<html><head><title>The Dormouse's story</title></head>
<body>
<p class="title">
    <b>The Dormouse's story</b>
    Once upon a time there were three little sisters; and their names were
    <a href="http://example.com/elsie" class="sister" id="link1">
        <span>Elsie</span>
    </a>
    <a href="http://example.com/lacie" class="sister" id="link2">Lacie</a> and
    <a href="http://example.com/tillie" class="sister" id="link3">Tillie</a>;
    <div class='panel-1'>
        <ul class='list' id='list-1'>
            <li class='element'>Foo</li>
            <li class='element'>Bar</li>
            <li class='element'>Jay</li>
        </ul>
        <ul class='list list-small' id='list-2'>
            <li class='element'><h1 class='yyyy'>Foo</h1></li>
            <li class='element xxx'>Bar</li>
            <li class='element'>Jay</li>
        </ul>
    </div>
    and they lived at the bottom of a well.
</p>
<p class="story">...</p>
"""
from bs4 import BeautifulSoup
soup=BeautifulSoup(html_doc,'lxml')

#1、CSS选择器
print(soup.p.select('.sister'))
print(soup.select('.sister span'))

print(soup.select('#link1'))
print(soup.select('#link1 span'))

print(soup.select('#list-2 .element.xxx'))

print(soup.select('#list-2')[0].select('.element')) #可以一直select,但其实没必要,一条select就可以了

# 2、获取属性
print(soup.select('#list-2 h1')[0].attrs)

# 3、获取内容
print(soup.select('#list-2 h1')[0].get_text())
6. selenium
6.1 selenium 介绍
selenium最初是一个自动化测试工具,而爬虫中使用它主要是为了解决requests无法直接执行JavaScript代码的问题
selenium本质是通过驱动浏览器,完全模拟浏览器的操作,比如跳转、输入、点击、下拉等,来拿到网页渲染之后的结果,可支持多种浏览器
# 驱动不同的浏览器
from selenium import webdriver
browser=webdriver.Chrome()
browser=webdriver.Firefox()
browser=webdriver.PhantomJS()
browser=webdriver.Safari()
browser=webdriver.Edge()
6.2 安装
由于是驱动浏览器:需要确定好驱动哪个浏览器(ie,火狐,谷歌(推荐)),下载相应的驱动
-
安装:
pip3 install selenium -
安装镜像站(以谷歌为例,谷歌国内访问不到使用镜像):
国内镜像网站地址:http://npm.taobao.org/mirrors/chromedriver/
最新的版本去官网找: https://sites.google.com/a/chromium.org/chromedriver/downloads -
Firefox 需要安装 geckodriver:https://github.com/mozilla/geckodriver/releases
注意:安装的驱动要和谷歌浏览器适配,如下示例
- 查看浏览器版本
- 选择对应的驱动
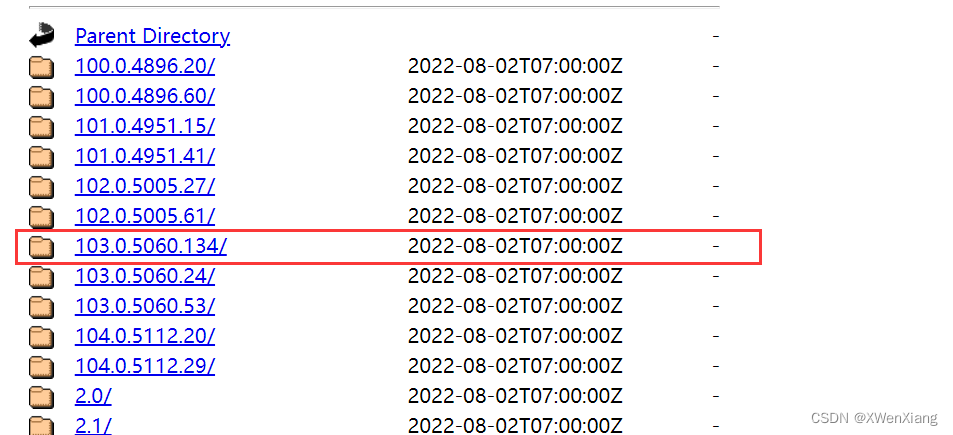
- 根据自己的系统下载驱动
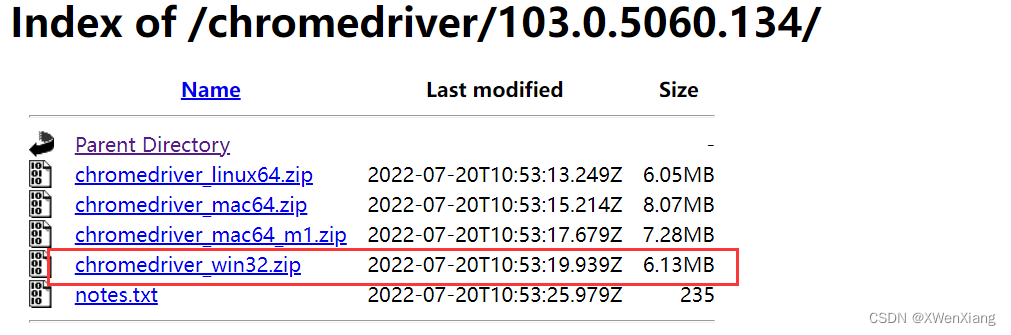
- 将其放置在项目根目录下,或者放到 python 安装路径的 scripts 目录中,便于找到即可
6.3 基本使用
from selenium import webdriver
import time

# 启动浏览器
chrome = webdriver.Chrome()
# 打开网址
chrome.get('http://www.baidu.com')
# 休眠便于观察
time.sleep(2)
# 关闭当前标签
chrome.close()

# 关闭浏览器
# bro.quit()
6.4 查找元素
通过ID查找元素
# 如果找不到任何元素,会抛出 NoSuchElementException 异常。
login_form = driver.find_element_by_id('loginForm')
from selenium import webdriver
from selenium.webdriver.common.by import By

# 启动浏览器
chrome = webdriver.Chrome()
# 打开网址
chrome.get('http://www.baidu.com')

# 根据id查找元素查找
# res = chrome.find_element_by_id('su')  # 旧版本
res1 = chrome.find_element(By.ID, 'su')  # 新版本
print(res1)

# 关闭当前标签
chrome.close()

# 关闭浏览器
# bro.quit()
通过Name查找元素
...
username = chrome.find_element_by_name('username')
password = chrome.find_element_by_name('password')

from selenium.webdriver.common.by import By
username = chrome.find_element(By.NAME, 'username')
password = chrome.find_element(By.NAME, 'password')
...
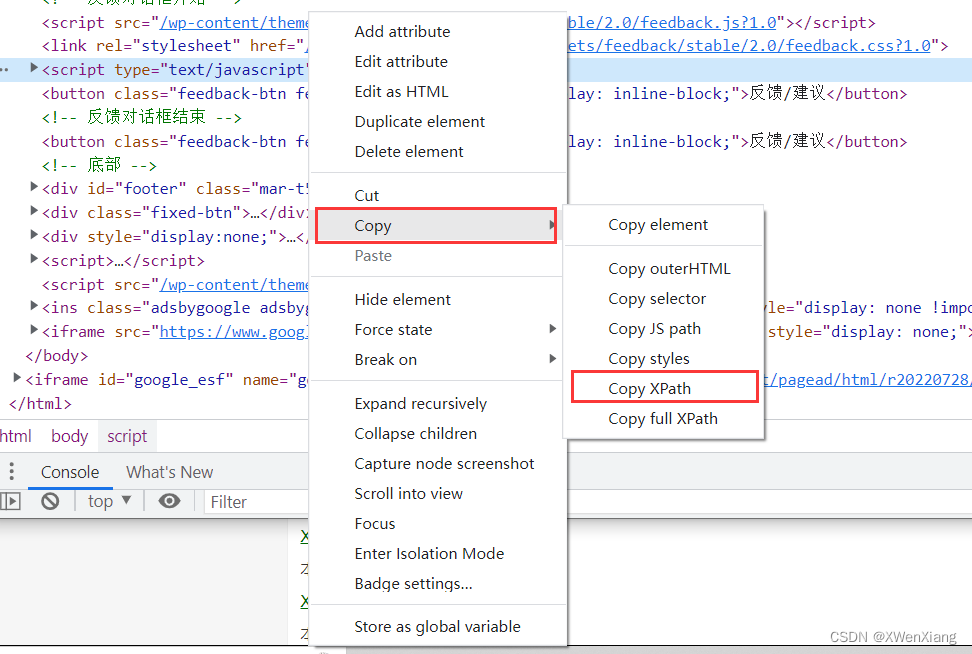
通过XPath查找元素
XPath 可以参考菜鸟教程教学。最省力的方式就是复制
通过链接文本获取超链接
...
# 根据链接的文本查找
link = chrome.find_element_by_link_text('新闻')
# 根据链接的文本模糊查找
link1 = chrome.find_element_by_partial_link_text('新')

# 新版根据链接的文本查找
link2 = chrome.find_element(By.LINK_TEXT, '新闻')
# 新版根据链接的文本模糊查找
link3 = chrome.find_element(By.PARTIAL_LINK_TEXT, '新')

print(link == link1 == link2 == link3)	# True
...
通过标签名查找元素
...
p = chrome.find_element_by_tag_name('p')
p1 = chrome.find_element(By.TAG_NAME, 'p')
print(p == p1)	# True
...
通过Class name 定位元素
...
class1 = chrome.find_element_by_class_name('soutu-btn')
class2 = chrome.find_element(By.CLASS_NAME, 'soutu-btn')
print(class1 == class2)  # True
...
通过CSS选择器查找元素
...
class1 = chrome.find_element_by_css_selector('.soutu-btn')
class2 = chrome.find_element(By.CSS_SELECTOR, '.soutu-btn')
print(class1 == class2)  # True
...
6.5 等待页面加载完成
显式等待
显式等待是你在代码中定义等待一定条件发生后再进一步执行你的代码。 最糟糕的案例是使用time.sleep(),它将条件设置为等待一个确切的时间段。 这里有一些方便的方法让你只等待需要的时间。WebDriverWait结合ExpectedCondition 是实现的一种方式。
from selenium import webdriver
from selenium.webdriver.common.by import By
from selenium.webdriver.support import expected_conditions as EC
from selenium.webdriver.support.ui import WebDriverWait

# 启动浏览器
chrome = webdriver.Chrome()
# 打开网址
chrome.get('http://www.baidu.com')

# 根据id查找元素查找
chrome.find_element_by_link_text('登录').click()

wait = WebDriverWait(chrome, 10)
element = wait.until(EC.element_to_be_clickable((By.ID, 'ss')))
print(element)

# 关闭当前标签
chrome.close()

# 关闭浏览器
# bro.quit()
配合异常处理
from selenium import webdriver
from selenium.webdriver.common.by import By
from selenium.webdriver.support.ui import WebDriverWait
from selenium.webdriver.support import expected_conditions as EC

driver = webdriver.Firefox()
driver.get("http://somedomain/url_that_delays_loading")
try:
    element = WebDriverWait(driver, 10).until(
        EC.presence_of_element_located((By.ID, "myDynamicElement"))
    )
finally:
    driver.quit()
在抛出TimeoutException异常之前将等待10秒或者在10秒内发现了查找的元素。 WebDriverWait 默认情况下会每500毫秒调用一次ExpectedCondition直到结果成功返回。 ExpectedCondition成功的返回结果是一个布尔类型的true或是不为null的返回值。
隐式等待
如果某些元素不是立即可用的,隐式等待是告诉WebDriver去等待一定的时间后去查找元素。 默认等待时间是0秒,一旦设置该值,隐式等待是设置该WebDriver的实例的生命周期。
...
# 隐式等待10秒
chrome.implicitly_wait(10)
...
6.6 浏览器交互
点击
x.click() # 如果不能点击尝试使用下面的方式
chrome.maximize_window() # 点击全屏
login = chrome.find_element(By.ID, 'login_btn')
chrome.execute_script("arguments[0].click();", login)	# 使用js方式
执行 JS 代码
代码执行 JS 语句使用 execute_script
...
# 移动到页面的底部
chrome.execute_script('scrollTo(0,document.body.scrollHeight)')
chrome.execute_script('alert(123)')
...
获取位置、属性、大小和文本
from selenium import webdriver
from selenium.webdriver.common.by import By
import base64

# 启动浏览器
chrome = webdriver.Chrome()

chrome.implicitly_wait(10)

# 打开网址
chrome.get('http://www.baidu.com')

# 根据id查找元素查找
chrome.find_element_by_link_text('登录').click()

img = chrome.find_element(By.CLASS_NAME, 'tang-pass-qrcode-img')
# 获取位置
location = img.location
# 获取大小
size = img.size
# 不是标签的id号
print(img.id)
# 标签名
print(img.tag_name)
# 获取属性
src = img.get_attribute('src')

b_src = base64.b64decode(src)
with open('code.png', 'wb') as f:
    f.write(b_src)

# 关闭当前标签
chrome.close()

# 关闭浏览器
# bro.quit()
切换选项卡
from selenium import webdriver
# 启动浏览器
chrome = webdriver.Chrome()
chrome.implicitly_wait(10)
# 打开网址
chrome.get('http://www.baidu.com')
# 打开新选项卡
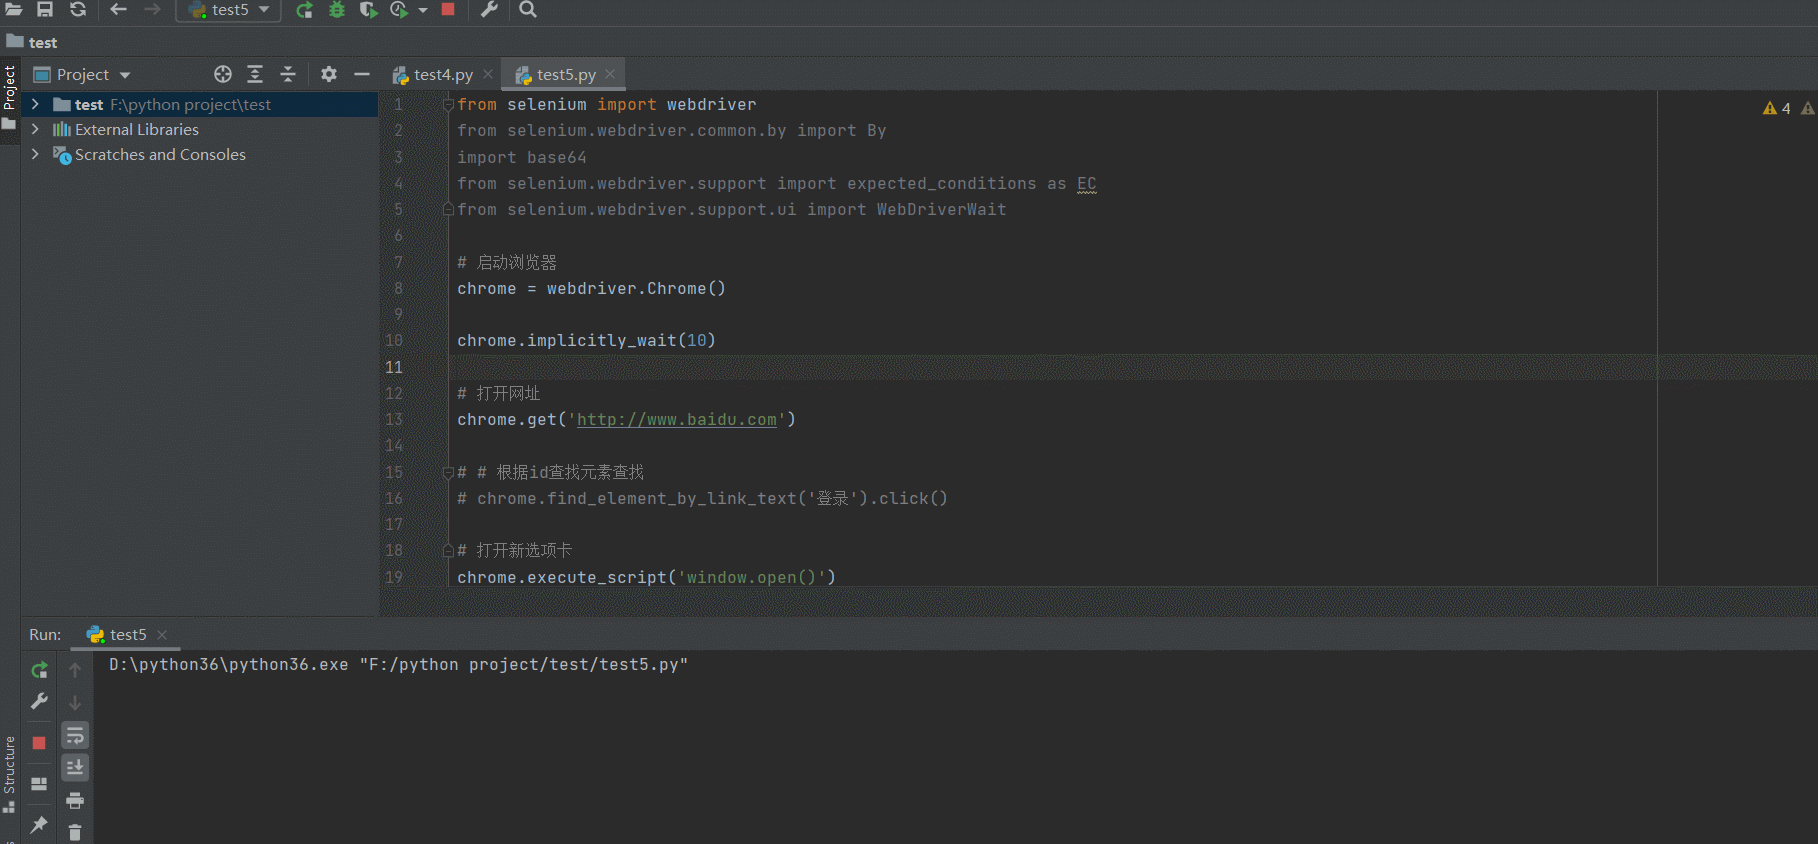
chrome.execute_script('window.open()')
# 切换选项卡
chrome.switch_to.window(chrome.window_handles[1])
# 在新选项卡中打开网址
chrome.get('http://www.baidu.com')
# 切回第一个选项卡
chrome.switch_to.window(chrome.window_handles[0])
input()
# 关闭当前标签
chrome.close()
# 关闭浏览器
# bro.quit()
浏览器前进后退
from selenium import webdriver
import time

# 启动浏览器
chrome = webdriver.Chrome()

chrome.implicitly_wait(10)

# 打开网址
chrome.get('http://www.baidu.com')
chrome.get('https://www.cnblogs.com/liuqingzheng/')

# 回退
chrome.back()

time.sleep(1)

# 前进
chrome.forward()

# 关闭当前标签
# chrome.close()

# 关闭浏览器
chrome.quit()
异常处理
from selenium import webdriver
import time

# 启动浏览器
chrome = webdriver.Chrome()

try:
    chrome.implicitly_wait(10)
    # 打开网址
    chrome.get('http://www.baidu.com')
    chrome.get('https://www.cnblogs.com/liuqingzheng/')
    # 回退
    chrome.back()
    time.sleep(1)
    # 前进
    chrome.forward()
except Exception as e:
    print(e)
finally:
    # 关闭浏览器
    chrome.quit()
无界面浏览器
不显示的打开浏览器的图形化界面,且获取数据
from selenium import webdriver
from selenium.webdriver.chrome.options import Options

# -------- 无界面浏览器配置 ---------
chrome_options = Options()

chrome_options.add_argument('window-size=1920x3000')  # 指定浏览器分辨率
chrome_options.add_argument('--disable-gpu')  # 谷歌文档提到需要加上这个属性来规避bug
chrome_options.add_argument('--hide-scrollbars')  # 隐藏滚动条, 应对一些特殊页面
chrome_options.add_argument('blink-settings=imagesEnabled=false')  # 不加载图片, 提升速度
chrome_options.add_argument('--headless')  # 浏览器不提供可视化页面. linux下如果系统不支持可视化不加这条会启动失败

# ---------------------------------

# 启动浏览器,添加 options 配置
chrome = webdriver.Chrome(options=chrome_options)

try:
    chrome.implicitly_wait(10)
    chrome.get('http://www.baidu.com')
    print(chrome.page_source)
except Exception as e:
    print(e)
finally:
    chrome.quit()
模拟百度登录、搜索
需要给输入框写入内容,使用方法 send_keys
- 登录
from selenium import webdriver
from selenium.webdriver.common.by import By
import time

# 启动浏览器
chrome = webdriver.Chrome()

chrome.implicitly_wait(10)

# 打开网址
chrome.get('http://www.baidu.com')

# 根据id查找元素查找
chrome.find_element_by_link_text('登录').click()

username = chrome.find_element(By.ID, 'TANGRAM__PSP_11__userName')
password = chrome.find_element(By.ID, 'TANGRAM__PSP_11__password')
login = chrome.find_element(By.ID, 'TANGRAM__PSP_11__submit')

username.send_keys('123')
time.sleep(1)
password.send_keys('123')

login.click()

# 关闭当前标签
chrome.close()

# 关闭浏览器
# bro.quit()
- 搜索
from selenium import webdriver
from selenium.webdriver.common.by import By

# 启动浏览器
chrome = webdriver.Chrome()

try:
    chrome.implicitly_wait(10)

    # 打开网址
    chrome.get('http://www.baidu.com')

    # 根据id查找元素查找
    chrome.find_element_by_link_text('登录').click()

    b_input = chrome.find_element(By.ID, 'kw')
    seek = chrome.find_element(By.ID, 'su')
    b_input.send_keys('妹子')
    seek.click()

    input()

except Exception as e:
    print(e)
finally:
    chrome.quit()
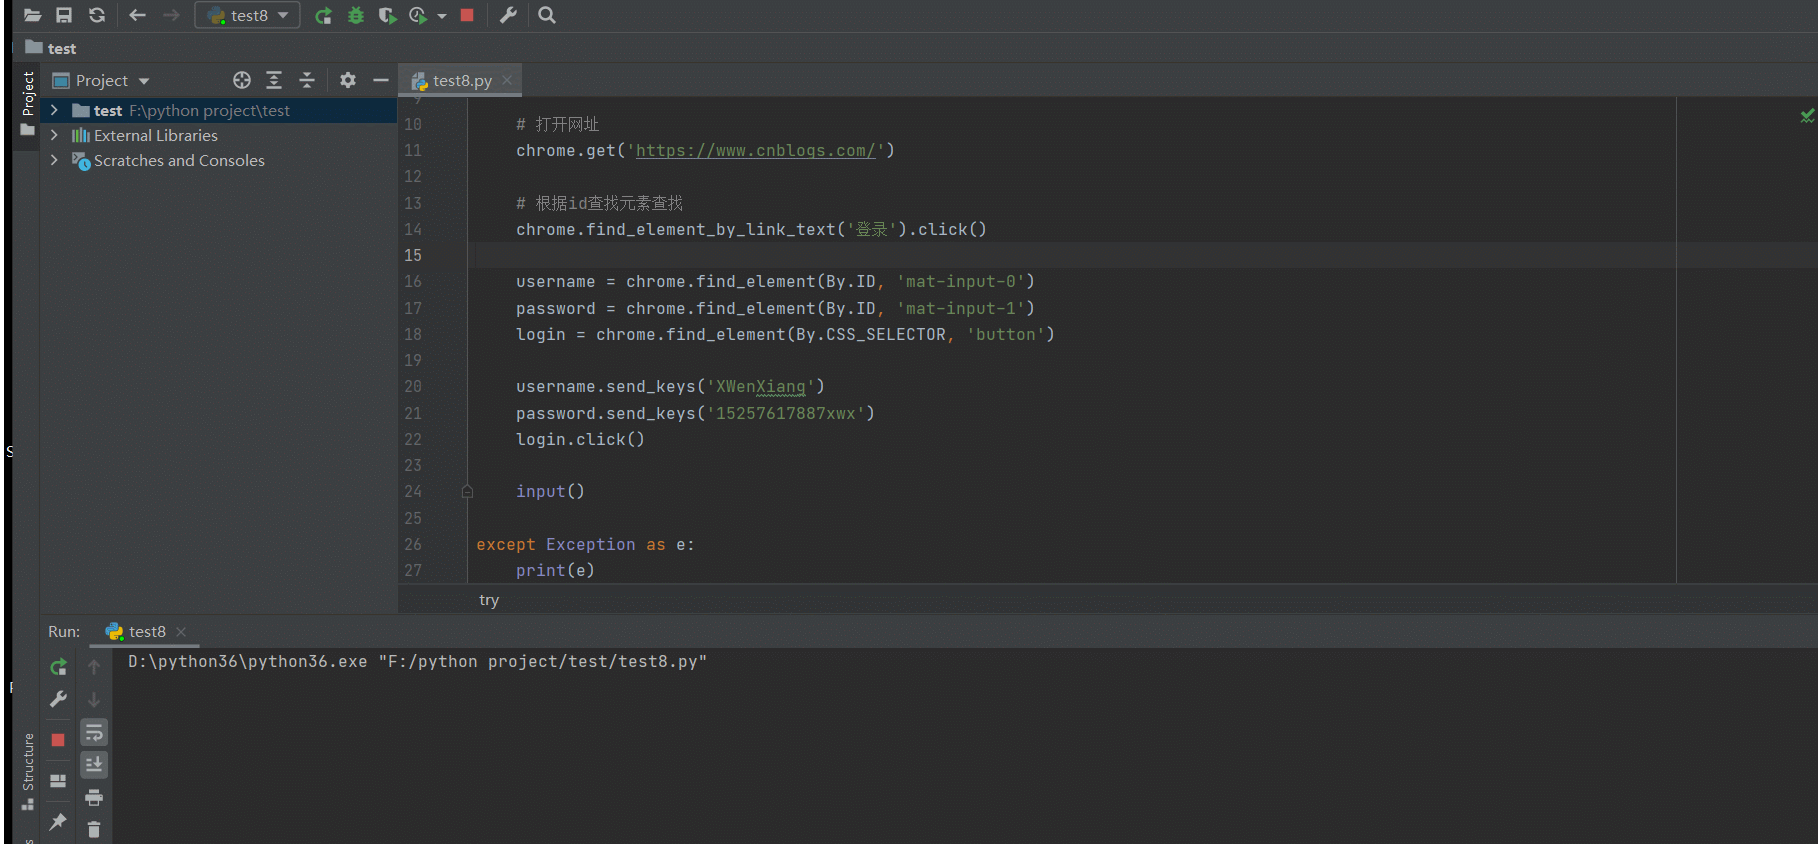
模拟博客园登录获取cookie
- 登录获取 cookie ,并存储到文件中
from selenium import webdriver
from selenium.webdriver.common.by import By
import json

# 启动浏览器
chrome = webdriver.Chrome()

try:
    chrome.implicitly_wait(10)

    # 打开网址
    chrome.get('https://www.cnblogs.com/')

    # 根据id查找元素查找
    chrome.find_element_by_link_text('登录').click()

    username = chrome.find_element(By.ID, 'mat-input-0')
    password = chrome.find_element(By.ID, 'mat-input-1')
    login = chrome.find_element(By.CSS_SELECTOR, 'button')

    username.send_keys('123')
    password.send_keys('123')
    login.click()

	# 获取 cookie
    cookie = chrome.get_cookies()

	# 写入文件
    with open('a.json', 'w', encoding='utf-8') as f:
        json.dump(cookie, f)

    input()

except Exception as e:
    print(e)
finally:
    chrome.quit()
- 添加 cookie 登录
from selenium import webdriver
from selenium.webdriver.common.by import By
import json
import time

# 启动浏览器
chrome = webdriver.Chrome()

try:
    chrome.implicitly_wait(10)
    # 打开网址
    chrome.get('https://www.cnblogs.com/')

    with open('a.json', 'r', encoding='utf-8') as f:
        res = json.load(f)

    for i in res:
        chrome.add_cookie(i)

    chrome.refresh()

    input()

except Exception as e:
    print(e)
finally:
    chrome.quit()
抽屉新热榜点赞
- 登录获取cookie
from selenium import webdriver
from selenium.webdriver.common.by import By
import json
import time

# 启动浏览器
chrome = webdriver.Chrome()

try:
    chrome.implicitly_wait(10)

    # 打开网址
    chrome.get('https://dig.chouti.com/')

    # 根据id查找元素查找
    login = chrome.find_element(By.ID, 'login_btn')
    chrome.execute_script("arguments[0].click();", login)

    phone = chrome.find_element(By.NAME, 'phone')
    password = chrome.find_element(By.NAME, 'password')
    login1 = chrome.find_element(By.CLASS_NAME, 'login-btn')

    phone.send_keys('123123123')
    password.send_keys('123123123')

    time.sleep(3)

    cookie = chrome.get_cookies()

    with open('b.json', 'w', encoding='utf-8') as f:
        json.dump(cookie, f)

    input()

except Exception as e:
    print(e)
finally:
    chrome.quit()
- 发送点赞请求
from selenium import webdriver
from selenium.webdriver.common.by import By
import json
import time
from bs4 import BeautifulSoup
import requests
from selenium.webdriver.chrome.options import Options

chrome_options = Options()

chrome_options.add_argument('window-size=1920x3000')  # 指定浏览器分辨率
chrome_options.add_argument('--disable-gpu')  # 谷歌文档提到需要加上这个属性来规避bug
chrome_options.add_argument('--hide-scrollbars')  # 隐藏滚动条, 应对一些特殊页面
chrome_options.add_argument('blink-settings=imagesEnabled=false')  # 不加载图片, 提升速度
chrome_options.add_argument('--headless')  # 浏览器不提供可视化页面. linux下如果系统不支持可视化不加这条会启动失败

# 启动浏览器
chrome = webdriver.Chrome(options=chrome_options)
# chrome = webdriver.Chrome()

try:
    chrome.implicitly_wait(10)
    # 打开网址
    chrome.get('https://dig.chouti.com/')

    with open('b.json', 'r', encoding='utf-8') as f:
        res = json.load(f)

    cookies = {}

    for i in res:
        chrome.add_cookie(i)
        cookies[i.get('name')] = i.get('value')

    headers = {
        'User-Agent': 'Mozilla/5.0 (Windows NT 10.0; Win64; x64) AppleWebKit/537.36 (KHTML, like Gecko) Chrome/103.0.0.0 Safari/537.36',
    }

    proxies = {
        'http': '112.14.47.6:52024',
    }

    res = requests.get('https://dig.chouti.com/', headers=headers, proxies=proxies)

    soup = BeautifulSoup(res.text, 'lxml')
    soup_list = soup.find_all('div', class_='link-item')

    id_list = []
    for i in soup_list:
        id_list.append(i.attrs['data-id'])

    for i in id_list:
        res1 = requests.post('https://dig.chouti.com/link/vote', data={'linkId': i}, headers=headers, proxies=proxies,
                             cookies=cookies)
        print(i)
    chrome.refresh()

    input()

except Exception as e:
    print(e)
finally:
    chrome.quit()
其他案例
# 2 爬红楼梦小说

#http://www.shicimingju.com/book/hongloumeng.html

# import requests
#
# from bs4 import BeautifulSoup
# ret=requests.get('https://www.shicimingju.com/book/hongloumeng.html')
# ret.encoding='utf-8'
#
# soup=BeautifulSoup(ret.text,'lxml')
# li_list=soup.find(class_='book-mulu').find('ul').find_all('li')
# with open('hlm.txt','w',encoding='utf-8') as f:
#     for li in li_list:
#         content=li.find('a').text
#         url='https://www.shicimingju.com'+li.find('a').get('href')
#         f.write(content)
#         f.write('\n')
#         res_content=requests.get(url)
#         res_content.encoding = 'utf-8'
#         res_content.encoding=res_content.apparent_encoding
#         soup2=BeautifulSoup(res_content.text,'lxml')
#         content_detail=soup2.find(class_='chapter_content').text
#         f.write(content_detail)
#         f.write('\n')
#         print(content,'写入了')


# 3 爬肯德基门店

# http://www.kfc.com.cn/kfccda/ashx/GetStoreList.ashx?op=keyword
import requests

header = {
    'User-Agent': 'Mozilla/5.0 (Macintosh; Intel Mac OS X 10_14_6) AppleWebKit/537.36 (KHTML, like Gecko) Chrome/80.0.3987.149 Safari/537.36'
}
data = {
    'cname': '',
    'pid': 20,
    'keyword': '浦东',
    'pageIndex': 1,
    'pageSize': 10
}
ret = requests.post('http://www.kfc.com.cn/kfccda/ashx/GetStoreList.ashx?op=keyword', data=data, headers=header)
print(ret.json())
7. 动作链
用 selenium 做自动化,需要模拟鼠标操作才能进行的情况,例如校验验证码的单击、双击、点击鼠标右键、拖拽等等。可以使用 selenium 提供了 ActionChains 类来处理
如果被检测出浏览器被自动化测试软件控制,可以添加 stealth.min.js 文件,如下所示。
options = Options()
options.add_argument("--disable-blink-features=AutomationControlled")
bro = webdriver.Chrome(options=options)
with open('../stealth.min.js', 'r', encoding='utf8') as f:
    res = f.read()

chrome.execute_cdp_cmd("Page.addScriptToEvaluateOnNewDocument", {
    "source": res
})
导入语句:from selenium.webdriver import ActionChains
| 方法 | 说明 |
|---|---|
| click(on_element=None) | 单击鼠标左键 |
| click_and_hold(on_element=None) | 点击鼠标左键,不松开 |
| context_click(on_element=None) | 点击鼠标右键 |
| double_click(on_element=None) | 双击鼠标左键 |
| drag_and_drop(source, target) | 拖拽到某个元素然后松开 |
| drag_and_drop_by_offset(source, xoffset, yoffset) | 拖拽到某个坐标然后松开 |
| key_down(value, element=None) | 按下某个键盘上的键 |
| key_up(value, element=None) | 松开某个键 |
| move_by_offset(xoffset, yoffset) | 鼠标从当前位置移动到某个坐标 |
| move_to_element(to_element) | 鼠标移动到某个元素 |
| move_to_element_with_offset(to_element, xoffset, yoffset) | 移动到距某个元素(左上角坐标)多少距离的位置 |
| perform() | 执行链中的所有动作 |
| release(on_element=None) | 在某个元素位置松开鼠标左键 |
| send_keys(*keys_to_send) | 发送某个键到当前焦点的元素 |
| send_keys_to_element(element, *keys_to_send) | 发送某个键到指定元素 |
7.1 基础使用
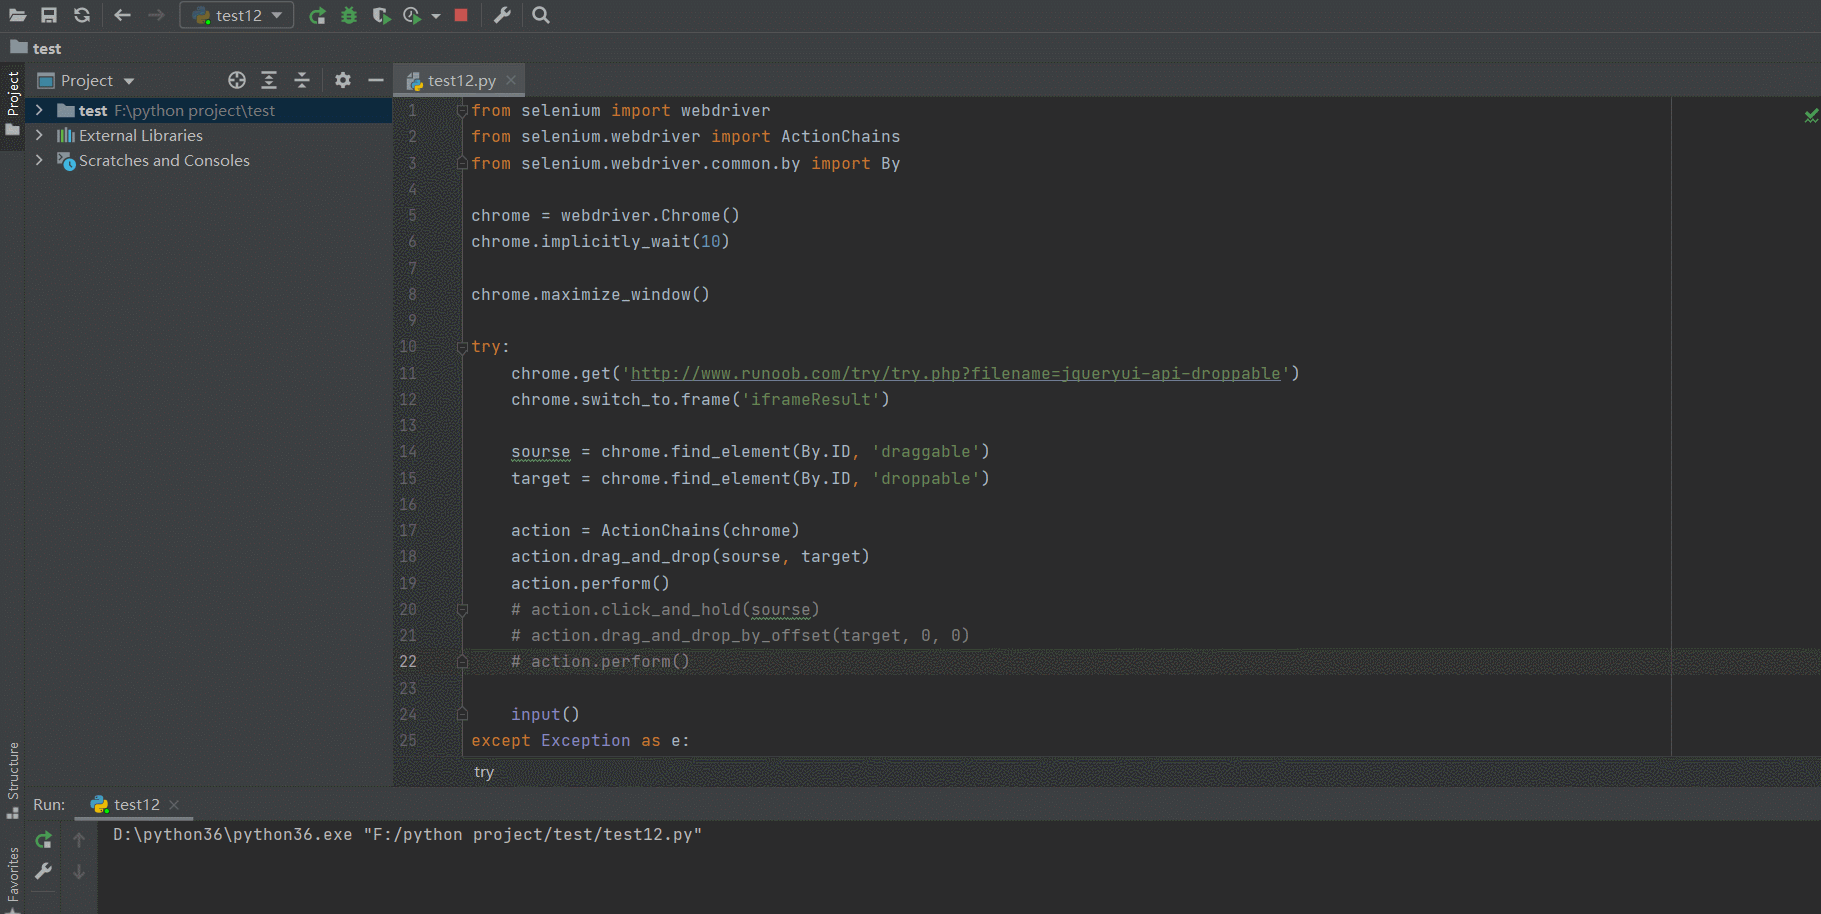
- 以菜鸟教程为例
from selenium import webdriver
from selenium.webdriver import ActionChains
from selenium.webdriver.common.by import By

chrome = webdriver.Chrome()
chrome.implicitly_wait(10)
# 全屏
chrome.maximize_window()

try:
	# 打开菜鸟教程
    chrome.get('http://www.runoob.com/try/try.php?filename=jqueryui-api-droppable')
    # 打开 iframe
    chrome.switch_to.frame('iframeResult')

	# 获取元素
    sourse = chrome.find_element(By.ID, 'draggable')
    target = chrome.find_element(By.ID, 'droppable')

	# 创建动作链对象
    action = ActionChains(chrome)
    # 移动元素
    action.drag_and_drop(sourse, target)
    # 执行动作链
    action.perform()

    # 或者使用下面方法,移动后还可以进行偏移调整
    # action.click_and_hold(sourse)
    # action.drag_and_drop_by_offset(target, 0, 0)
    # action.perform()

    input()
except Exception as e:
    print(e)
finally:
    chrome.quit()
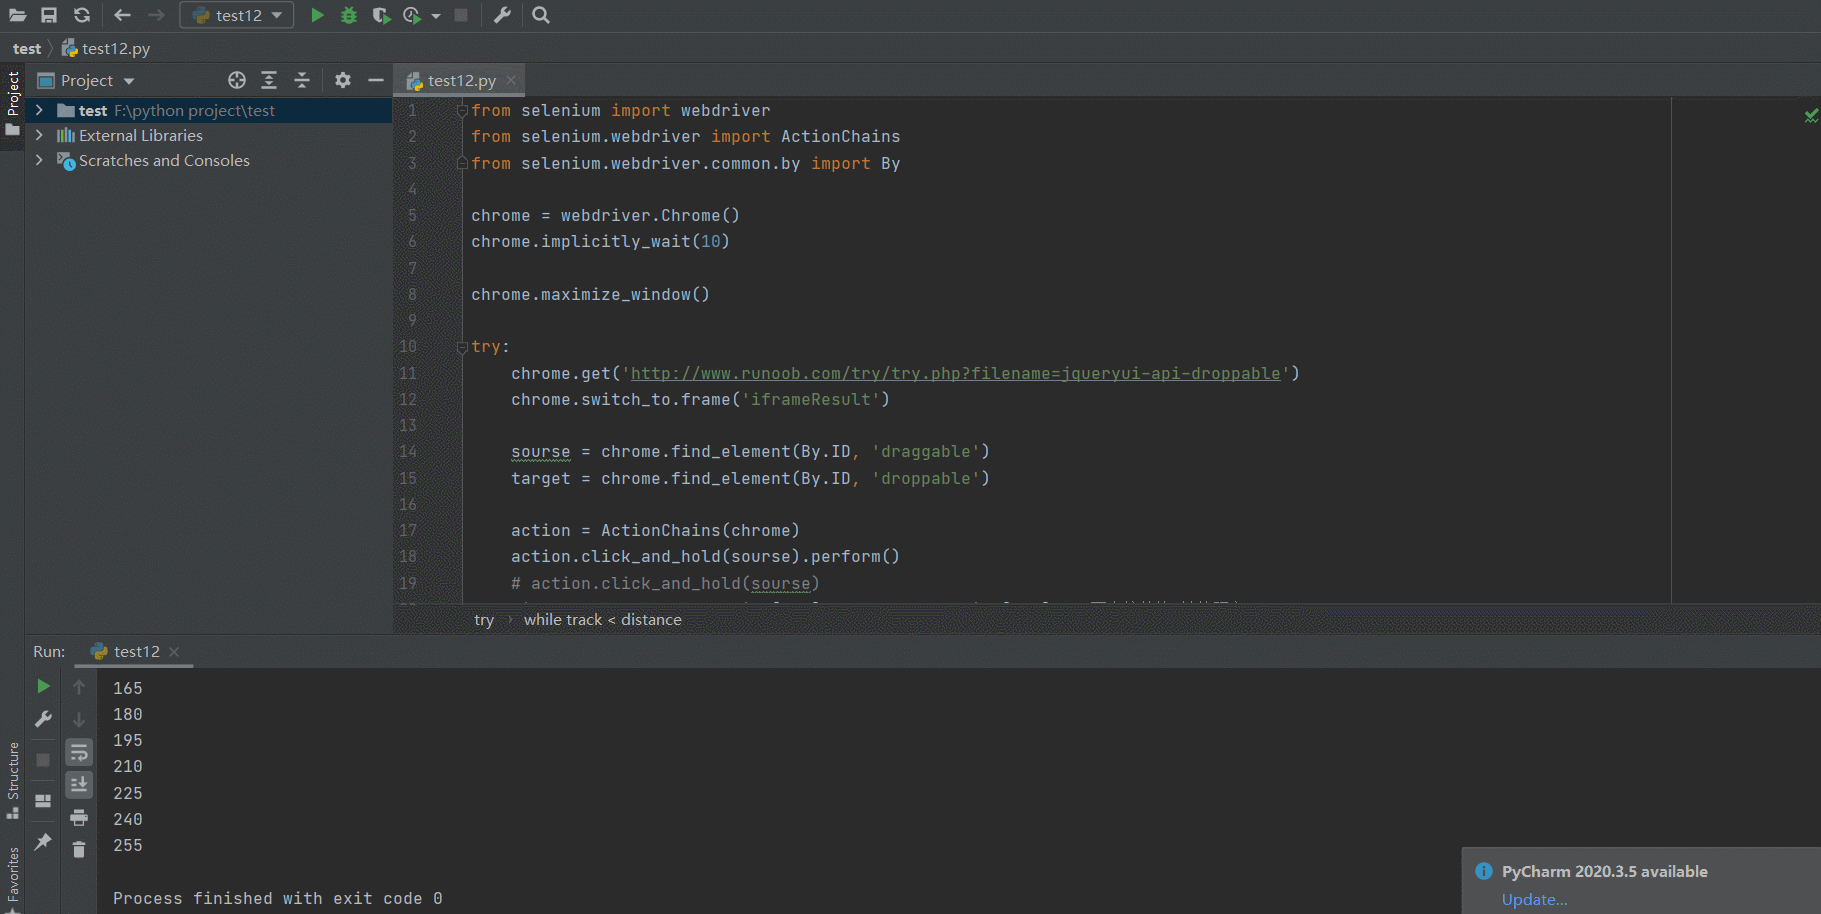
- 调整移动的速度
方法一:将动作放在同一个动作链中
from selenium import webdriver
from selenium.webdriver import ActionChains
from selenium.webdriver.common.by import By

chrome = webdriver.Chrome()
chrome.implicitly_wait(10)

chrome.maximize_window()

try:
    chrome.get('http://www.runoob.com/try/try.php?filename=jqueryui-api-droppable')
    chrome.switch_to.frame('iframeResult')

    sourse = chrome.find_element(By.ID, 'draggable')
    target = chrome.find_element(By.ID, 'droppable')

    action = ActionChains(chrome)
    action.click_and_hold(sourse)
    distance = target.location['x'] - sourse.location['x']  # 两个控件的x轴的距离
    track = 0
    while track < distance:
        action.move_by_offset(xoffset=15, yoffset=0)
        track += 15
    action.perform()

except Exception as e:
    print(e)
finally:
    chrome.quit()
方法二:把动作放在不同的动作链
from selenium import webdriver
from selenium.webdriver import ActionChains
from selenium.webdriver.common.by import By

chrome = webdriver.Chrome()
chrome.implicitly_wait(10)

chrome.maximize_window()

try:
    chrome.get('http://www.runoob.com/try/try.php?filename=jqueryui-api-droppable')
    chrome.switch_to.frame('iframeResult')

    sourse = chrome.find_element(By.ID, 'draggable')
    target = chrome.find_element(By.ID, 'droppable')

	# 单个动作链
    action = ActionChains(chrome)
    action.click_and_hold(sourse).perform()

	# 多个动作链
    distance = target.location['x'] - sourse.location['x']  # 两个控件的x轴的距离
    track = 0
    while track < distance:
        ActionChains(chrome).move_by_offset(xoffset=15, yoffset=0).perform()
        track += 15

except Exception as e:
    print(e)
finally:
    chrome.quit()
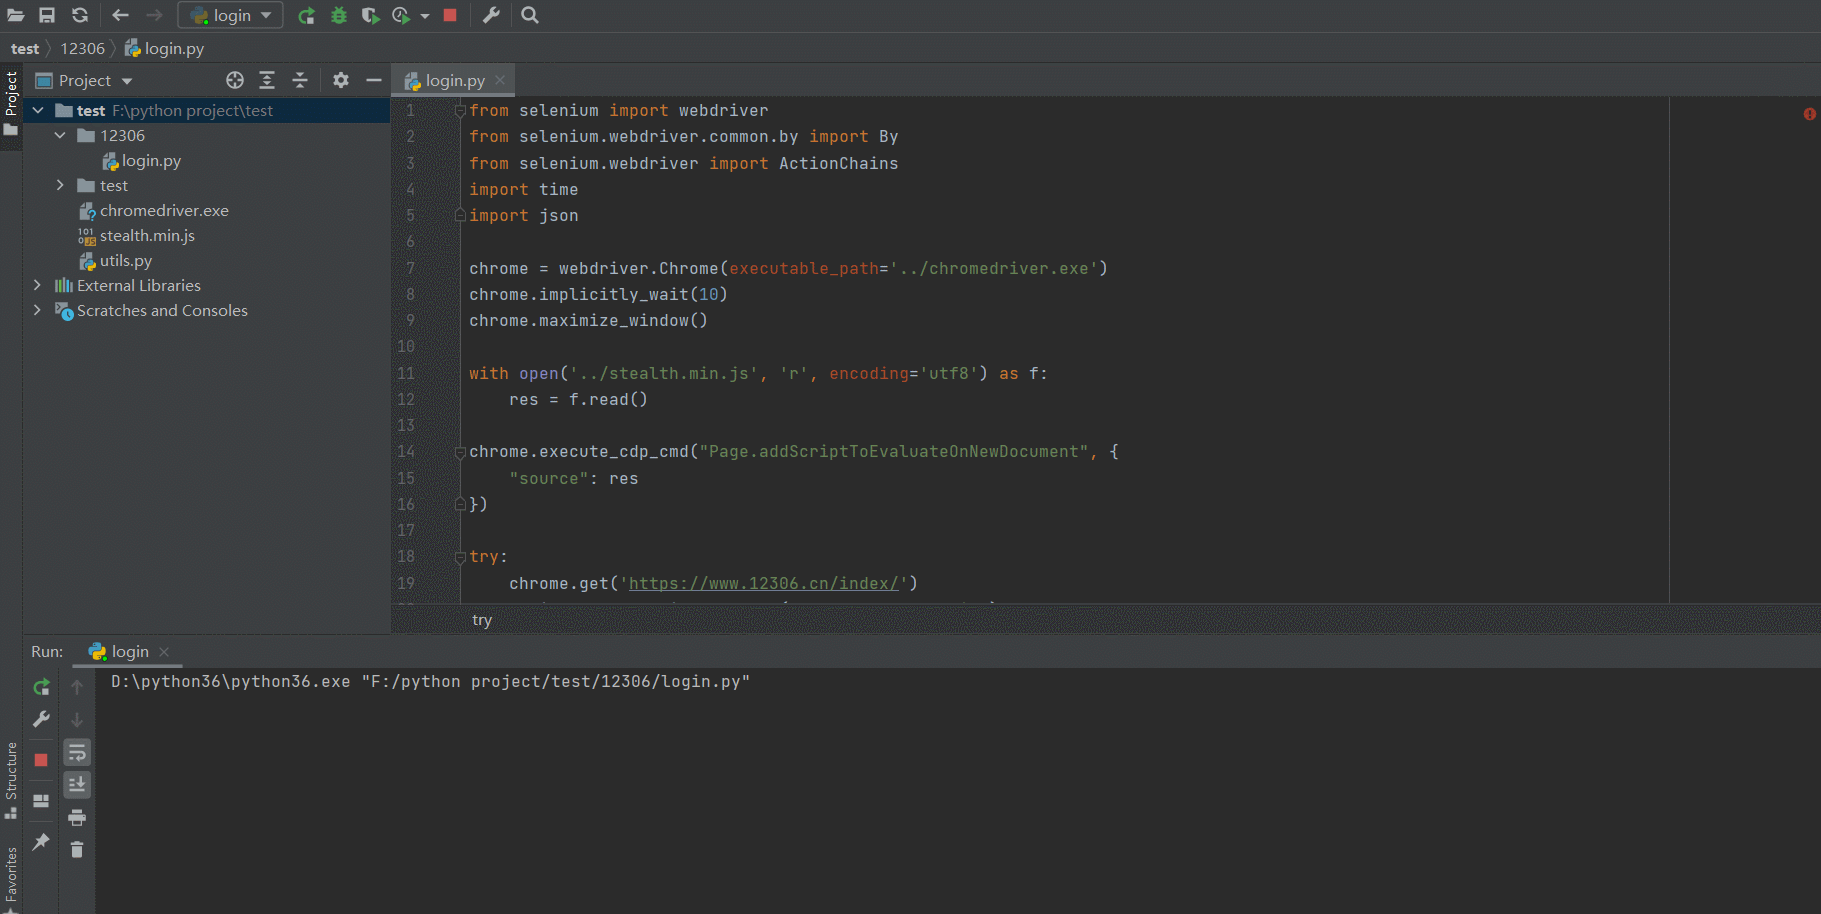
7.2 12306 登录
from selenium import webdriver
from selenium.webdriver.common.by import By
from selenium.webdriver import ActionChains
import time
import json

chrome = webdriver.Chrome(executable_path='../chromedriver.exe')
chrome.implicitly_wait(10)
chrome.maximize_window()

with open('../stealth.min.js', 'r', encoding='utf8') as f:
    res = f.read()

chrome.execute_cdp_cmd("Page.addScriptToEvaluateOnNewDocument", {
    "source": res
})

try:
    chrome.get('https://www.12306.cn/index/')
    login = chrome.find_element(By.ID, 'J-btn-login')
    login.click()
    username = chrome.find_element(By.ID, 'J-userName')
    password = chrome.find_element(By.ID, 'J-password')
    username.send_keys('123123')
    password.send_keys('123123')
    login_btn = chrome.find_element(By.ID, 'J-login')
    login_btn.click()

    action = ActionChains(chrome)
    sliding_block = chrome.find_element(By.ID, 'nc_1_n1z')
    action.click_and_hold(sliding_block)

    track = 0
    while track < 300:
        action.move_by_offset(xoffset=30, yoffset=0)
        track += 30

    action.perform()

    time.sleep(2)

    cookie = chrome.get_cookies()

    with open('12306.json', 'w', encoding='utf-8') as f:
        json.dump(cookie, f)


except Exception as e:
    print(e)
finally:
    chrome.quit()