pytorch安装&使用
安装
- 安装python
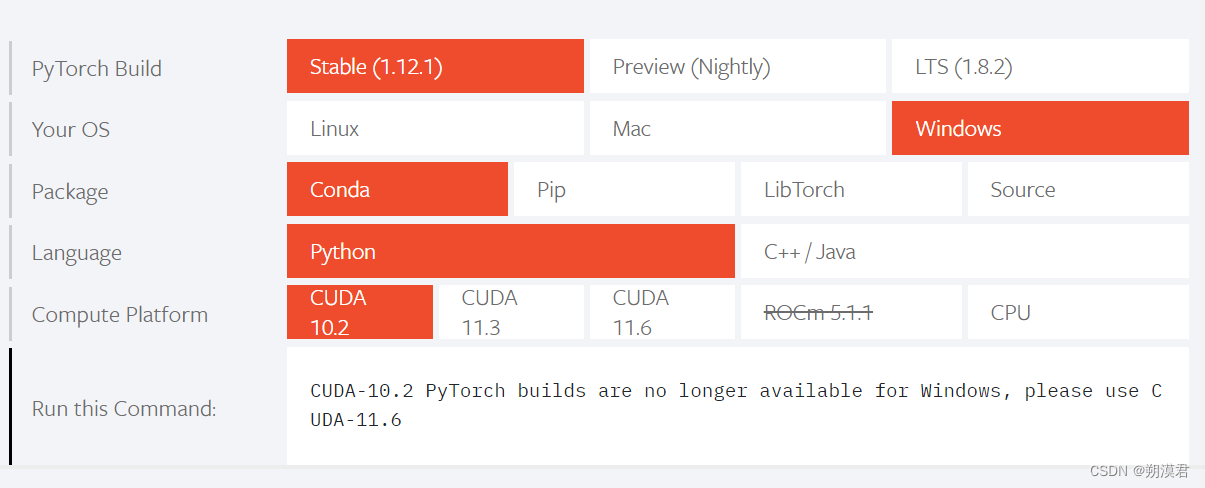
- 查看电脑配置,按自己的需求选择对应版本(cpu,gpu,python版本等)
- 使用指令 复制Run this Command内容执行即可

pytorch基础知识
张量
- pytorch基本运算单元,与数学上的使用,内容有不同
- 0阶为scalar,1阶为vector,二阶为matrix
- 其本质是一种多重线性映射关系,坐标分布在多维空间内,拥有多个分量的量。
pytorch中的使用
- 存储和变换数据的主要工具
- 和numpy非常相似,但提供GPU计算和自动梯度等功能
tensor创建
import torch
t1 = torch.zeros(4,3,dtype=torch.int)
t2 = torch.ones(4,3)
t3 = torch.eye(4,4)
t4 = torch.rand(4,3)
t1 = torch.Tensor(6,4,5)
t2 = torch.tensor([5.5,3])
t1 = torch.arange(0,10,2)
t2 = torch.linspace(0,10,5)
t3 = torch.normal(mean=0.5,std=torch.arange(1.,6.))
t4 = torch.randperm(7)
t1 = t1.new_ones(4,3)
t1 = torch.randn_like(t1,dtype=torch.float)
print(t1)
print(t1.size(),t1.shape)
tensor操作
y = torch.randn(4,3)
x = torch.randn(4,3)
x = torch.randn(4,4)
y = x.view(16)
z = x.view(-1,8)
x = torch.randn(4,4)
x2 = x.clone()
print(id(x),id(x2))
x = torch.unsqueeze(x,2)
x = torch.unsqueeze(x,1)
print(x.shape)
x = torch.squeeze(x,1)
print(x.shape)
tensor广播机制
x = torch.arange(1, 3).view(1, 2)
print(x)
y = torch.arange(1, 4).view(3, 1)
print(y)
print(x + y)
自动求导
- 目的:快速求解偏导
- 神经网络的核心:autograd(为张量上的所有操作提供自动求导机制)
- tensor中有一个属性为requires_grad,默认为False 设定为True后将追踪对于该张量的所有操作
from __future__ import print_function
import torch
x = torch.randn(3,3,requires_grad=True)
y = x**2
y.backward(gradient=torch.randn(3,3))
x = torch.ones(2,2,requires_grad=True)
y = x**2
out = (y*y*3).mean()
out.backward()
out1 = x.sum()
out1.backward()
x.grad.data.zero_()
out2 = x.sum()
out2.backward()
with torch.no_grad():
print((x**2).requires_grad)
x = torch.ones(1,requires_grad=True)
print(x.data)
print(x.data.requires_grad)
y = 2 * x
x.data *= 100
y.backward()
print(x.data)
print(x.grad)
并行计算
- 目的是提高效率,减少训练时间
- 涉及cuda的使用,GPU的调用,对于CPU就是进程的调用
常见的方法:
- 网络结构分布到不同不同的设备中
- 同一层的任务分布到不同设备中
- 不同数据分布到不同设备中
|
