一、flask实现gitlab推送企业微信消息
1.代码
# coding=utf-8
"""
    @Project :pachong-master
    @File    :gitlab_wechat.py
    @Author  :gaojs
    @Date    :2022/8/10 21:56
    @Blogs   : https://www.gaojs.com.cn
"""
from flask import Flask, request, json
import argparse
import requests

app = Flask(__name__)


@app.route('/webhook', methods=['POST'])
def webhook():
    # 请求参数
    params = request.json
    # 用户名
    user_name = params['user_name']
    # 提交类型
    object_kind = params['object_kind']
    # 总commits数
    total_commits_count = str(params['total_commits_count'])
    # 项目名称
    repository_name = params['repository']['name']
    # 分支
    ref = params['ref']
    # 发送内容
    content = user_name + ' ' + object_kind + ' 了 ' + total_commits_count + ' 个commits到 ' + repository_name + ' 仓库的 ' + ref + ' 分支 ;\n'
    # 引用形式列出提交的id
    for object in params['commits']:
        content = content + 'commitid是  [' + object['id'][0:8] + ']' + '(' + object['url'] + ')' + ' : ' + object['title'] + '\n'

    body = {
        "msgtype": "markdown",
        "markdown": {
            "content": content
        }
    }

    requests.request('POST', url, headers={'Content-Type': 'application/json'}, json=body)
    return 'OK'


if __name__ == '__main__':
    # 获取ArgumentParser对象
    parser = argparse.ArgumentParser()
    # 添加参数
    parser.add_argument('--wechatUrl', type=str)
    # args是一个命名空间
    url = args = parser.parse_args().wechatUrl
    if url is not None:
        # 可以接收webhook的地址和端口,可以指定GitLab地址 自定义端口
        app.run('0.0.0.0', 8007)
    print("启动参数 --wechatUrl 为空, 程序退出")
2.在gitlab服务器上执行脚本:
python3 gitlab_wechat.py --wechatUrl https://qyapi.weixin.qq.com/cgi-bin/webhook/send?key=2ae8c2ac-fb29-4160-a26f-a44494c63099

3.gitlab配置
gitlab上配置webhook格式如下:
webhook: http://{服务器地址}/webhook

4.提交代码—触发

二、dinglingdingling实现gitlab推送(网站偶尔会崩溃)
1.dinglingdingling首页
https://dinglingdingling.com/forwarders

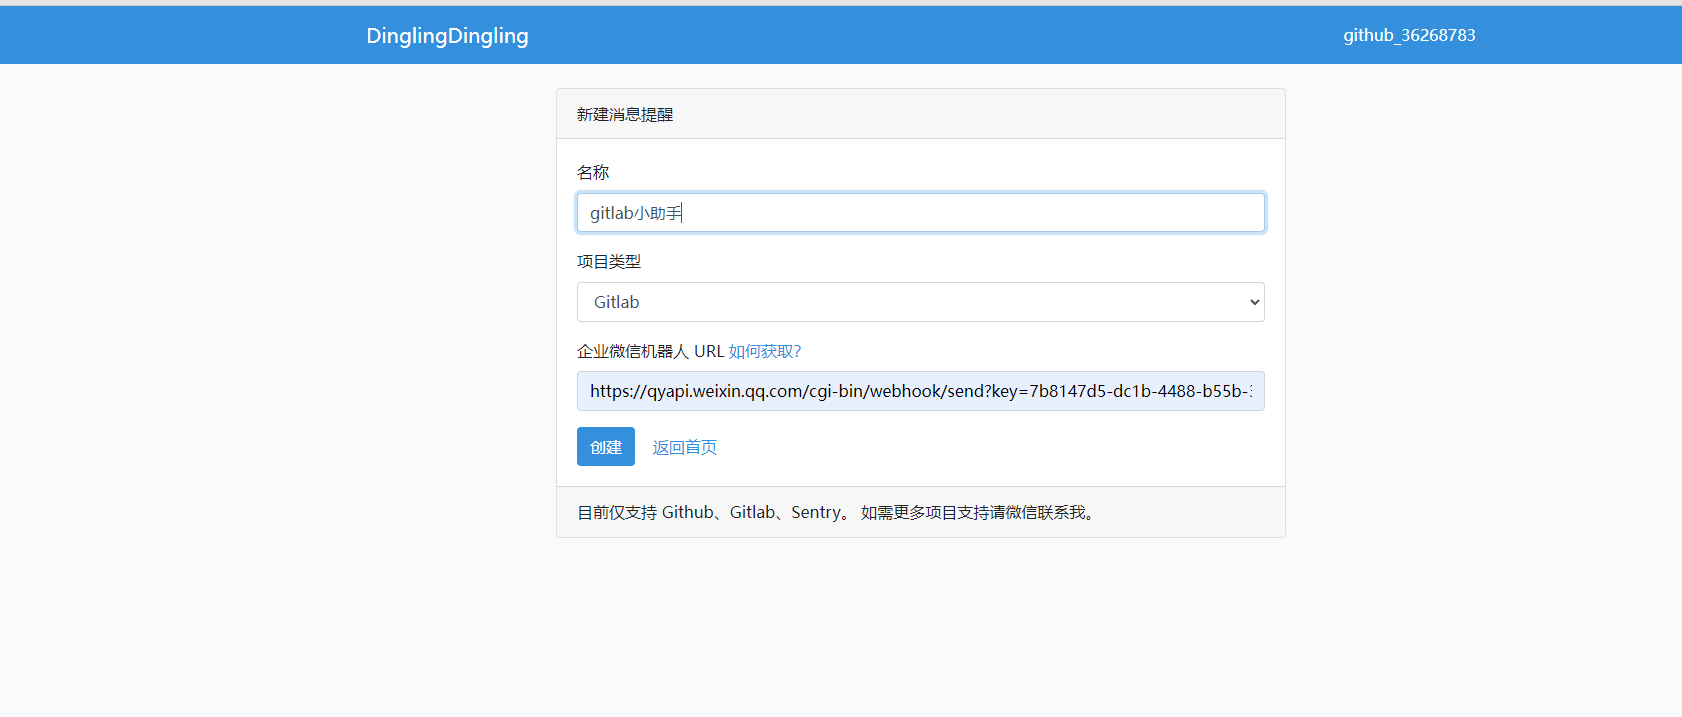
2.新建消息提醒
名称:随便写
项目类型:gitlab、github等,根据自己需求
企业微信机器人地址:https://qyapi.weixin.qq.com/cgi-bin/webhook/send?key=7b8147d5-dc1b-4488-xxxxxxxxxxxx
3.创建成功

4.配置gitlab
将上述产生的 Webhook URL配置在gitlabwebhook中即可


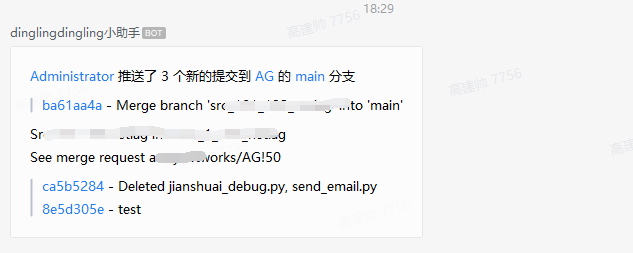
5.提交代码,接收消息提醒
三、github项目部署推送(我最中意的推送方式)

1.部署项目
项目地址:https://github.com/gaojianshuai/gitlab-bot

git clone https://github.com/gaojianshuai/gitlab-bot
2.配置环境变量
1.在服务器下main执行:
export WEBHOOK_URL_ARRAY=https://qyapi.weixin.qq.com/cgi-bin/webhook/send?key=ARGARREGAERGAERG45456
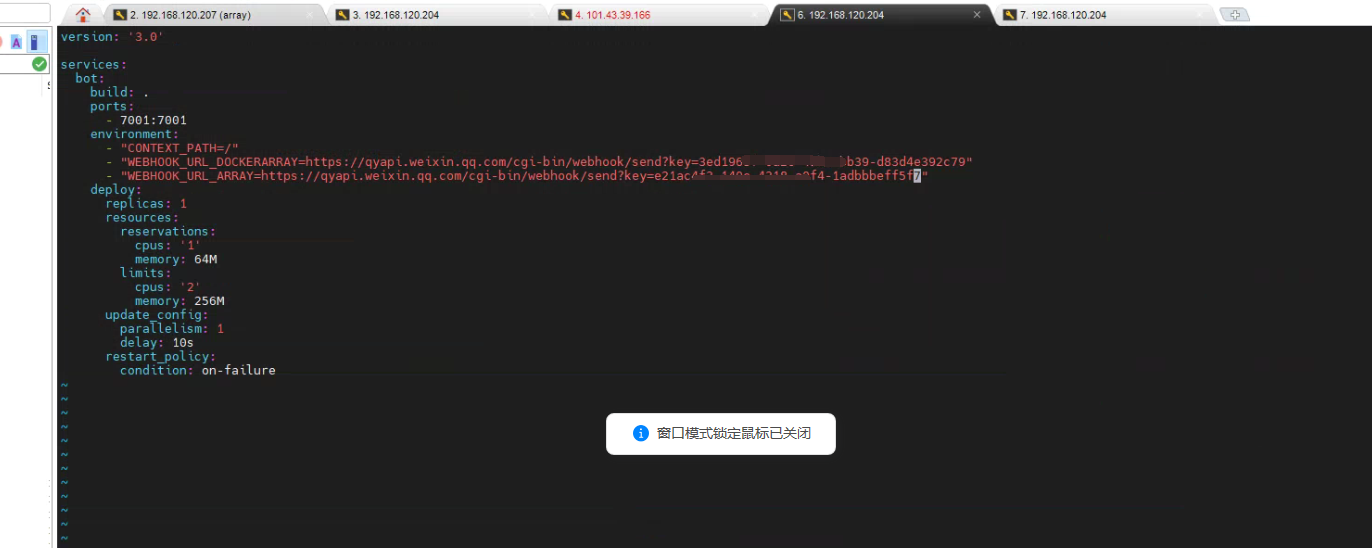
2.修改docker-compose.yml文件中的WEBHOOK_URL环境变量,添加企业微信机器人的webhook地址
如下图(我这里添加了俩个推送,可以添加多个,看自己需求)
3.安装docker-compose
apt install docker-compose
4.启动docker
docker-compose up -d

5.配置gitlab

6.推送结果
1.推送代码

2.流水线

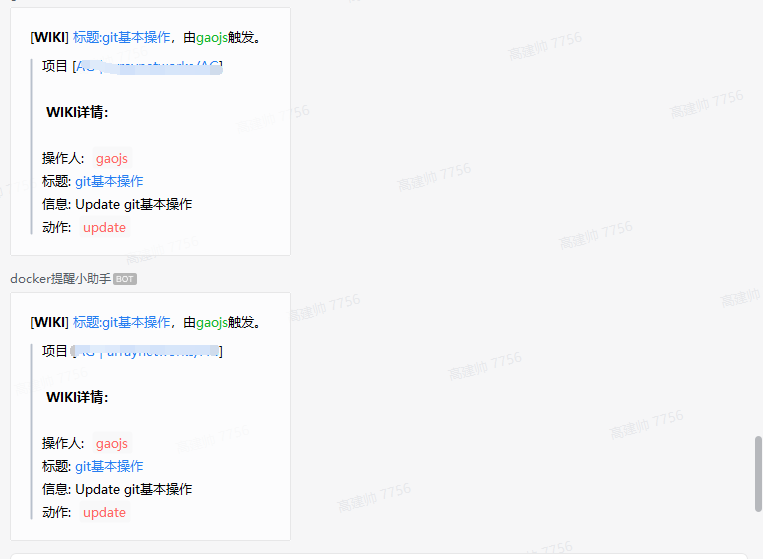
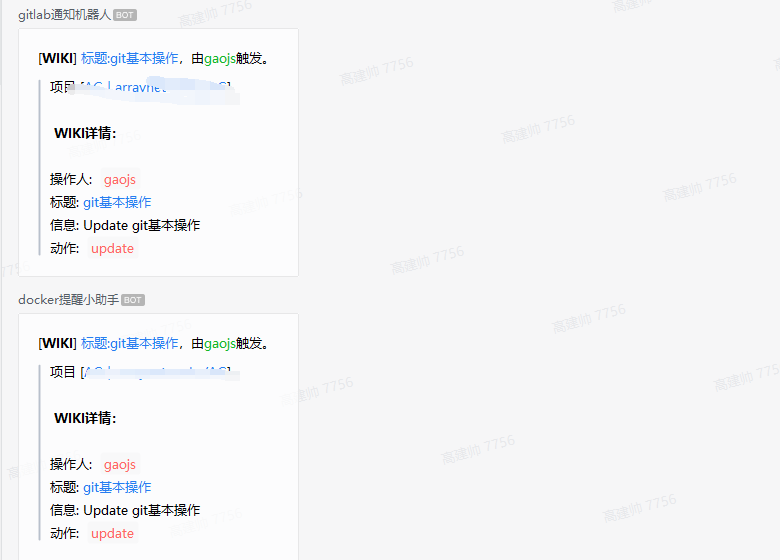
3.wiki操作
四、总结
github上无数开源项目,肯定有项目能帮到你,没事多逛逛github,fork之后看看源码。
