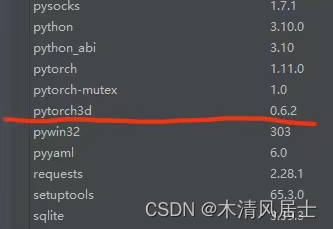
一、问题:
近期在入手三维重建中,发现很多项目程序都需要Pytorch3d库,其官网定义为:
PyTorch3D provides efficient, reusable components for 3D Computer Vision research with PyTorch.
可知Pytorch3d库可以提供多种应用于3D视觉处理的组件,其在ubuntu下安装较为简单,但win下稍繁琐,本贴是对个人安装方法的记录。
二、安装方法
安装要点:cuda、pytorch、NVIDIA CUB 版本的严格对应
安装所需链接:
- Pytorch3d 各版本:Pytorch3d Releases Download
- NVIDIA CUB 下载:NVIDIA/cub Download
安装前,首先要确定版本对应关系,本人的安装版本为:
CUDA Toolkit 11.3 + pytorch 1.11.0 + Visual Studio 2019 + Pytorch3d 0.6.2 + Python 3.10
1. 对于NVIDIA CUB, 其与CUDA Toolkit的版本关系如下图:
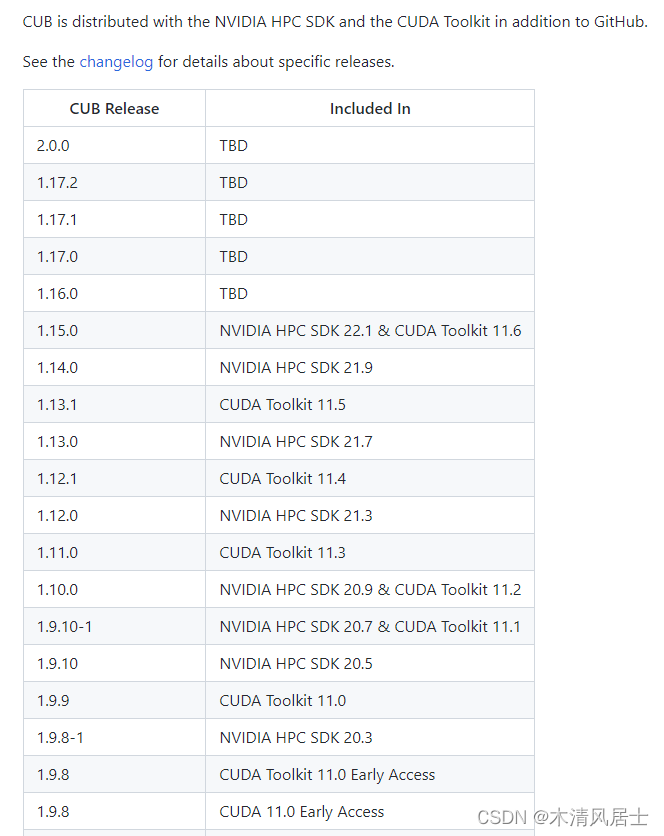
本人安装cuda版本为11.3,所以CUB选择了对应的1.11.0版本,下载解压后将其路径添加到环境变量中:

2. 安装依赖项:
conda install -c fvcore -c iopath -c conda-forge fvcore iopath
3. 选择Pytorch3d版本,每个版本的Pytorch3d下有注明其适用的pytorch版本,如下图:
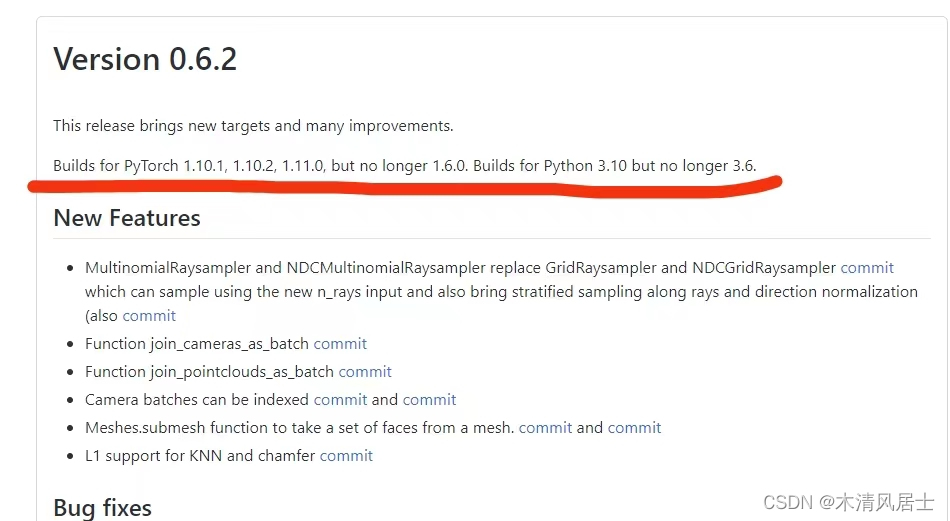
上图即pytorch3d 0.6.2版本适用的Pytorch版本为1.10.1, 1.10.2, 1.11.0,适用的Python为3.10, 但不再支持Pytorch1.6.0和Python3.6,其他版本的torch仍依据此下载对应的pytorch3d版本
4. 安装VS 2019后,打开如下图所示的"x64 Native Tools Command Prompt for VS 2019"终端,然后cd到pytorch3d解压后的目录路径里:

依次输入:
set DISTUTILS_USE_SDK=1
set PYTORCH3D_NO_NINJA=1
then, 修改 pytorch3d里setup.py文件的源码:将extra_compile_args = {“cxx”: [“-std=c++14”]} 修改为: extra_compile_args = {“cxx”: []};
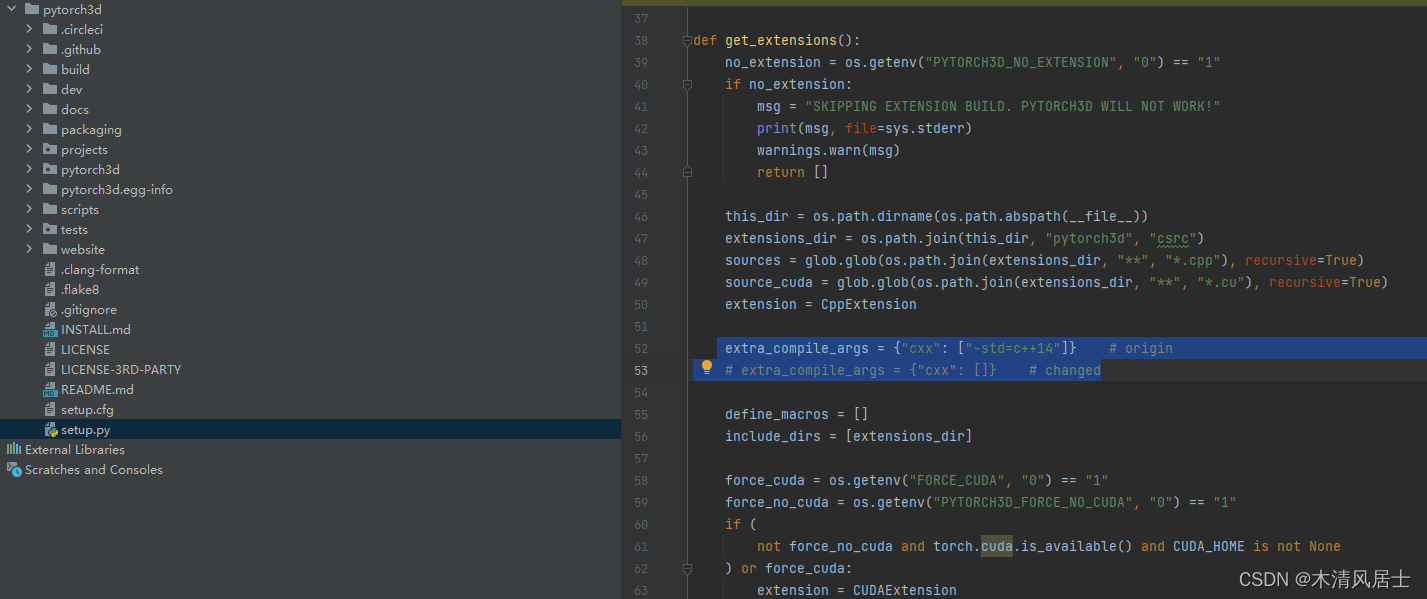
5. 最后在"x64 Native Tools Command Prompt for VS 2019"终端输入:
python setup.py install
安装过程本人电脑上大约5分钟左右,最后显示成功:
