Flask学习目录
、
入门
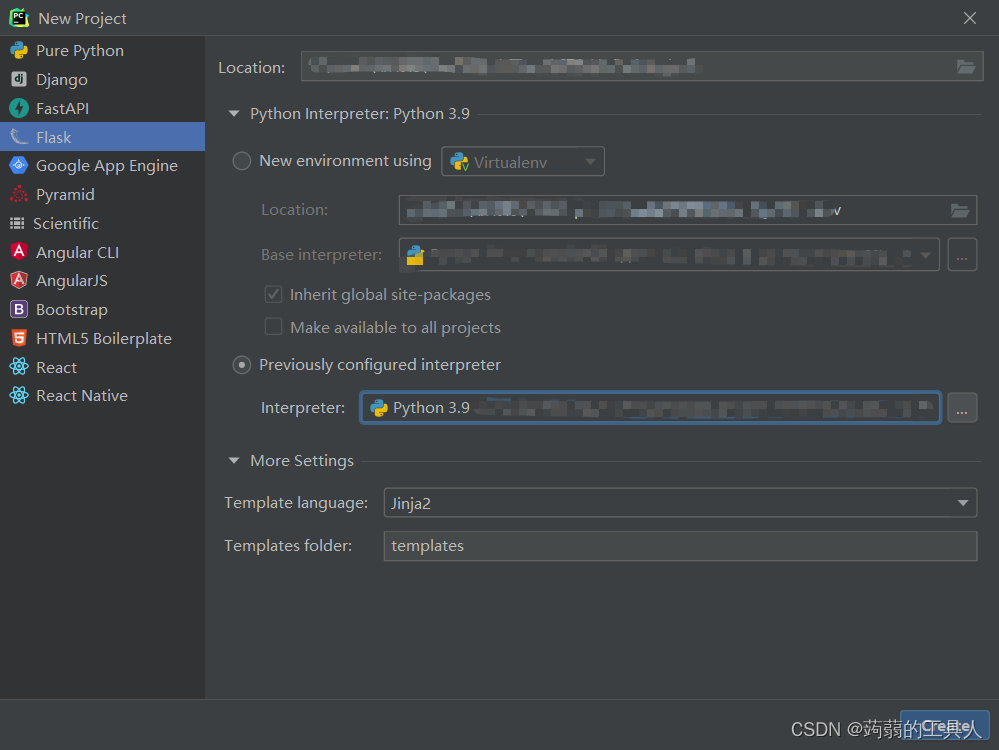
创建一个flask项目
使用pycharm
- template 放置html页面
- static 放置静态资源
Jinja
flask项目内默认配置Jinja库
渲染模板
# app.py
from flask import Flask, render_template

@app.route('/')
def index():
 	return render_template('index.html')
@app.route('/user/<name>')
def user(name):
 	return render_template('user.html', name=name)
# user.html
<h1>Hello, {{ name }}!</h1>
模板继承
创建base.html
<html>
<head>
 {% block head %}
 <title>{% block title %}{% endblock %} - My Application</title>
 {% endblock %}
</head>
<body>
 {% block body %}
 {% endblock %}
</body>
</html>
创建index.html
{% extends "base.html" %}
{% block title %}Index{% endblock %}
{% block body %}
<h1>Hello, World!</h1>
{% endblock %}
基础语法
{{}}包裹变量
{% %}包裹语句
路由
重定向
redirect‘index.html’)
url构建
url_for('index')
404
return render_template('page_not_found.html'), 404
基础
Bootstrap
在flask中使用flask_bootstrap
- 在app.py添加
bootstrap=flask_bootstrap.Bootstrap(app) - 在html顶部添加{%extends ‘bootstrap/base,html’%}
WTForms
#forms.py
from flask_wtf import FlaskForm
from wtforms import StringField, SubmitField, validators, PasswordField,EmailField
from wtforms.validators import data_required, Email, Regexp


class NameForm(FlaskForm):
    name = StringField("请输入你的姓名: ",[validators.Length(min=3)])
    password = PasswordField('密码', [
        validators.DataRequired(message="密码未输入"),
    ])
    confirm = PasswordField('确认密码',[validators.EqualTo('password', message='两次密码不一致')])
    # email = EmailField("邮箱", [validators.Email(message="邮箱格式不正确")])
    email = StringField("邮箱",[validators.Regexp(r'/^.*\.com$/',message="邮箱格式不正确")])
    submit = SubmitField('提交')
<!-- html -->
{{ wtf.quick_form(form) }}
# wtf表单必须用秘钥
app.config["SECRET_KEY"] = "hello"
form = forms.NameForm();
	#点击了提交按钮
    if form.validate_on_submit():
消息闪现
<!-- html -->
{% with messages = get_flashed_messages() %}
  {% if messages %}
    <ul class=flashes>
    {% for message in messages %}
      <li>{{ message }}</li>
    {% endfor %}
    </ul>
  {% endif %}
{% endwith %}
{% block body %}{% endblock %}
flash('xxxxxx')
SQLAlchemy
配置
#config.py
basedir = os.path.abspath(os.path.dirname(__file__))
app = Flask(__name__)
app.config['SQLALCHEMY_DATABASE_URI'] =\
 'sqlite:///' + os.path.join(basedir, 'data.sqlite')
app.config['SQLALCHEMY_TRACK_MODIFICATIONS'] = False
db = SQLAlchemy(app)
常用语法
db.create_all()将寻找所有db.Model 的子类,然后在数据库中创建对应的表db.drop_all()删除所有表db.session.add()参数是一个class(db.Model)的对象 增加或修改db.session.commit()提交到数据库db.session.delete()删除Role.query.all()查询Role.query.filter_by(role=user_role)有限制条件的查询,只支持=Role.query.filter(Role.name==user_role.name)支持>==<

启动shell
在Terminal终端输入
flask shell
flask-mail
#app.py
from flask import Flask
from flask_mail import Message,Mail
app = Flask(__name__)
app.config.update(
    MAIL_SERVER='smtp.qq.com',
    MAIL_USE_SSL=True,
    # 25/465 普通/加密
    MAIL_PORT=465,
    MAIL_USERNAME='9@qq.com',
    MAIL_PASSWORD='在qq邮箱获取验证码',

)
mail = Mail(app)

@app.route('/')
def hello_world():  # put application's code here
    msg = Message('title is hello',
                  sender='9@qq.com',
                  recipients=['9@qq.com']
                  )
    # body为txt格式 / html   两作用相同
    msg.body = 'testing'
    # msg.html = '<div><h1>how are you</h1></div>'
    mail.send(msg)
    return 'Hello World!'


if __name__ == '__main__':
    app.run()
Blueprint
当路由非常多的时候,可以使用蓝图管理。 Blueprint是flask内置的一个功能。
#app.py
from user import bp as user_page
app.register_blueprint(user_page)
#user.py
from flask import Blueprint, render_template, request, flash

bp = Blueprint('user', __name__, url_prefix='/user')


@bp.route('/', methods=['GET', 'POST'])
def index():
    print(request)
    if request.method == 'POST':
        flash('添加成功')
    return render_template("user.html")


@bp.route('/add')
def add():
    return render_template('add.html')
配置虚拟变量
当一些配置比如密码、秘钥等不适合在程序里,应当从虚拟环境中配置读取。
(venv) $ set PASSWORD=‘abcdefg’
app.config['SECRET_KEY']=os.getenv('PASSWORD')