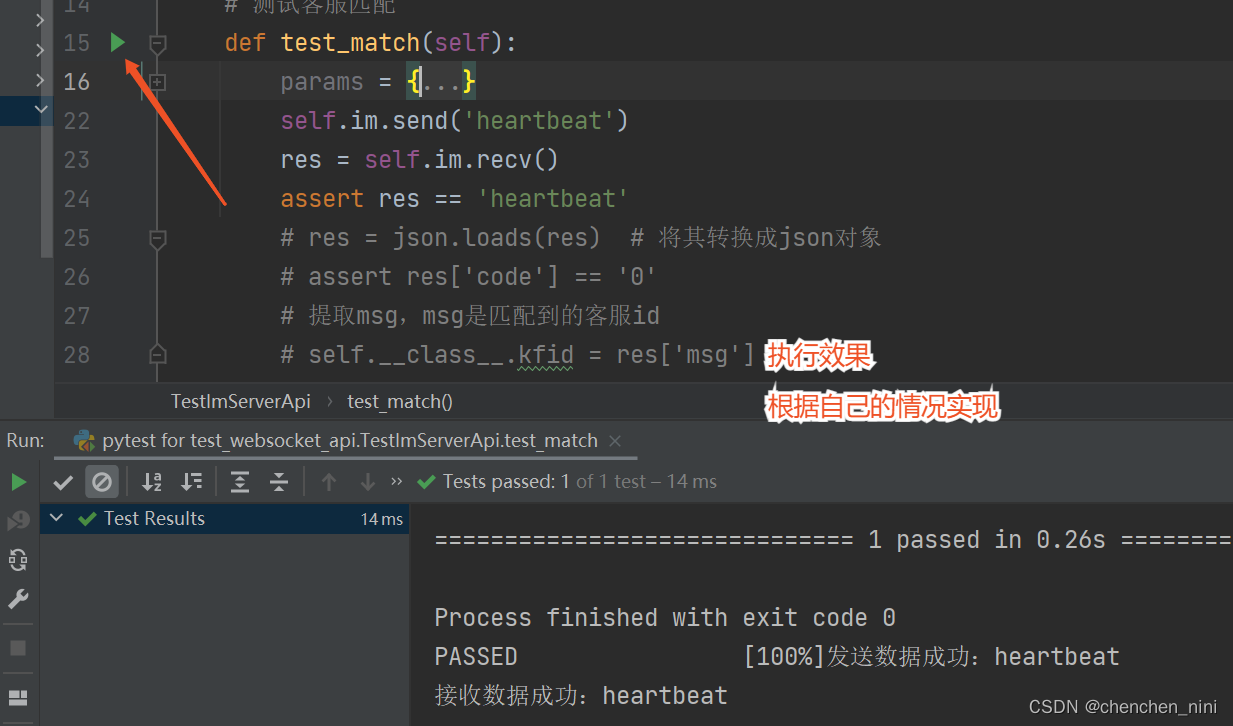
参考文章:websocket接口自动化集成pytest测试框架
对比需要学习:轮询、长轮询、websocket? 三者关系?
1、工作中遇到的情况
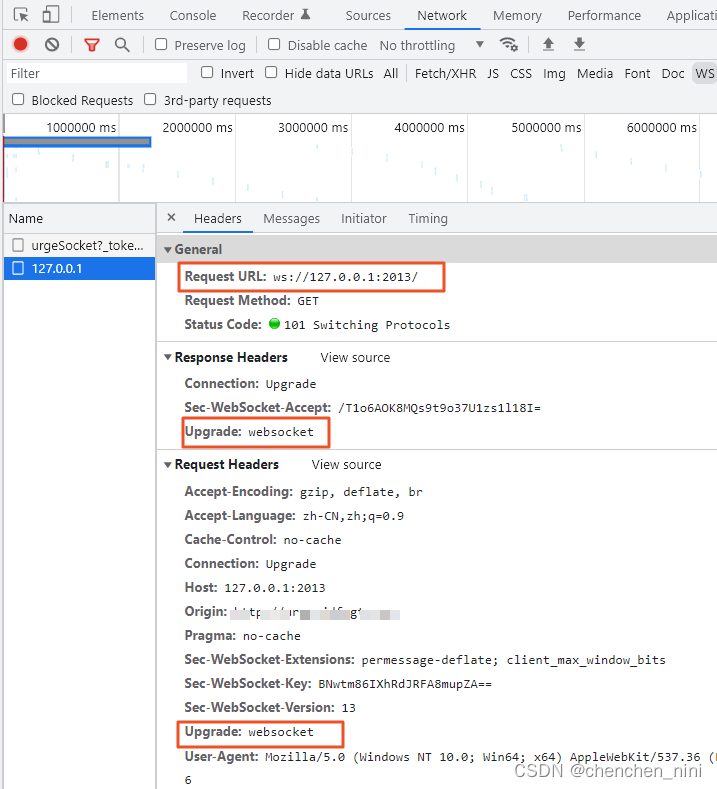
F12功能看到的数据
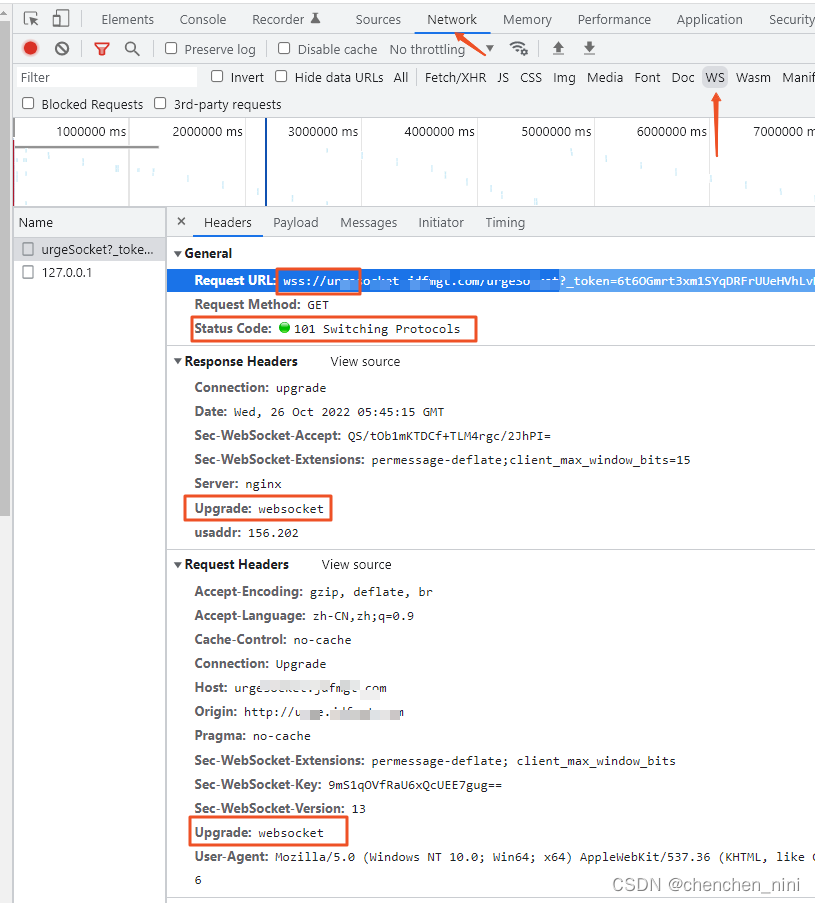
?
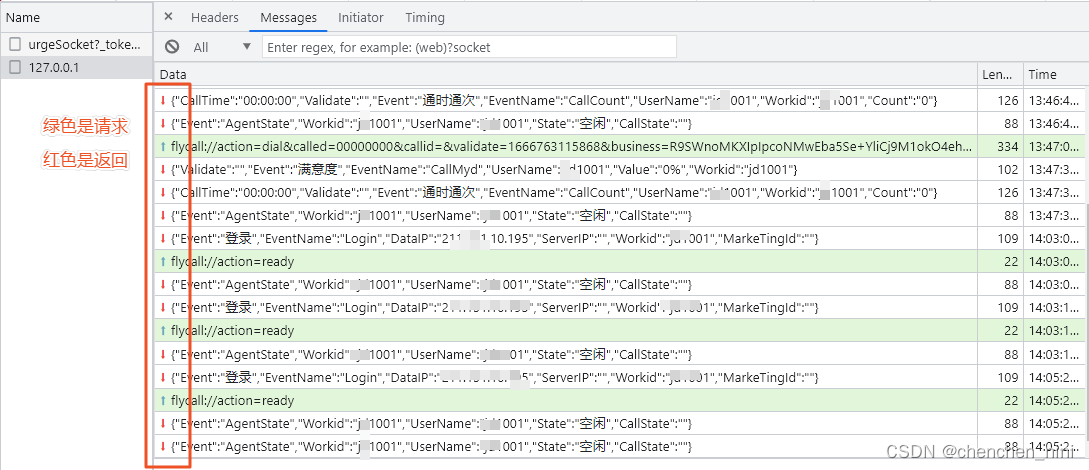 ??
??
2、python中操作ws
(1)websocket包
安装
pip install websocket -i https://pypi.douban.com/simple/
参考文章:你真的了解WebSocket吗? - 武沛齐 - 博客园
参考视频:08 python fullstack s9day131 websocket原理剖析_哔哩哔哩_bilibili
非常详细,就是照抄学习
(2)flask-websocket
参考文章:Flask教程(十九)SocketIO - 迷途小书童的Note迷途小书童的Note
参考视频:Flask Web开发教程(十九)SocketIO_哔哩哔哩_bilibili
代码:index.html
<!DOCTYPE html>
<html lang="en">
<head>
    <meta charset="UTF-8">
    <title>SocketIO Demo</title>
    <script type="text/javascript" src="//cdn.bootcss.com/jquery/3.1.1/jquery.min.js"></script>
<!--    <script type="text/javascript" src="//cdn.bootcss.com/socket.io/1.5.1/socket.io.min.js"></script>-->
    <script type="text/javascript" src="//cdnjs.cloudflare.com/ajax/libs/socket.io/4.5.0/socket.io.js"></script>
</head>
<body>

<h2>Demo of SocketIO</h2>
<div id="t"></div>
<script>
$(document).ready(function () {
    namespace = '/dcenter';
    var socket = io.connect(location.protocol + '//' + document.domain + ':' + location.port + namespace);
    socket.on('dcenter', function (res) {
        var t = res.data;
        if (t) {
            $("#t").append(t).append('<br/>');
        }

    });
});
</script>
</body>
</html>
?fw.py
# -*- coding:utf-8 -*-
"""
基于flask开发websocket服务
使用的包是flask-socketio
"""

from flask import Flask, render_template
from flask_socketio import SocketIO, emit

app = Flask(__name__)
app.config['SECRET_KEY'] = 'secret_key'

socketio = SocketIO()
socketio.init_app(app, cors_allowed_origins='*')

name_space = '/dcenter'


@app.route('/')
def index():
    return render_template('index1.html')


@app.route('/push')
def push_once():
    event_name = 'dcenter'
    broadcasted_data = {'data': "test message!"}
    socketio.emit(event_name, broadcasted_data, broadcast=False, namespace=name_space)
    return 'done!'


@socketio.on('connect', namespace=name_space)
def connected_msg():
    print('client connected.')


@socketio.on('disconnect', namespace=name_space)
def disconnect_msg():
    print('client disconnected.')


@socketio.on('my_event', namespace=name_space)
def mtest_message(message):
    print(message)
    emit('my_response',
         {'data': message['data'], 'count': 1})


if __name__ == '__main__':
    socketio.run(app, host='127.0.0.1', port=5000, debug=True)
安装
python39 -m pip install --upgrade Flask-SocketIO? ? ? ? ? ? ? ? 升级到了最高版本
python39 -m pip install --upgrade python-socketio==4.6.0? ?升级到指定版本
python39 -m pip install python-engineio==3.13.2? ? ? ? ? ? ? ? ? 安装指定版本
实际操作版本介绍:
eventlet? ? ? ? ? ? ? ? ? ? ? ?0.33.1
python-engineio ? ? ? ? ? 4.3.4
python-socketio ? ? ? ? ? 5.7.2
Flask? ? ? ? ? ? ? ? ? ? ? ? ? ?2.2.2
Flask-SocketIO ? ? ? ? ? 5.3.1
Python? ? ? ? ? ? ? ? ? ? ? ? 3.9.4
?代码与参考文章一致
重点:!!!!!!!!!!!!!!!!!!!!!!!!
下图问题原因: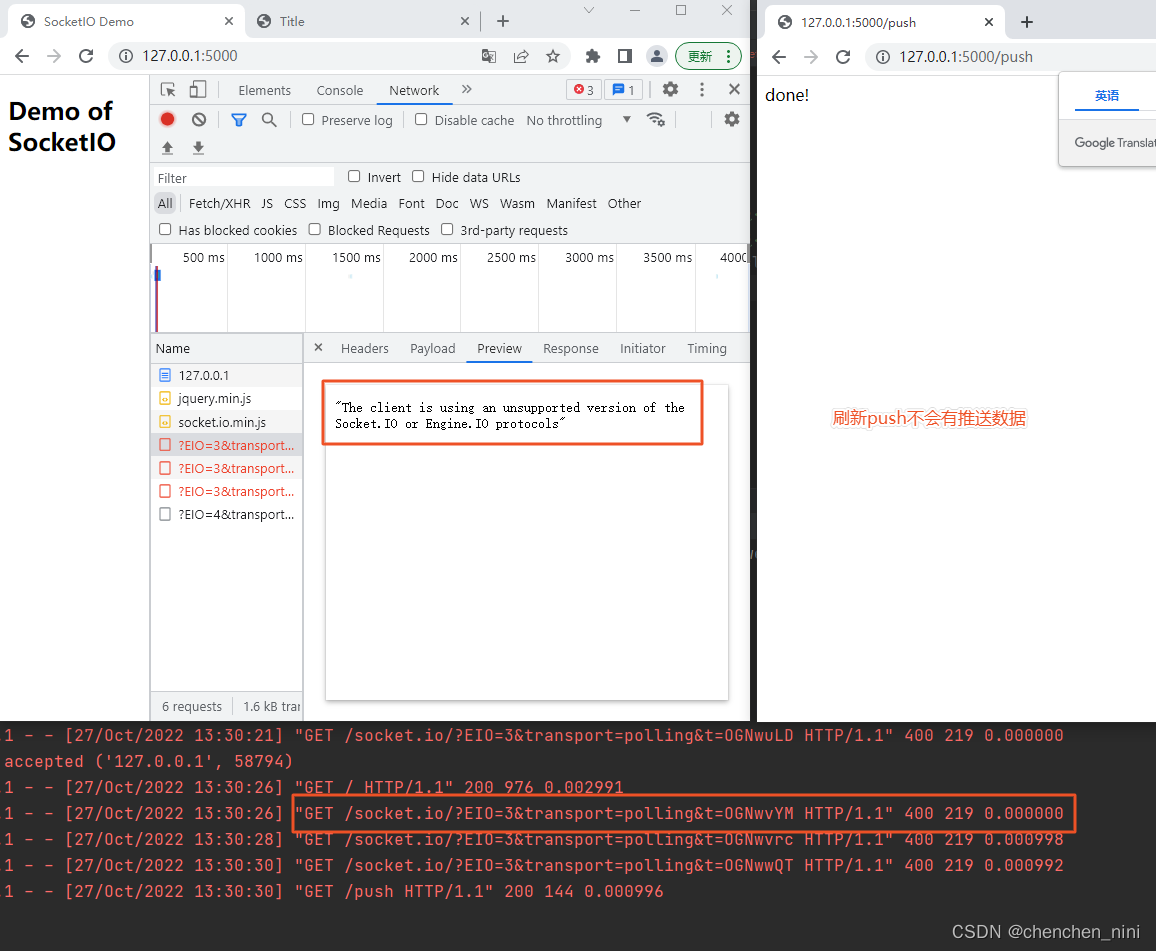
The client is using an unsupported version of the Socket.IO or Engine.IO protocols
版本不匹配的原因,下面的链接找到的答案:方式就是根据socket.io版本降低,或者升高socket.io的版本
在python-socketio的官网有说明:https://pypi.org/project/python-socketio/
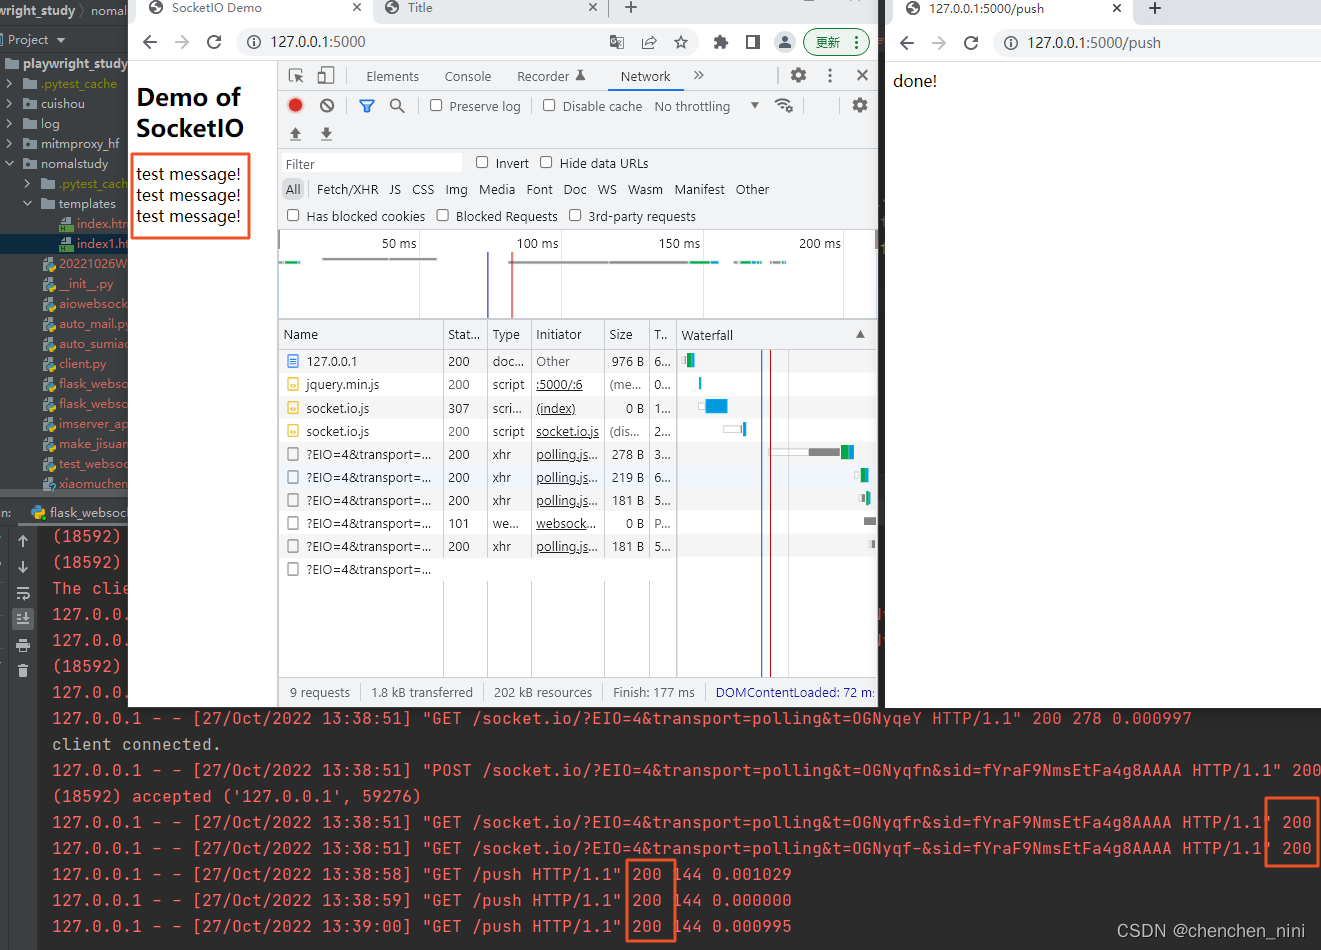
?根据我安装的python-socketio的版本升高js的socket.io版本
//cdnjs.cloudflare.com/ajax/libs/socket.io/4.5.0/socket.io.js

3、ws接口mock
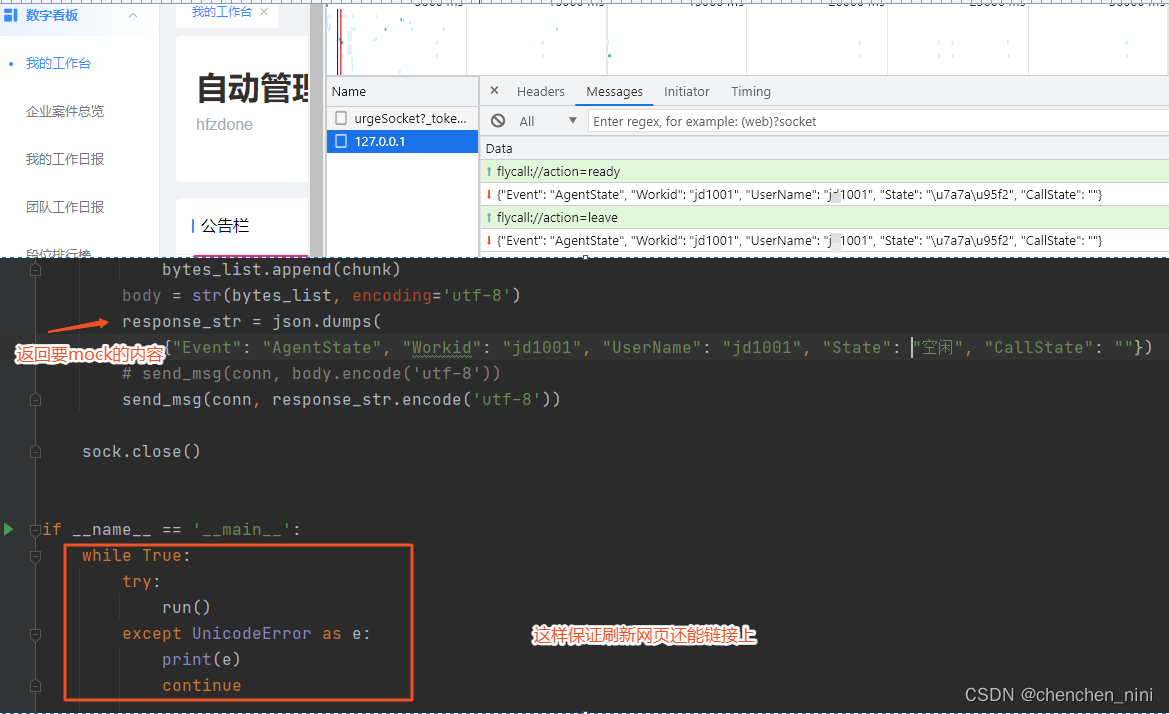
实际使用操作一波
4、ws接口测试
安装
pip install websocket -i https://pypi.douban.com/simple/
pip install websocket-client
clinet.py
# -*- coding:utf-8 -*-

class websocketclient:
    def __init__(self):
        self.host = 'wss://url'

    def send(self, params):
        try:
            self.ws.send(params)
            print(f'发送数据成功:{params}')
        except Exception as e:
            print(f'发送数据{params}失败')

    def recv(self):
        try:
            res = self.ws.recv()
            print(f'接收数据成功:{res}')
            return res
        except Exception as e:
            print(f'接收数据{res}失败')
            return ''
imserver_api.py
# -*- coding:utf-8 -*-

import websocket
from nomalstudy.client import websocketclient


class ImServerApi(websocketclient):
    def __init__(self, timeout=5):
        super(ImServerApi, self).__init__()
        self.url = f'{self.host}/urgeSocket?_token=6t6OGmrt3xm1SYqDRFrUUeHVhLvHvMVKJQ3UBxaQ4kK9RMde&_appType=receive'
        self.ws = websocket.create_connection(self.url, timeout=timeout)
test_websocket_api.py
# -*- coding:utf-8 -*-

import json
import pytest
from nomalstudy.imserver_api import ImServerApi


class TestImServerApi:
    kfid = ''  # 定义客服id,全局变量作为各个测试用例的关联数据

    def setup_class(self):
        self.im = ImServerApi()  # 创建一个websocket协议的接口对象

    # 测试客服匹配
    def test_match(self):
        params = {
            "msgId": "111",
            "type": "match",
            "from": "shamo",
            "to": "system"
        }
        self.im.send('heartbeat')
        res = self.im.recv()
        assert res == 'heartbeat'
        # res = json.loads(res)  # 将其转换成json对象
        # assert res['code'] == '0'
        # 提取msg,msg是匹配到的客服id
        # self.__class__.kfid = res['msg']

    # 测试给客服发送正常消息
    def test_message(self):
        params = {
            "msgId": "111",
            "type": "normal",
            "from": "admin",
            "to": f"{self.__class__.kfid}",
            "msg": "你好"
        }
        self.im.send(json.dumps(params))
        res = self.im.recv()
        res = json.loads(res)  # 将其转换成json对象
        pytest.assume(res['code'] == '0', f'期望值是0,实际结果是{res["code"]}')
        pytest.assume(res['msg'] == 'push success', f'期望值是0,实际结果是{res["msg"]}')
        # 再次接收客服发来的数据
        res = self.im.recv()
        res = json.loads(res)  # 将其转换成json对象
        pytest.assume(res['code'] == '0', f'期望值是0,实际结果是{res["code"]}')
        pytest.assume(res['msg'] == '同学,你好,非常高兴为你服务,有什么需要我帮忙的呢?', f'期望值是0,实际结果是{res["msg"]}')

    # 测试发送数据时消息是空的
    def test_message_msgisnull(self):
        params = {
            "msgId": "111",
            "type": "normal",
            "from": "admin",
            "to": f"{self.kfid}",
            "msg": ""
        }
        self.im.send(json.dumps(params))
        res = self.im.recv()
        res = json.loads(res)  # 将其转换成json对象
        # 断言系统推送消息时对于消息的判断
        pytest.assume(res['code'] == '1', f'期望值是1,实际结果是{res["code"]}')
        pytest.assume(res['msg'] == '消息内容为空', f'期望值是0,实际结果是{res["msg"]}')
