Django
1.项目的创建
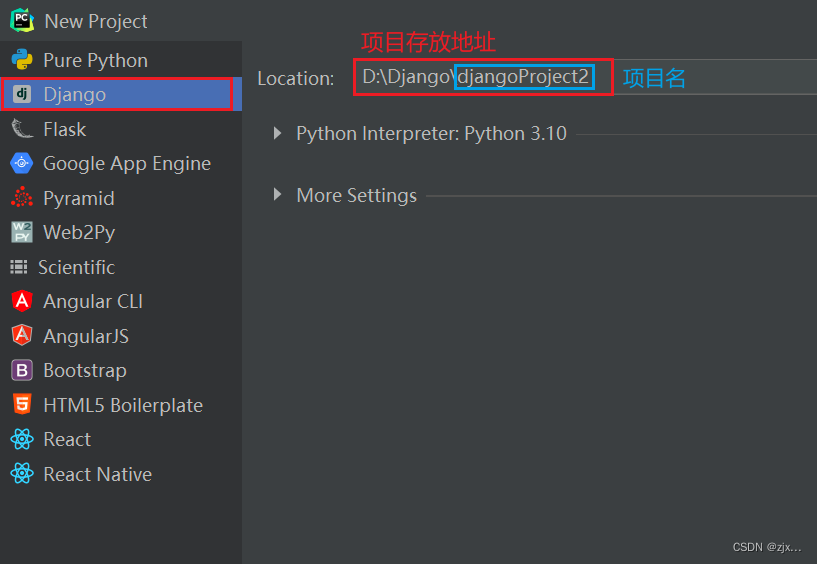
创建项目:
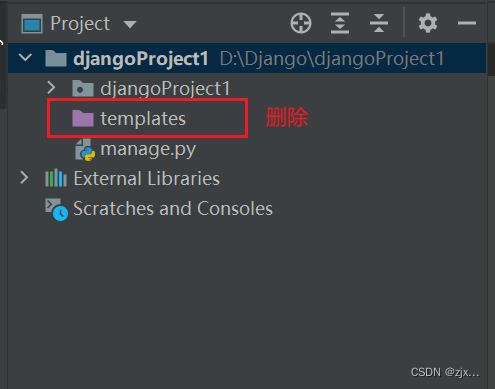
删除一些内容:
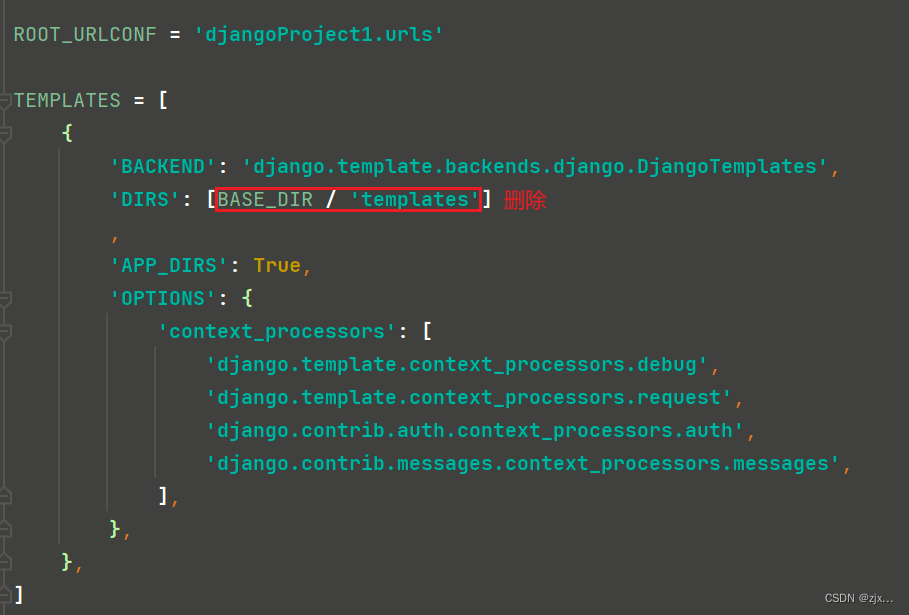
settings.py中:
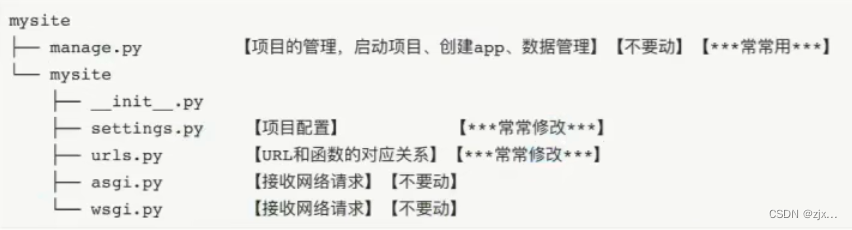
2.默认项目文件的介绍
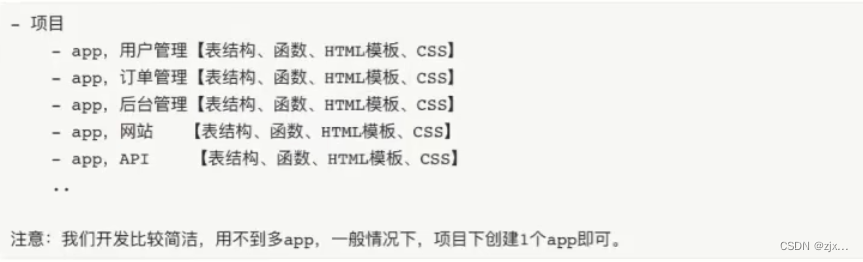
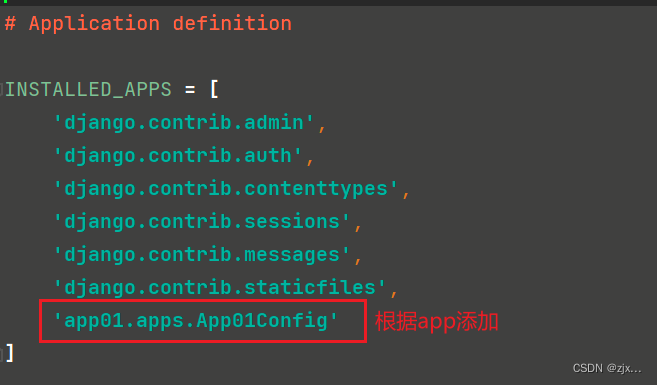
3.APP
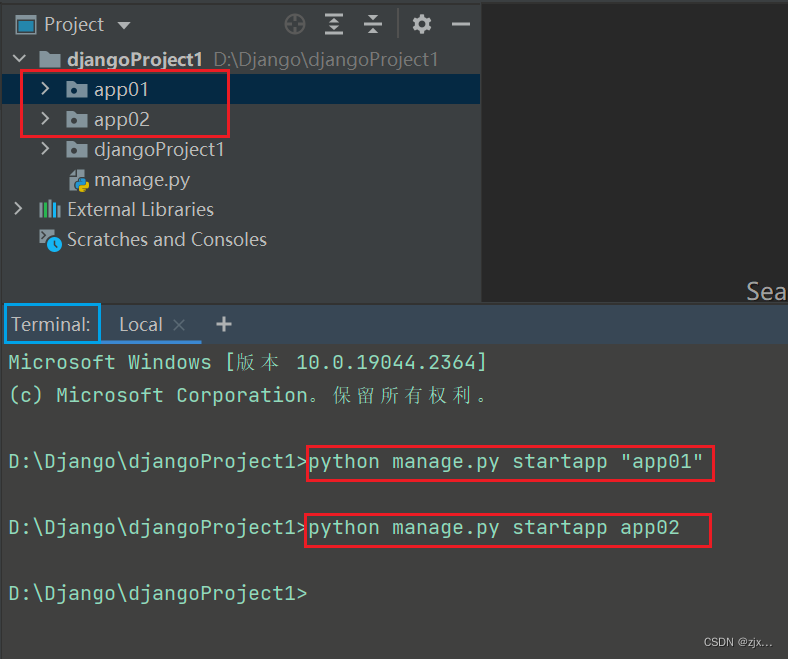
创建APP:
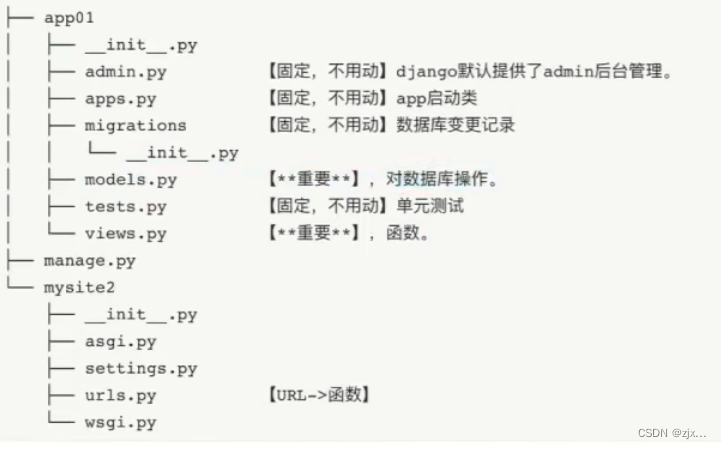
APP文件介绍:
4.快速上手
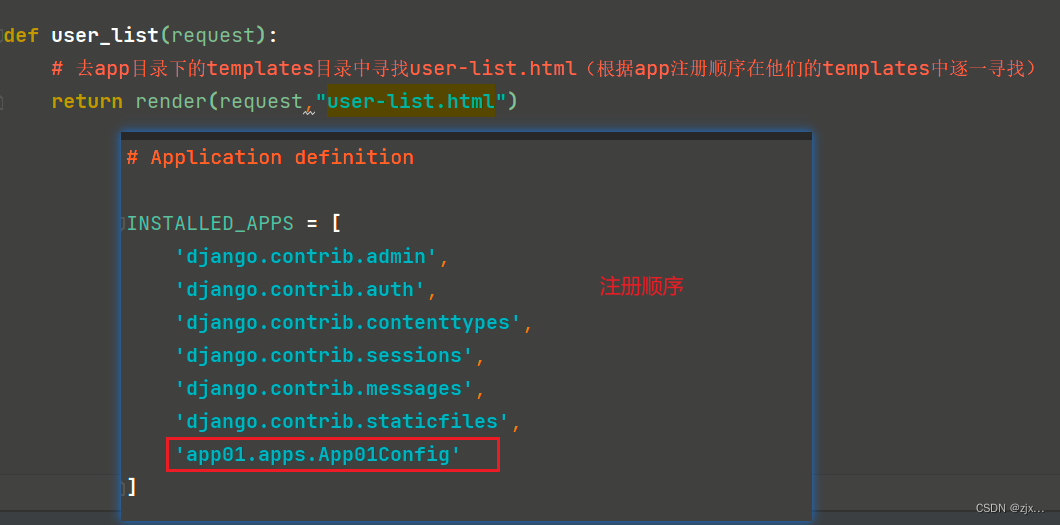
APP注册:
在app中找到apps.py:

在django的项目setting.py中找到:
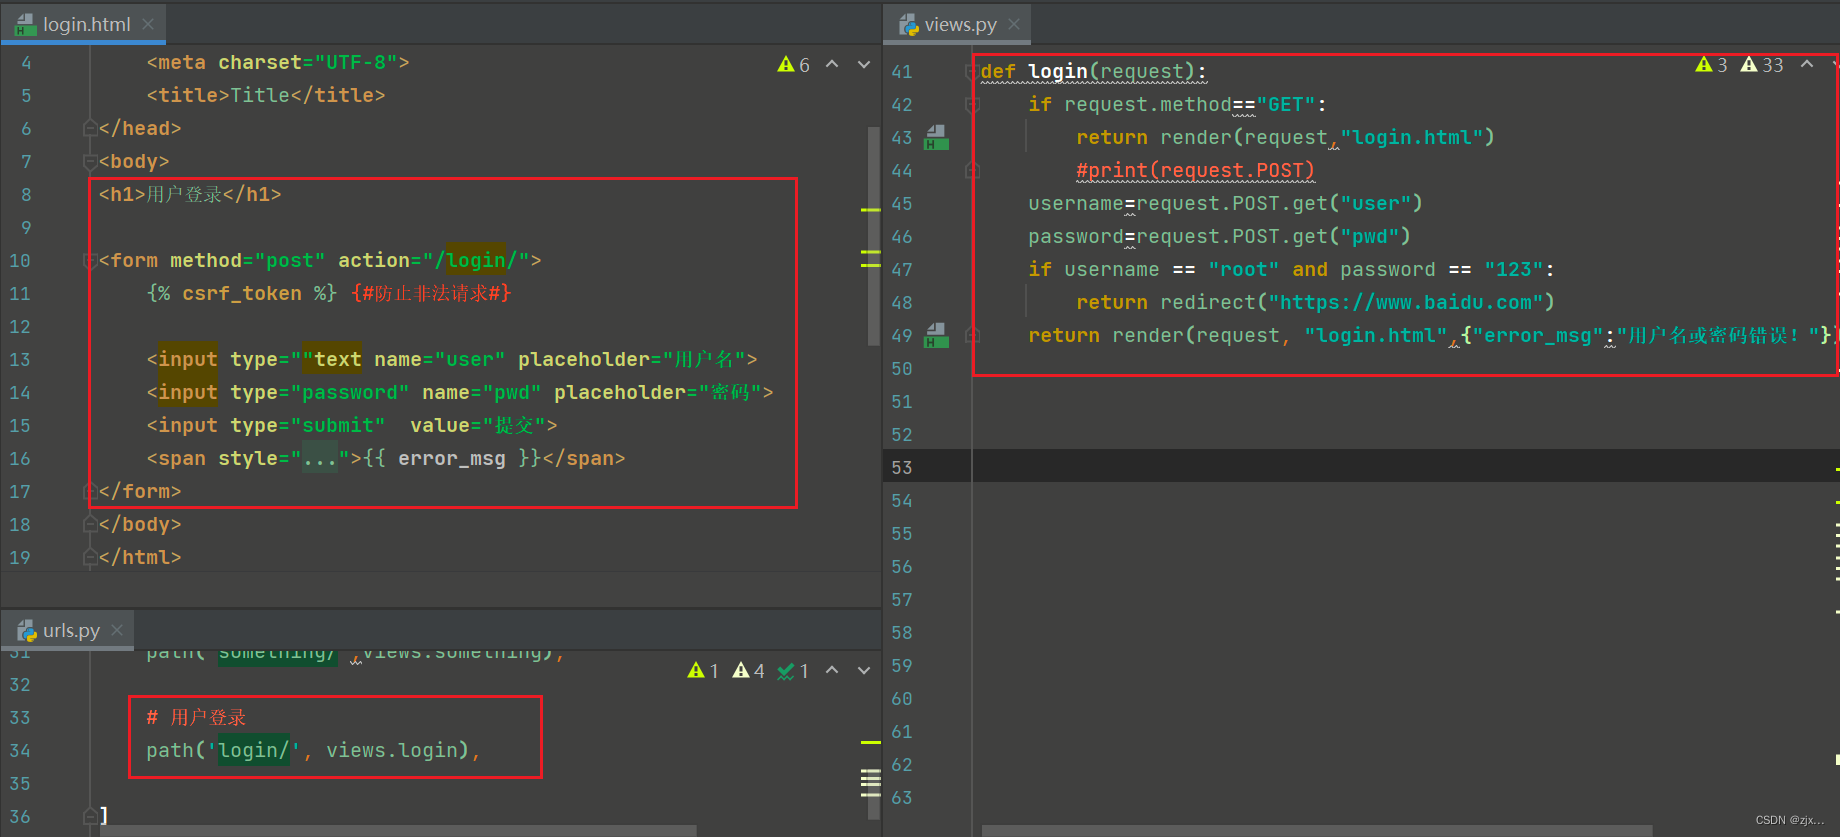
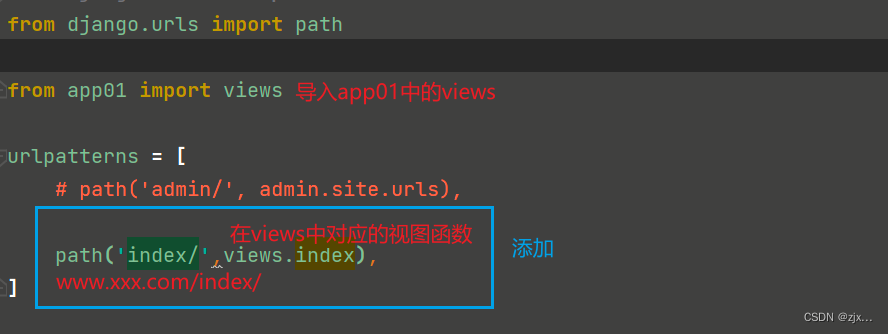
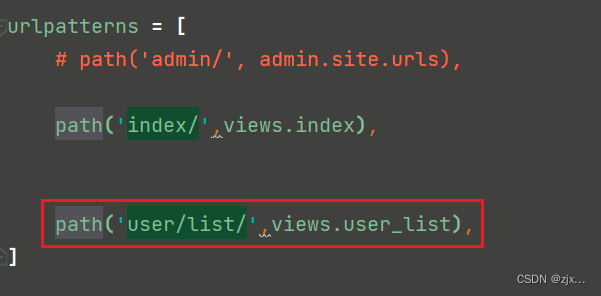
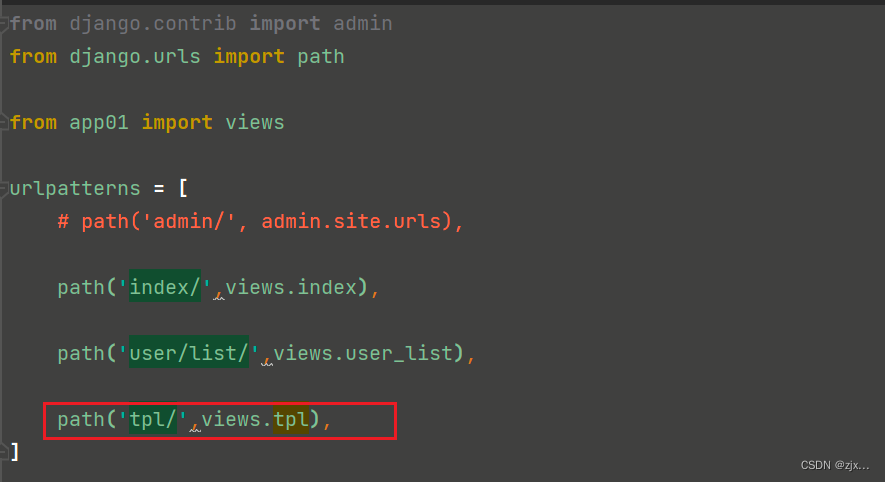
编写URL与视图函数的对应关系:
在django的项目urls.py中:
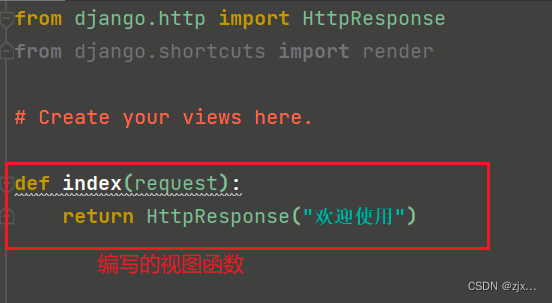
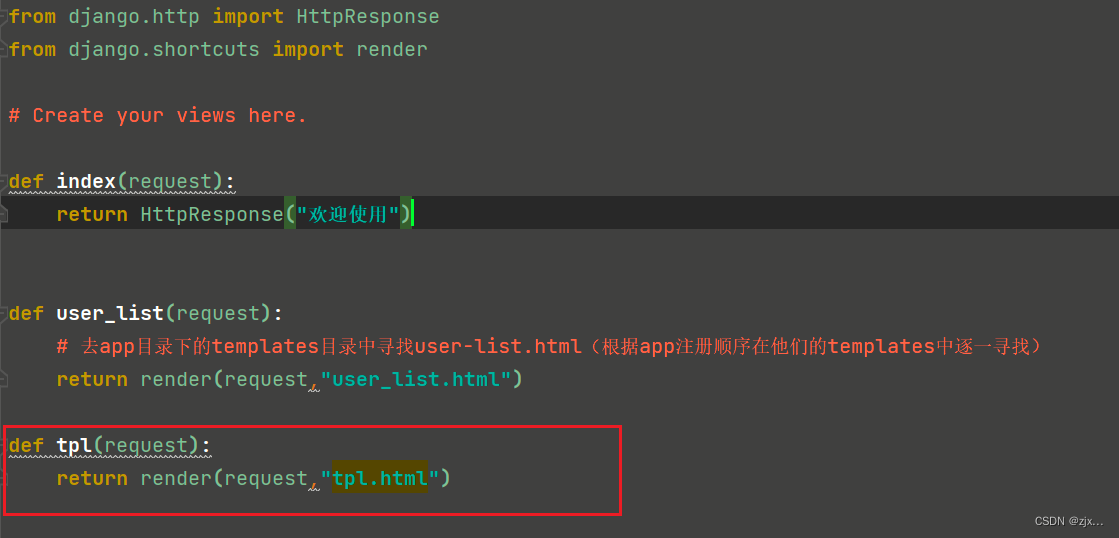
编写视图函数:
在app中找到views.py
启动Django项目:
命令行启动:
D:\Django\djangoProject1>python manage.py runserver
利用pycharm启动:
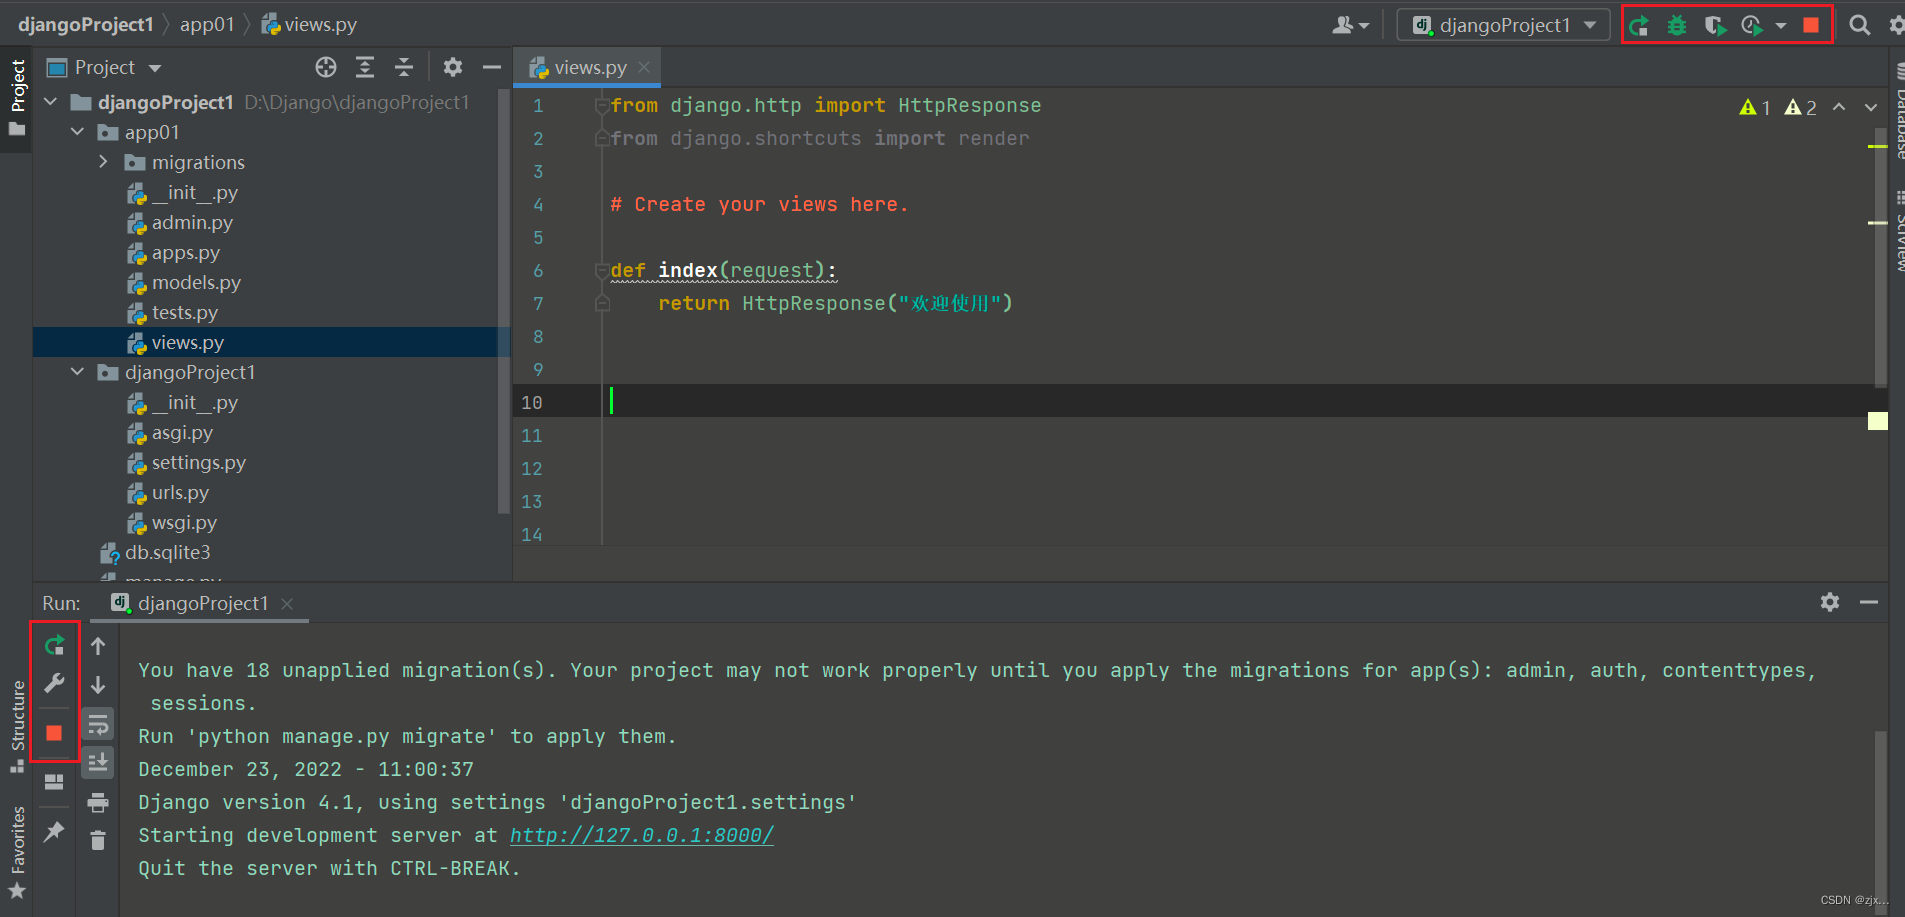
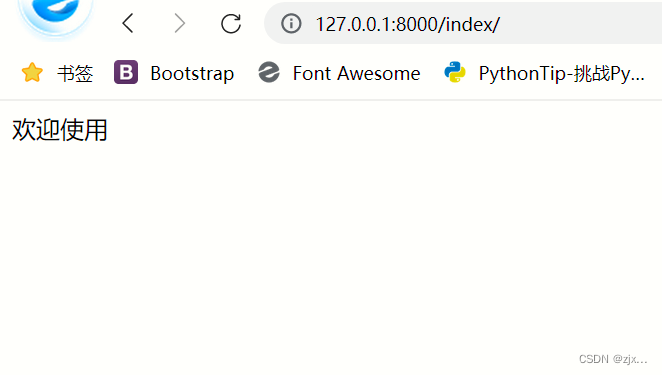
测试:
Templates模板:
添加url:
views.py中添加视图函数:
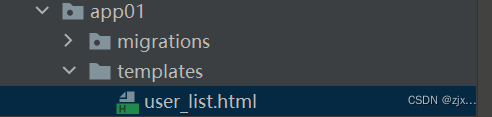
HTML文件:templates需要手动添加
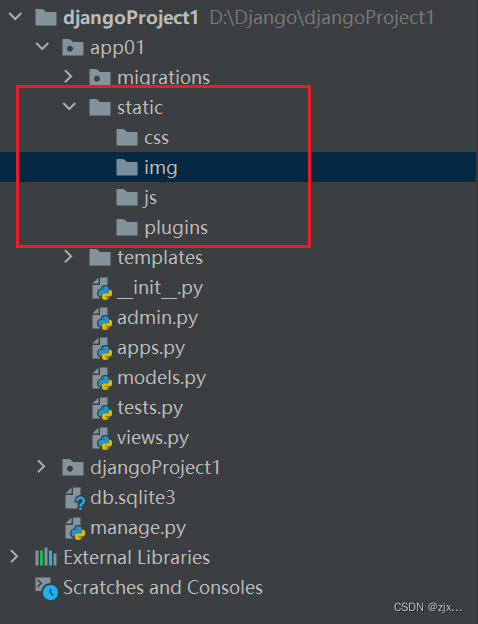
静态文件:
在app下创建static文件夹其中引入css,js,img,plugins
使用:

模板的语法:
本质上:在HTML中写一些占位符,由数据对这些占位符进行替换和处理。
实例:
1.创建url(urls.py中)
2.定义视图函数(views.py中)
3.模板语句
传递参数:
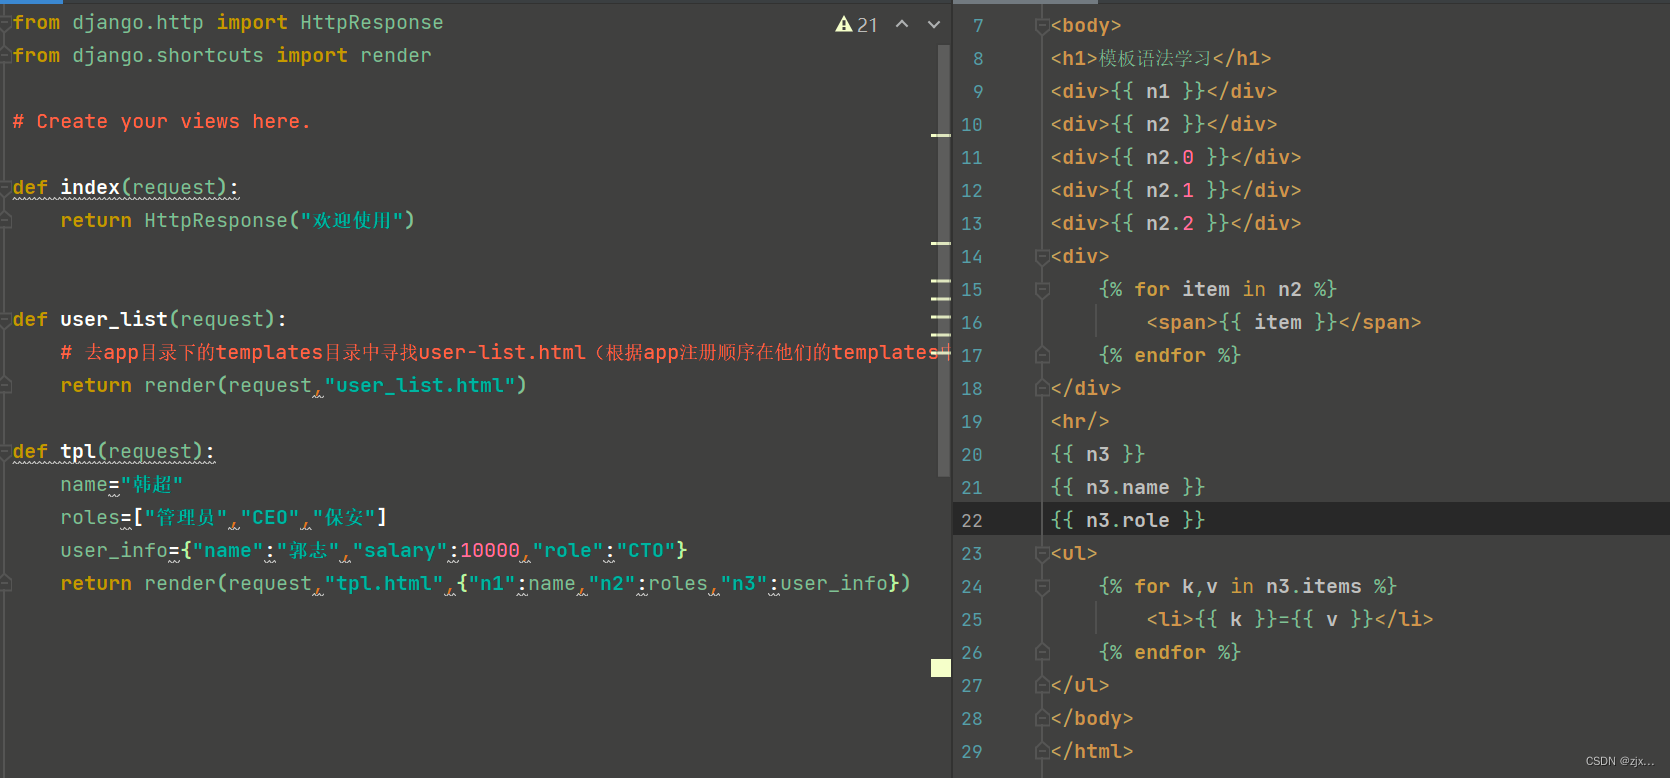
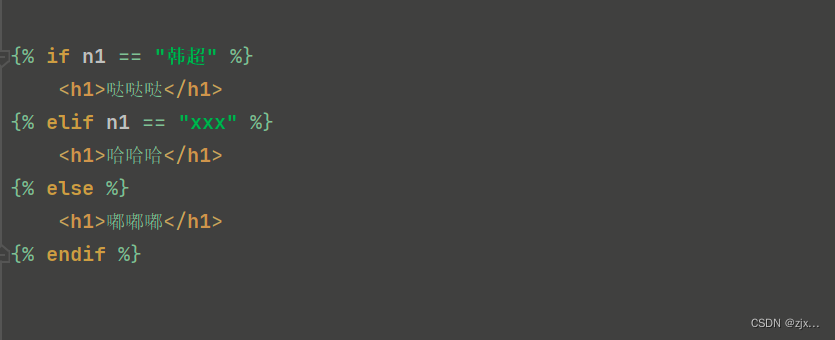
条件语句:
处理过程:
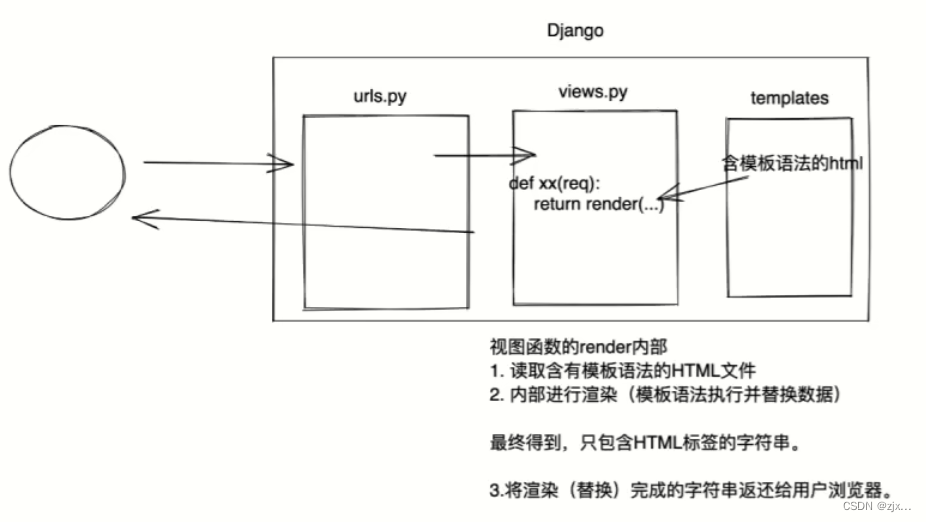
请求与响应
def something(request):
# request是一个对象,封装了用户发送过来的所有请求相关数据
# 1.获取请求方式 GET/POST
print(request.method)
# 2.在url上传递一些值 http://127.0.0.1:8000/something/?n1=2022&n2=1223
print(request.GET) #表面
# 3.在请求体中提交的数据
print(request.POST)
# 4.[响应]return HttpResponse("返回内容") 将字符串内容返回给请求者
return HttpResponse("返回内容")
# 5.[响应]读取HTML中的内容+渲染(替换)――>字符串,返还给用户浏览器
return render(request,"something.html")
# 6.[响应]让浏览器重定向到其他页面
return redirect ("https://www.baidu.com")
# 关于重定向:浏览器发送请求到Django,Django将另一个网页信息返回给浏览器,浏览器重新访问另一个网页。
测试:用户登录