ǰ��ʱ�������йش��������ʵѵ,��ʦҪ��ÿ���ύһ�ű��˰������Ƭ����¼���Ž����ϵͳ,�ҵ�ʱ��:�ø���,һ����Ƭ�Ϳ���Ү;������ѵ��ģ�ͻ��úö���ͼƬ�����ִε������ܲ����õ�Ч���ء���ʱ���ҷdz�����,�������֮��,һֱ�������Լ�Ҳ�ܿ���������һ��ϵͳ,Ȼ��,����֮�������,�ɹ���!��ͷ�ٿ��ſ��Ǹ��Ž����ϵͳ:��~�������!
Ŀ¼
2.2 face_recognition ��İ�װ��ʵ������
1 ����ʶ��Ӧ�����漰���Ĺ���ģ��
- ����ͷ����
- ����ͼ��ʶ��ʹ���
- ������
- ���̵߳�Ӧ��
- ��ʱ���ĵ���
2 ����ʶ��Ļ�������
- ������ 68 ������������λ���Լ�˳���ж� 68 ����������ͼ�������Ƿ���ڡ��Ƿ�����;
- ���� detect,��һ����Ҫ���Ƕ�λ������ͼ���е�λ��,����Ŀ�����㷨�������λ�þ��ο�;
- ���� shape?predictor,��һ������Ҫ�ҳ��۾�üë������;���ĵ�λ;
- �������� alignment,��һ����Ҫ��ͨ��ͶӰ���α任��һ�ű���;
- ����ʶ��,��һ�������ڶԼ�������ͼ������ȡ 128 ά����������,��������������ľ����������ж�ʶ��
python ����õ�����ʶ����ǻ��� C++ ������ dlib �⡣
2.1 dlib ��İ�װ��ʵ������
dlib ����Ҫ������װ,dlib ��Ŀǰ�Ѿ�����õİ�װ�汾ֻ֧�� python 3.6 �İ汾��
�������ṩһ�� python 3.7 �汾�� dlib �� whl �ļ�:����:https://pan.baidu.com/s/1Fch0AqhZTmql7MpFyEDtYA? ?��ȡ��:re7z
# -*-coding:GBK -*-
import dlib
from skimage import io
detector = dlib.get_frontal_face_detector() # ��ȡһ�����������,����������������������㷨
win = dlib.image_window()
img = io.imread('E:/girl.png') # ��ȡ������ͼ��
# ���������������ȡ������ͼ������,�ڶ�������1������ȡͼƬ���ز��Ŵ�1���Ա��ܹ��ռ����������Ƭϸ��
# ���ؽ����һ���������������
ders = detector(img, 1)
win.set_image(img)
win.add_overlay(ders)
dlib.hit_enter_to_continue()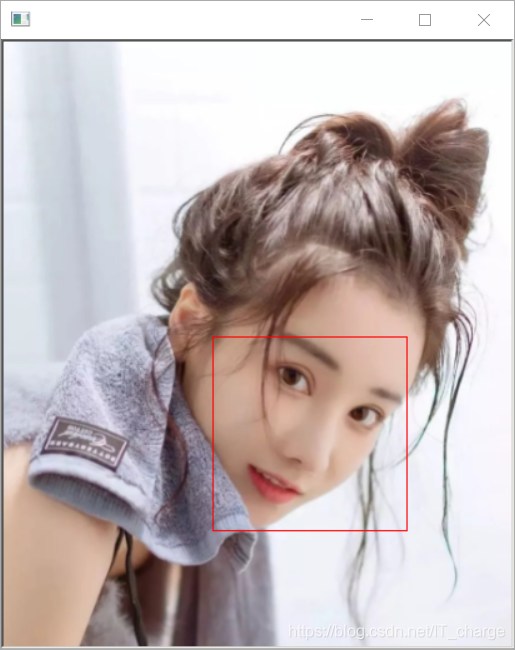
2.2 face_recognition ��İ�װ��ʵ������
face_recognition ���ǻ��� dlib �����˶��η�װ,�ų����������������ʶ��⡣
ѵ�����ݼ�:Labeled?Faces?in?the?Wild,13000 ��������Ϊѵ�����ݼ�,ʶ��Ч��ȡ���������������Լ�������
windows �ϰ�װ:?pip?install?-i?https://pypi.douban.com/simple?face_recognition
2.2.1?load_image_file
load_image_file ���������Ҫ���ڼ���Ҫʶ�e������ͼ��,���ط��ص������� Numpy ���M,��¼��ͼƬ���������ص�����������
# -*-coding:GBK -*-
import face_recognition

image = face_recognition.load_image_file('E:/girl.jpg')
print(image)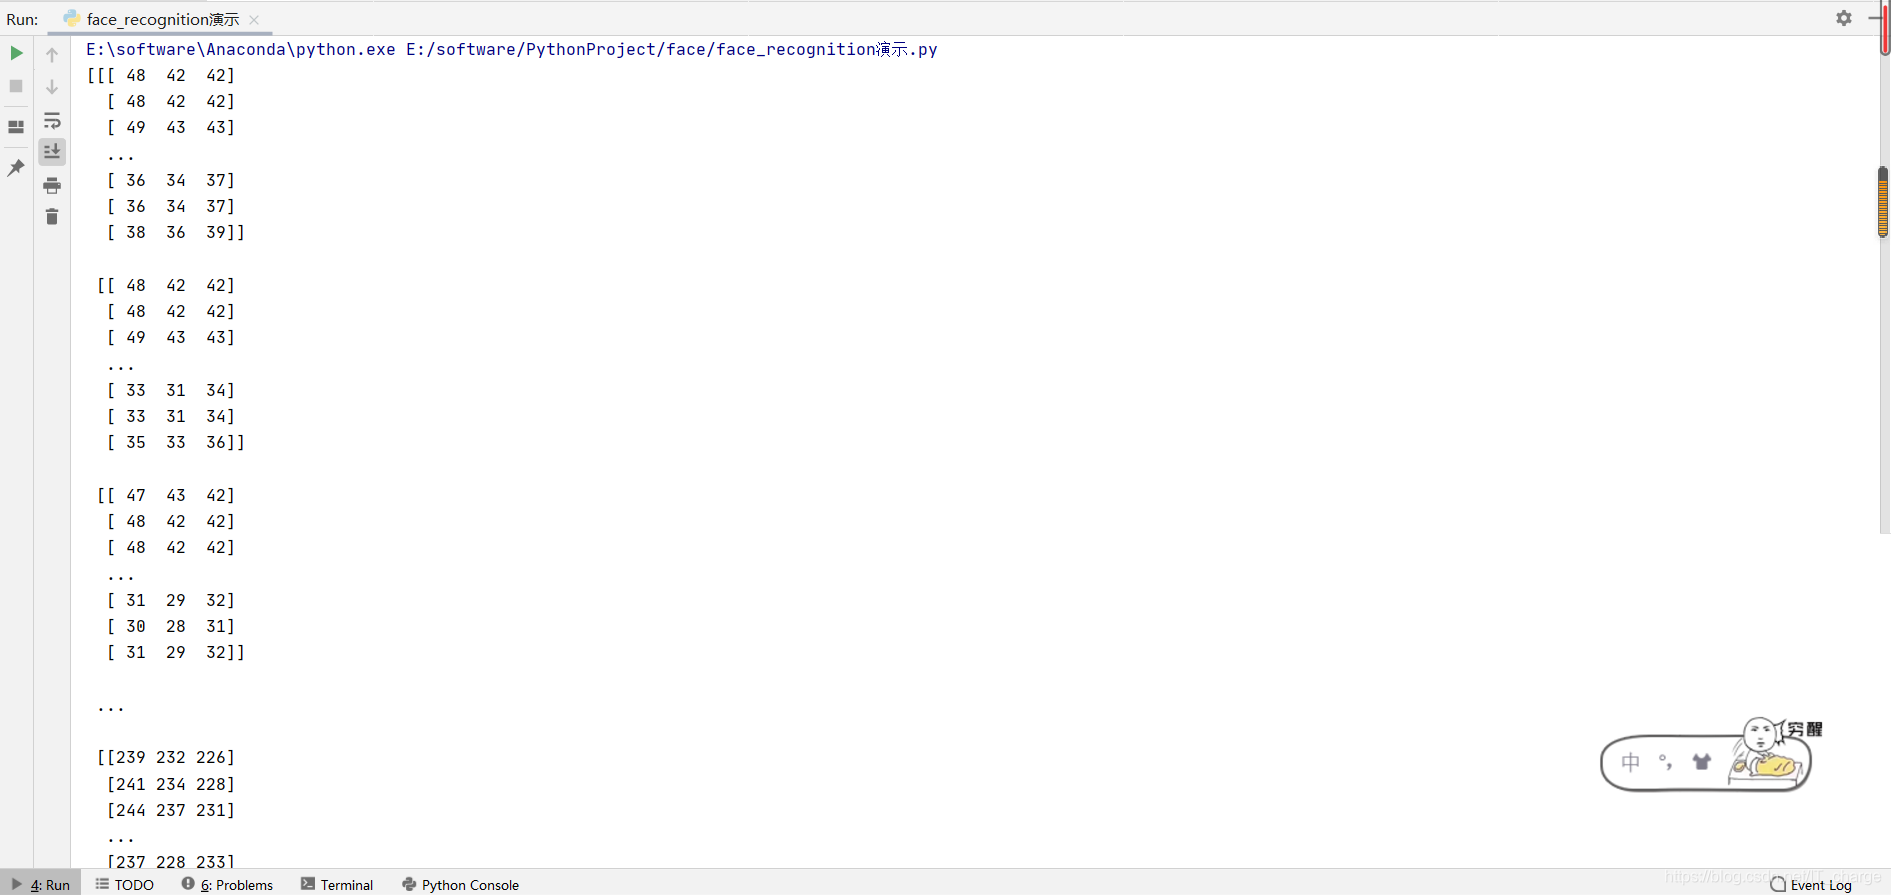
2.2.2?face_locations?
face_locations?��λͼ�����е�����������λ�á�
- ����ֵ��һ���б���ʽ,�б���ÿһ����һ��������λ����Ϣ,����[top,?right,?bottom, left],Ҳ������Ϊÿ����������һ��Ԫ����Ϣ����Ҫ���ڱ�ʶͼ�������е�������Ϣ��
# -*-coding:GBK -*-
import face_recognition
from PIL import Image
import cv2
# ͨ�� load_image_file �������ش�ʶ��ͼƬ
image = face_recognition.load_image_file('E:/girls.jpg')
# ͨ�� face_locations �õ�ͼ������������λ��
face_locations = face_recognition.face_locations(image)
for face_location in face_locations:
top, right, bottom, left = face_location # �ᱨ����,�õ�ÿ���������ĸ�λ����Ϣ
print("��ʶ��������λ,��������Ϊ:top{}, right{}, bottom{}, left{}".format(top, right, bottom, left))
# face_image = image[top:bottom, left:right]
# pil_image = Image.fromarray(face_image)
# pil_image.show()
start = (left, top)
end = (right, bottom)
# ��ͼƬ�ϻ��ƾ��ο�
cv2.rectangle(image, start, end, (0,0,255), thickness=2)
cv2.imshow('window', image)
cv2.waitKey()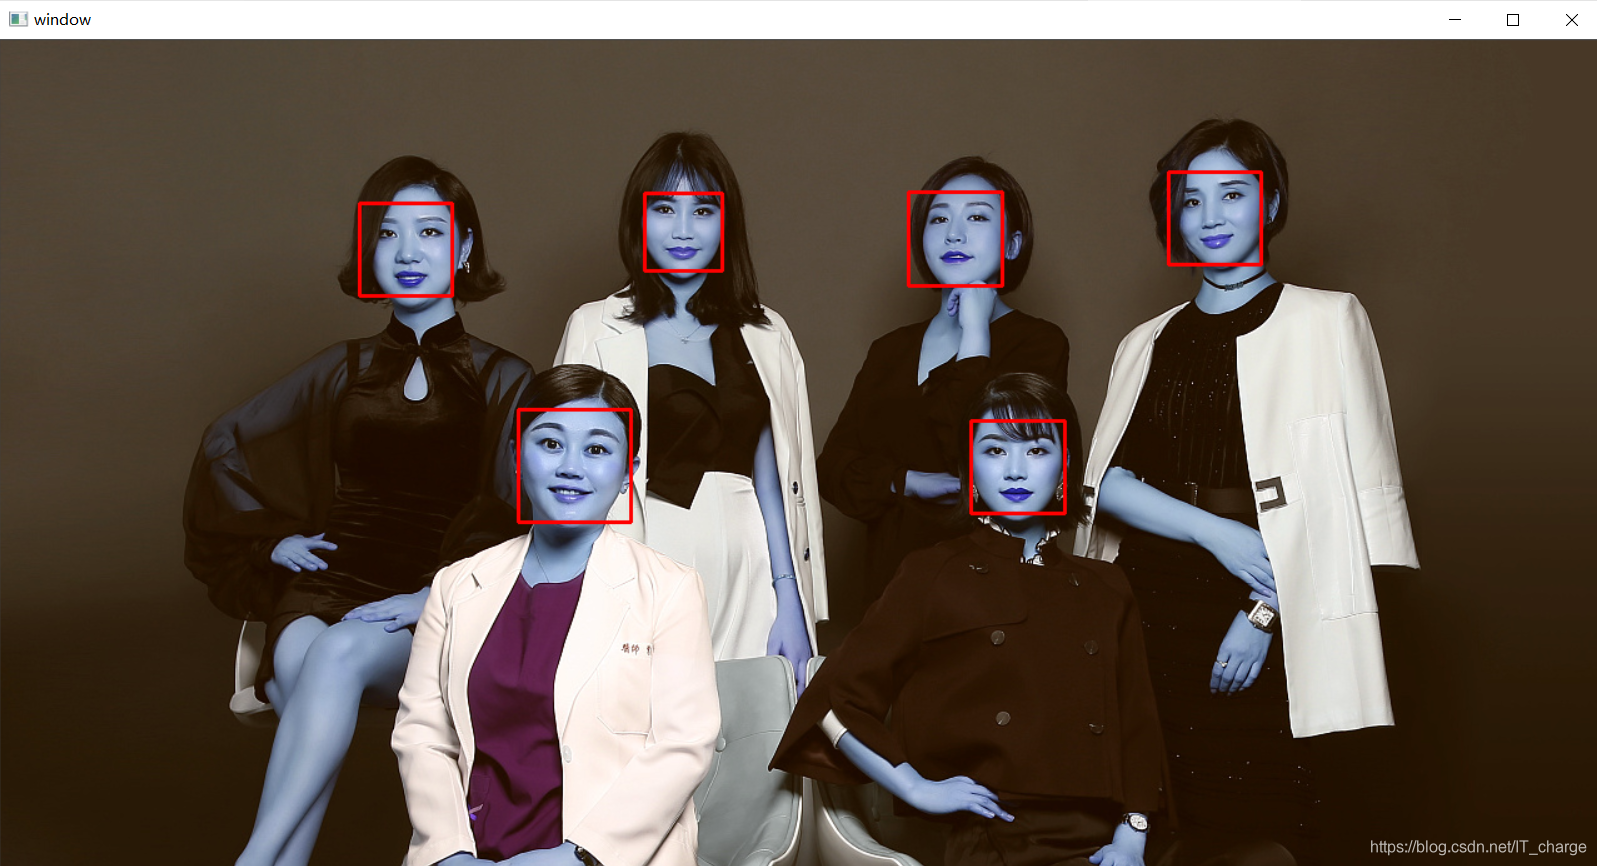

2.2.3?face_landmarks
face_landmarks ʶ�������ؼ������㡣
- ������Ȼ�Ǵ�����ͼ�����,����ֵ�ǰ����沿�������ֵ���б�,�б����Ⱦ���ͼ���е���������
- �沿�����������¼�������:nose_bridge?(����)��right?_eyebrow?(����ü)��left_eyebrow?(����ü)��right_eye(����)��left_eye(����)��chin(�°�)��?nose_tip(�±Dz�)��bottom_lip?(���촽)?
- ����������������
# -*-coding:GBK -*-
import face_recognition
from PIL import Image, ImageDraw
image = face_recognition.load_image_file('E:/boys.jpg')
face_landmarks_list = face_recognition.face_landmarks(image)
pil_image = Image.fromarray(image)
d = ImageDraw.Draw(pil_image) # ����һ��PILͼ��
for face_landmarks in face_landmarks_list:
facial_features = [
'chin',
'left_eyebrow',
'right_eyebrow',
'nose_bridge',
'nose_tip',
'left_eye',
'right_eye',
'bottom_lip'
]
for facial_feature in facial_features:
# print("ÿ���˵��沿������ʾ������Ϊλ��:{}".format(facial_feature))
d.line(face_landmarks[facial_feature], width=5) # ֱ�ӵ���PIL�е�line������PILͼ���л�������,�������ǹ۲�������
pil_image.show()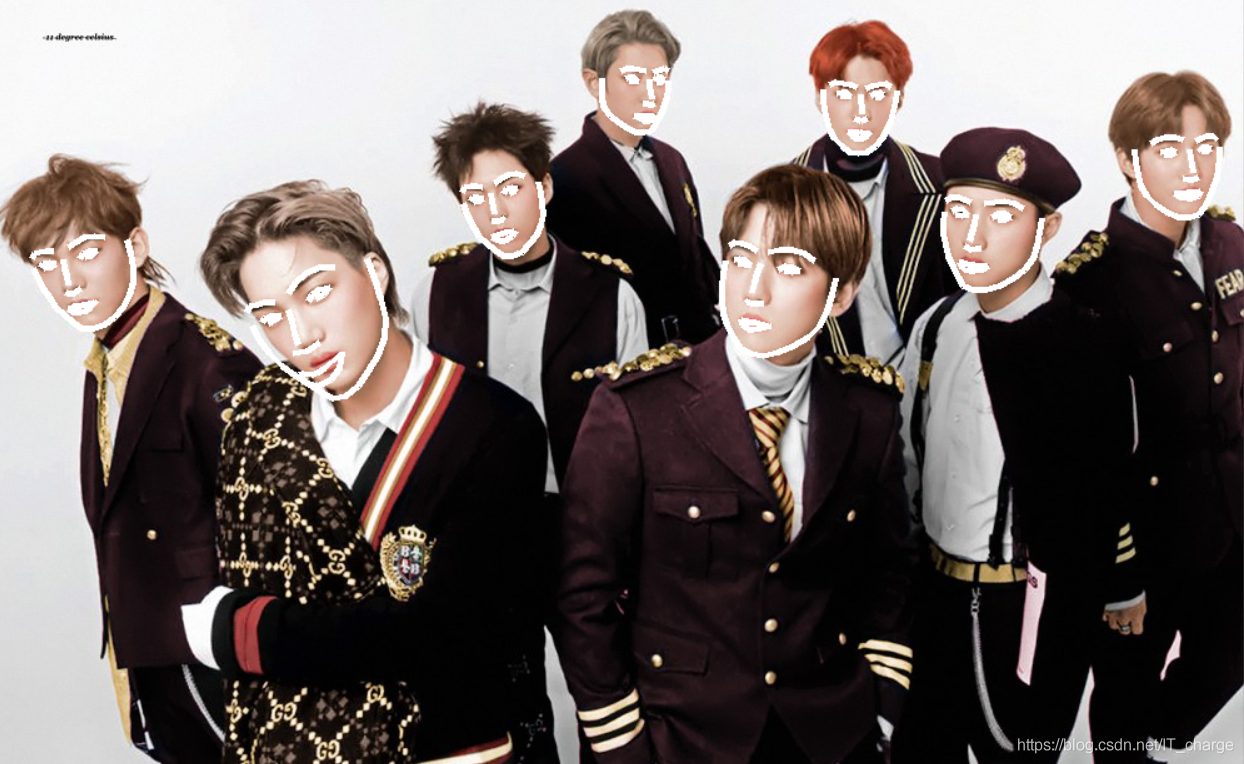
2.2.4?face_encodings
face_encodings ��ȡͼ���ļ��������沿������Ϣ��
- ����ֵ��һ�������б�,������Ȼ��Ҫʶ���ͼ����������������ʱ,��Ҫע�������������������з��ʡ�ÿ�������ı�����Ϣ��һ�� 128 ά������
- �沿������Ϣ�ǽ�������Աȵ���Ҫ������
# -*-coding:GBK -*-
import face_recognition
image = face_recognition.load_image_file('E:/boys.jpg')
# ����ͼ�����ж��ٸ�������Ϣ,����ֵ����һ���б�
face_encodings = face_recognition.face_encodings(image)
for face_encoding in face_encodings:
print("��Ϣ���볤��Ϊ:{}\n������ϢΪ:{}".format(len(face_encoding), face_encoding))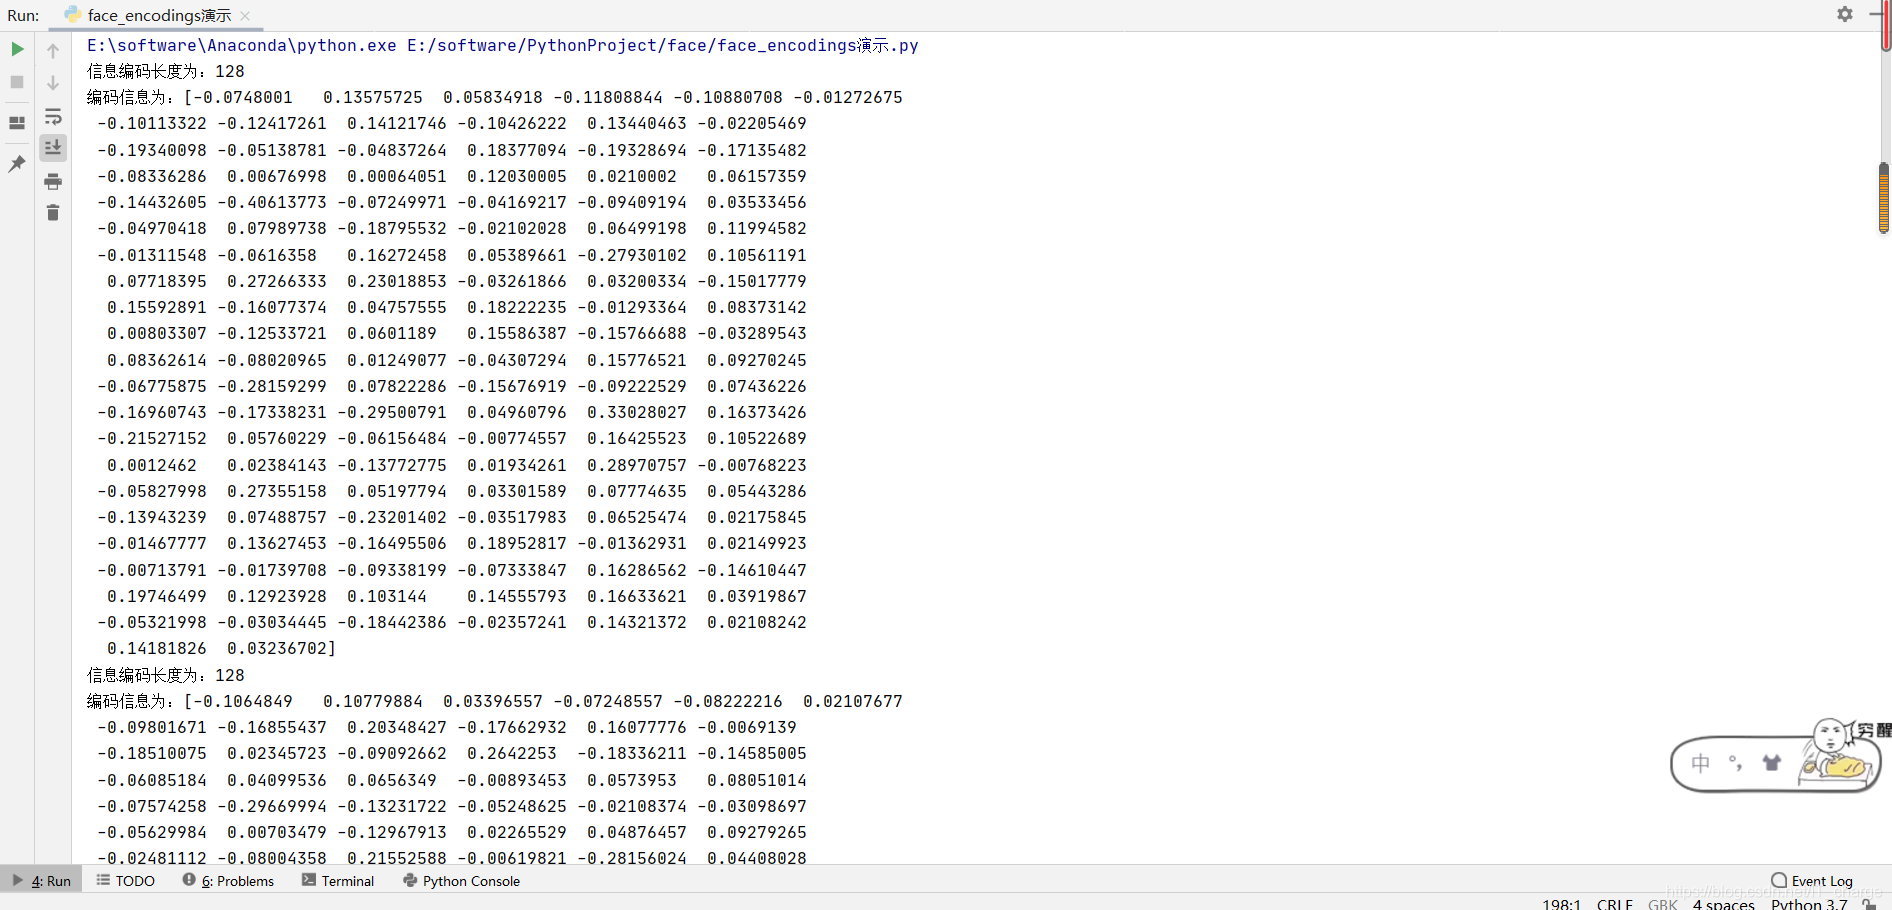
2.2.5?compare_faces?
compare_faces?���沿������Ϣ�����沿ʶ��ƥ�䡣
- ��Ҫ����ƥ�������沿��������,���������������������ڻ����������ƶ�,������ֵȷ���Ƿ���ͬһ���ˡ�
- ��һ����������һ���沿�����б�(�ܶ�����),?�ڶ����������Ǹ��������沿����(һ����),?compare_faces �Ὣ�ڶ��������еı�����Ϣ���һ�������е����б�����Ϣ����ƥ��,����ֵ��һ�������б�,ƥ��ɹ��� True,ƥ��ʧ���� False,˳�����һ����������������˳��һ�¡�
- ��������һ�� tolerance = 0.6,��ҿ��Ը���ʵ�ʵ�Ч�����е���,һ�㾭��ֵ�� 0.39��
tolerance ֵԽС,ƥ��Խ�ϸ�
# -*-coding:GBK -*-
import face_recognition
# ����һ�ź���
image1 = face_recognition.load_image_file('./facelib/yangmi+liukaiwei.jpeg')
# ����һ�ŵ�����
image2 = face_recognition.load_image_file('./facelib/yangmi.jpg')
known_face_encodings = face_recognition.face_encodings(image1)
# face_encodings���ص����б�����,����ֻ��Ҫ�õ���һ���������뼴��
compare_face_encodings = face_recognition.face_encodings(image2)[0]
# ע��ڶ�������,ֻ���Ǵ𰸸��沿��������,���ܴ��б�
matches = face_recognition.compare_faces(known_face_encodings, compare_face_encodings)
print(matches)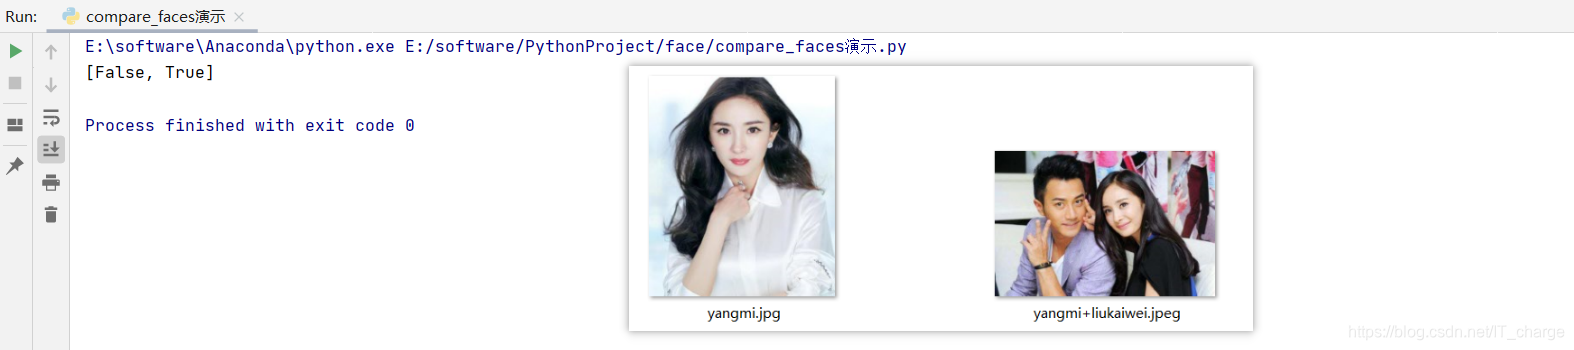
2.2.6 ��ȡ����ͷ��ͼ����Ϣ?
���ǿ������� cv2 ģ���е� VideoCapture ����,Ȼ��ÿ�ζ�ȡ���е�һ֡ͼ����д������ɡ�
# -*-coding:GBK -*-
import cv2
from PIL import Image, ImageDraw
import numpy as np
# 1.��������ͷ
# 2.��ȡ����ͷͼ����Ϣ
# 3.��ͼ��������������Ϣ
# 4.����ͼ��
cap = cv2.VideoCapture(0) # ���õ�һ������ͷ��Ϣ
while True:
ret, frame = cap.read()
# BGR��cv2 ��ͼ���ʽ,RGB��PIL��ͼ���ʽ,��ת��ʱ��Ҫ����ʽ�ϵ�ת��
img_PIL = Image.fromarray(cv2.cvtColor(frame, cv2.COLOR_BGR2RGB))
draw = ImageDraw.Draw(img_PIL)
draw.text((100, 100), 'press q to exit', fill=(255, 255, 255))
# ��frame����ת����cv2�ĸ�ʽ
frame = cv2.cvtColor(np.array(img_PIL), cv2.COLOR_RGB2BGR)
cv2.imshow('capture', frame)
if cv2.waitKey(1) & 0xFF == ord('q'):
cv2.imwrite('out.jpg', frame)
break
cap.release()
3 ʵ������ʶ��ļ��ϵͳ
��������ʶ����ϵͳ��Ҫ����:
- ������ͷ��ȡͼ�� ok
- ����֪����ͷ����жԱ�,ʶ����Щ����֪��Ա,��Щ��δ֪��Ա ok
- ������ͷͼ����ֱ�ӱ�ע�ԱȽ�� ok
- ��¼ÿ�ζԱȵĽ��,����δ֪��Ա��ͼ����б���
- ������
3.1 ����ʶ����ϵͳ
# -*-coding:GBK -*-
import face_recognition
import os
import cv2
from PIL import Image, ImageFont, ImageDraw
import numpy as np
import datetime
import threading
class Recorder:
pass
record_dic = {}
unknown_pic = []
flag_over = 0 # ����һ���Ƿ�������ü�¼�ı��
# ��ʱȥ����Ա�ͼ����Ϣ,���ҽ�λ����Ա��ͼ������
def save_recorder(name, frame):
global record_dic
global flag_over
global unknown_pic
if flag_over == 1: return
try:
record = record_dic[name]
seconds_diff = (datetime.datetime.now() - record.times[-1]).total_seconds()
if seconds_diff < 60 * 10:
return
record.times.append(datetime.datetime.now())
print('���¼�¼', record_dic, record.times)
except KeyError:
newRec = Recorder()
newRec.times = [datetime.datetime.now()]
record_dic[name] = newRec
print('���Ӽ�¼', record_dic, newRec.times)
if name == 'δ֪ͷ��':
s = str(record_dic[name].times[-1])
# print(s)
# δ֪��Ա��ͼƬ����
filename = s[:10]+s[-6:] + '.jpg'
cv2.imwrite(filename, frame)
unknown_pic.append(filename)
# ����������Ա��������Ƭ���õ���Ƭ���������沿������Ϣ
def load_img(path):
print('���ڼ�����֪��Ա��ͼƬ...')
for dirpath, dirnames, filenames in os.walk(path):
print(filenames)
facelib = []
for filename in filenames:
filepath = os.sep.join([dirpath, filename])
# �Ѷ�Ӧÿ��ͼƬ���ؽ���
face_image = face_recognition.load_image_file(filepath)
face_encoding = face_recognition.face_encodings(face_image)[0]
facelib.append(face_encoding)
return facelib,filenames
facelib, facenames = load_img('facelib')
# print(facenames)
video_capture = cv2.VideoCapture(0)
while True:
ret, frame = video_capture.read()
# ͨ����СͼƬ(��СΪ1/4),��߶Ա�Ч��
small_frame = cv2.resize(frame, (0,0), fx=0.25, fy=0.25)
rgb_small_frame = small_frame[:,:,::-1] # ��opencv��BGR��ʽת��ΪRGB��ʽ
face_locations = face_recognition.face_locations(rgb_small_frame)
face_encodings = face_recognition.face_encodings(rgb_small_frame, face_locations)
face_names = []
# ѭ����������
for face_encoding in face_encodings:
matches = face_recognition.compare_faces(facelib, face_encoding, tolerance=0.39)
name = 'δ֪ͷ��'
if True in matches:
# �������ͷ�����ͷ��ƥ������֪����ͷ��,��ȡ����һ��True��λ��
first_match_index = matches.index(True)
name = facenames[first_match_index][:-4] # ȡ���ļ��϶�Ӧ������
face_names.append(name)
for (top, right, bottom, left), name in zip(face_locations, face_names):
# ��ԭԭͼƬ��С
top *= 4
right *= 4
bottom *= 4
left *= 4
cv2.rectangle(frame, (left, top), (right, bottom), (0,0,255), thickness=2) # ��ע������Ϣ
img_PIL = Image.fromarray(cv2.cvtColor(frame, cv2.COLOR_BGR2RGB))
font = ImageFont.truetype('simhei.ttf', 40)
draw = ImageDraw.Draw(img_PIL)
draw.text((left+6, bottom-6), name, font=font, fill=(255,255,255))
frame = cv2.cvtColor(np.asarray(img_PIL),cv2.COLOR_RGB2BGR)
save_recorder(name, frame)
cv2.imshow('capture', frame)
if cv2.waitKey(1) & 0xFF == ord('q'):
break
video_capture.release()
3.2 գ�ۻ�����
# -*-coding:GBK -*-
from scipy.spatial import distance
import dlib
import cv2
from imutils import face_utils
def eye_aspect_ratio(eye):
'''
����EARֵ
:param eye: �۲�����������
:return: EARֵ
'''
A = distance.euclidean(eye[1], eye[5])
B = distance.euclidean(eye[2], eye[4])
C = distance.euclidean(eye[0], eye[3])
return (A+B) / (2.0*C)
detector = dlib.get_frontal_face_detector()
predictor = dlib.shape_predictor('shape_predictor_68_face_landmarks.dat')
# �����۾��ݺ�ȵ���ֵ
EAR_THRESH = 0.3
# ���Ǽٶ�����3֡���ϵ�EAR��ֵ��С����ֵ,��ȷ���Dz�����գ�۲���
EAR_CONSEC_FRAMES = 3
# �����������ж�Ӧ�۾����Ǽ�������������
RIGHT_EYE_START = 37-1
RIGHT_EYE_END = 42-1
LEFT_EYE_START = 43-1
LEFT_EYE_END = 48-1
frame_counter = 0 # ����֡�ļ���
blink_counter = 0 # գ�۵ļ���
cap = cv2.VideoCapture(0)
while True:
ret, frame = cap.read()
gray = cv2.cvtColor(frame, cv2.COLOR_BGR2GRAY) # ת��Ϊ�Ҷ�ͼ��
rects = detector(gray, 1) # �������
if len(rects) > 0:
shape = predictor(gray, rects[0]) # ���������
points = face_utils.shape_to_np(shape)
leftEye = points[LEFT_EYE_START:LEFT_EYE_END + 1] # ȡ������������
rightEye = points[RIGHT_EYE_START:RIGHT_EYE_END + 1] # ȡ������������
# ���������۵�EARֵ
leftEAR = eye_aspect_ratio(leftEye)
rightEAR = eye_aspect_ratio(rightEye)
# ��������EAR��ƽ��ֵ
ear = (leftEAR+rightEAR) / 2.0
# ʵ���ж�һ�����������ִ��벢���DZ����
# Ѱ�������۵�����
leftEyeHull = cv2.convexHull(leftEye)
rightEyeHull = cv2.convexHull(rightEye)
# ��������������
cv2.drawContours(frame, [leftEyeHull], -1, (0,255,0), 1)
cv2.drawContours(frame, [rightEyeHull], -1, (0, 255, 0), 1)
# ���EARС����ֵ,��ʼ��������֡
if ear < EAR_THRESH:
frame_counter += 1
else:
if frame_counter >= EAR_CONSEC_FRAMES:
print('գ�ۼ��ɹ�,�����')
frame_counter += 1
break
frame_counter = 0
cv2.putText(frame, "COUNTER: {}".format(frame_counter), (150, 30),
cv2.FONT_HERSHEY_SIMPLEX, 0.7, (0, 0, 255), 2)
cv2.putText(frame, "Blinks: {}".format(blink_counter), (10, 30),
cv2.FONT_HERSHEY_SIMPLEX, 0.7, (0, 0, 255), 2)
cv2.putText(frame, "EAR: {:.2f}".format(ear), (300, 30),
cv2.FONT_HERSHEY_SIMPLEX, 0.7, (0, 0, 255), 2)
# cv2.putText(frame, 'blink:{}'.format(blink_counter))
cv2.imshow('window', frame)
if cv2.waitKey(1) & 0xFF == ord('q'):
cv2.imwrite('out.jpg', frame)
break
cap.release()
cv2.destroyAllWindows()