第二周
1 identity_block
The Problem of Very Deep Neural Networks
神经网络变得越来越深,而使用深层神经网络的原因就是它能够完成很复杂的功能,深层的神经网络通常来说是没有坏处的,但是有一个特别麻烦的情况就是训练的时候会产生梯度消失。在梯度下降的过程中,当你从最后一层回到第一层的时候,你在每个步骤上乘以权重矩阵,因此梯度值可以迅速的指数式地减少到0(在极少数的情况下会迅速增长,造成梯度爆炸)。
随着迭代次数的增加,学习的速度会下降的非常快。因此需要构建残差网络解决这个问题
Building a Residual Network
在残差网络中使用跳跃连接使得梯度反向传播到更浅的层

步骤:
第一部分:
- 第一个Conv2D有F1个过滤器大小为(1x1)步长(1,1),填充为valid,使用0作为随机种子为其初始化
- 第一个BatchNorm是通道轴的归一化
- 最后使用ReLU函数
第二部分:
- 第二个Conv2D有F2个过滤器大小为(fxf),步长(1,1),填充为same,使用0为初始化
- 第二个BatchNorm
- 使用ReLU
第三部分:
- 第三个CONV2D有F3个过滤器,其大小为(1,1),步长为(1,1),使用填充方式为“valid”,命名规则为conv_name_base+‘2c’,使用0作为随机种子为其初始化。
- 第三个BatchNorm是通道的轴归一化
- 没有ReLU函数
最后一步:
- 将捷径与输入加在一起
- 使用ReLU激活函数,它没有命名也没有超参数
Exercise 1 - identity_block
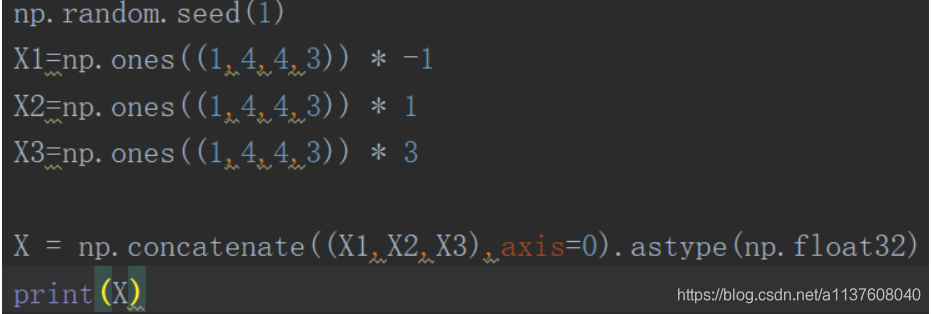
np.random.seed(1)
# 首先是下面的X1,X2,X3是初始化了X1,X2,X3的输入数据,后面*的数说明里面初始化的数
# 在python中打印出来表达的意思是1行4列的矩阵中每个元素为4行3列
# 在图像上理解为数量为1个的4x4x3的图像
X1 = np.ones((1, 4, 4, 3)) * -1
X2 = np.ones((1, 4, 4, 3)) * 1
X3 = np.ones((1, 4, 4, 3)) * 3

# concatenate()函数是连接函数,将X1,X2,X3连接在一起组成新的矩阵,axis为默认0
# astype()函数是将前面连接起来的矩阵中的数都转换为float
X = np.concatenate((X1, X2, X3), axis = 0).astype(np.float32)


A3 = identity_block(X, f=2, filters=[4, 4, 3],
                   initializer=lambda seed=0:constant(value=1),
                   training=False)

print('\033[1mWith training=False\033[0m\n')
A3np = A3.numpy()
# 将第3维平均一下,使用around第一个参数是数组,后面5的意思是小数点后保留5位
print(np.around(A3.numpy()[:,(0,-1),:,:].mean(axis = 3), 5))
resume = A3np[:,(0,-1),:,:].mean(axis = 3)
print(resume[1, 1, 0])

print('\n\033[1mWith training=True\033[0m\n')
np.random.seed(1)
A4 = identity_block(X, f=2, filters=[3, 3, 3],
                   initializer=lambda seed=0:constant(value=1),
                   training=True)
print(np.around(A4.numpy()[:,(0,-1),:,:].mean(axis = 3), 5))

public_tests.identity_block_test(identity_block)
代码段2:
def identity_block(X, f, filters, training=True, initializer=random_uniform):

    # F1,F2,F3分别是4,4,3
    F1, F2, F3 = filters

    # X_shortcut用来保存输入的图像X
    X_shortcut = X

    # First component of main path
    # 第一步 先卷积后归一化再ReLU函数非线性化
    X = Conv2D(filters = F1, kernel_size = 1, strides = (1,1), padding = 'valid', kernel_initializer = initializer(seed=0))(X)
    X = BatchNormalization(axis = 3)(X, training = training) # Default axis
    X = Activation('relu')(X)

    ### START CODE HERE
    ## Second component of main path (≈3 lines)
    X = Conv2D(filters = F2,kernel_size = f, strides=(1,1),padding = 'same', kernel_initializer = initializer(seed=0))(X)
    X = BatchNormalization(axis = 3)(X,training = training)
    X = Activation('relu')(X)

    ## Third component of main path (≈2 lines)
    X = Conv2D(filters = F3, kernel_size = 1, strides = (1,1), padding = 'valid', kernel_initializer = initializer(seed=0))(X)
    X = BatchNormalization(axis = 3)(X,training = training)

    ## Final step: Add shortcut value to main path, and pass it through a RELU activation (≈2 lines)
    # 最后通过Add()函数将处理后的结果与输入的结果相加并非线性化
    X = Add()([X,X_shortcut])
    X = Activation('relu')(X)
    ### END CODE HERE

    return X
分析:
- 首先是3个[1,4,4,3]的数组,里面的数字都不一样,利用concatenate()函数将三个数组合并在一起[3,4,4,3],进入identity_block()代码函数中,下面是对concatenate()函数进行验证

输出

- 在我们要实现的函数中根据作者的提示完成下面的函数,这里使用了Add()函数要严格按照给出的方式进行填写。
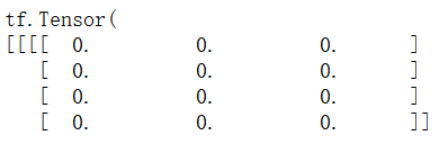
- 后面在该函数输出的结果是tf的张量,因此使用了**numpy()**将张量变为数组

The Convolutional Block

在捷径中有一个CONV2D层
步骤中在最后一步前面加了一个捷径
Exercise 2 - convolutional_block
from outputs import convolutional_block_output1, convolutional_block_output2
np.random.seed(1)
#X = np.random.randn(3, 4, 4, 6).astype(np.float32) 已经给出提示为float的[3,4,4,6]
X1 = np.ones((1, 4, 4, 3)) * -1
X2 = np.ones((1, 4, 4, 3)) * 1
X3 = np.ones((1, 4, 4, 3)) * 3
# 连接
X = np.concatenate((X1, X2, X3), axis = 0).astype(np.float32)
#进入编写函数
A = convolutional_block(X, f = 2, filters = [2, 4, 6], training=False)

# 进行判断输出的类型是否为EagerTensor
assert type(A) == EagerTensor, "Use only tenso撒rflow and keras functions"
assert tuple(tf.shape(A).numpy()) == (3, 2, 2, 6), "Wrong shape."
assert np.allclose(A.numpy(), convolutional_block_output1), "Wrong values when training=False."
print(A[0])

# 更改参数training
B = convolutional_block(X, f = 2, filters = [2, 4, 6], training=True)
assert np.allclose(B.numpy(), convolutional_block_output2), "Wrong values when training=True."

print('\033[92mAll tests passed!')
代码段2:
def convolutional_block(X, f, filters, s = 2, training=True, initializer=glorot_uniform):

    # Retrieve Filters
    F1, F2, F3 = filters

    # Save the input value
    X_shortcut = X


    ##### MAIN PATH #####

    # First component of main path glorot_uniform(seed=0)
    X = Conv2D(filters = F1, kernel_size = 1, strides = (s, s), padding='valid', kernel_initializer = initializer(seed=0))(X)
    X = BatchNormalization(axis = 3)(X, training=training)
    X = Activation('relu')(X)

    ### START CODE HERE

    ## Second component of main path (≈3 lines)
    X = Conv2D(filters = F2, kernel_size = f, strides = (1, 1), padding='same', kernel_initializer = initializer(seed=0))(X)
    X = BatchNormalization(axis = 3)(X, training=training)
    X = Activation('relu')(X)

    ## Third component of main path (≈2 lines)
    X = Conv2D(filters = F3, kernel_size = 1, strides = (1, 1), padding='valid', kernel_initializer = initializer(seed=0))(X)
    X = BatchNormalization(axis = 3)(X, training=training)

    ##### SHORTCUT PATH ##### (≈2 lines)
    X_shortcut = Conv2D(filters = F3, kernel_size = 1, strides = (s, s), padding='valid', kernel_initializer = initializer(seed=0))(X_shortcut)
    X_shortcut = BatchNormalization(axis = 3)(X_shortcut, training=training)

    ### END CODE HERE

    # Final step: Add shortcut value to main path (Use this order [X, X_shortcut]), and pass it through a RELU activation
    X = Add()([X, X_shortcut])
    X = Activation('relu')(X)

    return X
分析:
和之前的上一个作业一样只是在
X_shortcut = Conv2D(filters = F3, kernel_size = 1, strides = (s, s), padding='valid', kernel_initializer = initializer(seed=0))(X_shortcut)
    X_shortcut = BatchNormalization(axis = 3)(X_shortcut, training=training)
要注意里面的参数是X_shortcut也就是输入的图像
Building Your First ResNet Model (50 layers)
The details of this ResNet-50 model are:
对输入数据进行0填充,pad=(3,3)
Stage 1:
- 64个过滤器shape为(7,7),步数stridestride为2
- 规范层(BatchNorm)对输入数据进行通道轴归一化。
- 最大值池化层使用一个(3,3)的窗口和(2,2)的步伐。
Stage 2:
- 卷积块使用f=3大小为[64,64,256],步数为1
- 2个恒等块使用三个大小为[64,64,256]的过滤器,f=3
Stage 3:
- 卷积块使用f=3大小为[128,128,512],步数为2
- 3个恒等块使用三个大小为[128,128,512]的过滤器,f=3
Stage 4:
- 卷积块使用f=3大小为[256, 256, 1024],步数为2
- 5个恒等块使用三个大小为[256, 256, 1024]的过滤器,f=3
Stage 5:
- 卷积块使用f=3大小为[512, 512, 2048],步数为2
- 2个恒等块使用三个大小为[512, 512, 2048]的过滤器,f=3
均值池化层使用维度为(2,2)的窗口
展开操作没有任何超参数以及命名
全连接层(密集连接)使用softmax激活函数
Exercise 3 - ResNet50
def ResNet50(input_shape = (64, 64, 3), classes = 6):


    # Define the input as a tensor with shape input_shape
    X_input = Input(input_shape)


    # Zero-Padding pad=(3,3)的0填充
    X = ZeroPadding2D((3, 3))(X_input)

    # Stage 1
    X = Conv2D(64, (7, 7), strides = (2, 2), kernel_initializer = glorot_uniform(seed=0))(X)
    X = BatchNormalization(axis = 3)(X)
    X = Activation('relu')(X)
    X = MaxPooling2D((3, 3), strides=(2, 2))(X)

    # Stage 2
    X = convolutional_block(X, f = 3, filters = [64, 64, 256], s = 1)
    X = identity_block(X, 3, [64, 64, 256])
    X = identity_block(X, 3, [64, 64, 256])

    ### START CODE HERE

    ## Stage 3 (≈4 lines)
    X = convolutional_block(X, f = 3, filters = [128,128,512], s = 2)
    X = identity_block(X, 3, [128,128,512])
    X = identity_block(X, 3, [128,128,512])
    X = identity_block(X, 3, [128,128,512])

    ## Stage 4 (≈6 lines)
    X = convolutional_block(X, f = 3, filters = [256, 256, 1024], s = 2)
    X = identity_block(X, 3, [256, 256, 1024])
    X = identity_block(X, 3, [256, 256, 1024])
    X = identity_block(X, 3, [256, 256, 1024])
    X = identity_block(X, 3, [256, 256, 1024])
    X = identity_block(X, 3, [256, 256, 1024])

    ## Stage 5 (≈3 lines)
    X = convolutional_block(X, f = 3, filters = [512, 512, 2048], s = 2)
    X = identity_block(X, 3, [512, 512, 2048])
    X = identity_block(X, 3, [512, 512, 2048])

    ## AVGPOOL (≈1 line). Use "X = AveragePooling2D(...)(X)"
    X = AveragePooling2D(pool_size=(2,2))(X)

    ### END CODE HERE

    # output layer
    X = Flatten()(X)
    X = Dense(classes, activation='softmax', kernel_initializer = glorot_uniform(seed=0))(X)


    # Create model
    model = Model(inputs = X_input, outputs = X)

    return model
分析:
可以按照上面说的步骤直接写,修改参数就行了
model = ResNet50(input_shape = (64, 64, 3), classes = 6)
print(model.summary())
显示输出模型各层的参数状况
from outputs import ResNet50_summary

model = ResNet50(input_shape = (64, 64, 3), classes = 6)

comparator(summary(model), ResNet50_summary)
对模型做实体化和编译工作
模型已经准备好了,接下来就是加载训练集进行训练。
model.compile(optimizer='adam', loss='categorical_crossentropy', metrics=['accuracy'])
model.fit(X_train, Y_train, epochs = 10, batch_size = 32)
对结果进行估测并打印出来
preds = model.evaluate(X_test, Y_test)
print ("Loss = " + str(preds[0]))
print ("Test Accuracy = " + str(preds[1]))
