①我们做这个的目的是干什么?是为了面试,为了能够清晰地知道你当初干了什么。所以我们不是来这里看懂代码来了,而是只需要知道代码干了什么。看懂代码是次要的,重要的是看懂逻辑。
②缩略版就是展示了做了哪些功能+每个功能关联着哪张数据库
③详细版就是展示了做了哪些功能+如何实现这个功能的
④你可能感觉怎么总结还做了这么多?实际上都是图片,很快就看完了(我敢保证三个小时就能看完100集的东西)
文章目录
- p45 三级分类
- P46 配置网关路由与路径重写
- p48 树形展示菜单的三级分类数据
- p49(前台)完成菜单的删除功能1
- p50(后台)完成菜单的删除功能2
- p51(前台)完成菜单的删除功能3
- p52(前台)完成菜单的添加功能
- p53(前台)完成菜单的修改功能
- p54(前台)完成菜单的拖拽功能1
- p55(前台)完成菜单的拖拽功能2
- p56(后台+前台)菜单的拖拽功能3
- p57(前台)完成菜单的拖拽功能4
- p58(前台)完成菜单的批量删除功能
- p59品牌管理总说
- p60(前台)品牌的显示开关
- p61(后台)云存储OSS开通与使用
- p62(后台)OSS整合测试1
- p63(后台)OSS整合测试2
- p64(前后台)OSS整合测试3
- p65(前台)表单校验
- p66(后台)表单校验
- p67(后台)统一异常处理来处理校验结果
- p68(后台)分组校验
- p69(后台)自定义校验
- p70(分析)SPU与SKU
- p71(前台)搭建属性分组
- p72(后台)属性分组查询功能
- p73(前端)属性分组的新增功能
- p74(前端+后端)属性分组的修改功能
- p75(后台)品牌分类的查询
- p76(后台)规格参数的新增
- p77(后台)规格参数的查询所有
- p78(后台)规格参数的修改
- p79(后台)销售属性的获取
- p80(后台)查询属性分组关联的属性+删除关联
- p81(后台)查询未关联的属性
- p82(后台)添加分组与属性的关联关系
- p83 (后台)会员模块
- p84(后台)新增商品
- p85(后台)新增商品2
- p86(后台)录入商品数据,测试商品保存1
- P87(后台)录入商品数据,测试商品保存2
- P88(后台)录入商品数据,测试商品保存3
- P89(后台)录入商品数据,测试商品保存3
- P90(后台)录入商品数据,测试商品保存4
- P91(后台)录入商品数据,测试商品保存5
- P92(后台)录入商品数据,测试商品保存5
- P93(后台)SPU检索
- P94(后台)SKU检索
- p100(后台)SPU规格维护
- p95(后台)仓库列表的查询
- p96(后台)库存的查询与采购的查询
- p97(后台)合并采购需求
- p98(后台)采购人员领取采购单
- P99(后台)完成采购
- p101(后台)谷粒商城基础篇总结
- P102—P127是讲解ES的知识,和谷粒商城项目完全无关
- P128—P129商品上架功能0
- P130商品上架功能1
- P131商品上架功能2
- P132商品上架功能3
- P133商品上架功能4
- P134—P135商品上架功能—测试
p45 三级分类
1.三级分类数据的展示
1.效果展示
2.对应的数据库表
3.后台逻辑
①CategoryEntity实体类和数据库pms_category表的字段是一一对应的,
但CategoryEntity有一个数据库中不存在的字段List<CategoryEntity> ,在List<CategoryEntity>中封装了所有当前实体的子分类。
②一个CategoryEntity中有个字段是List<CategoryEntity>,在List<CategoryEntity>中的每一个CategoryEntity中有又有一个字段是List<CategoryEntity>…无限套娃的感觉
③前台发送http://localhost:88/api/product/category/list/tree请求,后台就会查询pms_category表,得到所有的parent_cid=0的实体集合List0<CategoryEntity>,这个集合List0<CategoryEntity>里面一定有一个CategoryEntity是“手机”(手机的id是2),继续查找pms_category表中所有parent_cid=2的实体就找到了“手机”的子分类的集合List1<CategoryEntity>,把List1<CategoryEntity>设置到"手机"的CategoryEntity中;在List1<CategoryEntity>中一定有一个CategoryEntity是"手机通讯"(手机通讯的id是34),继续查找pms_category表中所有parent_cid=34的实体就找到了“手机通讯”的子分类的集合List2<CategoryEntity>,把List2<CategoryEntity>设置到"手机通讯"的CategoryEntity中;
4.效果展示
P46 配置网关路由与路径重写
1.网关路由
- 我们修改前端代码的基准路径为网关路径
http://localhost:88/api,意思是说本vue项目中要请求的资源url都发给网关88,然后匹配到/api请求即可。 - 就以登陆页面的验证码为例,修改之前页面是发送
http://localhost:8080/renren-fast/captcha.jpg这样url,它的结构是localhost:8080+ 项目名renren-fast+ 请求地址/captcha.jpg。 - 修改之后,现在前台发送的url是
http://localhost:88/api/captcha.jsp,网关见到/api/captcha.jsp符合/api/**的路由规则,就会把/api/captcha.jsp路由给renren-fast,现在的地址就是http://localhost:8080/api/captcha.jsp,在网关处添加一层url过滤,把url中的/api/改变成/renren-fast/,也就是说刚刚的url就会被修改为http://localhost:8080/renren-fast/captcha.jsp - 想法很完美,但是人人开源的登陆页面的地址是
http://localhost:8001/#/login,而你验证码发送的请求却是http://localhost:88/api/captcha.jsp,存在跨域问题。
2.跨域问题
存在的跨域问题:
人人开源的登陆页面的地址是http://localhost:8001/#/login,而你验证码发送的请求却是http://localhost:88/api/captcha.jsp,存在跨域问题。就是说vue项目是8001端口,却要跳转到88端口,这是不安全的,不被浏览器通过。
解决跨域问题:
修改网关gulimall-gateway,写一个配置类:
package com.atguigu.gulimall.gateway.config;

@Configuration
public class GulimallCorsConfiguration {

	// 添加过滤器
    @Bean
    public CorsWebFilter corsWebFilter(){
        // 基于url跨域,选择reactive包下的
        UrlBasedCorsConfigurationSource source=new UrlBasedCorsConfigurationSource();
        // 跨域配置信息
        CorsConfiguration corsConfiguration = new CorsConfiguration();
        // 允许跨域的头
        corsConfiguration.addAllowedHeader("*");
        // 允许跨域的请求方式
        corsConfiguration.addAllowedMethod("*");
        // 允许跨域的请求来源
        corsConfiguration.addAllowedOrigin("*");
        // 是否允许携带cookie跨域
        corsConfiguration.setAllowCredentials(true);

       // 任意url都要进行跨域配置
        source.registerCorsConfiguration("/**",corsConfiguration);
        return new CorsWebFilter(source);
    }
}
p48 树形展示菜单的三级分类数据
前台请求发送的是http://localhost:88/api/product/category/list/tree,而我们的树形结构真实的路径是http://localhost:11100/product/category/list/tree,
所以,我们需要在网关处将/api/product/**这样的url进行路由,路由后的地址是http://localhost:11100/api/product/category/list/tree,经过路径重写后http://localhost:11100/product/category/list/tree
p49(前台)完成菜单的删除功能1
p50(后台)完成菜单的删除功能2
p51(前台)完成菜单的删除功能3
- 不到数据库中进行真实删除,而是逻辑删除,把状态由1改为0就是删除。
- 前台发送post请求,请求url为
http://localhost:88/api/product/category/delete,路由加过滤后实际的url为http://localhost:11100/product/category/delete - 请求体携带json的数据
[1432](数组里面存放着要删除的id,因为现在只是一个一个删除,所以数组里面就这么一条记录,等以后批量删除就是很多个id了),意思就是删除数据库中id为1432的菜单数据
p52(前台)完成菜单的添加功能
1.分析需求
前台发送http://localhost:88/api/product/category/save,路由到http://localhost:11100/product/category/save
2.实现方法
    @RequestMapping("/save")
    public R save(@RequestBody CategoryEntity category){
		categoryService.save(category);

        return R.ok();
    }

//save()方法是categoryService继承IService<CategoryEntity>后就自带的方法,所以不需要你写service层实现类的代码
p53(前台)完成菜单的修改功能
1)分析需求
2)实现方法:
//这是renren-fast自动生成的,没什么好讲的
    @RequestMapping("/update")
    public R update(@RequestBody CategoryEntity category){
		categoryService.updateCascade(category);
        return R.ok();
    }
p54(前台)完成菜单的拖拽功能1
p55(前台)完成菜单的拖拽功能2
p56(后台+前台)菜单的拖拽功能3
p57(前台)完成菜单的拖拽功能4
1)分析需求
2)实现方法:修改gulimall-product
1.修改CategoryController
    @RequestMapping("/update/sort")
    public R updateSort(@RequestBody CategoryEntity[] category){
        categoryService.updateBatchById(Arrays.asList(category));
        return R.ok();
    }
2.修改CategoryServiceImpl
由于updateBatchById()方法是categoryService继承IService<CategoryEntity>后就自带的方法,所以不需要你写service层代码
p58(前台)完成菜单的批量删除功能
1)分析需求
2)实现方法:
具体的实现回见p50(后台)完成菜单的删除功能2
p59品牌管理总说
p60(前台)品牌的显示开关
p61(后台)云存储OSS开通与使用
p62(后台)OSS整合测试1
p63(后台)OSS整合测试2
p64(前后台)OSS整合测试3
将gulimall-thirdd-party添加到Nacos注册中心和Nacos配置中心以后,这样去整合OSS:
1.在application.properties配置文件里面写好阿里云相关的配置
spring:
  cloud:
    nacos:
      discovery:
        server-addr: 127.0.0.1:8848
    alicloud:
      access-key: LTAI5tJbBoWagm2CVCTLTz2B  #阿里云配置
      secret-key: qRZsyTXB3uWdu8Rsz4gbWjGMZ3gqfk  #阿里云配置
      oss:
        endpoint: oss-cn-chengdu.aliyuncs.com  #阿里云配置
        bucket: gulimall-hello-redhur  #阿里云配置

  application:
    name: gulimall-third-party
2.写一个ossController用于上传文件
@RestController
public class OssController {

    @Autowired
    OSS ossClient;

    @Value("${spring.cloud.alicloud.oss.endpoint}")
    private String endpoint;
    @Value("${spring.cloud.alicloud.oss.bucket}")
    private String bucket;
    @Value("${spring.cloud.alicloud.access-key}")
    private String accessId;


    @RequestMapping("/oss/policy")
    public R policy() {

        //https://gulimall-hello-redhur.oss-cn-chengdu.aliyuncs.com/hahaha.jpg
        String host = "https://" + bucket + "." + endpoint; // host的格式为 bucketname.endpoint

        String format = new SimpleDateFormat("yyyy-MM-dd").format(new Date());
        String dir = format + "/"; // 我们希望以一个日期的方式为一个目录,某一天的图片全部上传到改目录下

        Map<String, String> respMap = null;
        try {
            long expireTime = 30;
            long expireEndTime = System.currentTimeMillis() + expireTime * 1000;
            Date expiration = new Date(expireEndTime);
            PolicyConditions policyConds = new PolicyConditions();
            policyConds.addConditionItem(PolicyConditions.COND_CONTENT_LENGTH_RANGE, 0, 1048576000);
            policyConds.addConditionItem(MatchMode.StartWith, PolicyConditions.COND_KEY, dir);

            String postPolicy = ossClient.generatePostPolicy(expiration, policyConds);
            byte[] binaryData = postPolicy.getBytes("utf-8");
            String encodedPolicy = BinaryUtil.toBase64String(binaryData);
            String postSignature = ossClient.calculatePostSignature(postPolicy);

            respMap = new LinkedHashMap<String, String>();
            respMap.put("accessid", accessId);
            respMap.put("policy", encodedPolicy);
            respMap.put("signature", postSignature);
            respMap.put("dir", dir);
            respMap.put("host", host);
            respMap.put("expire", String.valueOf(expireEndTime / 1000));


        } catch (Exception e) {
            System.out.println(e.getMessage());
        }

        return R.ok().put("data",respMap);
    }
}
3.测试访问:
4.添加网关
当你访问localhost:88/api/thirdparty/oss/policy时就会路由到localhost:3000/oss/policy,然后localhost:3000/oss/policy又会让你访问https://gulimall-hello-redhur.oss-cn-chengdu.aliyuncs.com/来存储你的文件
p65(前台)表单校验
p66(后台)表单校验
p67(后台)统一异常处理来处理校验结果
p68(后台)分组校验
p69(后台)自定义校验

①表单校验:前台有了表单校验还不够,我们后台还得校验一次才能保证安全。后台我们使用JSR303校验,在entity实体类里面添加@NotNull,@NotBlank、@NotEmpty、@Email、@URL这些注解,然后使用BindResult拿到校验结果进行自定义封装,或者统一异常处理来处理校验结果。
②分组校验:如果新增和修改两个接口需要验证的字段不同,比如id字段,新增可以不传递,但是修改必须传递id,我们就需要用到分组校验来实现。
③自定义校验:你想要在实体类的字段上添加自定义校验注解@ListValue(vals = {0,1}),其中的@ListValue是你自己起的名的注解,你想用它表示值只能是0和1
p70(分析)SPU与SKU
p71(前台)搭建属性分组
- SPU的属性就是基本属性。一款小米10手机的机身长度、宽度、厚度、重量、材质等等属性是所有小米10公用的属性,也是同一款手机的基本属性。这些属性就是spu属性。
- SKU的属性就是销售属性。你要买的小米10是什么颜色的?多少G的手机?这两个属性决定了价格,也决定了库存数量(比如
幻夜黑+64G的手机我们还剩1000件),这就是销售属性,就是sku属性。
p72(后台)属性分组查询功能
1)分析需求
2)实现方法:
前台把(分页信息page、limit)和(catalogid)还有(查询的条件key)传过来
后台查询pms_attr_group表
先判断key有没有值,如果有就拼接上分组id等于这个key或分组名字like这个key;
然后判断catalogid是否为0,如果不为0就拼接上这个条件,如果为0就列出所有;
最后使用分页工具PageUtils包装回去
@Service("attrGroupService")
public class AttrGroupServiceImpl extends ServiceImpl<AttrGroupDao, AttrGroupEntity> implements AttrGroupService {

    @Autowired
    AttrService attrService;

    @Override
    public PageUtils queryPage(Map<String, Object> params, Long catelogId) {
        String key = (String) params.get("key");

        //下面的语句等价于select * from pms_attr_group where catelog_id=? and (attr_group_id=key or attr_group_name like %key%)
        QueryWrapper<AttrGroupEntity> wrapper = new QueryWrapper<AttrGroupEntity>();
        if(!StringUtils.isEmpty(key)){
            wrapper.and((obj)->{
                obj.eq("attr_group_id",key).or().like("attr_group_name",key);
            });
        }


        if( catelogId == 0){
        	//如果前端没有把三级分类id传过来,那就说明是列出所有
            IPage<AttrGroupEntity> page = this.page(new Query<AttrGroupEntity>().getPage(params),wrapper);
            return new PageUtils(page);
        }else {
        	//如果前端把三级分类idid传过来了,那就查询指定id的内容
            wrapper.eq("catelog_id",catelogId);
            IPage<AttrGroupEntity> page = this.page(new Query<AttrGroupEntity>().getPage(params),wrapper);
            return new PageUtils(page);
        }

    }
3)测试
p73(前端)属性分组的新增功能
@JsonInclude去空字段
优化:没有下级菜单时不要有下一级空菜单,在java端把children属性空值去掉,空集合时去掉children字段,
可以用@JsonInclude(Inlcude.NON_EMPTY)注解标注在实体类的属性上,
@TableField(exist =false) //数据库中没有这个字段
@JsonInclude(JsonInclude.Include.NON_EMPTY) // 不为空时返回的json才带该children字段
private List<CategoryEntity> children;
@RestController
@RequestMapping("product/attrgroup")
public class AttrGroupController {
    @Autowired
    private AttrGroupService attrGroupService;

    @RequestMapping("/save")
    public R save(@RequestBody AttrGroupEntity attrGroup){
		attrGroupService.save(attrGroup); //MyBatisPlus自带的save()方法

        return R.ok();
    }
}
p74(前端+后端)属性分组的修改功能
前台传回来arrtGroupId,
后台根据arrtGroupId查询"pms_attr_group"表得到AttrGroupEntity(AttrGroupEntity里面就有回显的绝大部分东西),
AttrGroupEntity里面有catelogId,后台根据catelogId查询"pms_category"表得到CategoryEntity,
CategoryEntity里面有parent_cid,如果parent_cid不为0就继续根据parent_cid查询"pms_category"表得到CategoryEntity
p75(后台)品牌分类的查询
1.查询功能
前台把(分页信息page、limit)和(查询的条件key)传过来
后台查询"pms_category_brand_relation"表
先判断key有没有值,如果有就拼接上"brand_id"等于这个key或名字like这个key;
最后使用分页工具PageUtils包装回去
    @Override
    public PageUtils queryPage(Map<String, Object> params) {
        //1、获取key
        String key = (String) params.get("key");
        QueryWrapper<BrandEntity> queryWrapper = new QueryWrapper<>();
        if(!StringUtils.isEmpty(key)){
            queryWrapper.eq("brand_id",key).or().like("name",key);
        }

        IPage<BrandEntity> page = this.page(
                new Query<BrandEntity>().getPage(params),
                queryWrapper

        );

        return new PageUtils(page);
    }
2.品牌与分类的关联
根据brand_id查询pms_category_brand_relation表得到List<CategoryBrandRelationEntity>然后返回即可
3.保存品牌与分类的关联信息
前台传过来brand_id和catelog_id
后台根据brand_id查询"pms_brand"表得到brand_name
后台根据catelog_id查询"pms_category"表得到catelog_name
4.级联更新
    public void updateDetail(BrandEntity brand) {
        //保证冗余字段的数据一致
        this.updateById(brand);
        if(!StringUtils.isEmpty(brand.getName())){
            //同步更新其他关联表中的数据
            categoryBrandRelationService.updateBrand(brand.getBrandId(),brand.getName());

            //TODO 更新其他关联
        }
    }
    @Override
    public void updateBrand(Long brandId, String name) {
        CategoryBrandRelationEntity relationEntity = new CategoryBrandRelationEntity();
        relationEntity.setBrandId(brandId);
        relationEntity.setBrandName(name);
        this.update(relationEntity,new UpdateWrapper<CategoryBrandRelationEntity>().eq("brand_id",brandId));
    }
效果测试
p76(后台)规格参数的新增
1.总说
前端传回来的是要封装到attrVo里,我们返回给前端的是封装到AttrRespVo里,而attrEntity只是和数据库打交道的。
2.新增功能
p77(后台)规格参数的查询所有
①从前端的请求中可以得到这些东西:params(参数里装着分页信息+检索信息key), catelogId目录id, 还有attr_type
②要判断attr_type是base还是sale,
如果是base就执行SELECT * FROM pms_attr WHERE attr_type=1(查询基本属性)
如果是sale就执行SELECT * FROM pms_attr WHERE attr_type=0(查询销售属性)
③前台传回来catelogId不一定有值,如果有就在原来的语句上添加and “catelog_id” =#{catelogId}
④前台传回来用户输入的检索条件key也不一定有值,如果用户输入了检索条件,他输入的检索条件是什么?可能是要查询的id,也可能是关键字。所以就在原来的语句上添加and “attr_id”=#{key} or “attr_name” like %key%
⑤把查询到的attrEntity复制给AttrRespVo,
⑥另外,如果attr_type是base,返回给前端的数据还要包含attr_group_name和catelog_name
(根据"attr_id"从pms_attr_attrgroup_relation中检索到attr_group_id,然后根据attr_group_id从pms_attr_group中检索到attr_group_name),
(从分类表(pms_catelog)根据分类id(即catelog_id)检索得到catelog_name)
⑦如果attr_type是sale,返回给前端的数据还要包含catelog_name
(从分类表(pms_catelog)根据分类id(即catelog_id)检索得到catelog_name即可)。
⑧把以上所有封装到AttrRespVo
p78(后台)规格参数的修改
1.信息的回显
①根据attr_id查询属性表(pms_attr)找到atrrEntity;
②把AtrrEntity复制给AttrRespVo,
③根据attr_id查询关系表(pms_attr_attrgroup_relation)找到分组id(attr_group_id),根据分组id到分组表(pms_attr_group)查询到attr_group_name,设置到AttrRespVo里面
④根据atrrEntity里的catelog_id,我们之前写好的findCatelogPath(catelog_id)这个方法可以根据catelog_id找到catelog的完整路径(因为是三级目录),把完整路径设置到AttrRespVo里面
⑤根据atrrEntity里的catelog_id查询分类表(pms_catelog)找到catelog_name,设置到AttrRespVo里面
⑥返回AttrRespVo
findCatelogPath(catelog_id)这个方法:
根据catelog_id查询分类表(pms_catelog)找到当前目录的父分类id,将父分类id存进列表;
再根据父分类id 找 父类id的父分类id,存进列表;
直到父分类id=0说明当前目录就是根目录
根据catelog_id找到catelog的完整路径(因为是三级目录),把完整路径设置到AttrRespVo里面
2.修改信息的提交
它规格参数的修改和规格参数的新增调用的都是updateAttr(attrVo)方法,所以后台需要判断,如果是新增就需要用insert,如果是修改就需要用update
p79(后台)销售属性的获取
1.销售属性的获取
销售属性的获取和规格参数的获取调用的是同样的方法,上面讲过了。
①从前端的请求中可以得到这些东西:params(参数里装着分页信息+检索信息key), catelogId目录id, 还有attr_type
②要判断attr_type是base还是sale,
如果是base就执行SELECT * FROM pms_attr WHERE attr_type=1(查询基本属性)
如果是sale就执行SELECT * FROM pms_attr WHERE attr_type=0(查询销售属性)
③前台传回来catelogId不一定有值,如果有就在原来的语句上添加and “catelog_id” =#{catelogId}
④前台传回来用户输入的检索条件key也不一定有值,如果用户输入了检索条件,他输入的检索条件是什么?可能是要查询的id,也可能是关键字。所以就在原来的语句上添加and “attr_id”=#{key} or “attr_name” like %key%
⑤把查询到的attrEntity复制给AttrRespVo,
⑥另外,如果attr_type是base,返回给前端的数据还要包含attr_group_name和catelog_name
(根据"attr_id"从pms_attr_attrgroup_relation中检索到attr_group_id,然后根据attr_group_id从pms_attr_group中检索到attr_group_name),
(从分类表(pms_catelog)根据分类id(即catelog_id)检索得到catelog_name)
⑦如果attr_type是sale,返回给前端的数据还要包含catelog_name
(从分类表(pms_catelog)根据分类id(即catelog_id)检索得到catelog_name即可)。
⑧把以上所有封装到AttrRespVo
2.销售属性的新增
销售属性的新增和规格参数的新增调用的是同样的方法,上面讲过了。
3.销售属性修改时信息的回显
销售属性的信息回显和规格参数的信息回显调用的是同样的方法,上面讲过了。
①根据attr_id查询属性表(pms_attr)找到atrrEntity;
②把AtrrEntity复制给AttrRespVo,
③根据attr_id查询关系表(pms_attr_attrgroup_relation)找到分组id(attr_group_id),根据分组id到分组表(pms_attr_group)查询到attr_group_name,设置到AttrRespVo里面
④根据atrrEntity里的catelog_id,我们之前写好的findCatelogPath(catelog_id)这个方法可以根据catelog_id找到catelog的完整路径(因为是三级目录),把完整路径设置到AttrRespVo里面
⑤根据atrrEntity里的catelog_id查询分类表(pms_catelog)找到catelog_name,设置到AttrRespVo里面
⑥返回AttrRespVo
4.销售属性修改信息的提交
销售属性的修改信息的提交和规格参数的的修改信息的提交调用的是同样的方法,上面讲过了。
它规格参数的修改和规格参数的新增调用的都是updateAttr(attrVo)方法,所以后台需要判断,如果是新增就需要用insert,如果是修改就需要用update
p80(后台)查询属性分组关联的属性+删除关联
1.查询属性分组所有关联到的属性
2.删除关联
p81(后台)查询未关联的属性
①根据分组查出分类id:从分组表pms_attr_group根据分组id(attr_group_id)查出当前分组的分类id(catelog_id),
②根据分类查出所有分组:然后根据分类id(catelog_id)在分组表pms_attr_group中查出当前分类下的所有分组的id集合list1
③根据分组找出属性:根据list1中收集的分组id(attr_group_id)一个一个地从pms_attr_attrgroup_relation表找出它们关联的所有属性的集合list2,
④根据分类找出属性:属性分两类—基本属性和销售属性,我们用到的是attr_type为基本属性的那些属性,根据catelog_id和attr_type查询pms_attr表中所有在当前分类中的而且属于基本属性的那些属性的集合list3,
⑤从list3中把list2中的属性全部移除得到的list4就是没有被当前分组以及其它分组引用的属性,
⑥用户可能输入了查询条件key,从list4中筛选符合查询条件的属性
p82(后台)添加分组与属性的关联关系
把前台传过来的attr_id和attr_group_id(因为可以批量新增所以可能不止一组)封装到
List<AttrGroupRelationVo>,
到了后台把AttrGroupRelationVo里的数据复制给AttrAttrgroupRelationEntity,然后就能到数据库里面进行新增了。
p83 (后台)会员模块
p84(后台)新增商品
p85(后台)新增商品2
查出当前分类下的所有属性分组,查出每个属性分组的所有属性
①前台传回去catelog_id,
②后台根据catelog_id查询pms_attr_group分组表得到List<AttrGroupEntity>,将AttrGroupEntity复制到AttrGroupWithAttrsVo里面,
③后台再根据AttrGroupEntity里面的attr_group_id查询pms_attr_attrgroup_relation关系表获得当前分组下attr_id的集合,根据attr_id查询pms_attr表获得List<AttrEntity>
④然后就是把List<AttrEntity>存到AttrGroupWithAttrsVo里面
⑤返回List<AttrGroupWithAttrsVo>
p86(后台)录入商品数据,测试商品保存1
P87(后台)录入商品数据,测试商品保存2
P88(后台)录入商品数据,测试商品保存3
P89(后台)录入商品数据,测试商品保存3
P90(后台)录入商品数据,测试商品保存4
P91(后台)录入商品数据,测试商品保存5
P92(后台)录入商品数据,测试商品保存5
1、保存spu基本信息 pms_spu_info
把SpuSaveVo里的属性复制到SpuInfoEntity
然后把createTime和updateTime设置进SpuInfoEntity即可
然后SpuInfoEntity保存进pms_spu_info数据库即可
2、保存Spu的描述图片 pms_spu_info_desc
3、保存spu的图片集 pms_spu_images
4、保存spu的规格参数;pms_product_attr_value
把BaseAttrs里面的attrid、attrValue、showDesc保存到ProductAttrValueEntity里面,
然后根据attrid查询"pms_attr"表得到attr_name等
然后把ProductAttrValueEntity的字段存入数据库pms_product_attr_value表
5、保存spu的积分信息;gulimall_sms->sms_spu_bounds
积分信息在gulimall-coupon模块里面,我们现在写的是gulimall-product模块的service层,所以gulimall-product模块需要调用gulimall-coupon模块里的方法就需要用到OpenFeign。
6、保存当前spu对应的所有sku信息;
P93(后台)SPU检索
前台把(分页信息page、limit)和(catalogid、brand_id、status)还有(查询的条件key)传过来
后台查询"pms_spu_info"表
先判断key有没有值,如果有就拼接上id等于这个key或spu的名字like这个key;
然后判断status是否为空,如果不为空就拼接上publish_status等于传过来的值;
然后判断brand_id是否为空或为0,如果不是空也不是0就拼接上brand_id等于传过来的值;
然后判断catalogid是否为空或为0,如果不为空不为0就拼接上这个条件;
最后使用分页工具PageUtils包装回去
P94(后台)SKU检索
前台把(分页信息page、limit)和(catalogid、brand_id、min、max)还有(查询的条件key)传过来
后台查询"pms_sku_info"表
先判断key有没有值,如果有就拼接上id等于这个key或sku的名字like这个key;
然后判断brand_id是否为空或为0,如果不是空也不是0就拼接上brand_id等于传过来的值;
然后判断catalogid是否为空或为0,如果不为空不为0就拼接上这个条件;
然后判断min是否为空,不为空就让price大于这个传回来的值;
然后判断max是否为空,因为默认值是0,所以不为空且为0就不做处理,不为空也不为0就让price小于这个值
最后使用分页工具PageUtils包装回去
p100(后台)SPU规格维护
后台根据spuid查询"pms_product_attr_value"表
前台传回来spuid、List<ProductAttrValueEntity>
后台根据spuid删除"pms_product_attr_value"表中spuid下的所有数据,
然后根据spuid和List<ProductAttrValueEntity>保存到"pms_product_attr_value"表中
p95(后台)仓库列表的查询
1.查询
前台把(分页信息page、limit)还有(查询的条件key)传过来
后台查询"wms_ware_info"表
先判断key有没有值,如果有就拼接上id等于这个key 或 name像这个key 或 address像这个key 或 areacode像这个key;
然后使用分页工具PageUtils包装回去
p96(后台)库存的查询与采购的查询
1.库存的查询
前台把(分页信息page、limit)和 (skuId、wareId)传过来
后台查询"wms_ware_sku"表
先判断skuid有没有值,如果skuid有值就拼接上它;
后判断wareId有没有值,如果wareId有值就拼接上它;
然后使用分页工具PageUtils包装回去
2.采购需求的查询
前台把(分页信息page、limit)和 (status、wareId)还有(查询条件key)传过来
后台查询"wms_purchase_detail"表
先判断key有没有值,如果有就purchase_id等于key或sku_id等于key
先判断status有没有值,如果status有值就拼接上它;
后判断wareId有没有值,如果wareId有值就拼接上它;
然后使用分页工具PageUtils包装回去
p97(后台)合并采购需求
前台传回去分页参数(page、limit)
后台查询"wms_purchase"表,找status=0或status=1的那些PurchaseEntity
前台传回去采购需求id(purchaseId)和采购项id数组[1,2]
如果purchaseId为空就到"wms_purchase"表中新建一个,新建后拿到purchaseId;
后台根据采购项id查询"wms_purchase_detail"表,更新采购项的状态为已分配,并且purchase_id处赋予值;
然后在"wms_purchase"表中插入一条记录,指明purchaseId与更新时间
p98(后台)采购人员领取采购单
测试
根据采购项id到"wms_purchase"表中拿到List,
修改采购单状态为“已领取”
根据采购项id到"wms_purchase_detail"表中拿到List
修改采购项的状态为“正在采购”
P99(后台)完成采购
①一个采购单下多个采购项,遍历每一个采购项,根据采购项的状态更新wms_purchase_detail采购项表 和 wms_ware_sku库存表。
②在采购项表里面没有sku_name字段,我们根据采购项更新wms_ware_sku库存表时sku_name就没办法得到,所以想要得到sku_name就需要使用OpenFeign远程调用gulimall-product模块根据sku_id查询sku_name
③最后,根据采购项的状态更新采购单wms_purchase表,如果有一个采购项的状态是失败的,那么采购单状态也是失败的。
测试
p101(后台)谷粒商城基础篇总结
P102—P127是讲解ES的知识,和谷粒商城项目完全无关
P128—P129商品上架功能0
P130商品上架功能1
P131商品上架功能2
P132商品上架功能3
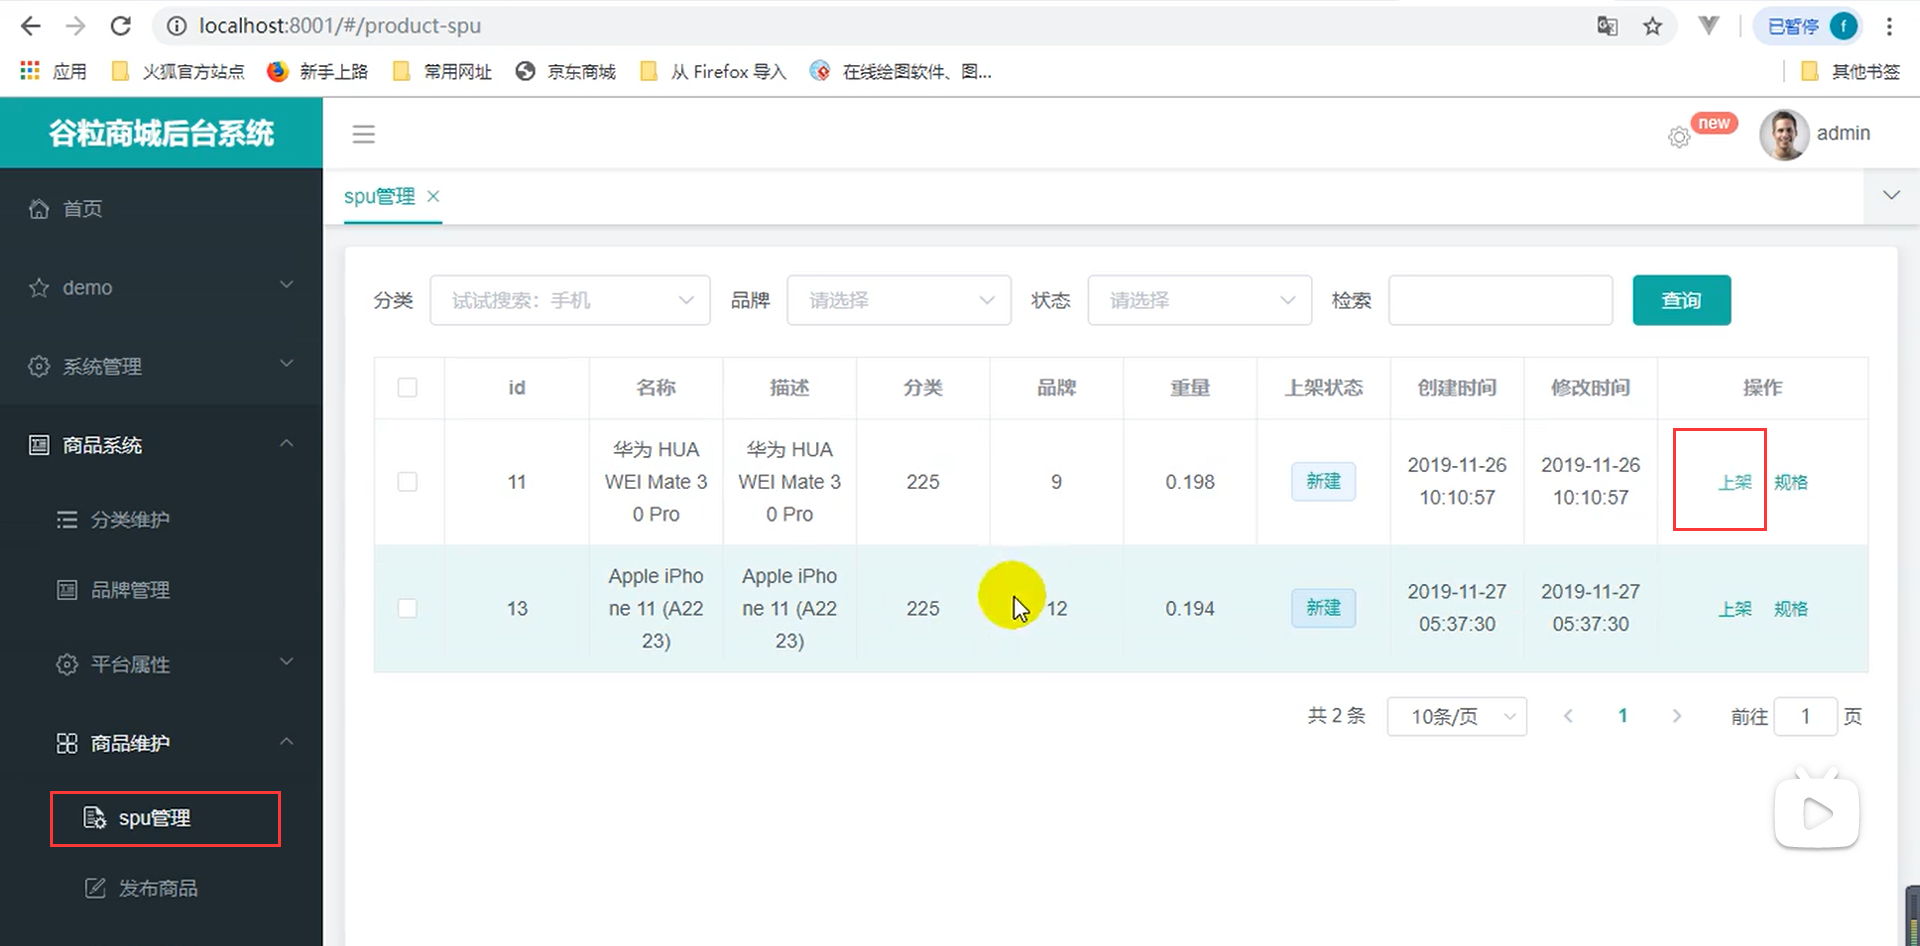
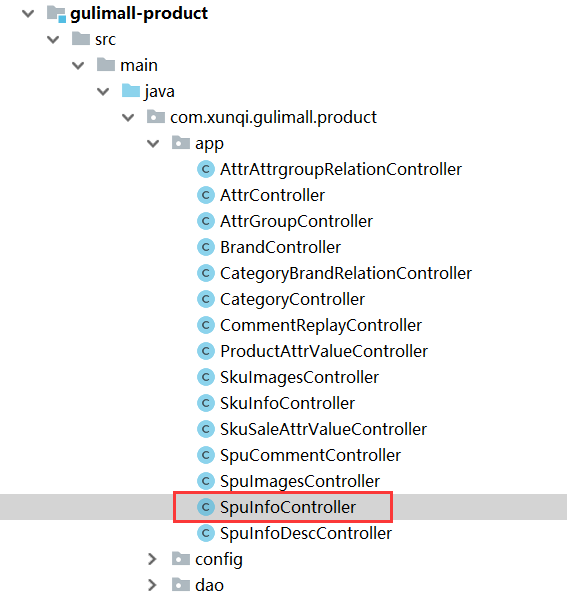
前台发送的请求是
http://localhost:88/api/product/spuinfo/11/up
前台发送上架请求,后台就把上架时需要展示的属性封装到SkuEsModel里面,SkuEsModel里面的多个字段又涉及到多个数据库,
@Data
public class SkuEsModel {

    private Long skuId; //(SkuInfoEntity)中有

    private Long spuId; //(SkuInfoEntity)中有

    private String skuTitle; //(SkuInfoEntity)中有

    private BigDecimal skuPrice; //(SkuInfoEntity)中有,但是名字不一样

    private String skuImg; //(SkuInfoEntity)中有,但是名字不一样

    private Long saleCount; //(SkuInfoEntity)中有

    private Boolean hasStock;最重要的字段,需要OpenFeign远程调用gulimall-ware仓储模块来查找。

    private Long hotScore;//热度评分设置为0即可

    private Long brandId; //(SkuInfoEntity)中有

    private Long catalogId; //(SkuInfoEntity)中有

    private String brandName; //{BrandEntity}中有

    private String brandImg; //{BrandEntity}中有

    private String catalogName;//【CategoryEntity】中有

    private List<Attrs> attrs;//{{ProductAttrValueEntity}}中有

    @Data
    public static class Attrs { //{{ProductAttrValueEntity}}中有

        private Long attrId;

        private String attrName;

        private String attrValue;

    }
}
①SkuEsModel里面的skuId、spuId、skuTitle、saleCount、brandId、catalogId这几个字段在SkuInfoEntity中有,所以只需要查询对应的pms_sku_info表即可;
②SkuEsModel里面的skuPrice、skuImg这两个字段SkuInfoEntity中有,但是名字不一样,所以需要单独设置;
③SkuEsModel里面的brandName、brandImg这两个字段BrandEntity中有,所以只需要只需要查询对应的pms_brand表即可;
④SkuEsModel里面的catalogName在CategoryEntity中有,所以只需要查询对应的pms_category表即可;
⑤手机的规格参数属性并非所有都是可以检索到的属性,比如你不能根据手机的长度去淘宝里面手机,但是你可以根据手机的颜色去检索手机,在SkuEsModel里面的List<Attrs> attrs里面封装了那些可以检索的属性。所以我们需要把规格参数里面能够检索的属性找到封装到SkuEsModel里面的List<Attrs> attrs。
先根据spuid找到pms_product_attr_value表,然后根据此表中的attr_id找到pms_attr表
⑥SkuEsModel里面的hotScore热度评分设置为0即可。
⑦SkuEsModel里面的hasStock是非常重要的一个字段。也是最难的一个字段。它在gulimall-product里面还没有,所以我们必须用OpenFeign远程调用gulimall-ware仓储模块的WareSkuController来查找。
P133商品上架功能4
前台发送上架请求,后台就把上架时需要展示的属性封装到SkuEsModel里面,然后把SkuEsModel里面的数据存储到ElasticSearch上面。上面实现了前半部分,接下来就是实现把SkuEsModel里面的数据发送给es。
(OpenFeign远程调用gulimall-search)


