前言
Opencv 在显示多张图片时,如果不加以拖动,可能不能及时找到想要查看的图片。
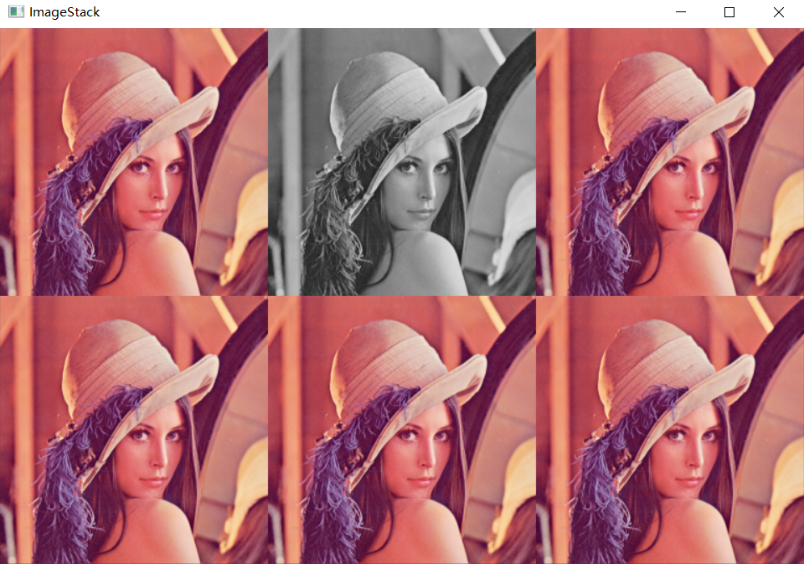
因此,特地编写一个函数,将图片按照 “矩阵” 形式排列开来,具体实现效果如下图:

预备知识
numpy 库的 hstack() 和 vstack() 函数可以对图片进行水平和垂直堆砌:
src = cv2.imread('Resources/lena.png')   # 读取图片

hor_pics = np.hstack((src,src))          # 水平堆砌,输入参数必须为元组
ver_pics = np.vstack((src,src))			 # 垂直堆砌,输入参数必须为元组

cv2.imshow('hor',hor_pics)
cv2.imshow('ver',ver_pics)
水平堆砌:

垂直堆砌:

但二者只是对图片进行原比例堆砌,因此,如果所要显示的图片很大,则很可能屏幕放不下;
因此有必要对图片进行一定比例缩放,这样可以很好的显示图片。
图片缩放及堆砌
def stackImages(scale,imgArray):
    rows = len(imgArray)        # 堆砌行数
    cols = len(imgArray[0])     # 堆砌列数
    rowsAvailable = isinstance(imgArray[0], list) # 判断是否为列表
    width = imgArray[0][0].shape[1]
    height = imgArray[0][0].shape[0]
    if rowsAvailable:
        for x in range ( 0, rows):
            for y in range(0, cols):
                if imgArray[x][y].shape[:2] == imgArray[0][0].shape [:2]:
                    # 修改图片尺寸并进行缩放
                    imgArray[x][y] = cv2.resize(imgArray[x][y], (0, 0), None, scale, scale)
                else:
                    imgArray[x][y] = cv2.resize(imgArray[x][y], (imgArray[0][0].shape[1], imgArray[0][0].shape[0]), None, scale, scale)
                if len(imgArray[x][y].shape) == 2: imgArray[x][y]= cv2.cvtColor( imgArray[x][y], cv2.COLOR_GRAY2BGR)
        imageBlank = np.zeros((height, width, 3), np.uint8)
        hor = [imageBlank]*rows
        hor_con = [imageBlank]*rows
        for x in range(0, rows):
            hor[x] = np.hstack(imgArray[x])
        ver = np.vstack(hor)
    else:
        for x in range(0, rows):
            if imgArray[x].shape[:2] == imgArray[0].shape[:2]:
                imgArray[x] = cv2.resize(imgArray[x], (0, 0), None, scale, scale)
            else:
                imgArray[x] = cv2.resize(imgArray[x], (imgArray[0].shape[1], imgArray[0].shape[0]), None,scale, scale)
            if len(imgArray[x].shape) == 2: imgArray[x] = cv2.cvtColor(imgArray[x], cv2.COLOR_GRAY2BGR)
        hor= np.hstack(imgArray)
        ver = hor
    return ver
测试:
img = cv2.imread('Resources/lena.png')                      # 读取图片
imgGray = cv2.cvtColor(img,cv2.COLOR_BGR2GRAY)				# 色彩转换,变为灰度图

imgStack = stackImages(0.5,([img,imgGray,img],[img,img,img])) # 每张图片尺寸变为原图一半

cv2.imshow("ImageStack",imgStack)

参考链接
备注
博主本人代做 Python 深度学习、目标检测方面代码及咨询,有合作者、业务需求者可联络QQ:1361114716,或者扫描二维码,添加好友:
