背景
前段时间找工作,做简历的时候看中了一个红色为底色的模板,但是发现我的证件照只有蓝色底色的,这和简历不搭啊!有点强迫症的我怎么能忍!果断上网找方法换证件照底色(不要问我为什么不去重新拍一张,因为我是个节(pin)俭(qiong)的人),几经周折,终于在支付宝上找到了换证件照背景的应用,然而。。。。。。
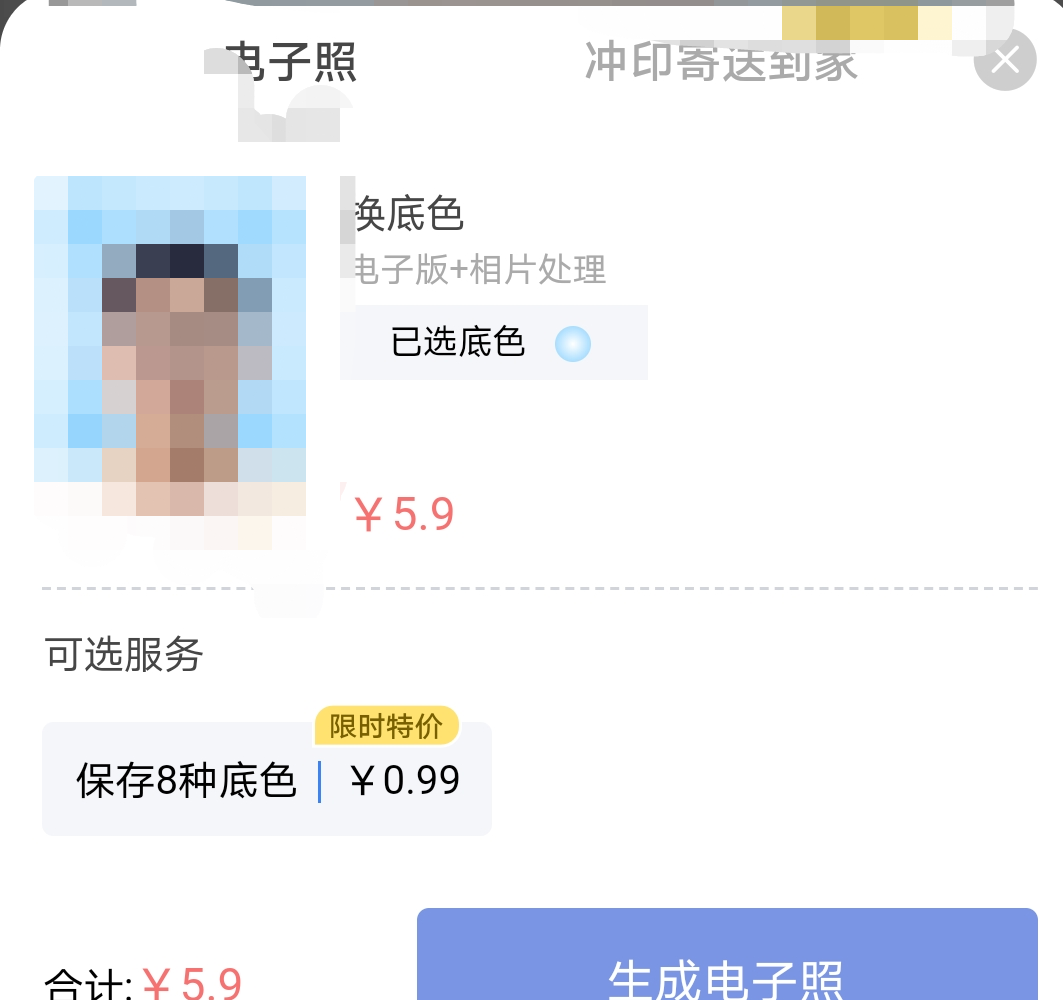
!!居然要钱?!作为一名资深白嫖党和工(diao)程(bao)师(xia)怎么能忍得了这个,那就两个字,撸它!
方案
比较常见且效果比较好的传统方法大致流程是这样的,用聚类的方法分离出背景色,然后背景与人物像素二值化,再结合高斯模糊和形态学上的一些处理,锐化人物边缘,使得边缘更加平和,如下所示,效果也是十分惊艳的
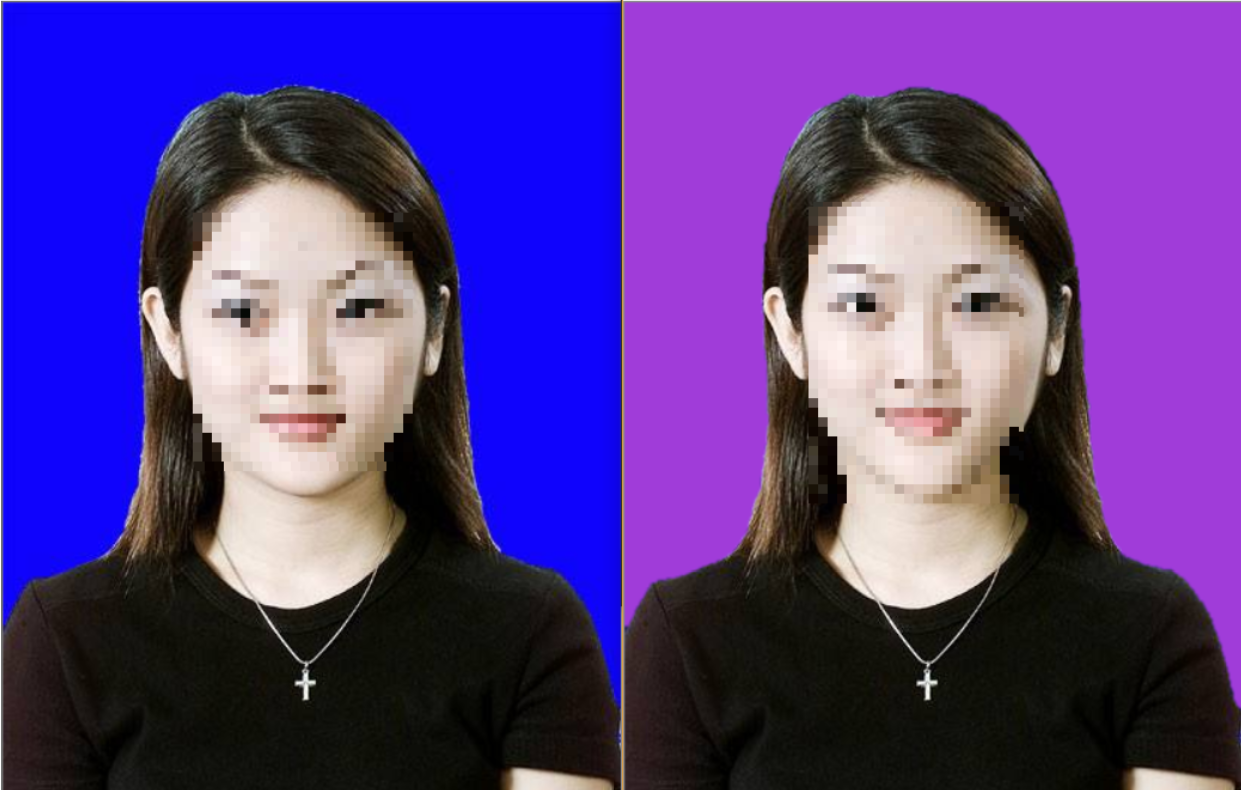
所以,问题就这么解决了?赶紧拿我自己的照片试试,然而结果是这样的
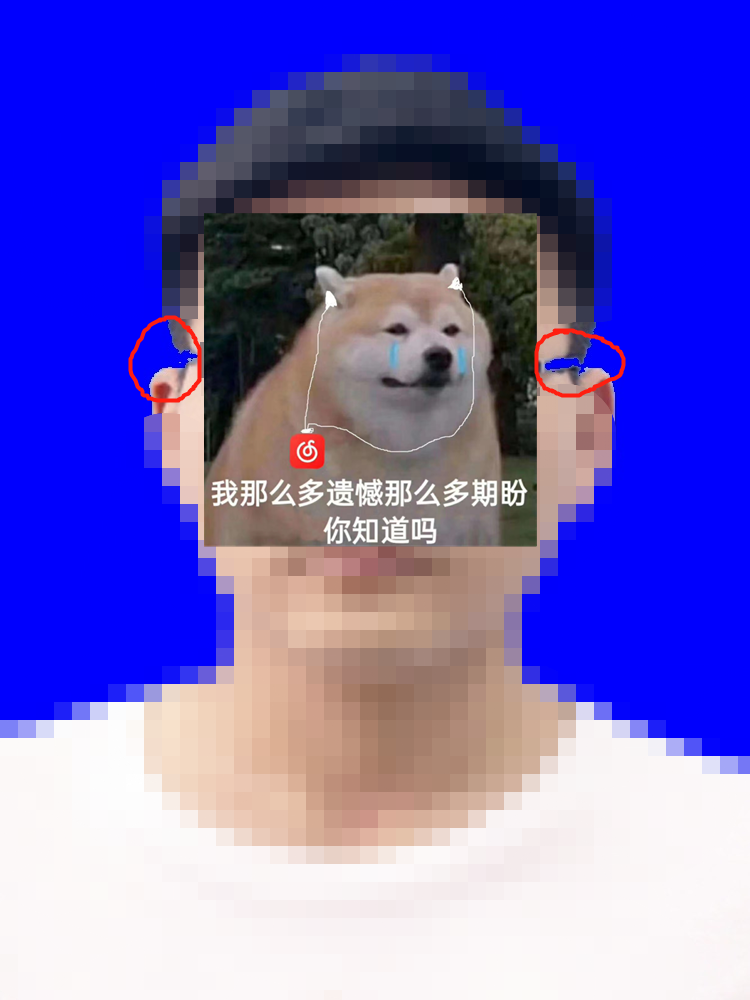
注意看眼镜腿那一块,因为是根据像素值来分割背景,所以一但身上的物品或衣服和原背景颜色相似,就容易出现上图的情况,其实应该也能解决,那就是先利用边缘检测的方法,分隔人物与背景,再用上述聚类的方法分离出背景色再进行替换,因为最近比较忙(lan),所以这里我就不尝试了。
接下来进入正题,既然要做,那功能就应该做的多一些对吧,不应该仅仅只能替换证件照的背景,复杂场景下的图片应该也能转换成证件照,那么问题来了,传统方法想实现复杂场景下的分割,才疏学浅的我真不知道怎么做了(卑微脸),如果有大佬有好的实现方法,记得指导一下哇!
最终我采用了 U2-Net 来作为分割网络,他是作者基于 Unet 提出的一种新的网络结构,同样基于 encode-decode,参考 FPN,Unet,在此基础之上提出了一种新模块 RSU(ReSidual U-blocks) 经过测试,对于分割物体前背景取得了惊人的效果,关于这个 RSU 模块,本身就类似于一个小号的 Unet 网络,然后作者通过类似于 FPN 的结构将多个小 Unet 的输出结果进行组合,最后合并得到 mask,同时通过多个 loss 在不同层的表现来进行模型参数的更新,这里贴一下它的模型结构
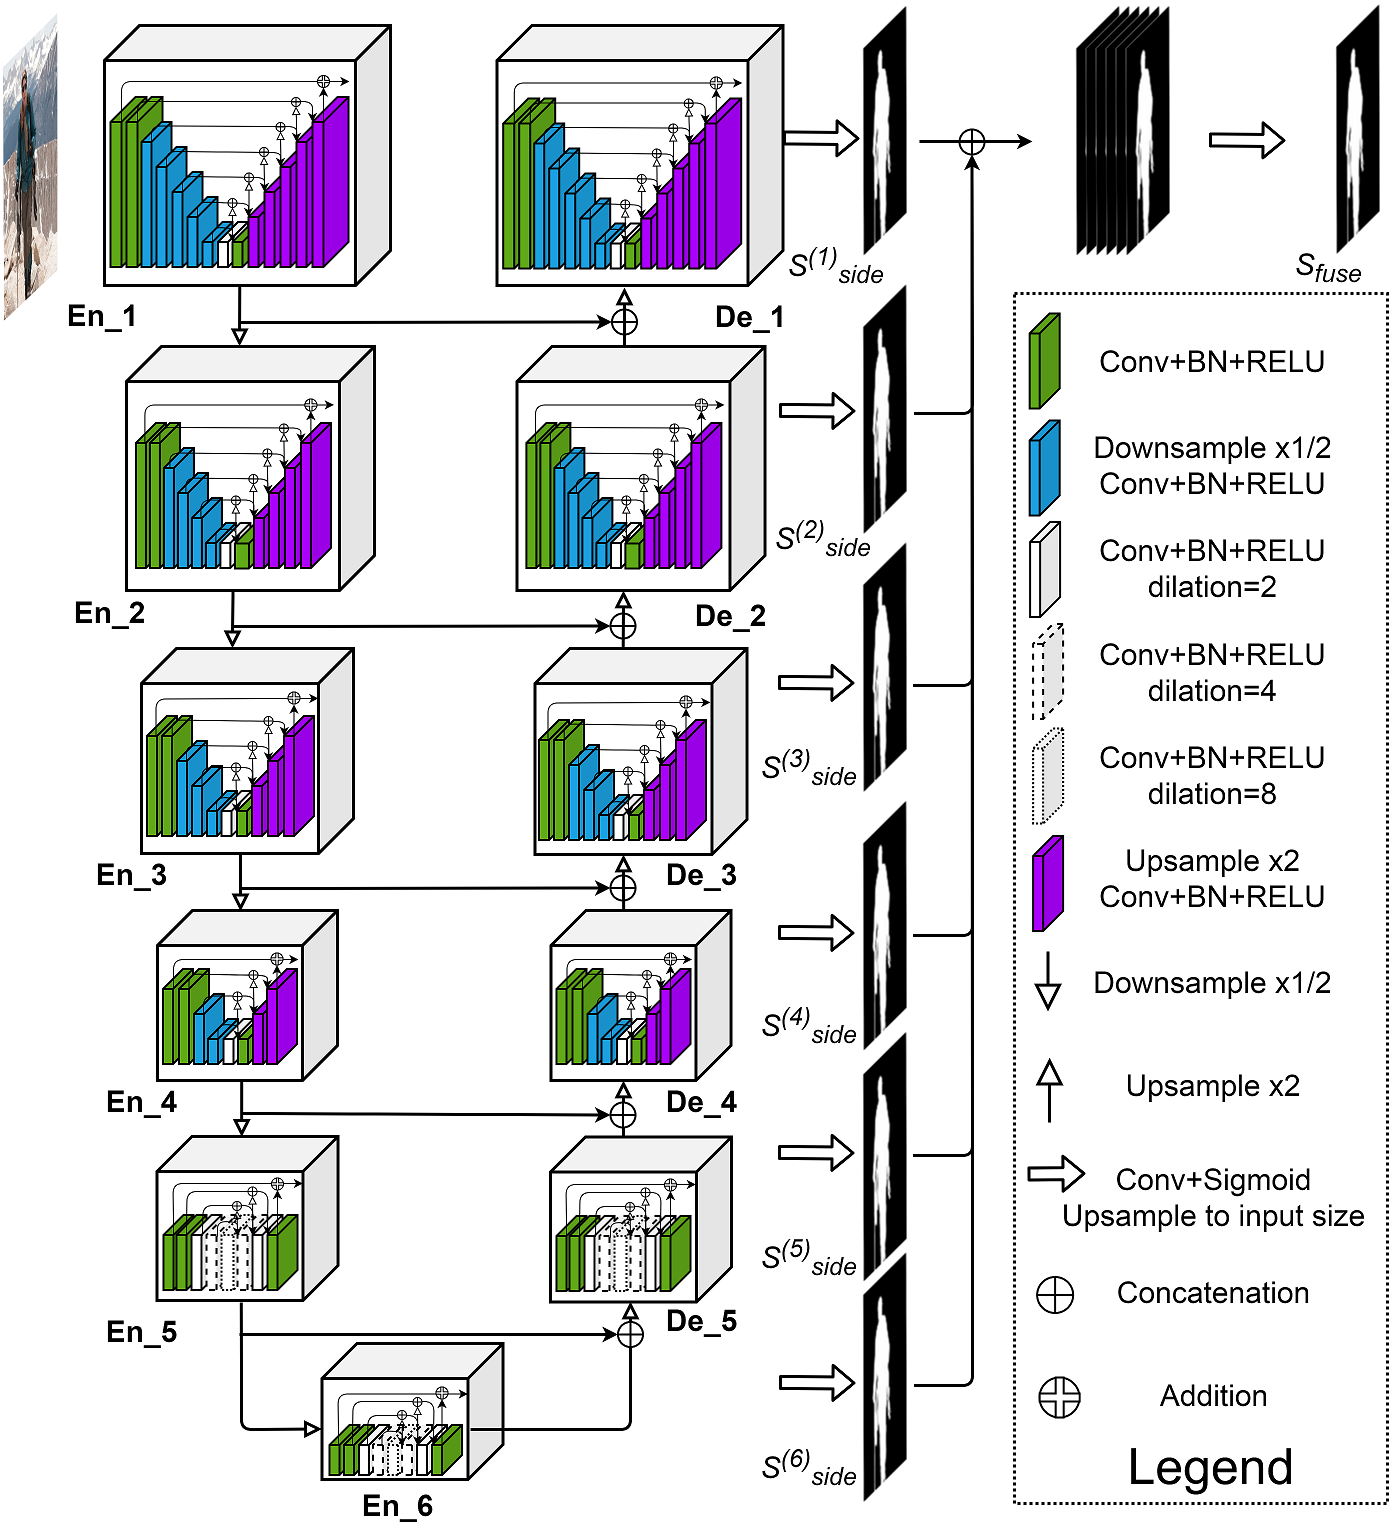
有兴趣的可以看一下原论文:https://arxiv.org/pdf/2005.09007.pdf 文章出来也比较早了,网上解读有很多,这里就不深入展开了。
来看一下实际的应用效果
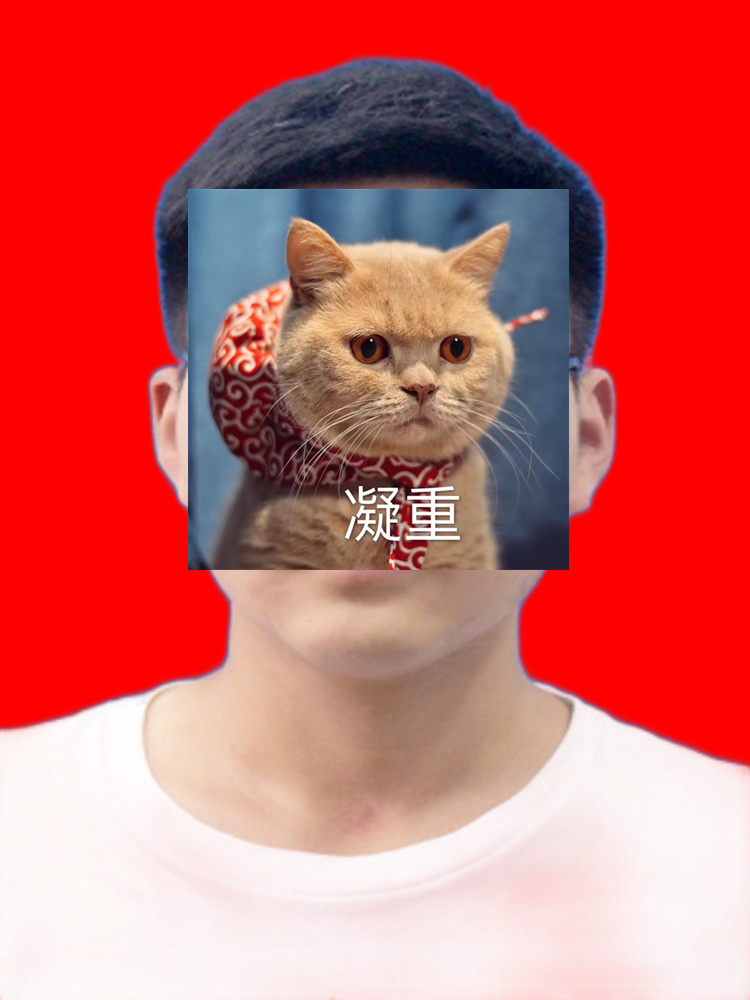
很明显的看到边缘还有一层残留的蓝色背景,这和论文配图的效果不相符合啊
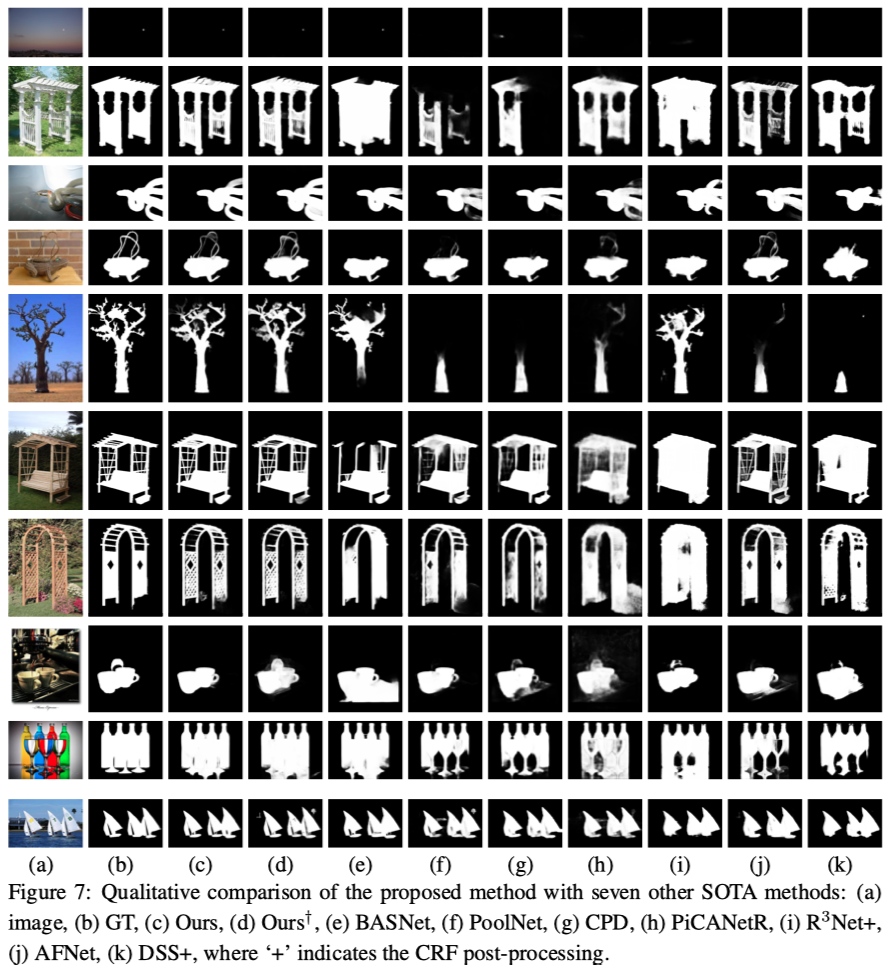
果然论文效果图看个热闹就好,但还好问题不是很大,加一些形态学的处理,再来看看效果
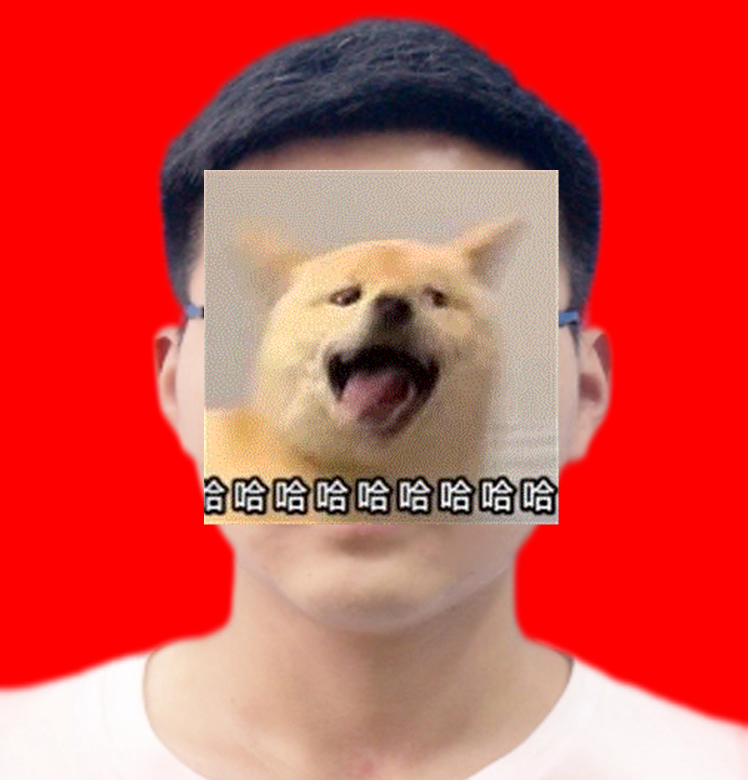
大功告成!
算法工作完成了,接下来就是 UI 界面了,对于 Python 玩家来说,Tkinter 和 PyQT 都是不错的 UI 工具,在这里我使用的是 Tkinter,以下是主程序代码
from tkinter import *
import tkinter as tk
from tkinter import ttk
import tkinter
from tkinter import messagebox
import threading
import cv2
import numpy as np
import torch
from tkinter.filedialog import *
import tkinter.colorchooser
from PIL import Image, ImageTk
from model import U2NET
import winreg

def get_desktop():
    key = winreg.OpenKey(winreg.HKEY_CURRENT_USER,
                          r'Software\Microsoft\Windows\CurrentVersion\Explorer\Shell Folders',)
    return winreg.QueryValueEx(key, "Desktop")[0]

def normPRED(d):
    ma = torch.max(d)
    mi = torch.min(d)
    dn = (d-mi)/(ma-mi)
    return dn

def get_img(pic_path, width, height):
    pic = Image.open(pic_path).resize((width, height))
    pic = ImageTk.PhotoImage(pic)
    return pic


class Operate(object):
    def __init__(self):
        self.root = tkinter.Tk()
        self.root.title(u"OutBreak-Hui&证件照编辑")
        self.root.geometry("600x380")
        self.root.resizable(width=False, height=False)

        self.picDir = ""
        self.color = None
        self.save_height = None
        self.save_width = None
        self.save_img = None

        self.lab1 = Label(self.root, text=u"选择图片")
        self.entry1 = Entry(self.root, width=60)
        self.entry1.delete(0, "end")
        self.B1 = Button(self.root, text=u"浏览", command=self.show_pic, width=7)

        self.lab2 = Label(self.root, text=u"选择尺寸", width=43)
        self.var1 = tkinter.StringVar()
        self.combobox = tkinter.ttk.Combobox(self.root, textvariable=self.var1, value=(u"一寸", u"小一寸", u"大一寸",
                                                                                       u"二寸", u"五寸"), width=41)
        self.B2 = Button(self.root, text=u"选择背景", command=self.ChooseColor, width=43)
        self.B3 = Button(self.root, text=u"转   换&预   览", command=self.change_background, width=43)
        self.B4 = Button(self.root, text=u"保   存", command=self.save_pic, width=43)

        self.canva_show = Canvas(self.root, width=240, height=320, bg="white")

        global img
        img = get_img("select.png", 300, 100)
        self.lab3 = Label(self.root, image=img)

    def gui_arrang(self):
        self.lab1.place(x=20, y=10, anchor='nw')
        self.B1.place(x=529, y=7, anchor='nw')
        self.entry1.place(x=90, y=10, anchor='nw')

        self.canva_show.place(x=20, y=40, anchor='nw')

        self.B2.place(x=275, y=41, anchor='nw')

        self.lab2.place(x=275, y=81, anchor='nw')
        self.combobox.place(x=275, y=121, anchor='nw')

        self.B3.place(x=275, y=161, anchor='nw')

        self.B4.place(x=275, y=201, anchor='nw')

        self.lab3.place(x=275, y=251, anchor="nw")

    def get_pic_dir(self):
        default_dir = r"文件路径"
        self.picDir = askopenfilename(title=u"选择文件", initialdir=(os.path.expanduser(default_dir)))
        self.entry1.insert(0, str(self.picDir))
        return self.picDir

    def show_pic(self):
        global img_tk
        picDir = self.get_pic_dir()
        # img = cv2.imread(picDir)
        img = cv2.imdecode(np.fromfile(picDir, dtype=np.uint8), -1)
        # print(img)
        canvawidth = int(self.canva_show.winfo_reqwidth())
        canvaheight = int(self.canva_show.winfo_reqheight())

        img = cv2.resize(img, (canvawidth, canvaheight), interpolation=cv2.INTER_AREA)
        imgcv2 = cv2.cvtColor(img, cv2.COLOR_BGR2RGBA)
        current_img = Image.fromarray(imgcv2)
        img_tk = ImageTk.PhotoImage(image=current_img)
        self.canva_show.create_image(0, 0, anchor='nw', image=img_tk)

    def ChooseColor(self):
        r = tkinter.colorchooser.askcolor(title="颜色选择器")
        r = r[0]
        self.color = r
        # return r

    def thread_creat(self, func, *args):
        t = threading.Thread(target=func, args=args)
        t.setDaemon(True)
        t.start()

    def change_background(self):
        global img_tk
        pic_path = self.picDir
        model_name = "u2net"
        model_dir = "saved_models\\u2net\\u2net.pth"

        net = U2NET(3, 1)
        mean = [0.485, 0.456, 0.406]
        std = [0.229, 0.224, 0.225]

        if torch.cuda.is_available():
            net.load_state_dict(torch.load(model_dir))
            net.cuda()
        else:
            net.load_state_dict(torch.load(model_dir, map_location="cpu"))

        net.eval()

        pic = cv2.imdecode(np.fromfile(pic_path, dtype=np.uint8), -1)
        pic = cv2.cvtColor(pic, cv2.COLOR_BGR2RGB)
        pic_file = pic
        size = (pic.shape[1], pic.shape[0])

        pic = cv2.resize(pic, (320, 320)).astype(np.float32)
        pic /= 255.0
        pic = ((pic - mean) / std).astype(np.float32)
        pic = torch.from_numpy(pic.transpose(2, 0, 1)).unsqueeze(0)


        if torch.cuda.is_available():
            pic = pic.cuda()
        else:
            pass

        d1, d2, d3, d4, d5, d6, d7 = net(pic)
        pred = d1[:, 0, :, :]

        pred = normPRED(pred)

        predict = pred
        predict = predict.squeeze()
        predict_np = predict.cpu().data.numpy()

        kernel = cv2.getStructuringElement(cv2.MORPH_RECT, (5, 5))
        predict_np = cv2.erode(predict_np, kernel)
        predict_np = cv2.GaussianBlur(predict_np, (3, 3), 0)

        im = Image.fromarray(predict_np * 255).convert('RGB')
        im = im.resize(size, resample=Image.BILINEAR)
        im = np.array(im)
        res = np.concatenate((pic_file, im[:, :, [0]]), -1)
        img = Image.fromarray(res.astype('uint8'), mode='RGBA')

        background = self.color
        color_list = list(background)
        color_list = [int(i) for i in color_list]
        background = tuple(color_list)

        base_image = Image.new("RGB", size, background)

        scope_map = np.array(img)[:, :, -1] / 255
        scope_map = scope_map[:, :, np.newaxis]
        scope_map = np.repeat(scope_map, repeats=3, axis=2)
        res_image = np.multiply(scope_map, np.array(img)[:, :, :3]) + np.multiply((1 - scope_map),
                                                                                  np.array(base_image))
        canvawidth = int(self.canva_show.winfo_reqwidth())
        canvaheight = int(self.canva_show.winfo_reqheight())
        self.save_img = Image.fromarray(np.uint8(res_image))
        res_image = cv2.resize(res_image, (canvawidth, canvaheight), interpolation=cv2.INTER_AREA)
        current_img = Image.fromarray(np.uint8(res_image))
        img_tk = ImageTk.PhotoImage(image=current_img)
        self.canva_show.create_image(0, 0, anchor='nw', image=img_tk)

    def save_pic(self):
        if self.picDir == "":
            tkinter.messagebox.showinfo("提示", "请选择图片")
        if self.combobox.get() == "一寸":
            self.save_height = 413
            self.save_width = 295
            self.save_img = self.save_img.resize((self.save_width, self.save_height), resample=Image.BILINEAR)
            out_path = os.sep.join([get_desktop(), "certificate.jpg"])
            self.save_img.save(out_path, quality=95, subsampling=0)
        elif self.combobox.get() == "小一寸":
            self.save_height = 390
            self.save_width = 260
            self.save_img = self.save_img.resize((self.save_width, self.save_height), resample=Image.BILINEAR)
            out_path = os.sep.join([get_desktop(), "certificate.jpg"])
            self.save_img.save(out_path, quality=95, subsampling=0)
        elif self.combobox.get() == "大一寸":
            self.save_height = 567
            self.save_width = 390
            self.save_img = self.save_img.resize((self.save_width, self.save_height), resample=Image.BILINEAR)
            out_path = os.sep.join([get_desktop(), "certificate.jpg"])
            self.save_img.save(out_path, quality=95, subsampling=0)
        elif self.combobox.get() == "二寸":
            self.save_height = 636
            self.save_width = 413
            self.save_img = self.save_img.resize((self.save_width, self.save_height), resample=Image.BILINEAR)
            out_path = os.sep.join([get_desktop(), "certificate.jpg"])
            self.save_img.save(out_path, quality=95, subsampling=0)
        elif self.combobox.get() == "五寸":
            self.save_height = 1200
            self.save_width = 840
            self.save_img = self.save_img.resize((self.save_width, self.save_height), resample=Image.BILINEAR)
            out_path = os.sep.join([get_desktop(), "certificate.jpg"])
            self.save_img.save(out_path, quality=95, subsampling=0)
        else:
            tkinter.messagebox.showinfo("提示", "请选择转换尺寸")


if __name__ == '__main__':
    O = Operate()
    O.gui_arrang()
    tkinter.mainloop()
最后比对一下支付宝上的收费应用的效果
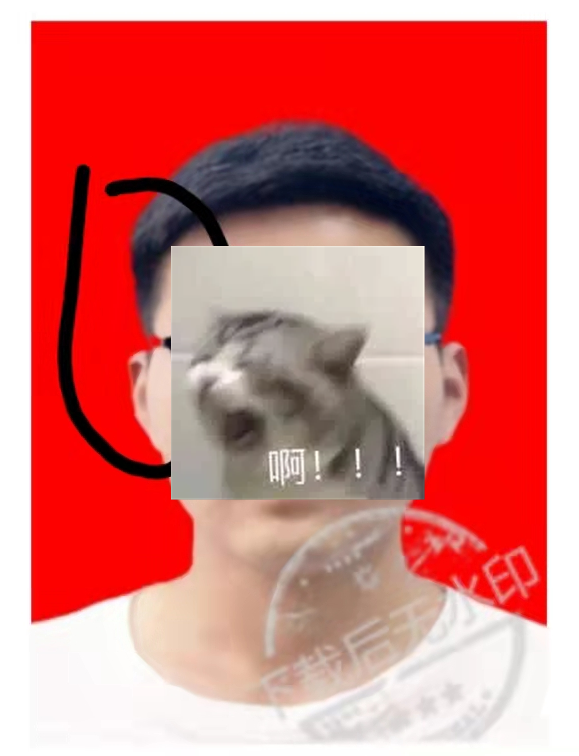
收钱居然还有瑕疵?差点浪费我六块大洋
完整工程见GitHub:https://github.com/OutBreak-hui/IDPhoto
如果可以的话给个star,哈哈哈哈
