背景
如果是做遥感在深度学习中应用的同学,会遇到将大范围遥感影像,按顺序裁剪为规则小范围的影像。由于之前做过类似的,我分享一下自己是怎么规则裁剪大范围栅格影像的。
裁剪方法
QGIS裁剪
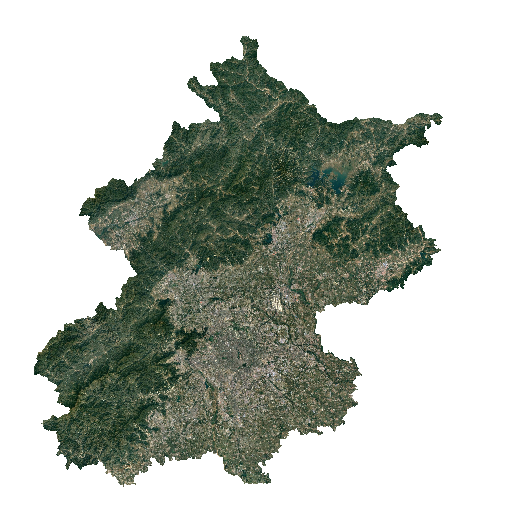
我们有一个北京市的Google影像图,想裁剪为256256大小的切片.

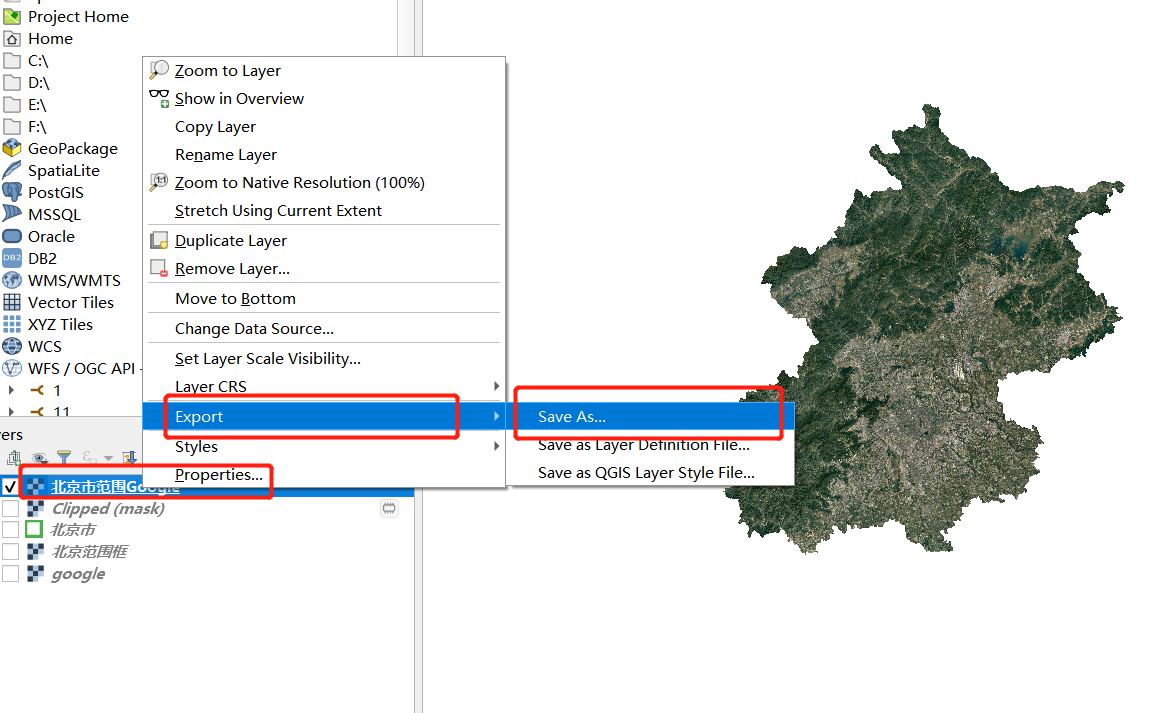
选中我们的影像,export,save as:

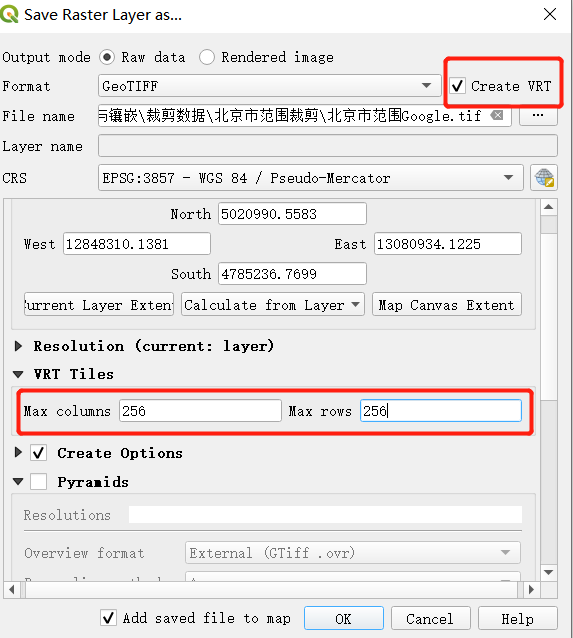
选中vrt,选择切割影像的大小,比如我们获得的每一张像片的大小为256256:

输出后就能获得我们需要的结果.

Python裁剪
我在学生阶段写的代码忘记备份,因此整理了网上的裁剪代码,原理都是相同的,用到的库有所区别,有的用
opencv,有的用PIL:
裁剪代码一
from cv2 import cv2
import numpy as np
Img_To_Clip = '.jpg' # 分割的图片的位置
pic_target = '/result/' # 分割后的图片保存的文件夹
#要分割后的尺寸
cut_width = 512
cut_length = 512
# 读取要分割的图片,以及其尺寸等数据
picture = cv2.imread(Img_To_Clip)
(width, length, depth) = picture.shape
# 预处理生成0矩阵
pic = np.zeros((cut_width, cut_length, depth))
# 计算可以划分的横纵的个数
num_width = int(width / cut_width)
num_length = int(length / cut_length)
# for循环迭代生成
for i in range(0, num_width):
    for j in range(0, num_length):
        pic = picture[i*cut_width : (i+1)*cut_width, j*cut_length : (j+1)*cut_length, :]
        result_path = pic_target + '{}_{}.jpg'.format(i+1, j+1)
        cv2.imwrite(result_path, pic)
裁剪代码二
from cv2 import cv2
#读取文件
im=cv2.imread(Img_To_Clip)
#获取小切片的行列数
M = im.shape[0]//2
N = im.shape[1]//2
#切割
tiles = [im[x:x+M,y:y+N] for x in range(0,im.shape[0],M) for y in range(0,im.shape[1],N)]
裁剪代码三
from PIL import Image

def crop(path, input, height, width, k, page, area):
    im = Image.open(input)
    imgwidth, imgheight = im.size
    for i in range(0,imgheight,height):
        for j in range(0,imgwidth,width):
            box = (j, i, j+width, i+height)
            a = im.crop(box)
            try:
                o = a.crop(area)
                o.save(os.path.join(path,"PNG","%s" % page,"IMG-%s.png" % k))
            except:
                pass
            k +=1