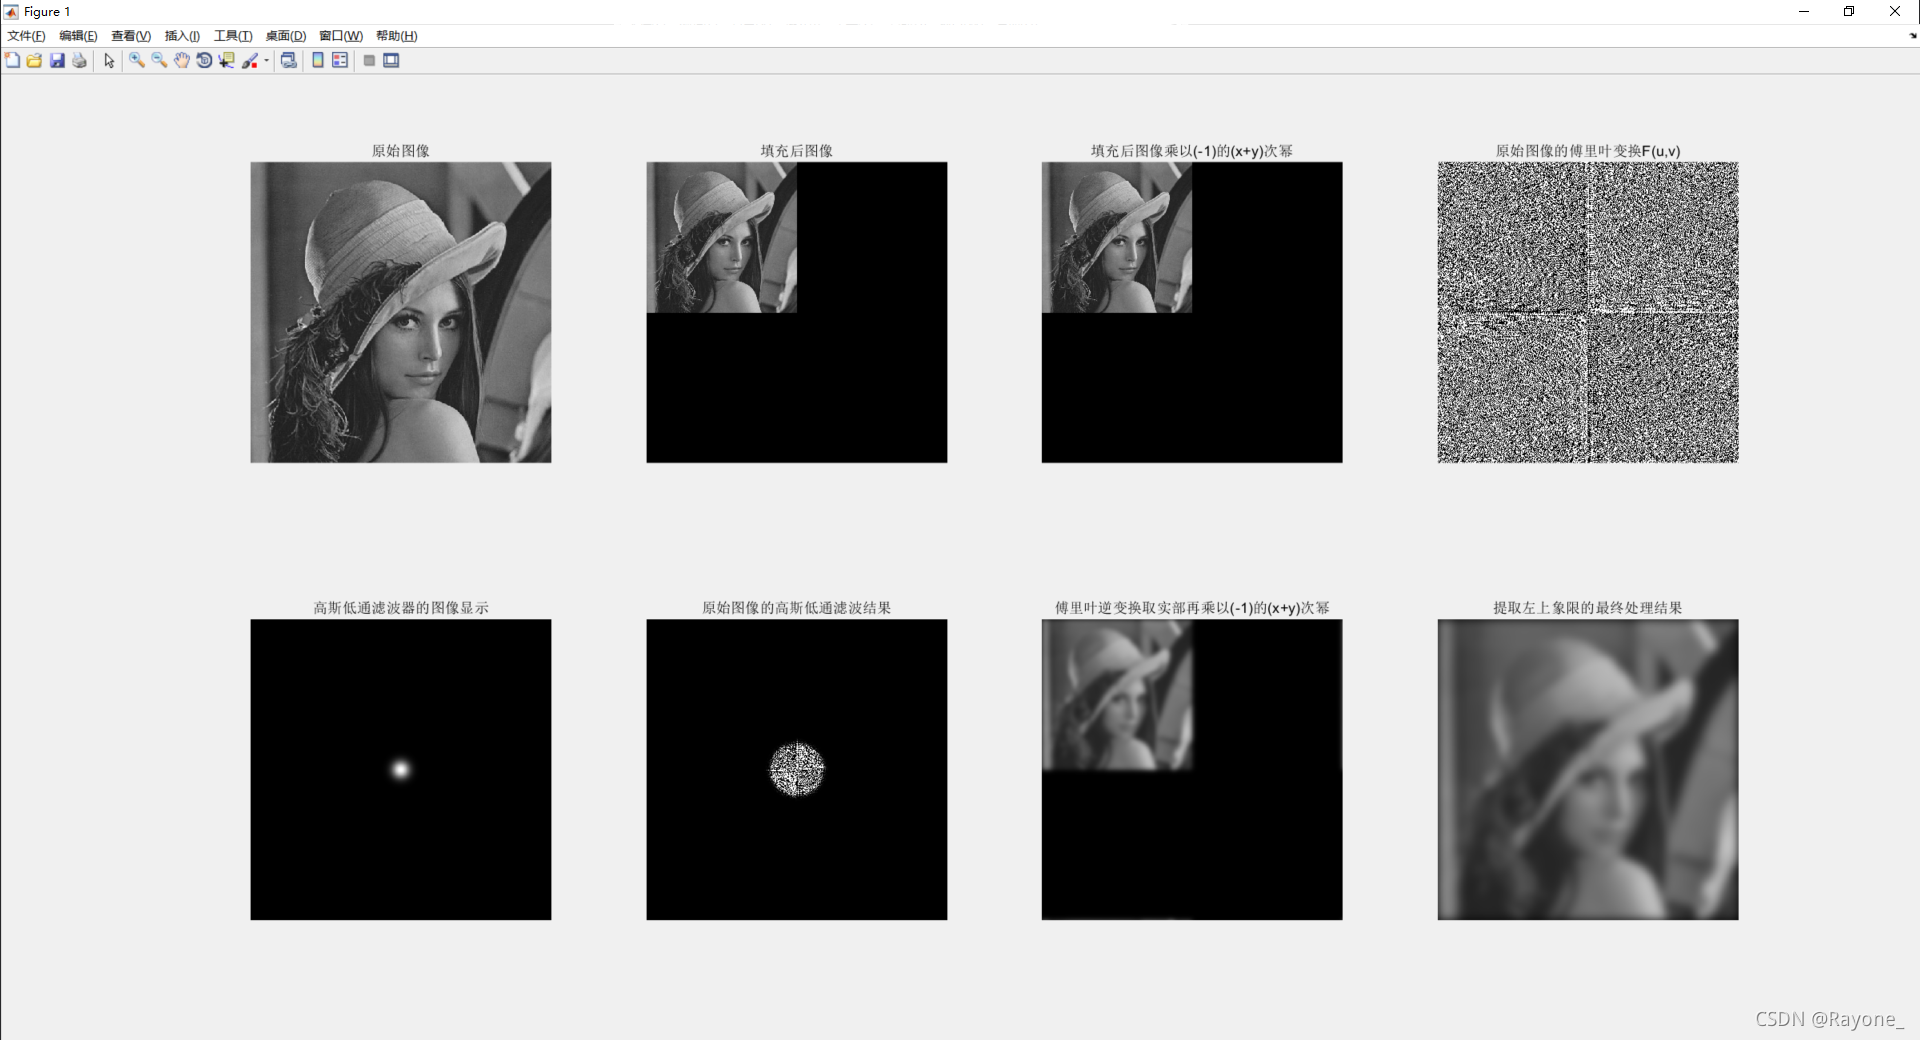
通过代码来分析如何对图像进行高斯滤波
先放镇楼图:

1. 读取图像,转灰度图像
I = imread('lena.bmp');	%读取原图像
I = rgb2gray(I);		%原图像转灰度图像
i_size = 512;			%原图像大小
fillsize = 1024;		%填充后图像大小
I = imresize(I,[i_size,i_size]);
figure(1);subplot(241);imshow(I);title('原始图像');
2.图像填充,避免循环卷积中的缠绕错误
fillimage = uint8(zeros(fillsize,fillsize));
fillimage(1:i_size,1:i_size)=I;
subplot(242);imshow(fillimage);title('填充后图像');
3.频谱中心化
for x = 1:fillsize
    for y = 1:fillsize
        h(x,y) =  (-1)^(x+y);
    end
end
fillimagecenter = h.*double(fillimage);%做(-1)^(x+y)运算   %h.*表示对应元素相乘,相当于做的阵列运算
subplot(243);imshow(fillimage);title('填充后图像乘以(-1)的(x+y)次幂');
4.二维离散傅里叶变换
F = fft2(double(fillimagecenter));%二维傅里叶变换
subplot(244);imshow(F),title('原始图像的傅里叶变换F(u,v)');
5.高斯滤波
低通滤波器:
%设置高斯低通滤波器
[r,c] = size(fillimage);
%设置截至半径
D0 = 20;
for i = 1:fillsize
    for j = 1:fillsize
        d = (i-r/2)^2+(j-c/2)^2;
        temp = exp(-d/(D0*D0*2));
        gaussian_lowpass_filter(i,j) = temp;
        gaussian_lowpass_result(i,j) = temp.*F(i,j);
    end
end
高通滤波器:
%设置高斯高通滤波器
[r,c] = size(fillimage);
%设置截至半径
D0 = 20;
for i = 1:fillsize
    for j = 1:fillsize
        d = (i-r/2)^2+(j-c/2)^2;
         temp=1-exp(-d/(D0*D0*2));
        gaussian_lowpass_filter(i,j) = temp;
        gaussian_lowpass_result(i,j) = temp.*F(i,j);
    end
end
6.最终结果显示
subplot(245);imshow(gaussian_lowpass_filter);title('高斯低通滤波器的图像显示');
subplot(246);imshow(gaussian_lowpass_result);title('原始图像的高斯低通滤波结果');
resultimage=real(ifft2(gaussian_lowpass_result)).*h; %傅里叶反变换
subplot(247);
imshow(uint8(resultimage));title('傅里叶逆变换取实部再乘以(-1)的(x+y)次幂');
final_result=resultimage(1:i_size,1:i_size);
subplot(248);
imshow(uint8(final_result));title('提取左上象限的最终处理结果');
低通滤波器的结果:

高通滤波器的结果:
