4.1 图像处理函数学习
思路:主要运用PIL对图片进行处理,可实现效果如高斯模糊、负片效果等。
【查看图像相关参数】
主要参数有:im.format,im.size,im.mode
from PIL import Image
import os

im=Image.open('pic.jpg')
print(im.format,im.size,im.mode)#图像格式、大小等
im.show()
【图像格式转换】
该功能可将jpg转换为png格式。
print(filelist):可以看到文件中有什么
from PIL import Image
import os
print(os.getcwd())
os.chdir(r'D:\a learn sth\大三上\Python程序设计\图像处理')
#写程序所有的文件名不要用中文,否则会有bug;也不要用空格

filelist=os.listdir(os.getcwd())
print(filelist)#这个列表可以看到文件中都有什么

for infile in filelist:
    filename=str(infile)
    print(filename)
    print(filename.find('.jpg'))
    isimg=filename.find('.jpg')
    if isimg>=0:
        outfile=infile[0:isimg]+".png"
        if infile!=outfile:
            try:
                Image.open(infile).save(outfile)#打开并且存成outfile
            except IOError:
                print("Cannot convert",infile)#不行的话就打印这个
【灰度图】
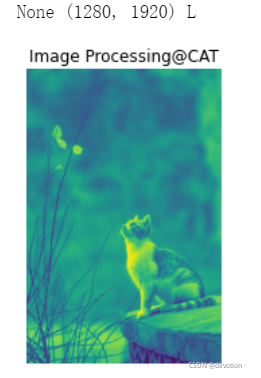
基本思路:1.确认当前文件路径? ?2.灰度转换? ?3.显示图片
from PIL import Image
import os
import matplotlib.pyplot as plt

#确认路径
print(os.getcwd())
os.chdir(r'D:\a learn sth\pythonclass\PIL')
print(os.getcwd())

#转换
im=Image.open('cat.jpg').convert("L")
print(im.format,im.size,im.mode)

#显示
plt.imshow(im)
plt.title("Image Processing@CAT")
plt.axis("off")
plt.show()
效果如图:

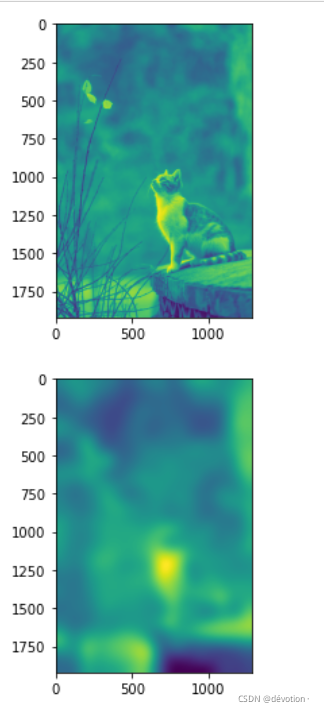
【高斯模糊】
from PIL import Image
from numpy import *
from scipy.ndimage import filters
import matplotlib.pyplot as plt

img=array(Image.open("cat.jpg").convert("L"))
img2=filters.gaussian_filter(img,50)#数字是参数,控制高斯模糊的程度

plt.figure()
plt.imshow(img)

plt.figure()
plt.imshow(img2)
plt.show()
效果如图:

【图像分割】
from PIL import Image
from numpy import *
from scipy.ndimage import measurements
import matplotlib.pyplot as plt
import os

#转换路径
print (os.getcwd())
os.chdir(r'D:\pythonclass\PIL')

#变为数组
im=array(Image.open('cat.jpg'))
plt.figure()
plt.imshow(im)

#图像分割
im=array(Image.open('cat.jpg').convert('L'))
plt.figure()
plt.imshow(im)
im=1*(im<128)
labels,nbrobjects=measurements.label(im)

print("对象个数=",nbrobjects)

#显示图片
plt.figure()
plt.imshow(im)
plt.show()
效果如图:
 ?
?
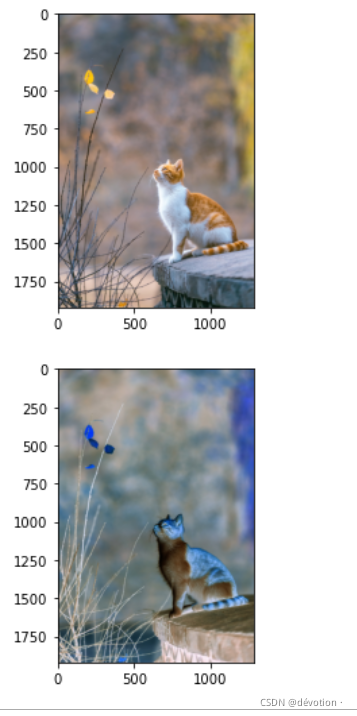
【负片效果】
from PIL import Image
import matplotlib.pyplot as plt

#确认路径
os.chdir(r'D:\pythonclass\PIL')

#转换为数组
im=array(Image.open('cat.jpg'))
plt.figure()
plt.imshow(im)

#负片效果
im2=255-im

#显示图片
plt.figure()
plt.imshow(im2)
plt.show()
效果如图:

?
4.2图像处理与人脸识别的结合
基本思路:
1.利用openCV识别出人脸
2.返回所识别人脸的坐标值
import face_recognition
import cv2
import matplotlib.pyplot as plt

image=face_recognition.load_image_file("yu.jpg")
face_locations=face_recognition.face_locations(image)

#查看检测到的人脸数量
face_num=len(face_locations)
print(face_num)

#返回人脸位置
org=cv2.imread("yu.jpg")
for i in range(0,face_num):
    top=face_locations[i][0]
    right=face_locations[i][1]
    bottom=face_locations[i][2]
    left=face_locations[i][3]

    start=(left,top)
    end=(right,bottom)
    print(start,end)

# 画出矩形框
    color=(0,255,0)
    thickness=5
    img=cv2.rectangle(org,start,end,color,thickness)

plt.imshow(img)
plt.axis("off")
plt.show()
效果如图:

3.对人脸区域进行图像处理,如高斯模糊、旋转等。
#图片局部模糊处理
  #Image类中的成员函数filter()来调用滤波函数对图像进行滤波
from PIL import Image, ImageFilter

class MyGaussianBlur(ImageFilter.Filter):#创建一个类
  name = "GaussianBlur"#英文是高斯模糊的意思

  def __init__(self, radius=2, bounds=None):#这个类的参数定义为radius和bounds
    self.radius = radius
    self.bounds = bounds

  def filter(self, image):
    if self.bounds:
      clips = image.crop(self.bounds).gaussian_blur(self.radius)#裁剪并高斯模糊
      image.paste(clips, self.bounds)#粘贴图片
      return image
    else:
      return image.gaussian_blur(self.radius)

bounds = (664, 480,1219, 1035)
image = Image.open('yu.jpg')
image = image.filter(MyGaussianBlur(radius=29, bounds=bounds))
#image.show()这个是图片弹出来
plt.imshow(image)
plt.axis("off")
plt.show()
?效果如图:

def __init__(self)相关知识:
def __init__(self)是什么意思_通俗的告诉你Python中 init_ 到底是什么含义?_weixin_39994438的博客-CSDN博客
4.3?ffmege命令学习
利用ffmege可以对音视频进行一定的处理。
【将视频拆成(黑白)图片】
基本思路:
1.找到路径? ?
2.新建文件夹用于放图片? ?
3.打印数量? ?
4.转为灰度图+拆成图片
5.再生成新视频,则在命令行输入:
fmpeg -f image2 -i ./img/image%d.jpg -r 24 output.mp4
注意:格式说明由“%”和格式字符组成,如%d%f等。它的作用是将输出的数据转换为指定的格式输出。
?%d相关介绍: C语言-格式输入输出中“%d,%o,%x,%e,%f”等的含义_李公子的博客-CSDN博客_%d
import os
import cv2
import subprocess

os.chdir(r'D:\a learn sth\大三上\Python程序设计\视频分镜头')#转到目录下
v_path='ghz.mp4'
image_save='./img'#新建一个文件夹用于放生成的图片

cap=cv2.VideoCapture(v_path)
frame_count=cap.get(cv2.CAP_PROP_FRAME_COUNT)
print(frame_count)

for i in range(int(frame_count)):
    _,img=cap.read()
    img=cv2.cvtColor(img,cv2.cv2.COLOR_BGR2GRAY) #cv2.COLOR_RGBGRAY  cv2.COLOR_BGR2GRAY
    #大写的都是常量
    cv2.imwrite('./img/image{}.jpg'.format(i),img)#把i传进{}中
【其他命令】
直接在命令行中写:
旋转90°:ffmpeg -i test.mp4 -metadata:s:v rotate="90" -codec copy out.mp4
去掉视频中的音频:ffmpeg -i input.mp4 -an output.mp4????????????
相关网址(包含其他命令):FFmpeg常用基本命令行_文明的博客-CSDN博客_ffmpeg 命令
?