练习1:提取视频中的每一帧
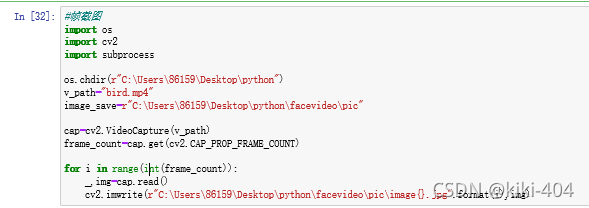
#帧截图
import os
import cv2
import subprocess

os.chdir(r"C:\Users\86159\Desktop\python")
v_path="bird.mp4"
image_save=r"C:\Users\86159\Desktop\python\facevideo\pic"

cap=cv2.VideoCapture(v_path)
frame_count=cap.get(cv2.CAP_PROP_FRAME_COUNT)

for i in range(int(frame_count)):
    _,img=cap.read()
    cv2.imwrite(r"C:\Users\86159\Desktop\python\facevideo\pic\image{}.jpg".format(i),img)
报错:
1.for语法没加空格出错,要严格遵循格式
2.路径前面加r,解决神秘错误
3.pic截图文件夹要先建立好
练习2:图片对比
import cv2
import numpy as np
import matplotlib.pyplot as plt
import os
os.chdir(r'C:\Users\86159\Desktop\python')

def aHash(img):
    # 缩放为8*8
    plt.imshow(img)
    plt.axis("off")  #去掉坐标轴
    plt.show()
    img = cv2.resize(img, (8, 8))
    plt.imshow(img)
    plt.axis("off")  #去掉坐标轴
    plt.show()

    # 转换为灰度图
    gray = cv2.cvtColor(img,cv2.COLOR_BGR2GRAY)
    # s为像素和初值为0,hash_str为hash值初值为''
    s = 0
    hash_str = ""
    # 遍历累加求像素和
    for i in range(8):
        for j in range(8):
            s = s + gray[i, j]
    # 求平均灰度
    avg = s / 64
    # 灰度大于平均值为1相反为0生成图片的hash值
    for i in range(8):
        for j in range(8):
            if gray[i, j] > avg:
                hash_str = hash_str + "1"
            else:
                hash_str = hash_str + "0"
    return hash_str


# 差值感知算法
def dHash(img):
    # 缩放8*8
    img = cv2.resize(img, (9, 8))
    # 转换灰度图
    gray = cv2.cvtColor(img, cv2.COLOR_BGR2GRAY)
    hash_str = ''
    # 每行前一个像素大于后一个像素为1,相反为0,生成哈希
    for i in range(8):
        for j in range(8):
            if gray[i, j] > gray[i, j + 1]:
                hash_str = hash_str + '1'
            else:
                hash_str = hash_str + '0'
    return hash_str


# 感知哈希算法(pHash)
def pHash(img):
    # 缩放32*32
    img = cv2.resize(img, (32, 32))  # , interpolation=cv2.INTER_CUBIC

    # 转换为灰度图
    gray = cv2.cvtColor(img, cv2.COLOR_BGR2GRAY)
    # 将灰度图转为浮点型,再进行dct变换
    dct = cv2.dct(np.float32(gray))
    # opencv实现的掩码操作
    dct_roi = dct[0:8, 0:8]

    hash = []
    avreage = np.mean(dct_roi)
    for i in range(dct_roi.shape[0]):
        for j in range(dct_roi.shape[1]):
            if dct_roi[i, j] > avreage:
                hash.append(1)
            else:
                hash.append(0)
    return hash


# 通过得到RGB每个通道的直方图来计算相似度
def classify_hist_with_split(image1, image2, size=(256, 256)):
    # 将图像resize后,分离为RGB三个通道,再计算每个通道的相似值
    image1 = cv2.resize(image1, size)
    image2 = cv2.resize(image2, size)
    plt.imshow(image1)
    plt.show()
    plt.axis('off')

    plt.imshow(image2)
    plt.show()
    plt.axis('off')

    sub_image1 = cv2.split(image1)
    sub_image2 = cv2.split(image2)
    sub_data = 0

    for im1, im2 in zip(sub_image1, sub_image2):
        sub_data += calculate(im1, im2)
    sub_data = sub_data / 3
    return sub_data


# 计算单通道的直方图的相似值
def calculate(image1, image2):
    hist1 = cv2.calcHist([image1], [0], None, [256], [0.0, 255.0])
    hist2 = cv2.calcHist([image2], [0], None, [256], [0.0, 255.0])
    plt.plot(hist1, color="r")
    plt.plot(hist2, color="g")
    plt.show()
    # 计算直方图的重合度
    degree = 0
    for i in range(len(hist1)):
        if hist1[i] != hist2[i]:
            degree = degree + (1 - abs(hist1[i] - hist2[i]) / max(hist1[i], hist2[i]))
        else:
            degree = degree + 1
    degree = degree / len(hist1)
    return degree
def cmpHash(hash1, hash2):
    n = 0
    # hash长度不同则返回-1代表传参出错
    if len(hash1)!=len(hash2):
        return -1
    # 遍历判断
    for i in range(len(hash1)):
        # 不相等则n计数+1,n最终为相似度
        if hash1[i] != hash2[i]:
            n = n + 1
    return n


img1 = cv2.imread(r"C:\Users\86159\Desktop\python\facevideo\image1.jpg")  #  11--- 16 ----13 ---- 0.43
img2 = cv2.imread(r"C:\Users\86159\Desktop\python\facevideo\image2.jpg")


hash1 = aHash(img1)
hash2 = aHash(img2)
n = cmpHash(hash1, hash2)
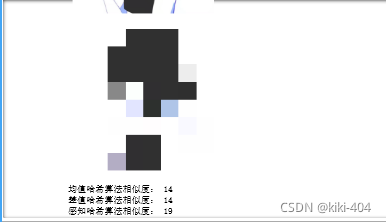
print("均值哈希算法相似度:", n)

hash1 = dHash(img1)
hash2 = dHash(img2)
n = cmpHash(hash1, hash2)
print("差值哈希算法相似度:", n)

hash1 = pHash(img1)
hash2 = pHash(img2)
n = cmpHash(hash1, hash2)
print("感知哈希算法相似度:", n)

n = classify_hist_with_split(img1, img2)
print("三直方图算法相似度:", n)
报错:
1.文件夹命名不要中文也不要空格
2.路径前加r
?练习3:基于相等判断图像是否相同
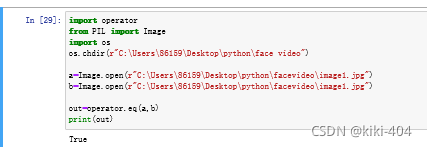
import operator
from PIL import Image
import os
os.chdir(r"C:\Users\86159\Desktop\python\face video")

a=Image.open(r"C:\Users\86159\Desktop\python\facevideo\image1.jpg")
b=Image.open(r"C:\Users\86159\Desktop\python\facevideo\image1.jpg")

out=operator.eq(a,b)
print(out)
?练习3:图片直方图
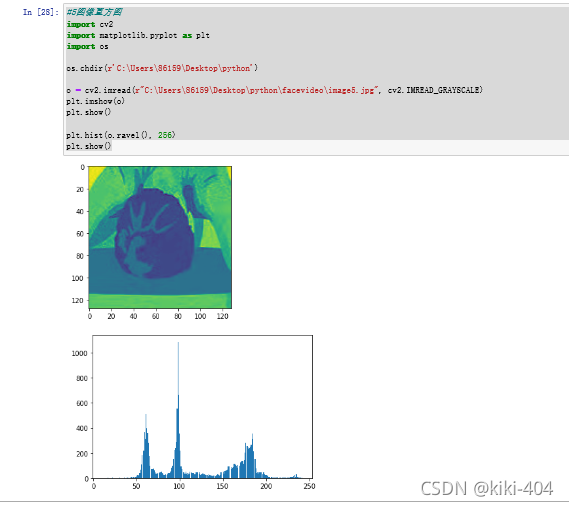
#5图像直方图
import cv2
import matplotlib.pyplot as plt
import os

os.chdir(r'C:\Users\86159\Desktop\python')

o = cv2.imread(r"C:\Users\86159\Desktop\python\facevideo\image5.jpg", cv2.IMREAD_GRAYSCALE)
plt.imshow(o)
plt.show()

plt.hist(o.ravel(), 256)
plt.show()
?报错:
1.TypeError: Image data of dtype object cannot be converted to float? 可能是图片像素太大,或者是路径中忘记加图片类型。
2.路径前要加r
练习4:图片处理——做灰度图
from PIL import Image
import os
import matplotlib.pyplot as plt
print(os.getcwd())
os.chdir(r"C:\Users\86159\Desktop\python")
print(os.getcwd())
im=Image.open(r"C:\Users\86159\Desktop\python\face video\image1.jpg").convert("L")
print(im.format,im.size,im.mode)#im.show())
plt.imshow(im)
plt.title("Image Processing@CUC")
plt.axis("off")
plt.show()

?报错:
1.前面的引用部分注意格式