这段代码的步骤大致如下:
1.处理单张图作为网络的输入。
2.根据给定的layer层,获取该层输出结果features。
3.考虑到features的形状为[batch_size, filter_nums, H, W],提取其中第一个过滤器得到的结果的feature。
4.以一张图作为输入的情况下,我们得到的feature即为[H,W]大小的tensor
5.将tensor转为numpy,然后归一化[0,1],最后乘以255,使得范围为[0,255]。
6.得到灰度图像保存。
――――――――――――――――――――――――――――――――
import cv2
import numpy as np
import torch
from torch.autograd import Variable
from torchvision import models


def preprocess_image(cv2im, resize_im=True):
    """
    Processes image for CNNs
    Args:
    PIL_img(PIL_img):Image to process
    resize_im(bool):Resize to 224 or not
    :return:
    im_as_var(Pytorch variable):Variable that contains processed float tensor
    """
    # mean and std list for channels (ImageNet)
    mean = [0.485, 0.456, 0.406]
    std = [0.229, 0.224, 0.225]
    # Resize image
    if resize_im:
        cv2im = cv2.resize(cv2im, (224, 224))
    im_as_arr = np.float32(cv2im)
    im_as_arr = np.ascontiguousarray(im_as_arr[..., ::-1])
    im_as_arr = im_as_arr.transpose(2, 0, 1)  # Convert array to D,W,H
    # Normalize the channels
    for channel, _ in enumerate(im_as_arr):
        im_as_arr[channel] /= 255
        im_as_arr[channel] -= mean[channel]
        im_as_arr[channel] /= std[channel]
    # Convert to float tensor
    im_as_ten = torch.from_numpy(im_as_arr).float()
    # Add one more channel to the beginning. Tensor shape =1,3,224,224
    im_as_ten.unsqueeze(0)
    # Convert to Pytorch variable
    im_as_var = Variable(im_as_ten, requires_grad=True)
    return im_as_var


class FeatureVisualization():
    def __init__(self, img_path, selected_layer):
        self.img_path = img_path
        self.selected_layer = selected_layer
        self.pretrained_model = models.vgg16(pretrained=True).features

    def process_image(self):
        img = cv2.imread(self.img_path)
        img = preprocess_image(img)
        return img

    def get_feature(self):
        # input = Variable(torch.randn(1, 3, 224, 224))
        input = self.process_image()
        x = input
        x = x.unsqueeze(0)
        for index, layer in enumerate(self.pretrained_model):
            x = layer(x)
            if (index == self.selected_layer):
                return x

    def get_single_feature(self):
        features = self.get_feature()
        # print("get_single_features: ", features.shape)
        feature = features[:, 0, :, :]
        # print("get_single_feature: ", feature.shape)
        feature = feature.view(feature.shape[1], feature.shape[2])
        return feature

    def save_feature_to_img(self, i):
        # to numpy
        feature = self.get_single_feature()
        feature = feature.data.numpy()
        # use sigmod to [0,1]
        feature = 1.0 / (1 + np.exp(-1 * feature))
        # to [0,255]
        feature = np.round(feature * 255)
        print("ok feature.shape: ", feature.shape)
        cv2.imwrite(str(i) + ".jpg", feature)


if __name__ == "__main__":
    for i in range(30):
        myClass = FeatureVisualization("31.jpg", i)
        # print(myClass.pretrained_model)
        myClass.save_feature_to_img(i)
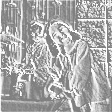
原图如下

―――――――――――――――――――――――――――――――――
可视化结果如下
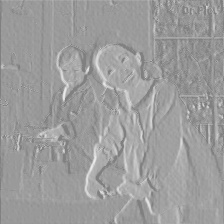
第1层

―――――――――――――――――――――――――――――――――
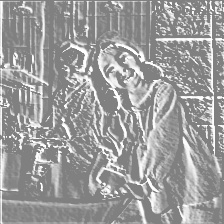
第2层
―――――――――――――――――――――――――――――――――
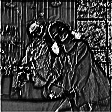
第3层

―――――――――――――――――――――――――――――――――
第4层
 ―――――――――――――――――――――――――――――――――
第5层
 ―――――――――――――――――――――――――――――――――
第6层
―――――――――――――――――――――――――――――――――
第7层
 ―――――――――――――――――――――――――――――――――
第8层
 ―――――――――――――――――――――――――――――――――
第9层
 ―――――――――――――――――――――――――――――――――
第10层
 ―――――――――――――――――――――――――――――――――
第11层
 ―――――――――――――――――――――――――――――――――
第12层
 ―――――――――――――――――――――――――――――――――
第13层
 ―――――――――――――――――――――――――――――――――
第14层
 ―――――――――――――――――――――――――――――――――
第15层

―――――――――――――――――――――――――――――――――
第16层
 ―――――――――――――――――――――――――――――――――
第17层

―――――――――――――――――――――――――――――――――
第18层

―――――――――――――――――――――――――――――――――
第19层
 ―――――――――――――――――――――――――――――――――
第20层
 ___________________________________________________________
第21层
 ___________________________________________________________
第22层
 ―――――――――――――――――――――――――――――――――
第23层

―――――――――――――――――――――――――――――――――
第24层

―――――――――――――――――――――――――――――――――
第25层

―――――――――――――――――――――――――――――――――
第26层

―――――――――――――――――――――――――――――――――
第27层

―――――――――――――――――――――――――――――――――
第28层

―――――――――――――――――――――――――――――――――
第29层

―――――――――――――――――――――――――――――――――
第30层

―――――――――――――――――――――――――――――――――