写在前面:最近看了《GAN实战》,由于本人忘性大,所以仅是笔记而已,方便回忆,如果能帮助大家就更好了。
目录
???????
目标识别模型学习图像中的模式以识别图像的内容
生成器学习合成这些模式(与目标识别模型过程相反)
?代价函数
表示生成器的代价函数,
代表鉴别器的代价函数
训练参数(权重与偏置):代表生成器,
代表鉴别器
因为GAN与传统的神经网络不同,它由两个网络构成,其代价函数依赖于两个网络的参数。也就是说生成器代价函数是(
,
),而鉴别器代价函数是?????????
(
,
)。在训练过程中,每个网络只能调整自己的参数:生成器只能调整
,鉴别器只能调整
?训练过程
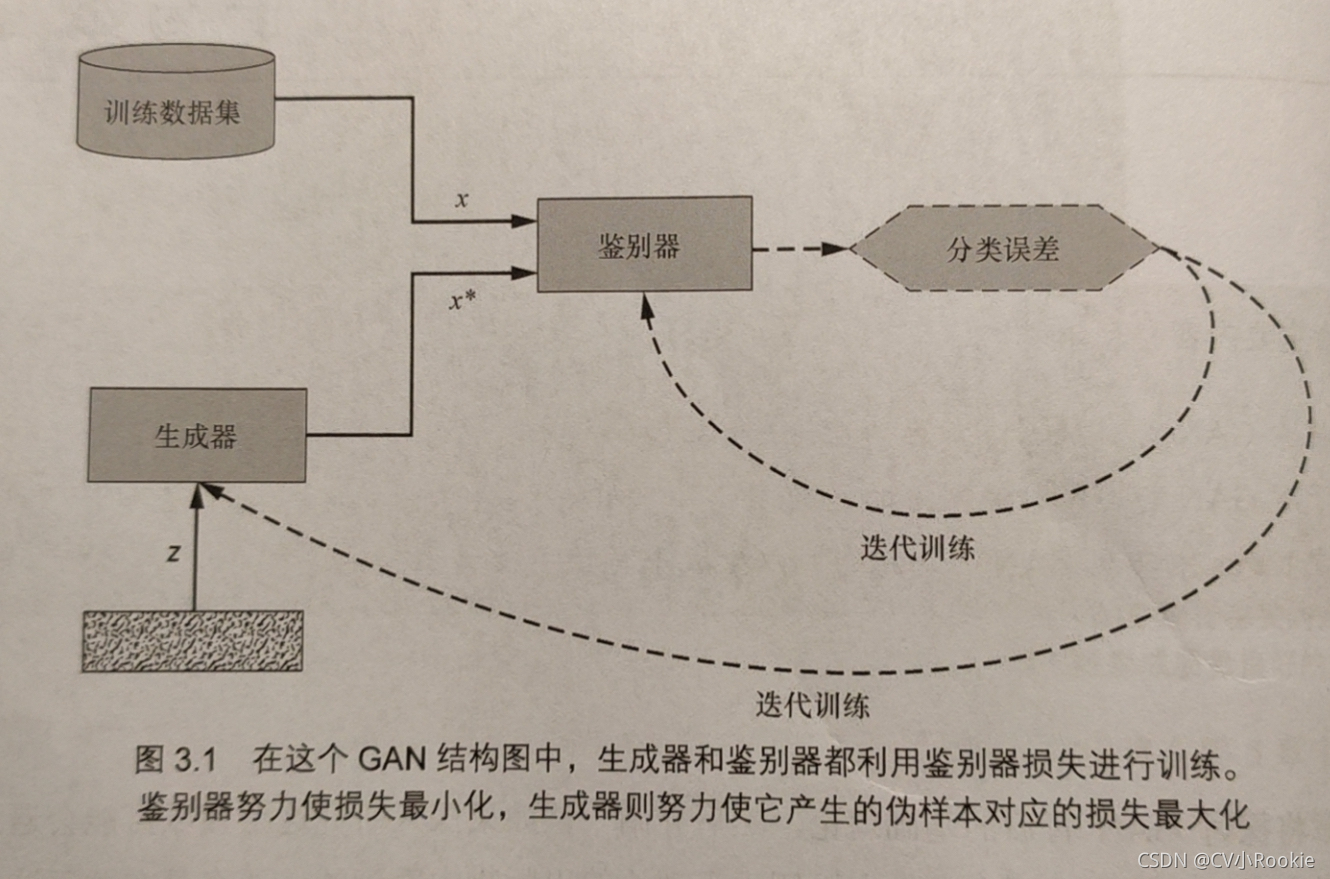
GAN训练过程可以用一个博弈过程来描述,而非优化。(博弈双方是GAN的两个网络)
生成器训练参数,使得?代价函数
(
,
)最小化。
同时,对应该网络参数下的鉴别器的代价函数?
(
,
)最小化
生成器和鉴别器
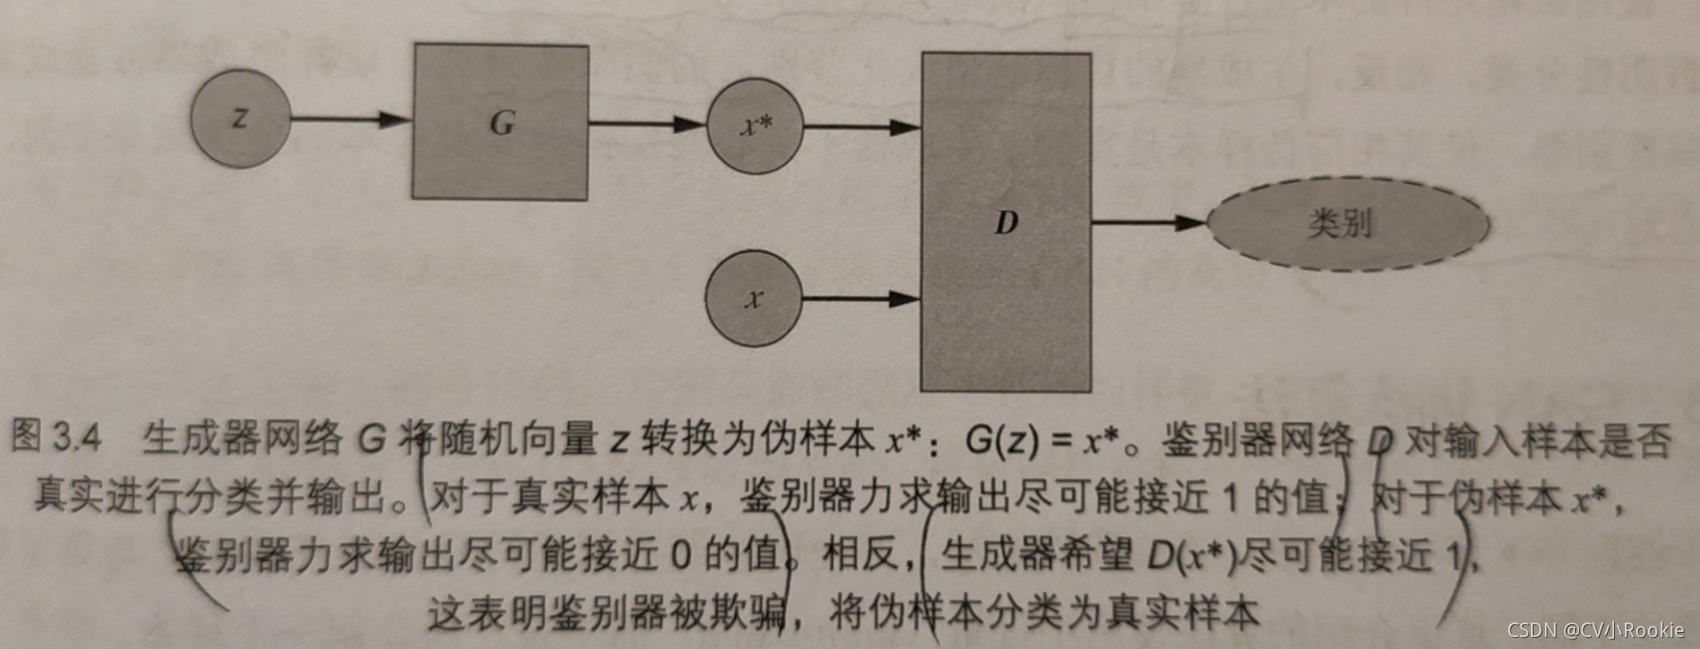
生成器G接受随机噪声向量z并生成一个伪样本x*,。
鉴别器D的输入要么是真实样本x,要么是伪样本x*,输出一个介于0和1之间的值(输入是真实样本的概率)
混淆矩阵
鉴别器的分类可以用混淆矩阵来表示,分类结果如下:
(1)真阳性true positive――真实样本正确,分类为真
(2)假阴性false negative――真实样本错误,分类为假
(3)真阴性true negative――伪样本正确,分类为假
(4)假阳性false positive――伪样本错误,分类为真
?鉴别器试图最大化真养性和真阴性分类
生成器目标是最大化鉴别器假阳性分类(不关心对真实样本分类效果只关心伪样本分类)
CGAN生成手写数字
导入声明
import matplotlib.pyplot as plt
import numpy as np

from keras.datasets import mnist
from keras.layers import Dense, Flatten, Reshape
from keras.layers.advanced_activations import LeakyReLU
from keras.models import Sequential
from keras.optimizers import Adam
模型输入维度
img_rows = 28
img_cols = 28
channels = 1

# Input image dimensions
img_shape = (img_rows, img_cols, channels)

# Size of the noise vector, used as input to the Generator
z_dim = 100
生成器
def build_generator(img_shape, z_dim):

    model = Sequential()

    # Fully connected layer
    model.add(Dense(128, input_dim=z_dim))

    # Leaky ReLU activation
    model.add(LeakyReLU(alpha=0.01))

    # Output layer with tanh activation
    model.add(Dense(28 * 28 * 1, activation='tanh'))

    # Reshape the Generator output to image dimensions
    model.add(Reshape(img_shape))

    return model
鉴别器
def build_discriminator(img_shape):

    model = Sequential()

    # Flatten the input image
    model.add(Flatten(input_shape=img_shape))

    # Fully connected layer
    model.add(Dense(128))

    # Leaky ReLU activation
    model.add(LeakyReLU(alpha=0.01))

    # Output layer with sigmoid activation
    model.add(Dense(1, activation='sigmoid'))

    return model
构建并编译GAN
def build_gan(generator, discriminator):

    model = Sequential()

    # Combined Generator -> Discriminator model
    model.add(generator)
    model.add(discriminator)

    return model

# Build and compile the Discriminator
discriminator = build_discriminator(img_shape)
discriminator.compile(loss='binary_crossentropy',
                      optimizer=Adam(),
                      metrics=['accuracy'])

# Build the Generator
generator = build_generator(img_shape, z_dim)

# Keep Discriminator’s parameters constant for Generator training
discriminator.trainable = False

# Build and compile GAN model with fixed Discriminator to train the Generator
gan = build_gan(generator, discriminator)
gan.compile(loss='binary_crossentropy', optimizer=Adam())
GAN训练循环
losses = []
accuracies = []
iteration_checkpoints = []


def train(iterations, batch_size, sample_interval):

    # Load the MNIST dataset
    (X_train, _), (_, _) = mnist.load_data()

    # Rescale [0, 255] grayscale pixel values to [-1, 1]
    X_train = X_train / 127.5 - 1.0
    X_train = np.expand_dims(X_train, axis=3)

    # Labels for real images: all ones
    real = np.ones((batch_size, 1))

    # Labels for fake images: all zeros
    fake = np.zeros((batch_size, 1))

    for iteration in range(iterations):

        # -------------------------
        #  Train the Discriminator
        # -------------------------

        # Get a random batch of real images
        idx = np.random.randint(0, X_train.shape[0], batch_size)
        imgs = X_train[idx]

        # Generate a batch of fake images
        z = np.random.normal(0, 1, (batch_size, 100))
        gen_imgs = generator.predict(z)

        # Train Discriminator
        d_loss_real = discriminator.train_on_batch(imgs, real)
        d_loss_fake = discriminator.train_on_batch(gen_imgs, fake)
        d_loss, accuracy = 0.5 * np.add(d_loss_real, d_loss_fake)

        # ---------------------
        #  Train the Generator
        # ---------------------

        # Generate a batch of fake images
        z = np.random.normal(0, 1, (batch_size, 100))
        gen_imgs = generator.predict(z)

        # Train Generator
        g_loss = gan.train_on_batch(z, real)

        if (iteration + 1) % sample_interval == 0:

            # Save losses and accuracies so they can be plotted after training
            losses.append((d_loss, g_loss))
            accuracies.append(100.0 * accuracy)
            iteration_checkpoints.append(iteration + 1)

            # Output training progress
            print("%d [D loss: %f, acc.: %.2f%%] [G loss: %f]" %
                  (iteration + 1, d_loss, 100.0 * accuracy, g_loss))

            # Output a sample of generated image
            sample_images(generator)
显示合成图像
def sample_images(generator, image_grid_rows=4, image_grid_columns=4):

    # Sample random noise
    z = np.random.normal(0, 1, (image_grid_rows * image_grid_columns, z_dim))

    # Generate images from random noise
    gen_imgs = generator.predict(z)

    # Rescale image pixel values to [0, 1]
    gen_imgs = 0.5 * gen_imgs + 0.5

    # Set image grid
    fig, axs = plt.subplots(image_grid_rows,
                            image_grid_columns,
                            figsize=(4, 4),
                            sharey=True,
                            sharex=True)

    cnt = 0
    for i in range(image_grid_rows):
        for j in range(image_grid_columns):
            # Output a grid of images
            axs[i, j].imshow(gen_imgs[cnt, :, :, 0], cmap='gray')
            axs[i, j].axis('off')
            cnt += 1
运行模型
# Set hyperparameters
iterations = 20000
batch_size = 128
sample_interval = 1000

# Train the GAN for the specified number of iterations
train(iterations, batch_size, sample_interval)
结果???????
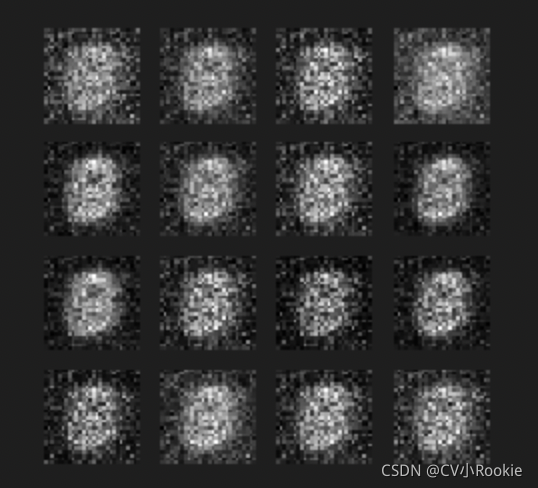
?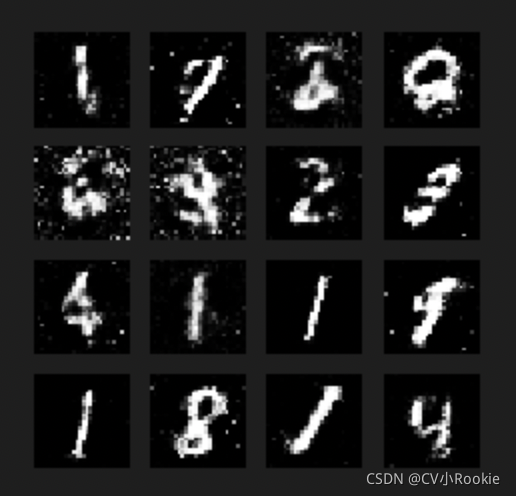
?虽然不是很完美,但是简单的双层生成器学会了生成逼真的数字