dlib+opencv+python库人脸识别
一、基于dlib库人脸特征提取
基于dlib库对人脸特征进行提取,在视频流中抓取人脸特征、并保存为64x64大小的图片文件。
注意的是:因为我们后面会对人脸数据集进行训练识别,因此,这一步非常重要。
- 光线——曝光和黑暗图片因手动剔除
- 摄像头的清晰度也比较重要——在哪台笔记本识别,就要在那台笔记本做数据集采集,我用了同学在其他笔记本采取的数据,因为电脑配置,在后面的训练中出现不能识别或错误识别的情况,因此,尽量同一设备——采取数据集和做人脸识别。
(一)采集人脸
1.代码实现
建立自己的人脸数据集:采集多角度的20张人脸
import cv2
import dlib
import os
import sys
import random
# 存储位置
output_dir = 'F:/picture/person/1xiaozhan'
size = 64

if not os.path.exists(output_dir):
    os.makedirs(output_dir)
# 改变图片的亮度与对比度

def relight(img, light=1, bias=0):
    w = img.shape[1]
    h = img.shape[0]
    #image = []
    for i in range(0,w):
        for j in range(0,h):
            for c in range(3):
                tmp = int(img[j,i,c]*light + bias)
                if tmp > 255:
                    tmp = 255
                elif tmp < 0:
                    tmp = 0
                img[j,i,c] = tmp
    return img

#使用dlib自带的frontal_face_detector作为我们的特征提取器
detector = dlib.get_frontal_face_detector()
# 打开摄像头 参数为输入流,可以为摄像头或视频文件
#用摄像头采集人脸
#camera = cv2.VideoCapture(0)
#用视频采集人脸
camera = cv2.VideoCapture('F:/picture/xz/xz1/.mp4')

index = 1
while True:
    if (index <= 20):#存储20张人脸特征图像
        print('Being processed picture %s' % index)
        # 从摄像头读取照片
        success, img = camera.read()
        # 转为灰度图片
        gray_img = cv2.cvtColor(img, cv2.COLOR_BGR2GRAY)
        # 使用detector进行人脸检测
        dets = detector(gray_img, 1)

        for i, d in enumerate(dets):
            x1 = d.top() if d.top() > 0 else 0
            y1 = d.bottom() if d.bottom() > 0 else 0
            x2 = d.left() if d.left() > 0 else 0
            y2 = d.right() if d.right() > 0 else 0

            face = img[x1:y1,x2:y2]
            # 调整图片的对比度与亮度, 对比度与亮度值都取随机数,这样能增加样本的多样性
            face = relight(face, random.uniform(0.5, 1.5), random.randint(-50, 50))

            face = cv2.resize(face, (size,size))

            cv2.imshow('image', face)

            cv2.imwrite(output_dir+'/'+str(index)+'.jpg', face)

            index += 1
        key = cv2.waitKey(30) & 0xff
        if key == 27:
            break
    else:
        print('Finished!')
        # 释放摄像头 release camera
        camera.release()
        # 删除建立的窗口 delete all the windows
        cv2.destroyAllWindows()
        break
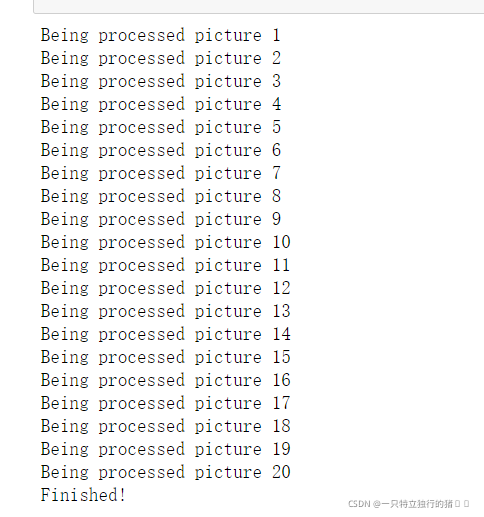
2.采集结果
我采集了五组数据如下


(二)采集20张图片对应的68个特征点数组和平均特征值
1.代码实现
由于光线、和角度等原因五官没有在采集到的图片内或模糊不清时可能一部分人脸图像无法识别
from cv2 import cv2 as cv2
import os
import dlib
from skimage import io
import csv
import numpy as np

# 要读取人脸图像文件的路径
path_images_from_camera = "F:/picture/person/"

# Dlib 正向人脸检测器
detector = dlib.get_frontal_face_detector()

# Dlib 人脸预测器
predictor = dlib.shape_predictor("shape_predictor_68_face_landmarks.dat")

# Dlib 人脸识别模型
# Face recognition model, the object maps human faces into 128D vectors
face_rec = dlib.face_recognition_model_v1("dlib_face_recognition_resnet_model_v1.dat")

# 返回单张图像的 128D 特征
def return_128d_features(path_img):
    img_rd = io.imread(path_img)
    #采取人脸特征数组,并写入文件夹F:/picture/features/631907060525/下
    s=path_img
    a=s[16:17]
    i1=str(a)
    a1=s[17:]
    str1="/"
    b=a1[a1.index(str1):-4]
    b1=b[1:]
    i2=str(b1)
    img_gray = cv2.cvtColor(img_rd, cv2.COLOR_BGR2RGB)
    faces = detector(img_gray, 1)
    for i in range(len(faces)):
        landmarks = np.matrix([[p.x, p.y] for p in predictor(img_rd,faces[i]).parts()])
        for idx, point in enumerate(landmarks):
            # 68点的坐标
            pos = (point[0, 0], point[0, 1])
            add="F:/picture/features/631907060525/face"+i1+"_feature"+i2+".csv"
            with open(add, "a", newline="") as csvfile:
                writer1 = csv.writer(csvfile)
                writer1.writerow((idx,pos))
        print(add)

    print("%-40s %-20s" % ("检测到人脸的图像 / image with faces detected:", path_img), '\n')

    # 因为有可能截下来的人脸再去检测,检测不出来人脸了
    # 所以要确保是 检测到人脸的人脸图像 拿去算特征
    if len(faces) != 0:
        shape = predictor(img_gray, faces[0])
        face_descriptor = face_rec.compute_face_descriptor(img_gray, shape)
    else:
        face_descriptor = 0
        print("no face")

    return face_descriptor


# 将文件夹中照片特征提取出来, 写入 CSV
def return_features_mean_personX(path_faces_personX):
    features_list_personX = []
    photos_list = os.listdir(path_faces_personX)
    if photos_list:
        for i in range(len(photos_list)):
            # 调用return_128d_features()得到128d特征
            print("%-40s %-20s" % ("正在读的人脸图像 / image to read:", path_faces_personX + "/" + photos_list[i]))
            features_128d = return_128d_features(path_faces_personX + "/" + photos_list[i])
            #  print(features_128d)
            # 遇到没有检测出人脸的图片跳过
            if features_128d == 0:
                i += 1
            else:
                features_list_personX.append(features_128d)
                i1=str(i+1)
                add="F:/picture/features/tz/face_feature"+i1+".csv"
                print(add)
                with open(add, "w", newline="") as csvfile:
                    writer1 = csv.writer(csvfile)
                    writer1.writerow(features_128d)

    else:
        print("文件夹内图像文件为空 / Warning: No images in " + path_faces_personX + '/', '\n')

    # 计算 128D 特征的均值
    # N x 128D -> 1 x 128D
    if features_list_personX:
        features_mean_personX = np.array(features_list_personX).mean(axis=0)
    else:
        features_mean_personX = '0'

    return features_mean_personX


# 读取某人所有的人脸图像的数据
people = os.listdir(path_images_from_camera)
people.sort()
with open("F:/picture/features/features2_all.csv", "w", newline="") as csvfile: #程序会新建一个表格文件来保存特征值,方便以后比对
    writer = csv.writer(csvfile)
    for person in people:
        print("##### " + person + " #####")
        # Get the mean/average features of face/personX, it will be a list with a length of 128D
        features_mean_personX = return_features_mean_personX(path_images_from_camera + person)
        writer.writerow(features_mean_personX)
        print("特征均值 / The mean of features:", list(features_mean_personX))
        print('\n')
    print("所有录入人脸数据存入 / Save all the features of faces registered into:F:/picture/features/features2_all.csv")
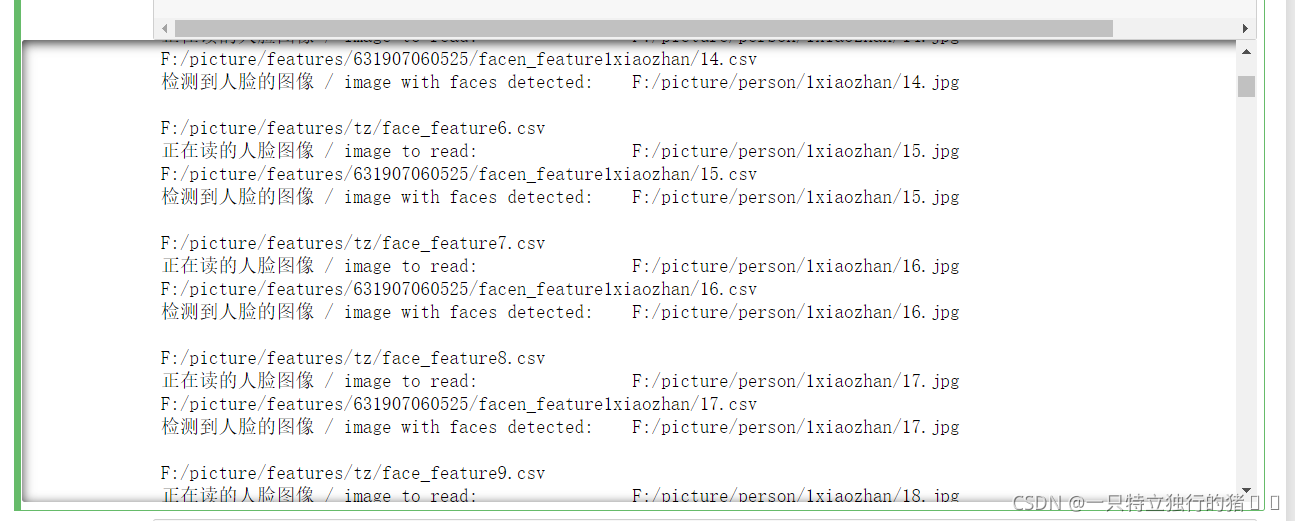
2.采集结果
(1)特征数组

可以观察到有20组

特征数组的值
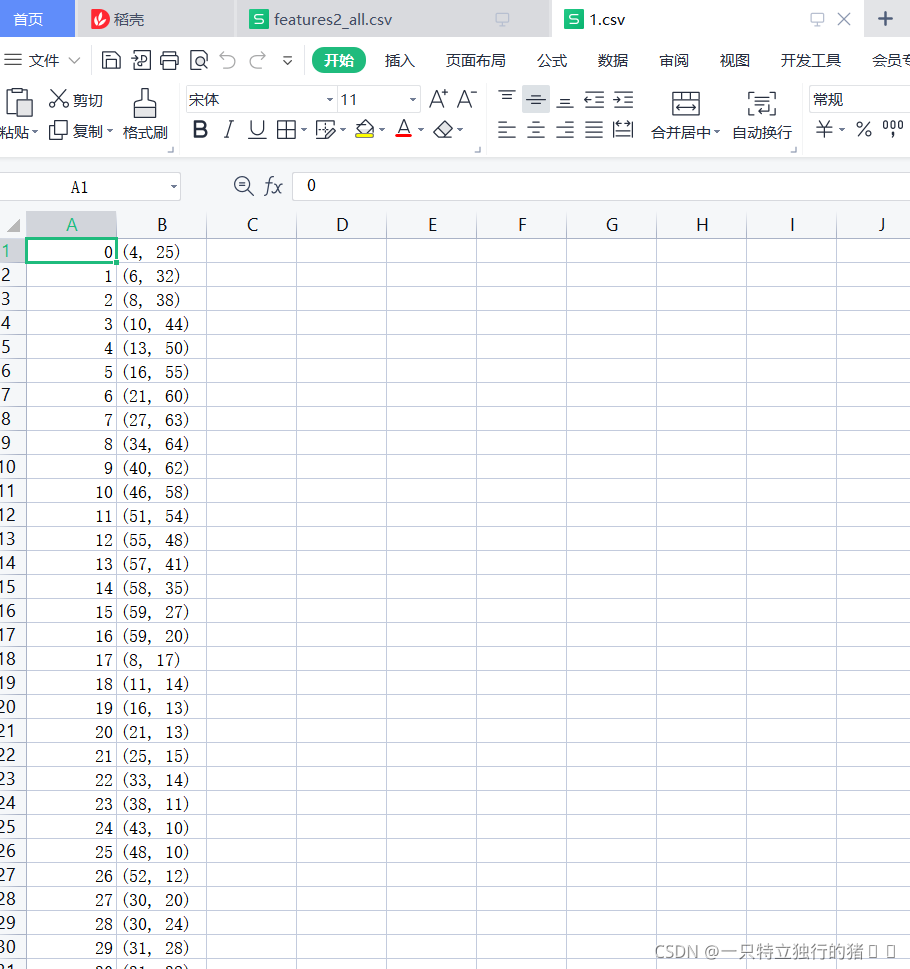
(2)特征值
这是我个人的特征值,一共20组

这是其中一组值

(3)特征平均值
以下是所有人的特征平均值

二、人脸识别
(一)实现代码
# 摄像头实时人脸识别
import os
import winsound # 系统音效
from playsound import playsound # 音频播放
import dlib          # 人脸处理的库 Dlib
import csv # 存入表格
import time
import sys
import numpy as np   # 数据处理的库 numpy
from cv2 import cv2 as cv2           # 图像处理的库 OpenCv
import pandas as pd  # 数据处理的库 Pandas


# 人脸识别模型,提取128D的特征矢量
# face recognition model, the object maps human faces into 128D vectors
# Refer this tutorial: http://dlib.net/python/index.html#dlib.face_recognition_model_v1
facerec = dlib.face_recognition_model_v1("dlib_face_recognition_resnet_model_v1.dat")


# 计算两个128D向量间的欧式距离
# compute the e-distance between two 128D features
def return_euclidean_distance(feature_1, feature_2):
    feature_1 = np.array(feature_1)
    feature_2 = np.array(feature_2)
    dist = np.sqrt(np.sum(np.square(feature_1 - feature_2)))
    return dist


# 处理存放所有人脸特征的 csv
path_features_known_csv = "F:/picture/features/features2_all.csv"
csv_rd = pd.read_csv(path_features_known_csv, header=None)


# 用来存放所有录入人脸特征的数组
# the array to save the features of faces in the database
features_known_arr = []

# 读取已知人脸数据
# print known faces
for i in range(csv_rd.shape[0]):
    features_someone_arr = []
    for j in range(0, len(csv_rd.iloc[i, :])):
        features_someone_arr.append(csv_rd.iloc[i, :][j])
    features_known_arr.append(features_someone_arr)
print("Faces in Database:", len(features_known_arr))

# Dlib 检测器和预测器
# The detector and predictor will be used
detector = dlib.get_frontal_face_detector()
predictor = dlib.shape_predictor('shape_predictor_68_face_landmarks.dat')

# 创建 cv2 摄像头对象
# cv2.VideoCapture(0) to use the default camera of PC,
# and you can use local video name by use cv2.VideoCapture(filename)
cap = cv2.VideoCapture(0)

# cap.set(propId, value)
# 设置视频参数,propId 设置的视频参数,value 设置的参数值
cap.set(3, 480)

# cap.isOpened() 返回 true/false 检查初始化是否成功
# when the camera is open
while cap.isOpened():

    flag, img_rd = cap.read()
    kk = cv2.waitKey(1)

    # 取灰度
    img_gray = cv2.cvtColor(img_rd, cv2.COLOR_RGB2GRAY)

    # 人脸数 faces
    faces = detector(img_gray, 0)

    # 待会要写的字体 font to write later
    font = cv2.FONT_HERSHEY_COMPLEX

    # 存储当前摄像头中捕获到的所有人脸的坐标/名字
    # the list to save the positions and names of current faces captured
    pos_namelist = []
    name_namelist = []

    # 按下 q 键退出
    # press 'q' to exit
    if kk == ord('q'):
        break
    else:
        # 检测到人脸 when face detected
        if len(faces) != 0:
            # 获取当前捕获到的图像的所有人脸的特征,存储到 features_cap_arr
            # get the features captured and save into features_cap_arr
            features_cap_arr = []
            for i in range(len(faces)):
                shape = predictor(img_rd, faces[i])
                features_cap_arr.append(facerec.compute_face_descriptor(img_rd, shape))

            # 遍历捕获到的图像中所有的人脸
            # traversal all the faces in the database
            for k in range(len(faces)):
                print("##### camera person", k+1, "#####")
                # 让人名跟随在矩形框的下方
                # 确定人名的位置坐标
                # 先默认所有人不认识,是 unknown
                # set the default names of faces with "unknown"
                name_namelist.append("unknown")

                # 每个捕获人脸的名字坐标 the positions of faces captured
                pos_namelist.append(tuple([faces[k].left(), int(faces[k].bottom() + (faces[k].bottom() - faces[k].top())/4)]))

                # 对于某张人脸,遍历所有存储的人脸特征
                # for every faces detected, compare the faces in the database
                e_distance_list = []
                for i in range(len(features_known_arr)):
                    # 如果 person_X 数据不为空
                    if str(features_known_arr[i][0]) != '0.0':
                        print("with person", str(i + 1), "the e distance: ", end='')
                        e_distance_tmp = return_euclidean_distance(features_cap_arr[k], features_known_arr[i])
                        print(e_distance_tmp)
                        e_distance_list.append(e_distance_tmp)
                    else:
                        # 空数据 person_X
                        e_distance_list.append(999999999)
                # 找出最接近的一个人脸数据是第几个
                # Find the one with minimum e distance
                similar_person_num = e_distance_list.index(min(e_distance_list))
                print("Minimum e distance with person", int(similar_person_num)+1)

                # 计算人脸识别特征与数据集特征的欧氏距离
                # 距离小于0.4则标出为可识别人物
                if min(e_distance_list) < 0.4:
                    # 这里可以修改摄像头中标出的人名
                    # Here you can modify the names shown on the camera
                    # 1、遍历文件夹目录
                    folder_name = 'F:/picture/person'
                    # 最接近的人脸
                    sum=similar_person_num+1
                    key_id=1 # 从第一个人脸数据文件夹进行对比
                    # 获取文件夹中的文件名:1wang、2zhou、3...
                    file_names = os.listdir(folder_name)
                    for name in file_names:
                        # print(name+'->'+str(key_id))
                        if sum ==key_id:
                            #winsound.Beep(300,500)# 响铃:300频率,500持续时间
                            name_namelist[k] = name[1:]#人名删去第一个数字(用于视频输出标识)
                        key_id += 1
                    # 播放欢迎光临音效
                    #playsound('D:/myworkspace/JupyterNotebook/People/music/welcome.wav')
                    # print("May be person "+str(int(similar_person_num)+1))
                    # -----------筛选出人脸并保存到visitor文件夹------------
                    for i, d in enumerate(faces):
                        x1 = d.top() if d.top() > 0 else 0
                        y1 = d.bottom() if d.bottom() > 0 else 0
                        x2 = d.left() if d.left() > 0 else 0
                        y2 = d.right() if d.right() > 0 else 0
                        face = img_rd[x1:y1,x2:y2]
                        size = 64
                        face = cv2.resize(face, (size,size))
                        # 要存储visitor人脸图像文件的路径
                        path_visitors_save_dir = "F:/picture/person/visitor/known"
                        # 存储格式:2019-06-24-14-33-40wang.jpg
                        now_time = time.strftime("%Y-%m-%d-%H-%M-%S", time.localtime())
                        save_name = str(now_time)+str(name_namelist[k])+'.jpg'
                        # print(save_name)
                        # 本次图片保存的完整url
                        save_path = path_visitors_save_dir+'/'+ save_name
                        # 遍历visitor文件夹所有文件名
                        visitor_names = os.listdir(path_visitors_save_dir)
                        visitor_name=''
                        for name in visitor_names:
                            # 名字切片到分钟数:2019-06-26-11-33-00wangyu.jpg
                            visitor_name=(name[0:16]+'-00'+name[19:])
                        # print(visitor_name)
                        visitor_save=(save_name[0:16]+'-00'+save_name[19:])
                        # print(visitor_save)
                        # 一分钟之内重复的人名不保存
                        if visitor_save!=visitor_name:
                            cv2.imwrite(save_path, face)
                            print('新存储:'+path_visitors_save_dir+'/'+str(now_time)+str(name_namelist[k])+'.jpg')
                        else:
                            print('重复,未保存!')

                else:
                    # 播放无法识别音效
                    #playsound('D:/myworkspace/JupyterNotebook/People/music/sorry.wav')
                    print("Unknown person")
                    # -----保存图片-------
                    # -----------筛选出人脸并保存到visitor文件夹------------
                    for i, d in enumerate(faces):
                        x1 = d.top() if d.top() > 0 else 0
                        y1 = d.bottom() if d.bottom() > 0 else 0
                        x2 = d.left() if d.left() > 0 else 0
                        y2 = d.right() if d.right() > 0 else 0
                        face = img_rd[x1:y1,x2:y2]
                        size = 64
                        face = cv2.resize(face, (size,size))
                        # 要存储visitor-》unknown人脸图像文件的路径
                        path_visitors_save_dir = "F:/picture/person/visitor/unknown"
                        # 存储格式:2019-06-24-14-33-40unknown.jpg
                        now_time = time.strftime("%Y-%m-%d-%H-%M-%S", time.localtime())
                        # print(save_name)
                        # 本次图片保存的完整url
                        save_path = path_visitors_save_dir+'/'+ str(now_time)+'unknown.jpg'
                        cv2.imwrite(save_path, face)
                        print('新存储:'+path_visitors_save_dir+'/'+str(now_time)+'unknown.jpg')

                # 矩形框
                # draw rectangle
                for kk, d in enumerate(faces):
                    # 绘制矩形框
                    cv2.rectangle(img_rd, tuple([d.left(), d.top()]), tuple([d.right(), d.bottom()]), (0, 255, 255), 2)
                print('\n')

            # 在人脸框下面写人脸名字
            # write names under rectangle
            for i in range(len(faces)):
                cv2.putText(img_rd, name_namelist[i], pos_namelist[i], font, 0.8, (0, 255, 255), 1, cv2.LINE_AA)

    print("Faces in camera now:", name_namelist, "\n")

    #cv2.putText(img_rd, "Press 'q': Quit", (20, 450), font, 0.8, (84, 255, 159), 1, cv2.LINE_AA)
    cv2.putText(img_rd, "Face Recognition", (20, 40), font, 1, (0, 0, 255), 1, cv2.LINE_AA)
    cv2.putText(img_rd, "Visitors: " + str(len(faces)), (20, 100), font, 1, (0, 0, 255), 1, cv2.LINE_AA)

    # 窗口显示 show with opencv
    cv2.imshow("camera", img_rd)
    key = cv2.waitKey(1) & 0xFF
    #退出程序
    if key == ord("q"):
        break
    # 开始程序
    if key == ord("d"):
        dealing = not dealing

# 释放摄像头 release camera
cap.release()

# 删除建立的窗口 delete all the windows
cv2.destroyAllWindows()
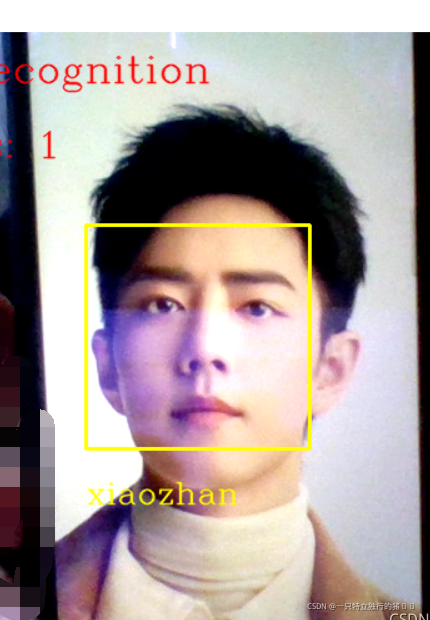
(二)识别结果
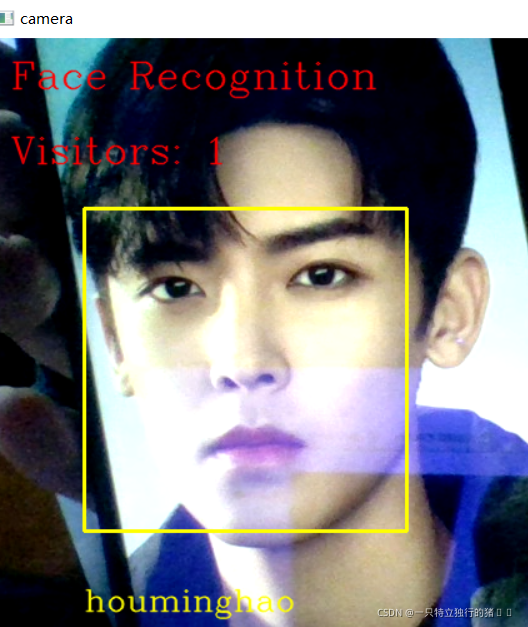
三、总结
人脸识别的过程是采集人脸,通过采集的图片获得人脸特征,并计算得到平均特征值,人脸识别时通过实时采集的人脸特征和保存的特征值比对,达到识别人脸的目的。