#include<iostream>
#include<opencv2/opencv.hpp>
#include<opencv2/core.hpp>
#include<opencv2/highgui.hpp>
using namespace std;
using namespace cv;

// 1 用指针访问像素
void colorReduce(Mat& inputimg, Mat& outputimg, int div)
{
	//参数准备
	outputimg = inputimg.clone();
	int nrow = outputimg.rows;
	int ncol = outputimg.cols;
	//遍历所有像素值
	for (int i = 0; i < nrow; i++)
	{
		uchar* data = outputimg.ptr<uchar>(i);
		for (int j = 0; j < ncol; j++)
		{
			data[j] = data[j] / div * div + div / 2;
		}
	}
}

// 2 用迭代器访问
void colorReduce1(Mat& inputimg, Mat& outputimg, int div)
{
	//参数准备
	outputimg = inputimg.clone();//复制实参到临时变量
	//获取迭代器
	Mat_<Vec3b>::iterator it = outputimg.begin<Vec3b>();//初始位置的迭代器
	Mat_<Vec3b>::iterator itend = outputimg.end<Vec3b>();//终止位置的迭代器
	//存取彩色图像像素
	for (; it != itend; ++it)
	{
		//开始处理每个像素
		(*it)[0] = (*it)[0] / div * div + div / 2;
		(*it)[1] = (*it)[1] / div * div + div / 2;
		(*it)[2] = (*it)[2] / div * div + div / 2;
	}
}

// 3 动态地址计算
//at方法
void colorReduce2(Mat& inputimg, Mat& outputimg, int div)
{
	outputimg = inputimg.clone();
	int nrow = outputimg.rows;
	int ncol = outputimg.cols;

	for (int i = 0; i < nrow; i++)
	{
		for (int j = 0; j < ncol; j++)
		{
			outputimg.at<Vec3b>(i, j)[0] = outputimg.at<Vec3b>(i, j)[0] / div * div + div / 2;
			outputimg.at<Vec3b>(i, j)[1] = outputimg.at<Vec3b>(i, j)[1] / div * div + div / 2;
			outputimg.at<Vec3b>(i, j)[02] = outputimg.at<Vec3b>(i, j)[2] / div * div + div / 2;
		}
	}
}

int main()
{
	//创建原始图像并显示
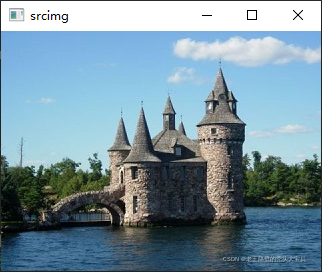
	Mat srcimg = imread("C:\\Users\\Administrator\\Desktop\\1.jpg");
	imshow("srcimg", srcimg);
	//按原始图像的参数规格来创建效果
	Mat dstimg;
	dstimg.create(srcimg.rows, srcimg.cols, srcimg.type());
	//记录起始时间
	double time0 = static_cast<double>(getTickCount());
	//调用颜色空间所见函数
	colorReduce(srcimg, dstimg, 32);
	//计算运行时间
	time0 = ((double)getTickCount() - time0) / getTickFrequency();
	cout << "shijian " << time0 << "s" << endl;
	imshow("dstimg", dstimg);
	waitKey(0);
	return 0;
}
原图:

?用指针显示结果:

用迭代器显示结果:

?
用动态地址计算显示结果:

?